Chapter 5 Host Manager Reference Information
This chapter contains reference information for features found in Host Manager.
This is a list of the overview information in this chapter.
Main Window Areas
When you select the Host Manager icon in the Solstice Launcher, the Host Manager's main window is displayed. The areas in the Host Manager's main window are shown in Figure 5-1.
Figure 5-1 Host Manager Main Window Areas
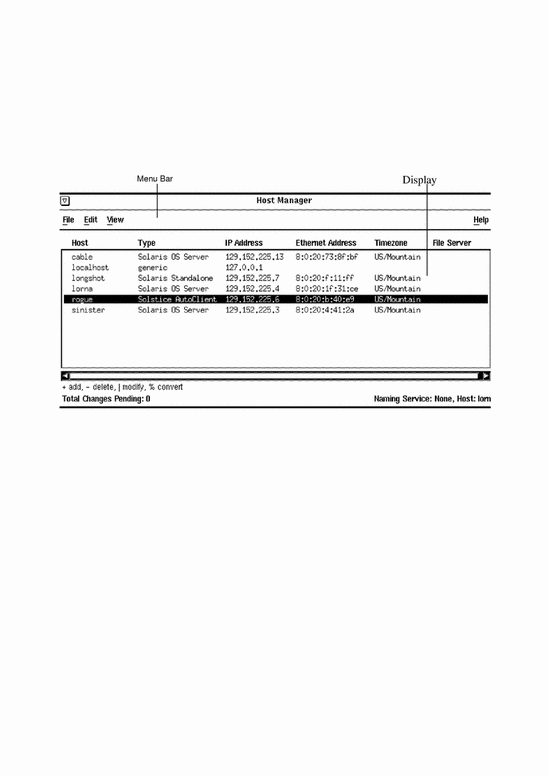
The main window contains two areas: a menu bar and a display area. The menu bar usually contains four menus: File, Edit, View, and Help. For more information on these menus, see the online help reference (the section "Using Admin Help" describes how to access online help).
Using Admin Help
An important part of the Solstice AutoClient software is a Help utility called Admin Help. Admin Help provides detailed information about Host Manager and its functions.
-
To access Admin Help from the Host Manager main window, choose "About Host Manager" from the Help menu.
-
To access the online help from a command window, click on the Help button.
Figure 5-2 shows the Admin Help window.
Figure 5-2 Admin Help Window
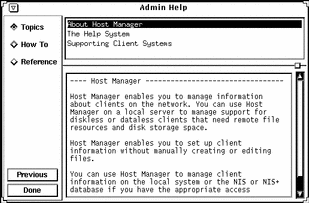
The titles displayed in the top window pane identify the list of topics available for each level of help.
The text displayed in the bottom window pane describes information about using the current menu or command.
Use the scroll bars to the right of each pane to scroll through the help information displayed.
On the left side of the Admin Help window are buttons used to find information and navigate through the help system. The buttons are described in Table 5-1.
Table 5-1 Admin Help Buttons|
This Button ... |
Is Used To ... |
Notes |
|---|---|---|
|
Topics |
Displays a list of overview topics. |
Click on a title in the top window pane to view the accompanying help text. |
|
How To |
Displays a list of step-by-step procedures. |
Click on a title in the top window pane to view the accompanying help text. |
|
Reference |
Displays a list of more detailed information. |
Click on a title in the top window pane to view the accompanying help text. |
|
Previous |
Returns to the last accessed help text. |
The help viewer automatically returns to the previous help selection. |
|
Done |
Exits the help system. |
The Admin Help window is closed. |
Filtering System Entries
To view specific system entries in Host Manager's main window, choose Set Filter from the View menu. The Filter window is displayed and you have the option of setting from one to three filtering characteristics, as shown in Figure 5-3.
Figure 5-3 Filtering System Entries With Host Manager
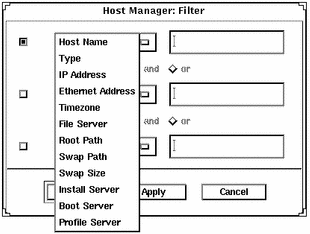
After you have chosen a method for filtering the entries that are displayed in the main window, click on OK.
Buttons
Table 5-2 describes the common window buttons used in Host Manager.
Table 5-2 Common Window Buttons in Host Manager|
This Button ... |
Is Used To ... |
|---|---|
|
OK |
Complete a task so that it can be processed. The window is closed after the task is completed. |
|
Apply |
Complete a task but leave the window open. (Not available on all windows.) |
|
Reset |
Reset all fields to their original contents (since the last successful operation). |
|
Cancel |
Cancel the task without submitting any changes and close the window. Fields are reset to their original contents. |
|
Help |
Access Admin Help. |
Clicking on OK after clicking on Apply might cause a duplicate operation, resulting in an error. Click on Cancel after clicking on Apply to dismiss the window.
Global Browsing Capabilities
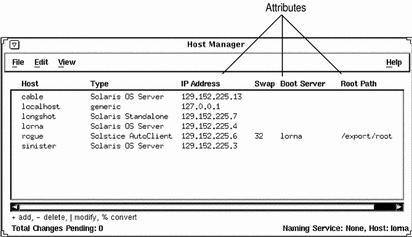
Host Manager enables you to see most system attributes in the main window, shown in Figure 5-4. Choose Customize from the View menu to change your attribute viewing options.
Figure 5-4 Global Browsing Capabilities With Host Manager
Batching Operations
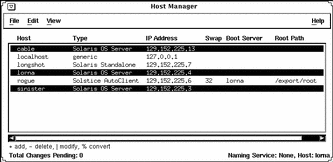
Host Manager enables you to add, delete, modify, convert, and revert more than one system at the same time, which is called batching. The scrolling and highlighting capabilities of the main window enable you to select multiple systems, as shown in Figure 5-5. To select more than one system, click SELECT (by default, the left mouse button) on the first system. Then select each subsequent system by pressing the Control key and clicking SELECT.
Figure 5-5 Selecting Multiple Entries Within Host Manager
See Chapter 6, Managing AutoClient Systems, for information on completing add, delete, modify, convert, and revert operations.
Status Area
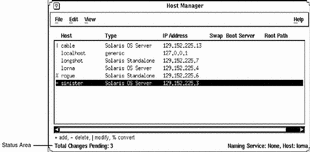
"Main Window Areas" describes two areas of Host Manager's main window: a menu bar area and a display area. The Host Manager main window also has a status area in the bottom of the window, which is shown in Figure 5-6.
In the left corner, the status area displays status information about pending changes, such as how many systems are waiting to be added, deleted, modified, and converted. In the right corner, the status area displays the current name service you are modifying with Host Manager.
The message "Total Changes Pending" reflects the number of systems that are waiting to be added, deleted, modified, and converted when you choose Save Changes from the File menu. After you choose "Save Changes" from the File menu, this message changes to "All Changes Successful." If any changes did not succeed, a message is written to the Errors pop-up window.
Figure 5-6 Status Information Within Host Manager
Logging Host Manager Operations
You can set up a log file to record each major operation completed with Host Manager or its command-line equivalents. After you enable logging, the date, time, server, user ID (UID), and description for every operation are written to the specified log file.
You need to follow the procedure described in "How to Enable Logging of Host Manager Operations" on each server where you run the Host Manager and want to maintain a logging file.
How to Enable Logging of Host Manager Operations
You do not need to quit Host Manager or the Solstice Launcher, if they are already started.
-
Become root.
-
Edit the /etc/syslog.conf file and add an entry at the bottom of the file that follows this format:
user.info filename
Note that filename must be the absolute path name of the file, for example: /var/log/admin.log.
-
Create the file, filename, if it does not already exist:
# touch filename
-
Make the changes to the /etc/syslog.conf file take effect by stopping and starting the syslog service:
# /etc/init.d/syslog stop
Stopping the syslog service.
# /etc/init.d/syslog start
syslog service starting.
#
Solstice AdminSuite operations will now be logged to the file you specified.
Example of a Host Manager Log File
Aug 30 10:34:23 lorna Host Mgr: [uid=100] Get host prototype Aug 30 10:34:52 lorna Host Mgr: [uid=100] Adding host: frito Aug 30 10:35:37 lorna Host Mgr: [uid=100] Get host prototype Aug 30 10:35:59 lorna Host Mgr: [uid=100] Deleting host frito Aug 30 10:36:07 lorna Host Mgr: [uid=100] Modifying sinister with sinister Aug 30 14:39:21 lorna Host Mgr: [uid=0] Read hosts Aug 30 14:39:43 lorna Host Mgr: [uid=0] Get timezone for lorna Aug 30 14:39:49 lorna Host Mgr: [uid=0] Get host prototype Aug 30 14:40:01 lorna Host Mgr: [uid=0] List supported architectures for lorna dirpath=/cdrom/cdrom0/s0 |
- © 2010, Oracle Corporation and/or its affiliates
