Creating a POJO Service Provider (With Binding)
This procedure creates a POJO service provider using a wizard to guide you through the steps. This wizard includes the steps for configuring the binding component for the service provider and automatically generates the WSDL file.
 To Create a POJO Service Provider (With Binding)
-
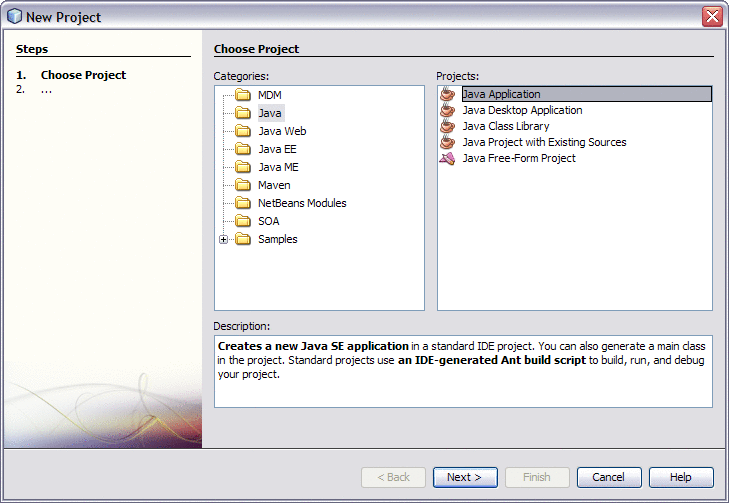
Right-click in the NetBeans Projects window, and then select New Project.
The New Project Wizard appears.
-
Under Categories, select Java; under Projects, select Java Application.
-
Click Next.
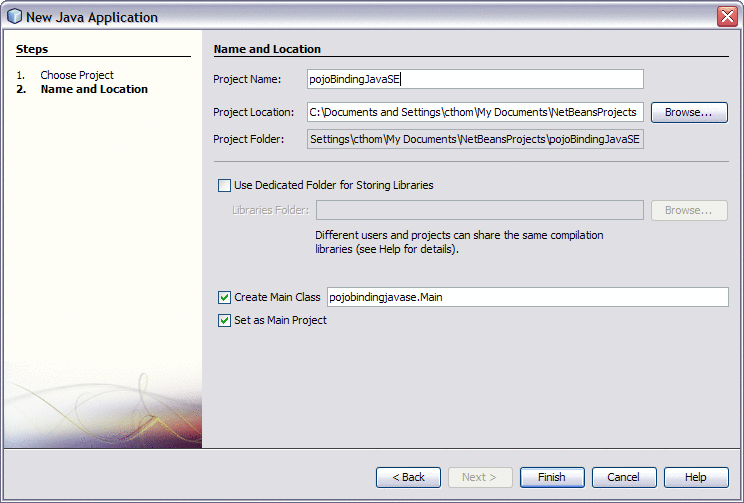
The Name and Location window appears.
-
Enter a unique name for the project and a name for the main Java package and class.
-
Click Finish.
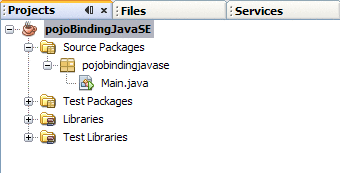
The project structure is generated and appears in the Projects window.
-
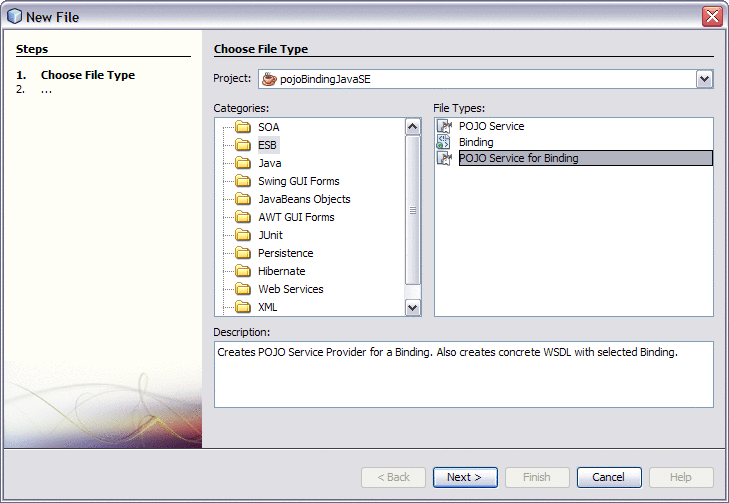
Right-click the project you just created, point to New, and then select Other.
The New File Wizard appears.
-
Under Categories, select ESB; under Projects, select POJO Service for Binding.
-
Click Next.
The Name and Location window for the WSDL file appears.
-
Fill in the Name and Location properties for the POJO service.
For more information, see Table 3.
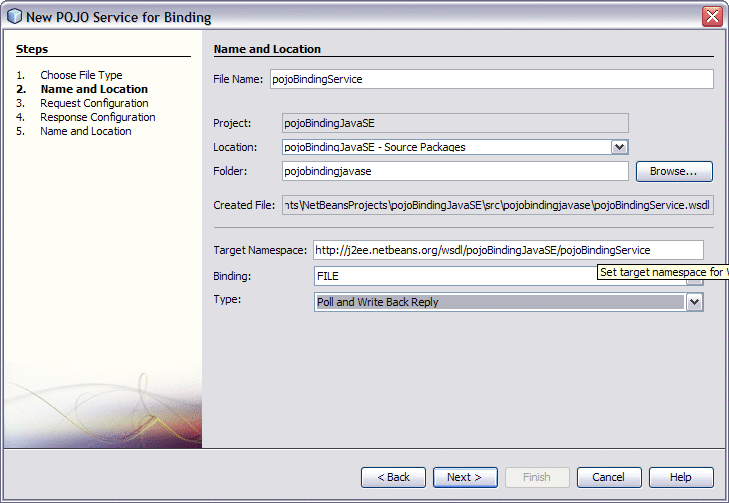
Note –The sequence of steps changes to reflect the binding component and type you choose. The subsequent steps will vary depending on those two properties.
-
Click Next.
The binding configuration window appears.
-
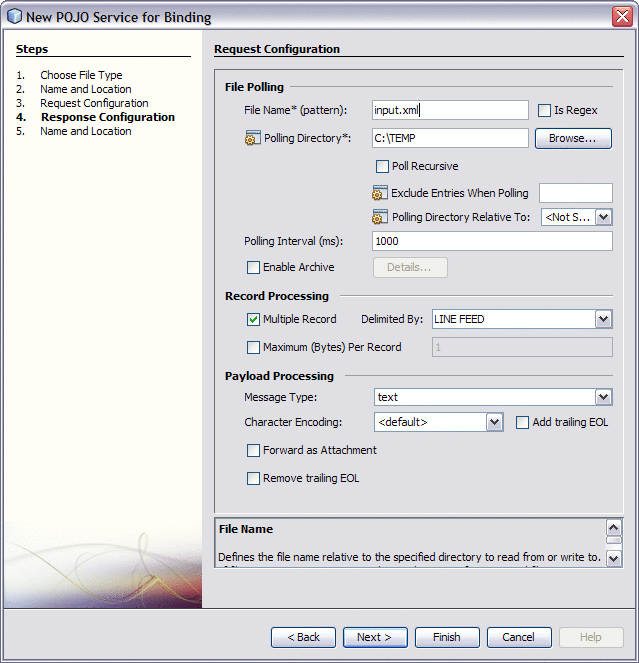
Enter information about the binding component and type, and then click Next.
Note –This page varies by binding component and type. For more information about a specific binding component, refer to the user's guide for that component or refer to the property descriptions at the bottom of the window. An example for the File Binding Component is shown below.
-
If a second page of binding configuration appears, enter the required information and then click Next.
-
On the Name and Location window for the POJO service, fill in the fields described in Table 1.
-
On the New POJO Service Wizard, click Finish.
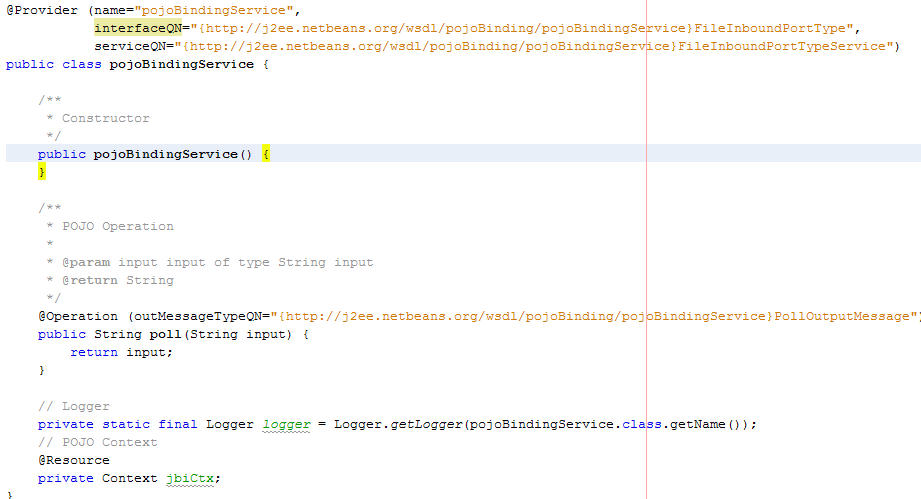
The new POJO class and WSDL file are generated in the project structure and any library JAR files needed to compile the project are added to the Libraries node of the project. The POJO file includes the @Provider, @Operation, and @Resource annotations.
Next Steps
For instructions on creating a composite application for this project, see Creating a Composite Application for a POJO Service Provider (With Binding).
- © 2010, Oracle Corporation and/or its affiliates
