Users Tab Page
The Users tab page provides the means to browse the organization tree and to manage policy groups for the organization tree. It has two sub-tabs: Organization Tree and Policy Repository.
Organization Tree Navigation
You can browse the organization tree using the parentage path or the Navigation table.
Parentage Path
At the top of the Users tab page is the parentage path, which is an area that shows the path to the current entity. Every path particle is a link that represents an entity, except for the last link, which is displayed as normal text and denotes the current entity.
To navigate using the parentage path, click on a link. This will refresh the Navigation pane so that the parentage path points to the clicked entity, and so that the navigation table contains the sub-entities of that entity. The Content pane with the configuration policy data associated with that entity is also refreshed.
Navigation Table
The navigation table is located below the parentage path, and lists the sub-entities of the current entity. The "Name" column contains the names of all sub-entities of the current entity. The "Type" column displays the type of the entity. The "Action" column contains a View link for every row.
If an entity is an organization or a role with sub-roles, you can click on the listed name, which results in the following actions:
-
Makes the selected sub-entity the current entity.
-
Refreshes the Navigation pane so that the parentage path points to the new current entity, and so that the navigation table contains the sub-entities of that entity.
-
Refreshes the Content pane with the configuration policy associated with that entity.
An entity can be either of type "Organization", "User" or "Role".
To view a listed entity's details without changing the current entity in the Navigation pane, click on the View link. This changes the background color of the selected row to blue and refreshes the Content pane with the data associated with the selected entity.
A row with blue background marks the entity whose data is currently visible in the Content pane.
The top of the navigation table contains the Filter drop-down
menu and the Advanced Filter icon. See Advanced Filter for more information. When the table contains more than ten
entries, the Page/Scroll Through All Data icon  appears,
which allows you to change the view of the table entries.
The Filter drop-down menu allows you to choose which type of entity to display in the navigation table. It contains the following choices:
-
"All Items" displays all types of entities in the navigation table.
-
"Organizations" displays only entities of type "Organization" in the navigation table.
-
"Users" displays only entities of type "User" in the navigation table.
-
"Roles" displays only entities of type "Role" in the navigation table.
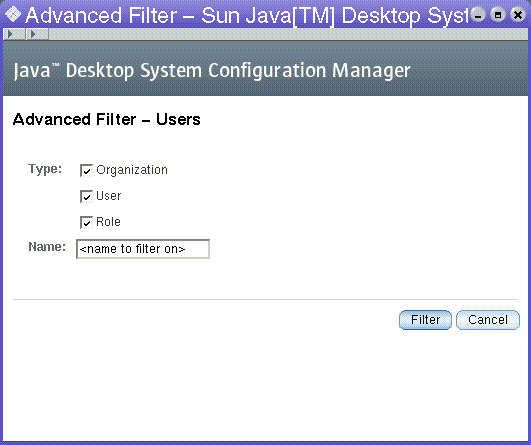
Advanced Filter
Figure 2–3 Advanced Filter dialog

The Advanced Filter function enables the administrator to define the types of entities to be displayed.
 Using the Advanced Filter dialog
Steps
-
Click the Advanced Filter icon
 at
the top of the navigation table to open the dialog.
 -
In the Type section, select the type of entity that you want to filter. For a more specific filter, type a name in the Name text field.
Note –You can use an asterisk "*" in the Name text field as a wildcard.
-
Click the Filter button at the bottom of the dialog to run the filter.
- © 2010, Oracle Corporation and/or its affiliates
