| C H A P T E R 4 |
|
Configuring and Administering Data Replication Manager |
This chapter describes the Data Replication Manager configuration and administration tasks. It contains the following sections:
During the Data Replication Manager installation, no accounts or roles were created. However, Data Replication Manager requires one role to be manually set up. The drmadmin role should be given to any user who will add devices, create replication sets, or do anything more than simply view and refresh the configuration information.
|
Note - The user whose role you plan to modify must be logged out of the system. If the user is not logged out of the system, the role assignment will fail. |
To set up the drmadmin role, you must be logged in as root.
1. To create the drmadmin role, type the following command:
2. Set the drmadmin role password. The password is not displayed.
# /usr/bin/passwd drmadmin New Password:drmadminpassword Re-enter new Password:drmadminpassword passwd: password successfully changed for drmadmin # |
3. Determine the existing roles of the user to whom you want to grant the drmadmin role.
4. Do one of the following, depending on the output from the preceding command:
5. Verify that the drmadmin role was granted to the user:
The drmadmin role should be listed in the output from the above command.
If the drmadmin role does not appear in the output, refer to the usermod(1m) and roles(1m) man pages for assistance in diagnosing and resolving the issue.
To set or change the drmadmin password, enter the following command:
To log in to Data Replication Manager after it is installed, use the following procedure:
1. Enter the following URL in your web browser:
where drm-system is the host name or IP address of the system on which Data Replication Manager has been installed.
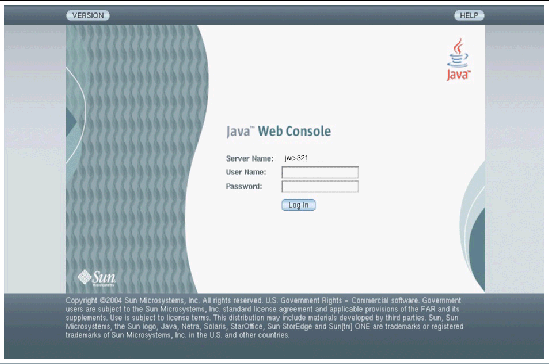
2. Enter your user name and password and click Log In.
All users have access to Data Replication Manager. However, only users with the drmadmin role will have administrative access, which allows them to configure and manage replication services.
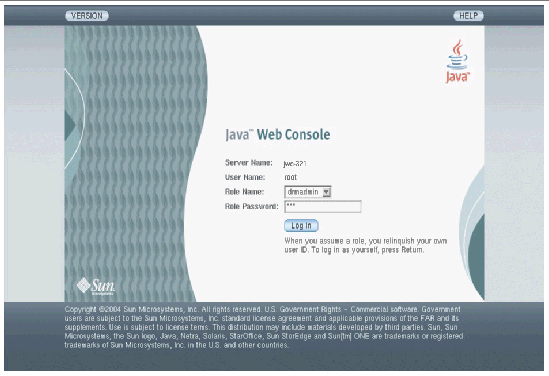
3. If you entered the user name and password of a user with the drmadmin role, select drmadmin from the Role Name list and provide the assigned role password, as shown here.
The Application Selection page is displayed.
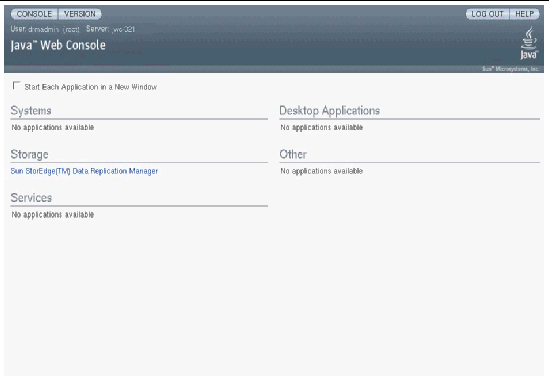
5. To access Data Replication Manager, select the Sun StorEdge Data Replication Manager link.
Data Replication Manager displays the Device Summary page, which enables you to manage registered replication devices. You must register devices for them to be listed here. For instructions, see the next section, Registering Devices.
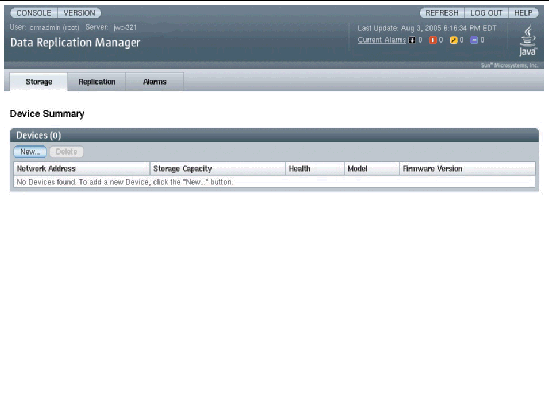
You must be logged in to Data Replication Manager with the dradmin role to register devices, including the Sun StorEdge 6920 systems.
1. Click New on the Device Summary page.
The Register New Device page is displayed.
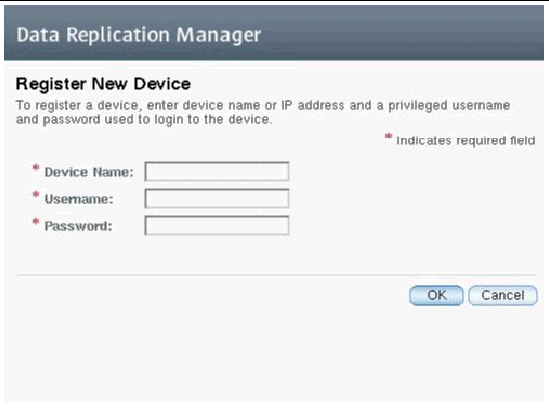
2. In the Device Name field, type a host name or IP address. In the Username and Password fields, type the user name and password that Data Replication Manager will require for access to the device.
Although Data Replication Manager stores this data on disk, this data is encrypted and cannot be read.
The registration process starts. As part of this process, Data Replication Manager logs in to the device and collects some initial data about the device.
When the process is complete, the Device Summary page displays the new device.
In addition to validating credentials and collecting initial data, Data Replication Manager initiates a full scan of the device to collect details about associated replication sets, volumes, consistency groups, and other pieces of data.
If the registration fails, check the following items:
After you have registered your devices, you can perform management operations. For more information, see the Data Replication Manager online help.
If you are using the Sun StorEdge Management Portal software and the Data Replication Reporter portlet, you must manually configure the port for the Data Replication Manager server. For instructions, see To Back Up and Restore Data Replication Manager Data.
In the upper right corner of every page in the Data Replication Manager user interface is a link to the online help. The help window is context-sensitive; it automatically displays text for the current UI page.
The following subsections discuss Data Replication Manager administrative tasks:
|
If you make configuration changes to the Data Replication Manager server, enable the Data Replication Manager portlet, or change the device rescan interval, you may need to start, stop, or restart the Data Replication Manager processes.
 To start the server, log in as root and type the following command:
 To stop the server, log in as root and type the following command:
 To restart the server, log in as root and type the following command:
|
By default, the Data Replication Manager server rescans devices for updated information (for example, new replication sets, volumes, or consistency groups) every 15 minutes. This section describes how to change the polling interval.
Although Data Replication Manager does not have any restrictions on the frequency of rescans, the interval should be as low as practical, given site considerations, including network speed and latency. Additionally, an interval more frequent than every 15 minutes can generate excessive traffic and is not recommended.
1. Edit the file /opt/SUNWrrm/etc/rrmapp.properties and change the value of updaterScanInterval to the desired polling frequency, in minutes.
The following example shows how the relevant section of the file would appear if you were setting Data Replication Manager to rescan devices on an hourly basis:
# Default scan interval in minutes. Set to 0 or < 0 to turn off automatic updates updaterScanInterval=60 |
2. Restart the Data Replication Manager server by typing the following command:
|
1. Shut down the Data Replication Manager server:
2. Back up or restore the Data Replication Manager data. To backup or restore Data Replication Manager data, proceed to Step 2a or 2b, as appropriate.
a. Backup the /var/opt/SUNWrrm/datastore and /opt/SUNWrrm/etc directories, using the tools employed at your site. For example, using tar, type:
b. Restore the /var/opt/SUNWrrm/datastore and /opt/SUNWrrm/etc directories, using the tools employed at your site. For example, using tar, type:
3. Start the Data Replication Manager server:
|
Data Replication Manager maintains a number of logging and tracing files under /var/opt/SUNWrrm. By default, only minimal tracing is turned on. To enable a greater level of tracing, you must change the log4j.properties files.
You must be logged in as root to perform the following tasks.
1. Edit the file /opt/SUNWrrm/etc/bui/log4j.properties, which contains the logging and tracing configuration for the user interface, and search for the following two lines:
log4j.logger.com.sun.netstorage.mgmt.rrm=ERROR, RRM_TRACE_APPENDER log4j.logger.RRMLogger=INFO, RRM_LOG_APPENDER |
2. Change ERROR and INFO to ALL, as shown below:
log4j.logger.com.sun.netstorage.mgmt.rrm=ALL, RRM_TRACE_APPENDER log4j.logger.RRMLogger=ALL, RRM_LOG_APPENDER |
3. Restart the Sun Java Web Console, using the following command:
# /usr/sbin/smcwebserver restart |
4. Open the file /opt/SUNWrrm/etc/server/log4j.properties, which contains the logging and tracing configuration for the Data Replication Manager server, and search for the following two lines:
log4j.logger.com.sun.netstorage.mgmt.rrm=ERROR, RRM_TRACE_APPENDER log4j.logger.RRMLogger=INFO, RRM_LOG_APPENDER |
5. Change ERROR and INFO to ALL, as shown below:
log4j.logger.com.sun.netstorage.mgmt.rrm=ALL, RRM_TRACE_APPENDER log4j.logger.RRMLogger=ALL, RRM_LOG_APPENDER |
6. Restart the server, using the following command:

|
Caution - Restarting the Web Console server will disrupt any active Web Console sessions. Users should log out prior to performing a restart and remain logged out until after the restart completes. |
# /opt/SUNWrrm/bin/drmserver restart |
The logging and tracing files in /var/opt/SUNWrrm/log and /var/opt/SUNWrrm/trace will now contain all actions that Data Replication Manager attempts to perform, including stack traces from exception handling.
Copyright © 2005, Sun Microsystems, Inc. All Rights Reserved.