Planning and Setting Up for Installation
Ways to Run Solaris Web Start
You can run Solaris Web Start two ways, as a:
-
Graphical user interface, which requires a local or remote CD-ROM drive or network connection, video adapter, keyboard, and monitor
-
Command-line user interface, which requires a local or remote CD-ROM drive or network connection, keyboard, and monitor; you can run the Solaris Web Start command-line user interface with tip(1)
The content and sequence of instructions in both the graphical user interface and command-line user interface are generally the same, with slight differences, as shown by these examples:
Example 1-1 Graphical User Interface: Time Zone Dialog Box
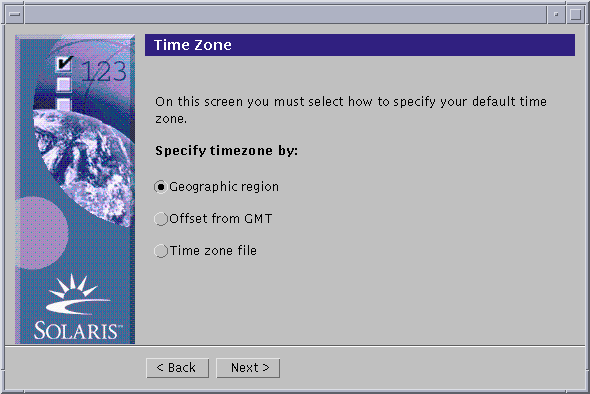
Example 1-2 Command-line User Interface: Time Zone Menu and Prompt
Please select how to specify your default time zone. Specify Time Zone by: 1. Geographic region 2. Offset from GMT 3. Time zone file Please enter the number corresponding to how you would like to specify the time zone [1]: |
What Determines Which Interface Is Used
If Solaris Web Start detects a video adapter for the system, it uses the graphical user interface, and if it does not, it uses the command-line user interface.
To Plan Your Installation
Note -
The instructions in this book describe how to install Solaris 8 software using a CD. If you choose to install Solaris 8 software over a network, some steps might differ.
-
Use this decision table to determine what to do first.
If you intend to install Solaris software from
Then go to
A CD-ROM drive attached to your system
Step 2. A remote CD-ROM drive on a network
Solaris 8 Advanced Installation Guide and the steps presented in this and later chapters.
-
Is Solaris already installed on the system?
-
If yes, go to Chapter 4, Upgrading a System in this book.
-
If no, go to Step 3.
-
-
Make sure your hardware is supported.
See the Solaris 8 (Intel Platform Edition) Hardware Compatibility List.
-
If your system is attached to a network, gather the following information about the system on which you intend to install the Solaris operating environment.
Note -If Solaris is not already installed on the system, contact your system administrator or whoever is responsible for maintaining your network to find the following information.
Information
Example
To find the information (with Solaris installed), use
Host name
crater
uname -n
Host IP address
129.221.2.1
ypmatch system_name hosts or
nismatch system_name hosts.org_dir
Subnet mask
255.255.255.0
more /etc/netmasks
Type of name service (DNS, NIS, or NIS+)
passwd:     files nis
group:      files nis

hosts:      xfn nis [NOTFOUND=return] files
networks:   nis [NOTFOUND=return] files
protocols:  nis [NOTFOUND=return] files
rpc:        nis [NOTFOUND=return] files
ethers:     nis [NOTFOUND=return] files
netmasks:   nis [NOTFOUND=return] files
bootparams: nis [NOTFOUND=return] files
publickey:  nis [NOTFOUND=return] files

netgroup:   nis

automount:  files nis
aliases:    files nis

services:   files nis
sendmailvars:   files
cat /etc/nsswitch.conf
Domain name
lbloom.West.Arp.COM
domainname
Host name of name server
thor75
ypwhich
Host IP address of name server
129.153.75.20
ypmatch nameserver_name hosts or
nismatch nameserver_name hosts.org_dir
-
Determine which of the following software you intend to install and the total disk space the combined software will require.
-
The Solaris software group:
Software Group
Recommended Disk Space
Entire Distribution Plus OEM Support 2.4 Gbytes Entire Distribution 2.3 Gbytes Developer System Support 1.9 Gbytes End User System Support 1.6 Gbytes
Note -Swap space is included in the disk space recommendations. A minumum of 320 Mbytes is required for swap space, but more might be needed due to available memory and other factors. By default, Solaris Web Start allocates 512 Mbytes for swap space.
-
Additional software
See the documentation to determine the disk space you'll need.
-
Vendor or third-party software
See the vendor or third-party software documentation.
-
Space for home directories
Home directories might contain user files such as mail, text or data files, or application files.
-
-
Determine the language you want to use to install Solaris. If you use the CD labeled:
-
Solaris 8 Installation English Intel Platform Edition--all prompts, messages, and other installation information are displayed in English only.
-
Solaris 8 Installation Multilingual Intel Platform Edition--you can select one of the following languages in which to display all prompts, messages, and other installation information:
-
Simplified Chinese
-
Traditional Chinese
-
English
-
French
-
German
-
Italian
-
Japanese
-
Korean
-
Spanish
-
Swedish
-
-
-
Make sure you have at least the following CDs:
-
Solaris 8 Installation English Intel Platform Edition or Solaris 8 Installation Multilingual Intel Platform Edition
-
Solaris 8 Software 1 of 2 Intel Platform Edition and Solaris 8 Software 2 of 2 Intel Platform Edition
-
Solaris 8 Languages Intel Platform Edition (if you use the Multilingual CD)
-
To Set Up for Installation
Note -
The BIOS on most IA motherboards manufactured since late 1997 supports the "El Torito" standard and thus recognizes CD-ROM drives as boot devices.
-
Do you intend to install the Solaris software through a tip(1) line?
-
If no, go to the next step.
-
If yes, make sure your window display is at least 80 columns wide and 24 rows long.
Note -To determine the current dimensions of your tip window, use the stty(1) command.
-
-
Is your system capable of booting from a CD?
-
If yes, ensure that the capability is turned on by using your system's BIOS setup tool.
-
If no, insert the diskette labeled Solaris 8 Device Configuration Assistant Intel Platform Edition into the system's diskette drive.
Note -You can also download the Solaris 8 Device Configuration Assistant from the Solaris Driver Connection at http://soldc.sun.com/support/drivers.
-
-
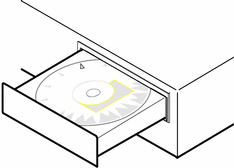
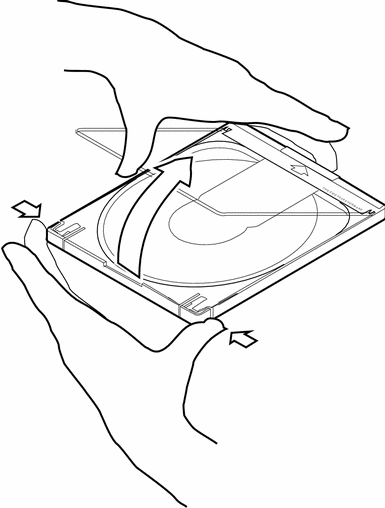
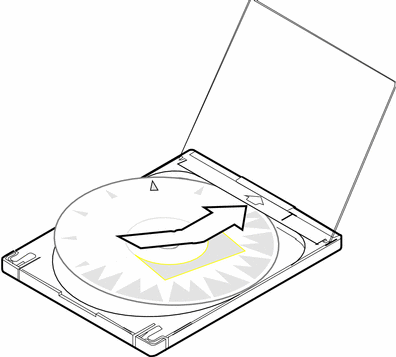
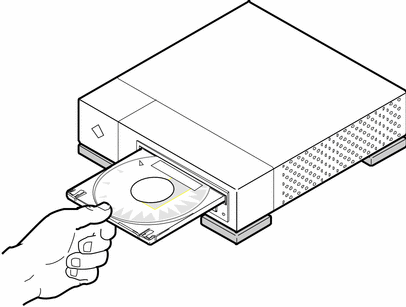
Insert the CD labeled Solaris 8 Installation English Intel Platform Edition or Solaris 8 Installation Multilingual Intel Platform Edition into the system's CD-ROM drive:
-
Boot the system by shutting it down and then turning it off and on.
A memory test and hardware detection are executed. The screen refreshes.
-
If you're using the diskette labeled Solaris 8 Device Configuration Assistant Intel Platform Edition, the message:
Solaris Boot Sector Version 1
is displayed at the top of your screen. Then, information similar to this is displayed:
Solaris for x86 - Generic DCB                 Version 1.234


                       loading /solaris/boot.bin
The screen refreshes and information similar to this is displayed:
SunOS Secondary Boot version 3.00 Solaris Intel Platform Edition Booting System Running Configuration Assistant... -
If you're using only the CD labeled Solaris 8 Installation English Intel Platform Edition or Solaris 8 Installation Multilingual Intel Platform Edition, the message:
SunOS - Intel Platform Edition Primary Boot Subsystem, vsn 2.0
is displayed at the top of the screen. Then, information similar to this is displayed:
SunOS Secondary Boot version 3.00

             Solaris Intel Platform Edition Booting System


Running Configuration Assistant...
-
-
When the Solaris Device Configuration Assistant screen is displayed, press F2_Continue.
The Bus Enumeration screen is displayed with the message:
Determining bus types and gathering hardware configuration data ...
The Scanning Devices screen is then displayed. System devices are scanned. When scanning is complete, the Identified Devices screen is displayed.
-
Press F2_Continue.
The Loading screen is displayed with messages about drivers that are loaded to boot your system. After a few seconds, the Boot Solaris screen is displayed.
-
On the Boot Solaris screen, select CD and press F2_Continue.
-
If you're using the CD labeled Solaris 8 Installation English Intel Platform Edition, and Solaris Web Start cannot find a Solaris fdisk partition, the Running Driver screen is displayed briefly, followed by information similar to this:
<<< Current Boot Parameters >>> Boot path: /pci@0,0/pci-ide@7,1/ide@1/sd@0,0:a Boot args: kernel/unix <<< Starting Installation >>> SunOS Release 5.8 Version Generic 32-bit Copyright 1983-2000 Sun Microsystems, Inc. All rights reserved. Configuring /dev and /devices Using RPC Bootparams for network configuration information. Solaris Web Start 3.0 installer English has been selected as the language in which to perform the install. Starting the Web Start 3.0 Solaris installer Solaris installer is searching the system's hard disks for a location to place the Solaris installer software. No suitable Solaris fdisk partition was found. Solaris Installer needs to create a Solaris fdisk partition on your root disk, c0d0, that is at least 395 MB. WARNING: All information on the disk will be lost. May the Solaris Installer create a Solaris fdisk [y,n,?] -
Otherwise, if you're using the CD labeled Solaris 8 Installation English Intel Platform Edition, and Solaris Web Start can find a Solaris fdisk partition, the Running Driver screen is displayed briefly, followed by information similar to this:
<<< Current Boot Parameters >>> Boot path: /pci@0,0/pci-ide@7,1/ide@1/sd@0,0:a Boot args: kernel/unix <<< Starting Installation >>> SunOS Release 5.8 Version Generic 32-bit Copyright 1983-2000 Sun Microsystems, Inc. All rights reserved. Configuring /dev and /devices Using RPC Bootparams for network configuration information. Solaris Web Start 3.0 installer English has been selected as the language in which to perform the install. Starting the Web Start 3.0 Solaris installer Solaris installer is searching the system's hard disks for a location to place the Solaris installer software. The default root disk is /dev/dsk/c0d0. The Solaris installer needs to format /dev/dsk/c0d0 to install Solaris. WARNING: ALL INFORMATION ON THE DISK WILL BE ERASED! Do you want to format /dev/dsk/c0d0? [y,n,?,q] -
If you're using the CD labeled Solaris 8 Installation Multilingual Intel Platform Edition, information similar to this is displayed:
                        <<< Current Boot Parameters >>>
Boot path: /pci@0,0/pci-ide@7,1/ide@1/sd@0,0:a
Boot args: kernel/unix


                        <<< Starting Installation >>>

SunOS Release 5.8 Version Generic 32-bit
Copyright 1983-2000 Sun Microsystems, Inc.  All rights reserved.
Configuring /dev and /devices
Using RPC Bootparams for network configuration information.
Solaris Web Start 3.0 installer
The Solaris Installer can be run in English, or any of the following languages:

  1) English           6) Japanese
  2) German            7) Korean
  3) Spanish           8) Swedish
  4) French            9) Simplified_Chinese
  5) Italian          10) Traditional_Chinese
Select the language you want to use to run the installer:
-
-
Which installation CD are you using?
-
If the Solaris 8 Installation English Intel Platform Edition CD, go to the next step.
-
If the Solaris 8 Installation Multilingual Intel Platform Edition CD, type the number to select the language in which to display prompts, messages, and other installation information.
If Solaris Web Start cannot find a Solaris fdisk partition, information similar to this is displayed (in the language you selected):
language_you_selected has been selected as the language in which to perform the install.
Starting the Web Start 3.0 Solaris installer

Solaris installer is searching the system's hard disks for a
location to place the Solaris installer software.

No suitable Solaris fdisk partition was found.

Solaris Installer needs to create a Solaris fdisk partition
on your root disk, c0d0, that is at least 395 MB.

WARNING: All information on the disk will be lost.


May the Solaris Installer create a Solaris fdisk [y,n,?]
If Solaris Web Start can find a Solaris fdisk partition, information similar to this is displayed (in the language you selected):
language_you_selected has been selected as the language in which to perform the install.
Starting the Web Start 3.0 Solaris installer

Solaris installer is searching the system's hard disks for a
location to place the Solaris installer software.


The default root disk is /dev/dsk/c0d0.
The Solaris installer needs to format
/dev/dsk/c0d0 to install Solaris.

WARNING: ALL INFORMATION ON THE DISK WILL BE ERASED!


Do you want to format /dev/dsk/c0d0?  [y,n,?,q]
-
-
Was Solaris Web Start able to find a Solaris fdisk partition?
-
If yes, go to Step 21.
-
If no, at the prompt, type y and press Enter.
Information similar to this is displayed:
Total disk size is 972 cylinders Cylinder size is 4032 (512 byte) blocks Cylinders Partition Status Type Start End Length % ========= ====== ============ ===== === ====== === 1 DOS12 0 7 8 1 SELECT ONE OF THE FOLLOWING: 1. Create a partition 2. Specify the active partition 3. Delete a partition 4. Exit (update disk configuration and exit) 5. Cancel (exit without updating disk configuration) Enter Selection: -
-
Type 1 and press Enter.
Information similar to this is displayed:
Select the partition type to create:
   1=SOLARIS   2=UNIX        3=PCIXOS     4=Other
   5=DOS12     6=DOS16       7=DOSEXT     8=DOSBIG
   A=x86 Boot  B=Diagnostic  0=Exit?
-
Type A and press Enter.
Information similar to this is displayed:
Specify the percentage of disk to use for this partition
(or type "c" to specify the size in cylinders).
-
Type the percentage you want and press Enter.
Information similar to this is displayed:
Should this become the active partition? If yes, it will be activated
each time the computer is reset or turned on.
Please type "y" or "n".
-
Type y and press Enter.
Information similar to this is displayed:
Partition 2 is now the active partition.


SELECT ONE OF THE FOLLOWING:

   1. Create a partition
   2. Specify the active partition
   3. Delete a partition
   4. Exit (update disk configuration and exit)
   5. Cancel (exit without updating disk configuration)
-
Type 1 and press Enter.
Information similar to this is displayed:
Select the partition type to create:
   1=SOLARIS   2=UNIX        3=PCIXOS     4=Other
   5=DOS12     6=DOS16       7=DOSEXT     8=DOSBIG
   A=x86 Boot  B=Diagnostic  0=Exit?
-
Type 1 and press Enter.
Information similar to this is displayed:
Specify the percentage of disk to use for this partition
(or type "c" to specify the size in cylinders).
-
Type the percentage you want and press Enter.
Information similar to this is displayed:
Should this become the active partition? If yes, it will be activated
each time the computer is reset or turned on.
Please type "y" or "n".
-
Type n and press Enter.
An IA boot partition and a Solaris partition are created. Information similar to this is displayed:
Total disk size is 972 cylinders Cylinder size is 4032 (512 byte) blocks Cylinders Partition Status Type Start End Length % ========= ====== ============ ===== === ====== === 1 DOS12 0 7 8 1 2 Active x86 Boot 8 16 9 1 3 Solaris 17 969 953 98 SELECT ONE OF THE FOLLOWING: 1. Create a partition 2. Specify the active partition 3. Delete a partition 4. Exit (update disk configuration and exit) 5. Cancel (exit without updating disk configuration) Enter Selection: -
Type 4 and press Enter.
Information similar to this is displayed:
No suitable Solaris fdisk partition was found.

Solaris Installer needs to create a Solaris fdisk partition
on your root disk, c0d0, that is at least 395 MB.

WARNING: All information on the disk will be lost.


May the Solaris Installer create a Solaris fdisk [y,n,?]
-
Type n and press Enter.
Information similar to this is displayed:
Please choose another installation option, see the
Solaris Install Documentation for more details.

To restart the installation, run /sbin/cd0_install.
-
At the system prompt, type /sbin/cd0_install and press Enter.
Information similar to this is displayed:
The default root disk is /dev/dsk/c0d0.
The Solaris installer needs to format
/dev/dsk/c0d0 to install Solaris.

WARNING: ALL INFORMATION ON THE DISK WILL BE ERASED!


Do you want to format /dev/dsk/c0d0?  [y,n,?,q]
-
At the prompt, type y and press Enter.
Information similar to this is displayed:
NOTE: The swap size cannot be changed during filesystem layout.


Enter a swap partition size between 384MB and 1865MB, default = 512MB [?]
-
At the prompt, press Enter to accept the default swap partition size, or type the swap partition size you want and press Enter.
Information similar to this is displayed:
The Installer prefers that the swap slice is at the beginning of the
disk. This will allow the most flexible filesystem partitioning later in the installation.

Can the swap slice start at the beginning of the disk  [y,n,?,q]
-
Do you want to place the swap space at the beginning of the disk (and thus improve the flexibility of partitioning the file system and the efficiency with which the disk is accessed)?
-
If yes, type y, press Enter, and go to Step 25.
-
If no, type n and press Enter.
Information similar to this is displayed:
WARNING: Placing the swap slice at a cylinder location other than cylinder 0
requires expert knowledge about disk layout. This choice may affect
disk layout choices later in the installation.

Enter a starting cylinder between 3 and 590, default = 3 [?]
-
-
Press Enter to accept the default starting cylinder (3), or type the starting cylinder you want and press Enter.
Information similar to this is displayed:
You have selected the following to be used by the Solaris installer: Disk Slice : /dev/dsk/c0d0 Size : 512 MB Start Cyl. : 3 WARNING: ALL INFORMATION ON THE DISK WILL BE ERASED! Is this OK [y,n,?,q] -
At the prompt, type y and press Enter.
Information similar to this is displayed:
The Solaris installer will use disk slice, /dev/dsk/c0d0s1.
After files are copied, the system will automatically reboot, and
installation will continue.
Please Wait...

Copying mini-root to local disk....done.


Copying platform specific files....done.

Preparing to reboot and continue installation.
Need to reboot to continue the installation
Please remove the boot media (floppy or cdrom) and press Enter
Note: If the boot media is cdrom, you must wait for the system
to reset in order to eject.
-
Did you insert the diskette labeled Solaris 8 Device Configuration Assistant Intel Platform Edition into the system's diskette drive in Step 2?
-
If yes, eject the diskette from the system's diskette drive and press Enter.
-
If no, press Enter.
Information similar to this is displayed:
Syncing file systems... 49 done
rebooting...
The system resets, and a memory test and hardware detection are executed.
-
-
Quickly, eject the Solaris 8 Installation English Intel Platform Edition or Solaris 8 Installation Multilingual Intel Platform Edition CD from the CD-ROM drive before the system completes the memory test and hardware detection.
Information similar to this is displayed:
SunOS - Intel Platform Edition                   Primary Boot Subsystem, vsn 2.0


                        Current Disk Partition Information

                 Part#   Status    Type      Start       Length
                ================================================
                   1              DOS12          63       32193
                   2     Active   X86 BOOT    32256       36288
                   3              SOLARIS     68544     3842496
                   4              <unused>


               Please select the partition you wish to boot:
After a few seconds, the screen refreshes and information similar to this is displayed:
SunOS Secondary Boot version 3.00


             Solaris Intel Platform Edition Booting System


Running Configuration Assistant...
Autobooting from bootpath /pci@0,0/pci-ide@7,1/ata@1/cmdk@0,0:b

If the system hardware has changed, or to boot from a different
device, interrupt the autoboot process by pressing ESC.


Initializing system
Please wait...


                      <<< Current Boot Parameters >>>
Boot path: /pci@0,0/pci-ide@7,1/ata@1/cmdk@0,0:b
Boot args:

Type    b [file-name] [boot-flags] <ENTER>      to boot with options
or      i <ENTER>                               to enter boot interpreter
or      <ENTER>                                 to boot with defaults

                  <<< timeout in 5 seconds >>>

Select (b)oot or (i)nterpreter:
SunOS Release 5.8 Version Generic 32-bit
Copyright 1983-2000 Sun Microsystems, Inc.  All rights reserved.
Configuring /dev and /devices
Using RPC Bootparams for network configuration information.
The Solaris Installation Program screen is then displayed.
-
Press F2_Continue.
The kdmconfig - Introduction screen is displayed.
-
Press F2_Continue.
The kdmconfig - View and Edit Window System Configuration screen is displayed.
-
Examine the configuration information on the kdmconfig - View and Edit Window System Configuration screen and make any changes you need.
-
When you're done, select No changes needed - Test/Save and Exit, and press F2_Continue.
The kdmconfig Window System Configuration Test screen is displayed.
-
Press F2_Continue.
-
On the screen that is displayed, try to move the pointer and examine the colors shown on the palette to ensure that they're displayed accurately.
-
Are the colors displayed accurately and can you move the pointer?
-
If no, either click No (if possible), press any key on the keyboard, or wait until kdmconfig exits the kdmconfig Window System Configuration Test screen automatically, and then repeat Step 30 through Step 34 until the colors are displayed accurately and you can move the pointer as expected.
-
If yes, click Yes.
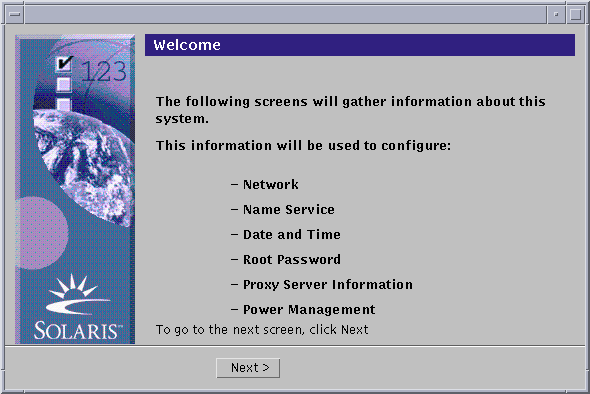
After a few seconds, the Welcome screen is displayed:
-
- © 2010, Oracle Corporation and/or its affiliates

