SPARC: To Get Started
-
Check Table 5-4 to make sure the system on which you intend to install Solaris 8 is prepared for an interactive installation.
Table 5-4 SPARC: Task Map: Setting Up a System for an Interactive InstallationTask
Description
For instructions, go to
Back up existing Solaris 1.x (SunOS 4.x) files
If a previous Solaris 1.x release (SunOS 4.x) is installed on the system, you can convert or merge some Solaris 1.x files into Solaris 8 files. You can use begin and finish scripts to convert or merge the files.
Check if the system is supported
Check the hardware documentation to see if the system is supported in Solaris 8.
Decide how to upgrade the system if a previous version of Solaris is installed on it
If the system has a previous release of Solaris installed, you need to determine how to upgrade the system. Make sure you know what to do before and after you upgrade a system.
"SPARC: Upgrading a System" in this chapter
Check if the system has enough disk space for the Solaris 8 software
Optional. There are many considerations when planning disk space, such as deciding which software group you want to install.
Preconfigure system configuration information
Optional. You can use the sysidcfg file or the name service to preconfigure installation information (for example, locale) for a system so you won't be prompted to supply the information during the installation.
Set up the system to install over the network
For network installations only
To install a system from a remote Solaris 8 Software SPARC Platform Edition CD image, you need to set up the system to boot and install from an install or boot server.
Chapter 9, Preparing to Install Solaris Software Over the Network
-
If the system is part of a network, make sure an Ethernet connector or similar network adapter is plugged into your system.
-
Do you intend to install the Solaris software on a system through a tip(1) line?
-
If no, go to the next step.
-
If yes, make sure your window display is at least 80 columns wide and 24 rows long.
Note -To determine the current dimensions of your tip window, use the stty(1) command.
-
-
Do you intend to use the system's CD-ROM drive to install the Solaris 8 software on the system?
-
If no, go to the next step.
-
If yes, insert the CD labeled Solaris 8 Software 1 of 2 SPARC Platform Edition into that system's CD-ROM drive.
-
-
Boot the system:
If your system is
Then
New, out-of-the-box
Turn on the system.
Existing
Display the ok prompt (by typing halt as superuser or by pressing both the Stop and A keys at the same time), and type:
ok boot cdrom
to boot from the local CD, or type:
ok boot net
to boot from an install server on a network.
Information similar to this is displayed:
Boot device: /sbus/espdma@e,8400000/esp@e,8800000/sd@6,0:f  File and args:
SunOS Release 5.8 Version Generic 32-bit
Copyright 1983-2000 Sun Microsystems, Inc.  All rights reserved.
Configuring /dev and /devices
Using RPC Bootparams for network configuration information.
le0: No carrier - cable disconnected or hub link test disabled?
After a few seconds, a menu of languages is displayed.
-
Type the number that corresponds to the language in which to display prompts, messages, and other installation information.
A menu of locales is displayed.
-
Type the number that corresponds to the locale you want to use for the installation.
The OpenWindowsTM desktop starts. An empty desktop and the Solaris Install Console window are displayed with the message:
The system is coming up. Please wait.
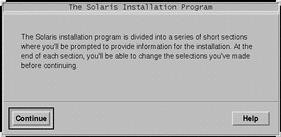
The Solaris Installation Program dialog box is displayed:

-
Click Continue.
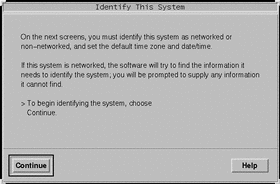
The Identify This System dialog box is displayed:

- © 2010, Oracle Corporation and/or its affiliates
