Chapter 10 Print Tool
The Print Tool DeskSet application provides an easy way to print files. Print Tool provides a graphical user interface to the UNIX printing functions.
This chapter describes the functions of the Print Tool. For information about UNIX printing functions, see System Administration Guide or the OpenWindows Advanced User's Guide.
To start Print Tool, choose Workspace -> Programs -> Print Tool.
Print Tool Icons
You can print files by dragging and dropping files from the File Manager or a header attachment from the Mail Tool onto the Print Tool icon, which is shown in Figure 10-1.
Figure 10-1 Print Tool Icon-Before and During Printing
The name of the current printer is displayed at the bottom of the Print Tool icon. When a file is dragged and dropped onto the Print Tool, the footer of the open Print Tool window displays the name of the file being printed and may also display error messages. You can drag and drop files to be printed onto the drop target of the Print Tool window and onto the Print Tool icon.
Print Tool Window
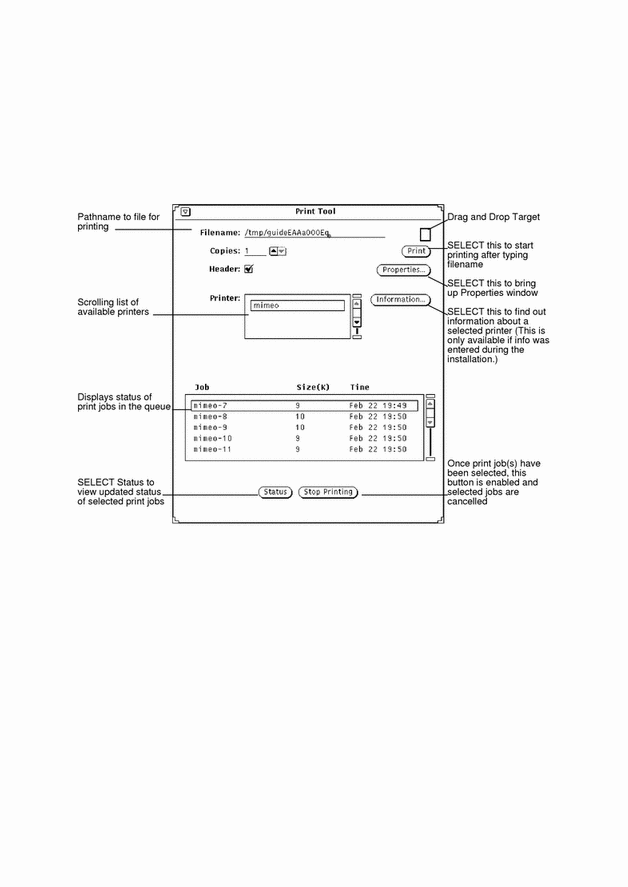
You can perform the following operations from the Print Tool window, as shown in Figure 10-2:
-
Print files using the Filename text field and the Print button.
-
Print files by dragging and dropping files from other applications.
-
Specify the number of copies to print.
-
Specify a header page.
-
Choose which of the available printers to use.
-
Use the Information button to view information about each printer, if set up by system administrator.
-
Specify an executable print command or print script for use with the file to be printed.
-
Display print queue status.
-
Stop printing job(s) in this print queue.
-
Change printer property information such as including a header page, notification of job completion, overriding a default print method.
Figure 10-2 Print Tool Window
Printing Files
There are two ways to print files:
-
By typing the filename in the Print Tool window
-
By dragging and dropping
With both methods, status messages are displayed in the footer of the Print Tool window. The following sequence of messages is typical (each time you start a print job or change printers):
-
Printing <filename>
This flashes for a short time before displaying:
-
no entries
You see no entries once all the job(s) have been completed.
If the properties have been set, the Print Tool window flashes and beeps, when all printing jobs have been completed.
If you want to print a file with a format other than the default, you need to supply an alternative print method. Refer to "Changing the Print Method in the Print Tool" for information on these procedures.
Typing the Filename in the Print Window
To print by typing the file name in the PrintTool window:
-
Type the file's full path name in the Filename text field.
If the file is in your home directory, just type the filename. Otherwise, start the path name from your home directory and include each subdirectory in the path to the file in the form: directory1/directory2/filename.
-
Click SELECT on the Print button.
Dragging and Dropping the File
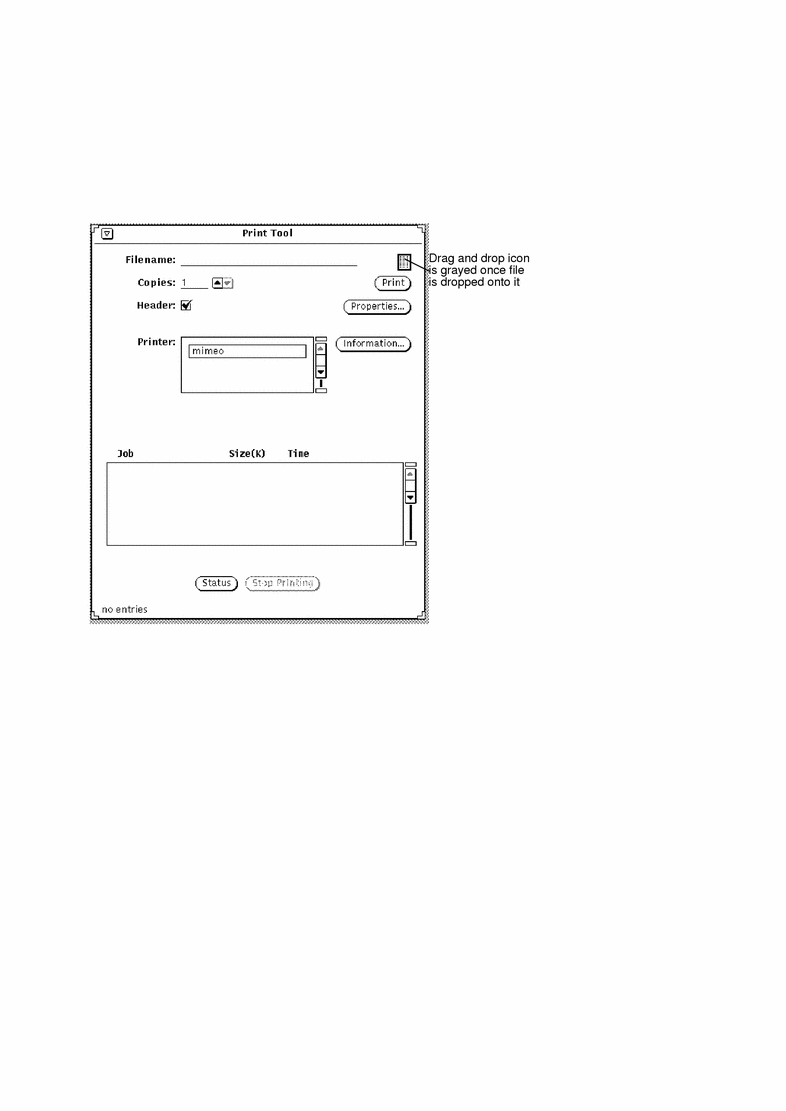
When you drag a file from another application, you can drop it onto either the Print Tool icon or the drop target of the Print Tool window.
To print a file by dragging and dropping:
-
Display the item you want to print.
For example:
-
A file in the File Manager window
-
A mail message in Mail Tool
-
An attachment in a Mail Tool message
-
-
Drag the icon or message header to either the Print Tool icon or the drop target in the Print Tool window.
To drag more than one file, click ADJUST on additional files.
-
Release the mouse button to drop the file.
Printing should begin.
Figure 10-3 Dropping a File on the Print Tool Drop Target
Choosing Another Printer
When the Print Tool window is open, the list of available printers is shown in the scrolling list for Printer. The list is alphabetical with the default printer highlighted and located at the top of the list, if it exists. If a default printer does not exist, the first printer in the list is highlighted.
To choose another printer, follow these steps:
-
Scroll down the list until the printer you want to use is visible.
-
Select the printer name.
The printer must be available. For information on adding a printer, refer to System Administration Guide.
The printer you chose is selected, as shown in the example in Figure 10-3.
Checking the Print Queue Status
To check the status of your print jobs, click SELECT on the Status button near the bottom of the Print Tool window. The scrolling status window lists by job, size (in KB), and time all of your files or jobs (for the selected printer) in the print queue as shown in Figure 10-4.
Figure 10-4 Example of Entries in the Print Queue
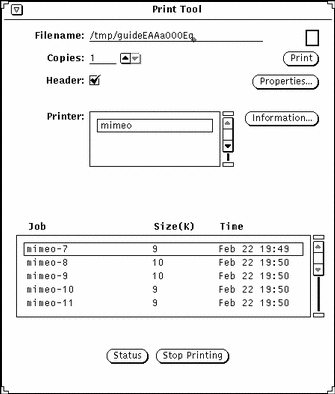
Each entry in the print queue is identified by Job, Size (in KB), and Time. The Job category shows a unique job number for each file in the queue. It is also helpful to know the size of a print job. Time shows the time the job was submitted. Figure 10-4 shows that the job ranked first will take longer to print than the following job, because it is larger in size.
Stopping a Print Job
You can stop one or more of your jobs in the queue. To stop your job(s) in the queue, do the following:
-
Click SELECT on the Status button to display the jobs in the print queue.
-
Move the pointer onto the job you want to cancel, and click SELECT.
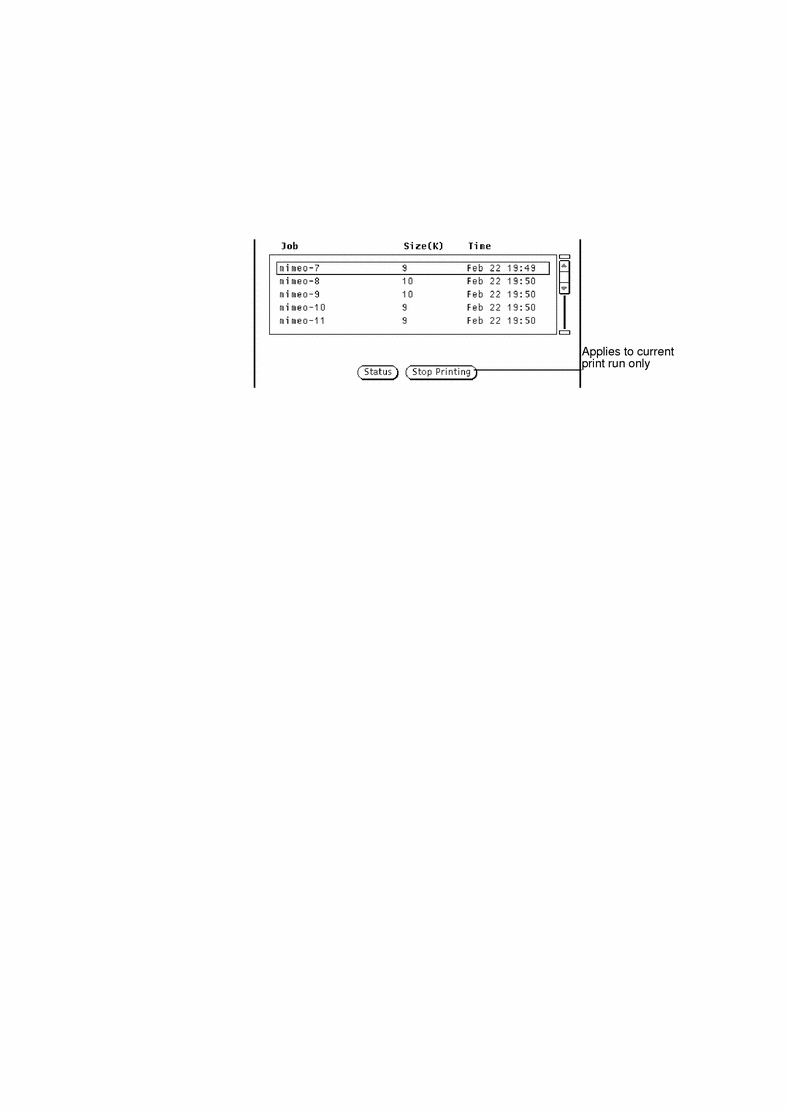
To stop more than one job, point to the additional jobs and click SELECT. The Stop printing button is enabled once a job is selected.
-
Click SELECT on the Stop Printing button, shown in Figure 10-5.
Figure 10-5 Stopping a Print Job
Note -When you stop printing one or more print jobs, the Print Tool remains busy and does not accept further input until the printer acknowledges the request. Depending on the number of jobs selected and the status of the printer queue, it may take several minutes for the printer to respond to your request.
Changing Print Tool Properties
The Print Tool properties window allows you to change certain of functions of Print Tool.
Click SELECT on the Properties button from the Print Tool window.
The Print Tool Properties window is shown in Figure 10-6.
Figure 10-6 The Print Tool Properties Window
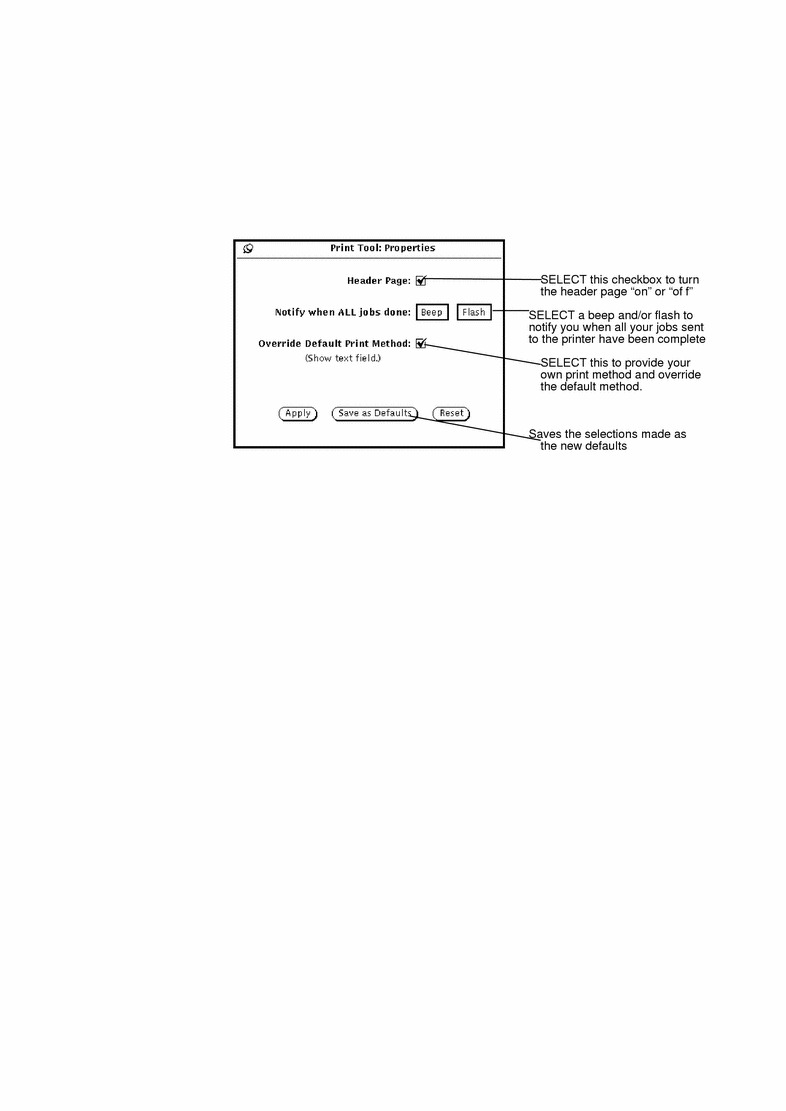
The following properties can be set from the Print Tool Properties window:
-
Use the Header Page setting to indicate whether or not your jobs should print with a header (or banner) page. The Header Page setting on the Print Tool window overrides the setting made here.
You can turn the header page on or off for an individual job from the Print Tool window, without going back and forth to the Print Tool: Properties window. A check in the checkbox box indicates that the default is to print a header page with each job.
-
Use the Notify when ALL jobs done setting to beep and/or flash you when all of the print jobs you sent to the queue have printed.
-
Use the Override Default Print Method to use your own print method next time you start Print Tool. For more information on using your own print method, refer to "Changing the Print Method in the Print Tool".
Changing the Print Method in the Print Tool
Note -
Depending upon your installation, certain printer filter programs should have been installed for the printers you use by the system administrator. If no print filters are installed, your print job will not be printed. Check with your system administrator for the filter programs installed for your printer, or for a complete listing of print filters available and information about the lpfilter command, refer to System Administration Guide.
The Override default print method option allows you to use alternate (command line) print methods within Print Tool. If you need to print a file with another print method (such as troff), you need to override the default print method. You must also use the following environment variables (listed here with their meaning):
$FILE=Name of your file
$PRINTER/$LPDEST=Printer name
$COPIES=Number of copies to be printed
$HEADER=Print header page with job
You can type any command line print method, including UNIX pipes and shell scripts. The print method must be an executable command in your path. For example, if you want to pretty-print a C source file using the vgrind command, you would follow these steps:
-
Click SELECT on the Properties button.
-
Click the Override Default Print Method checkbox, and press Apply.
-
In the Print Method text field, type:
vgrind $FILE | dpost | lp -d$PRINTER -n$COPIES -Tpostscript
-
Type the name of the file in the File text field, or drag and drop the file to be printed onto the Print Tool icon or drag and drop target.
Note -The SunOS 5.X print system does not recognize the type of the file to be printed. You must supply the appropriate filter for the file type when using an alternate print method. Otherwise, the file will be printed as a plain ASCII file.
Changing the Print Method with the Binder
You can use the Binder application to view or change the print method bound to specific types of files. This information is stored in the non-ASCII file called cetables in the /usr/openwin/lib/cetables directory and can be viewed using Binder. Once you use Binder to customize this file, the information is stored as .cetables directory in your home directory. For complete information on using Binder, refer to Chapter 16, Binder.
Starting Print Tool from the Command Line
When started from the command line, Print Tool looks at the following to determine the default printer:
-
If the Print Tool was started in a Shell Tool or Command Tool, and the printer was specified with the -P command line argument, Print Tool uses that printer as the default. For example, the printer named mimeo is the default if Print Tool is started by typing printtool -P mimeo.
-
If a printer was not specified with a command line argument, Print Tool looks for the environment variable $PRINTER (or $LPDEST, if the $PRINTER environment variable has not been set). If this environment variable is set, the printer it specifies becomes the Print Tool default.
-
If neither a command line argument was specified, nor the $PRINTER (or $LPDEST) environment variable was set, Print Tool automatically selects the name of your system default printer.
All printers that are available to you are listed on the Printer scroll list. Printers are in separate directories under /etc/lp/printers. If you need to add or delete printers to your system configuration, you must use the admin tool. See System Administration Guide for more information.
- © 2010, Oracle Corporation and/or its affiliates
