| C H A P T E R 5 |
|
Monitoring the RFID System |
The RFID Management Console is a web-based application for monitoring the readers and components of the RFID Event Manager system.
This chapter includes the following topics:
The RFID Management Console is a web-based application that can be accessed using a web browser to both monitor and modify the various components of the RFID Event Manager. The RFID Management Console shows the status of the readers and components and can be used to quickly assess the overall state of the RFID Event Manager system.
The RFID Management Console may also be used to modify various read and write properties of the RFID Event Manager components as the system is running.
The Sun Java System RFID Software 3.0 release has enhanced the RFID Management Console in the area of user creation and management. The previous release provided one user, admin, of the console. RFID Software 3.0 enables the creation of multiple role-based user logins. By default, the system still defines the admin user. The admin user is assigned the following administrative privileges:
For more details, see Creating and Managing RFID Management Console Users.
|
1. Confirm that the RFID Event Manager and your application server are running.
To use the RFID Management Console, your application server must be running. To see all of the screens and data for the RFID Management Console, the RFID Event Manager must also be running.
2. Open a supported web browser and type the RFID Management Console URL.
The URL is of the following format: http://hostname:port-number/sdui. For example, http://myhost:8080/sdui.
The RFID Management Console login screen appears.
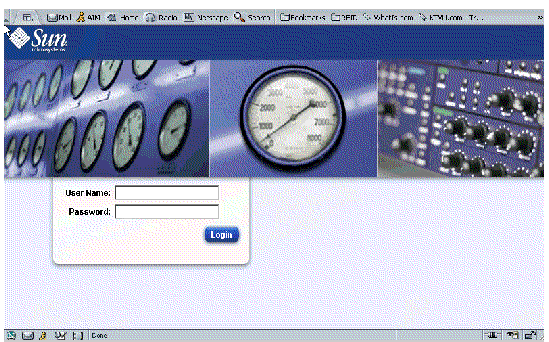
3. Type the user name and password.
The RFID Management Console Welcome screen appears.
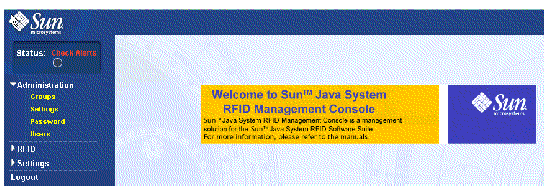
4. Choose the task to perform from the links on the left side of the screen.
See the following sections of this chapter for more information on using the RFID Management Console.
From the RFID Management Console Administration menu, you can perform the following tasks:
When you log in to the RFID Management Console for the first time, you must log in as the default admin user. The admin user has administrator privileges and can view all readers and groups. The admin user also creates new users and groups. New users can have administrator privileges. A user with administrator privileges is called an administrator and has the same privileges as the default admin user. An administrator can view all groups and readers.
Administrator privileges enable the user to create new users and groups. By default, any user created with administrator privileges is automatically assigned to the All Readers group. This group enables the user to view all readers for potential assignment to the various reader groups. An administrator can also assign Add/Delete Reader privileges to a user. These privileges enable the user to add and delete readers from owned groups. Otherwise, the user can only view the list of readers that an administrator has assigned to its groups.
|
Note - An administrator automatically receives Add/Delete Reader privileges. |
An administrator can also create new groups and assign specific readers to the groups as they are created. This privilege enables an administrator to control the readers that are viewed by each user.
A user without administrator privileges (a nonadministrator) cannot create new users or new groups. A nonadministrator can be assigned Add/Delete Reader privileges and can then assign readers to his or her own groups.
In summary, the administrator can define new users as defined in the following table.
|
Can only view readers in the groups to which the user belongs. |
To manage the RFID Management Console users, select the appropriate icon. The icons are defined in the following table.
|
|
|
|
|
|
|
|
|
|
|
|
|
|
|
Only administrators can create new users.
1. Log in to the RFID Management Console as the admin user.
See To Access the RFID Management Console.
2. Choose Administration  Users.
The existing default admin user information appears.

The Create New User dialog box appears.
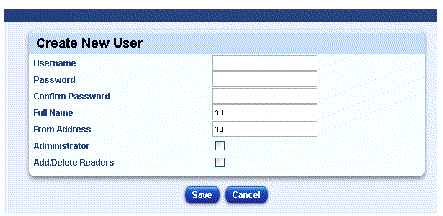
4. Type the necessary values to create the new user.
5. Select the Administrator check box to enable the user to create new users and groups.
6. Select the Add/Delete Readers check box to enable the user to add and delete readers.
The Groups menu option enables you to group different readers for easier tracking. Choosing this option displays the groups that have been created and the number of readers that are in each group. A default group named All Readers contains a list of all available readers. The All Readers group enables administrators to view all the available readers in the entire system. A nonadministrator can only view groups to which he or she has been assigned
To manage the RFID Management Console groups, select the appropriate icon. The icons are defined in the following table.
|
|
|
|
|
|
|
|
|
|
|
|
|
|
|
Only administrators can create groups.
1. Log in to the RFID Management Console as the admin user.
See To Access the RFID Management Console.
2. Choose Administration  Groups.
The following screen appears and shows the default group, All Readers, and any previously created groups and the number of readers that are in each group.
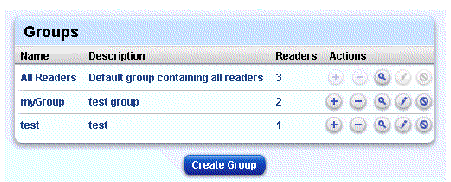
If no groups have been created, only the default All Readers group appears. If the user is not assigned to any groups, then no groups appear.
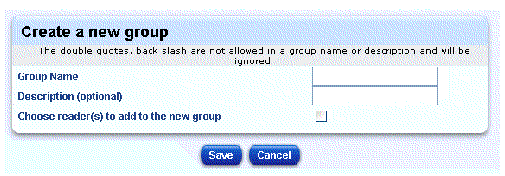
5. (Optional) Type the Description.
6. (Optional) Select the check box, Choose reader(s) to add to the new group.
Selecting this check box enables you to add readers to the new group at the same time as you create the group. If the check box is not selected, only the group is created and the readers must be added later.
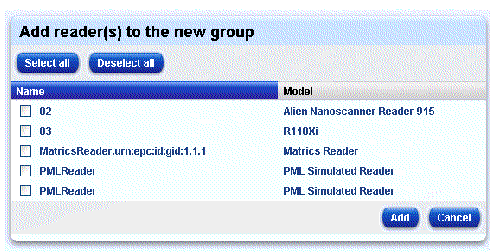
8. Select the readers to add to the group, then click Add.
Your new group appears in the list of groups.
9. After you have created your groups, you can log out of the RFID Management Console by choosing Logout from the menu.
The Settings menu shows the following options:
1. Log in to the RFID Management Console.
2. Choose Administration  Settings.
The Jini Locators list appears.


4. Type the locator in the format jini://IP-address:port-number.
5. (Optional) Type a description for the locator.
1. Log in to the RFID Management Console.
2. Choose Administration  Settings.
The Email Notification Configuration dialog box appears. This dialog box appears with the Jini Locator dialog box described in To Add a Jini Locator.
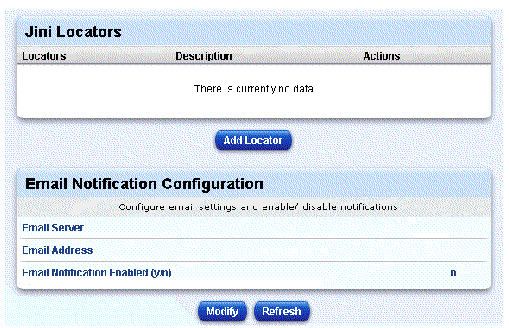
The Email Notification Configuration dialog box appears.
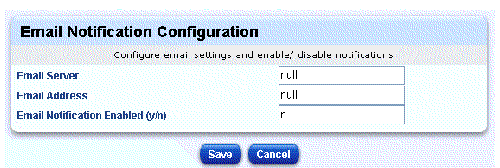
For example, mail-server.company.com.
For example, myname@company.com.
6. Enable the Alerts email notification by typing y in the Email Notification Enabled (y/n) text box.
You are returned to the original Settings page and receive the following confirmation message.

Use the following procedure to change the default password that is used to access the RFID Management Console as the admin user.
1. Log in to the RFID Management Console as the admin user.
2. Choose Administration  Password.
The following dialog box appears.
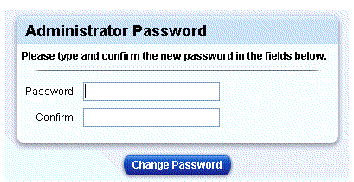
4. Type the same value in the Confirm text field.
5. Click Change Password to save the new value.
Use the new password the next time that you log in to the RFID Management Console as the admin user.
The RFID Management Console provides the following options for managing the RFID reader network. Expand the RFID menu option to see the following links:
The RFID Management Console provides a reader grouping function so that distinct groups of readers can be monitored in a meaningful way. For example, all readers in a particular section of a warehouse might be grouped together and specified with a the name warehouseSectionA. Another area of the warehouse might contain a set of readers in a group named warehouseShippingArea. Once you have grouped your readers and other RFID devices into meaningful groups, the viewing functions provided by the RFID Management Console can be used effectively to monitor the RFID reader network.
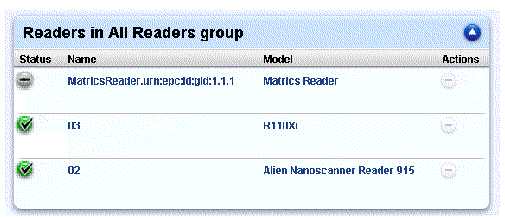
Due to the dynamic nature of RFID readers, a short-lived network malfunction can cause a reader to not be seen for a period of time. Deleting a malfunctioning reader from its group would require it to be added back to the group manually when it was reactivated. Rather than delete such a reader from its group, every reader that has ever been added to a group is shown. If, for some reason, a reader disappears from the network, it is marked as inactive. An inactive reader is indicated by greying out (or disabling) the Status icon with the horizontal dash. This icon is shown in TABLE 5-5.
You can view the reader groups in two ways as described in the following procedures.
|
1. From the RFID Management Console main menu choose Administration  Groups.
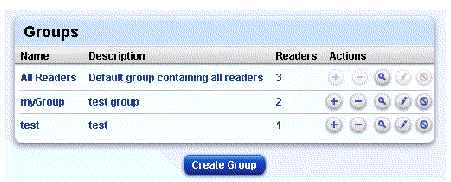
2. Choose a reader group to view.
You see something similar to the following screen capture. In this example one reader is inactive and two readers are active. The delete Action icon is greyed out.
|
The RFID Readers view enables you to view readers by group and to view and to set the reader attributes. You can quickly view the status of all devices.
1. From the RFID Management Console main menu choose RFID  RFID Readers.
The View Readers by Group page appears as shown in the following screen capture. The page shows the existing reader groups to which you belong. If no groups are assigned to you (your user login) no groups appear on this screen.
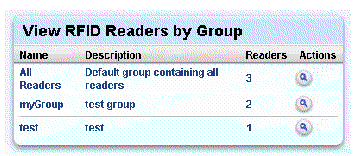
2. To view the readers in a group, click the Inspect icon in the Actions column.
For example, if you click the Inspect icon for the All Readers group, the Readers in All Readers group panel appears as shown in the following screen capture. The group has one inactive reader and two active readers. The Actions icons for the inactive readers are greyed out because you cannot inspect them or view their tags when they are inactive. If the readers become active again later, then they would appear with the green Status icon and be selectable for other actions. TABLE 5-4 describes the Actions icons.
|
|
View Tags - Display the RFID tags that are within view of the selected reader. |
3. Review the status of the readers in the selected group.
The Status icons are described in the following table.
|
|
|
|
|
|
|
|
|
|
|
|
|
|
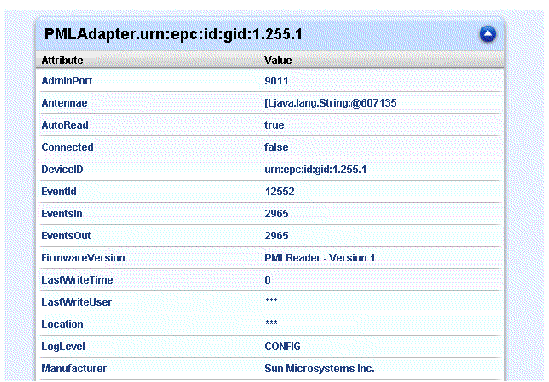
4. To view reader attributes, click the Inspect icon (see TABLE 5-4) in the Actions column.
The RFID Reader Attribute pane appears.
5. (Optional) To modify reader properties, follow these steps:
a. Scroll to the bottom of the Reader Attribute pane, and click Modify.
A pane that shows the modifiable properties appears.
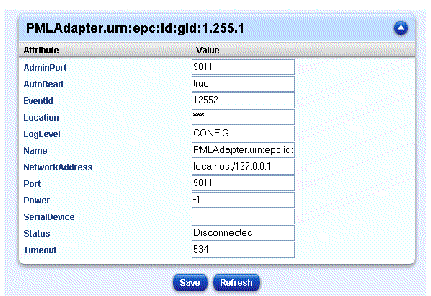
b. Type your changes, and click Save.
c. (Optional) Click Refresh to determine if attribute values have changed while you have been reviewing them.
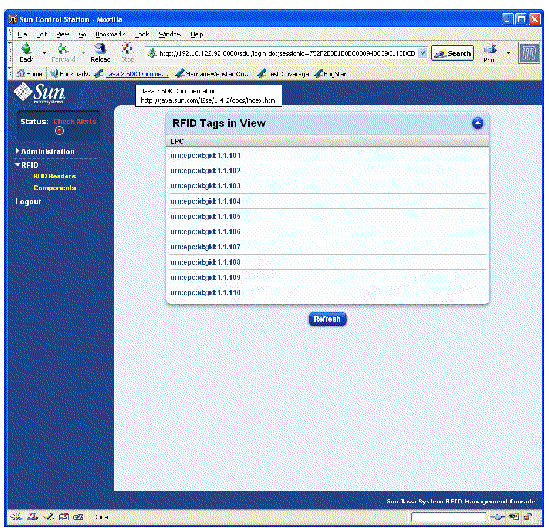
6. (Optional) To view the tags in view of a selected reader, from the Readers in Groups pane (shown in Step 2), click the View Tags icon located in the Actions column.
The RFID Tags in View pane appears.
|
The components menu option enables you to view all RFID system components, such as filters, connectors, and reader adapters, for each running service. This option is only available to the administrative user.
1. Log in to the RFID Management Console as the admin user.
A list of RFID services similar to the following appears.

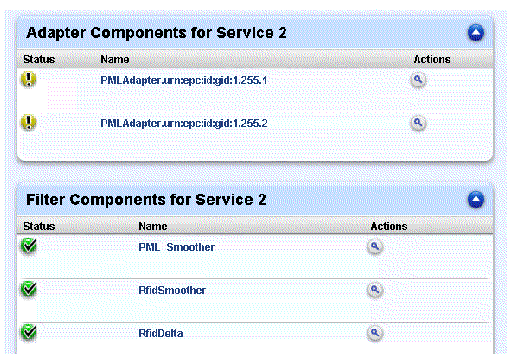
3. To view the components for a specific service, click the Inspect icon in the Actions column.
Each component type is grouped in its own table, similar to the following.
4. (Optional) To view the component properties, click the Inspect icon in the Actions column.
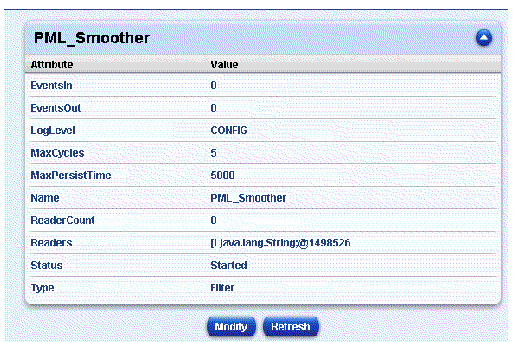
For example, the following screen capture shows the properties for the PML_Smoother component.
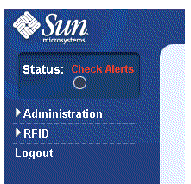
The RFID Management Console enables you to view alerts from the RFID reader network. An alert indicates that one of the RFID readers or other RFID devices is malfunctioning. The red Check Alerts label and the button below it indicate that there are alerts to be viewed. When you review and dismiss the alert from the Alerts display, the alert is archived in a database. When all alerts have been archived, the Check Alerts button turns green to indicate no more alerts exist. When new alerts arrive, the Check Alerts button turns red again.
You can also create alert filters. The RFID Software 3.0 supports two types of alert filters:
|
1. From the RFID Management Console, choose Settings  Alert Filters.
A list of the existing filters appears. By default, there is only one filter, the "Last 24 hours" filter. The default state for this filter is OFF, which is indicated by the Status icon, indicated by a red circle with an X.
3. Check the type of filter that you want to create.
a. Type a name for the filter, and click Next.
b. Select Date Range and type the following properties values:
Type two different dates with the end date later than the start date. If you type the same date, you will not view any alerts.
The new filter appears in the Alert Filters list.
a. Type a name for the filter, and click Next.
a. Select Elapsed Time and type the following properties values:
The new filter appears in the Alert Filters list.
4. To activate a filter, click the green check icon in the Actions column.
Activating a filter deactivates any previously active filter and activates the filter you selected. Once you click the Activate icon, the Status column changes from a red X to a green check icon.
5. To view the list of alerts as filtered by the active filter, click Check Alerts in the Status area of the left menu.
The RFID Management Console uses the currently active filter to display the alerts.
6. To archive these alerts, click Archive All.
|
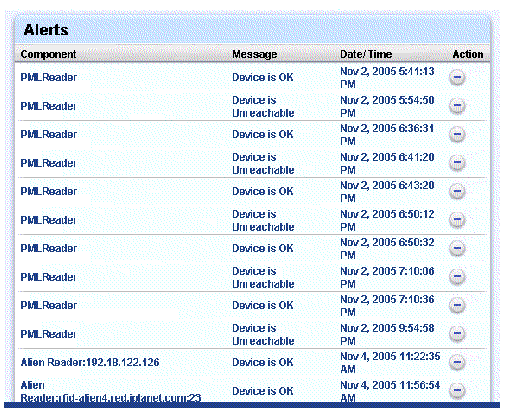
The Alerts pane appears showing the alerts for the currently active filter. You see something similar to the following screen capture.
|
1. Click the Inspect (magnifying glass) icon next to a filter.
2. Type the new property values, and click Save.
|
 Click the Delete icon (a circle with a minus sign).
The filter is immediately deleted. No undo function is available.
|
 Click the green check icon or the red X icon in the Status column to toggle the filter's state to on or off.
Copyright © 2006, Sun Microsystems, Inc. All Rights Reserved.