| C H A P T E R 4 |
|
Using Web Services for Device Access |
In addition to the Java APIs described in Chapter 3, the Sun Java System RFID Software 3.0 provides two web services that can be used by Java and non-Java client applications to access RFID devices. The web services for device access can be installed by using the custom installation option of the RFID Event Manager installer. This chapter describes how to use these web services and includes the following topics:
These web services expose the device client Java interface of Sun RFID Event Manager. So any client application, including standalone Java applications, web clients, J2EE application clients, and other native clients, can use the common XML-based interface to interact with readers configured in the RFID Event Manager
The device access web services are only available if you install the RFID Event Manager using the custom installation option and choose the Web Services for ALE and Device Access component. See the Sun Java System RFID Software 3.0 Installation Guide for information on using this option of the RFID Event Manager installer.
The device access web services are described by the WSDL located at the following URLs:
The variable, em-hostname, is the host name of the machine where the RFID Event Manager is installed. The app-server-port, is your application server HTTP port number.
For example, using Sun Java System Application Server 8.1 Platform Edition listening on port 8080, the URL is http://localhost:8080/readeraccess/ReaderAccess?WSDL.
This section describes the interfaces for the device access web services as follows:
The following terms are used in the interface descriptions:
The implementation of the reader access Java interface API is contained in the following class, ReaderAccessSEI.java.
The following table lists the public ReaderAccessSEI APIs:
The implementation of the printer access Java interface API is contained in the following class, PrinterAccessSEI.java.
All of the public PrinterAccessSEI APIs are listed in the following table.
To discover a specific reader service in the RFID Jini lookup server, you need to supply the following parameters:
These parameters are described in more detail in Reader Client Constructor Parameters of Chapter 3 of this guide.
To simplify the call parameters, the DeviceFinder class has been defined to package these three parameters. You must create a DeviceFinder object that defines the name of the reader you wish to access, along with the necessary Jini information, such as the list of Jini groups in which to search for the reader and any Jini locators that may be necessary to find readers running in an RFID Event Manager on a different subnet. The list of Jini groups and Jini locators may be null. If null is specified for the groups argument, then all Jini groups are searched. If null is specified for the locators argument, then only readers running on the same subnet on which the client is running are found. You can specify multiple groups and locators in either String by using a space, tab, or comma as the separator character.
The four types of device clients that can be used to interact with the RFID device access web services are the following:
This guide focuses on the first two methods and provides examples of how to develop the reader access client. The examples are packaged as NetBeans projects and are included in the Sun Java System RFID Software Toolkit (RFID Software Toolkit).
To use the examples you need an installation of the NetBeans 4.1 IDE. You also need to download and install the RFID Software Toolkit.nbm and set up your RFID environment. Use the following procedures to set up your NetBeans environment.
If you are not familiar with the NetBeans 4.1 IDE, refer to the NetBeans 4.1 Quick Start Guides.
|
1. After installing and starting the NetBeans 4.1 IDE, choose Help  Tutorials
  Quick Start Guide.
The Getting Started with NetBeans IDE 4.1 Quick Start Guide web page appears in your web browser.
The NetBeans IDE 4.1 Quick Start Guide for Web Services web page appears.
3. Review the instructions as needed to get started creating your own web services clients.
When you are ready, proceed to the examples in this chapter. The following sections of this chapter describe using the ReaderAccess client example to illustrate how to develop a web service client.
|
Prerequisite - Confirm that you have installed the NetBeans 4.1 IDE and installed the RFID Software Toolkit. See Prerequisites for Running the Web Services Client Examples.
1. Start your application server.
2. Confirm that the reader client web service has been deployed as part of your RFID Event Manager installation.
See the Sun Java System RFID Software 3.0 Installation Guide.
3. Confirm that Sun Java System Application Server 8.1 is configured in NetBeans.
For example, use the following steps:
a. In the IDE's Runtime window, right-click Servers and choose Add Server from the contextual menu.
The Choose Server pane of the Add Server wizard appears.
b. Select Sun Java System Application Server 8.1 and click Next.
Browse to the location of your application server installation.
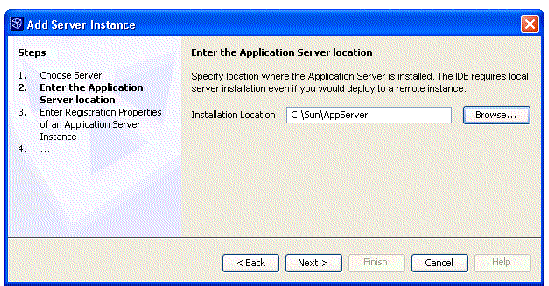
c. Select your application server and click Next.
The Enter Registration Properties pane of the wizard appears.
d. Type the registration properties following the instructions on the wizard pane and click Finish.
The Sun Java System Application Server 8.1 instance is added to the IDE's Runtime window.
4. Start the RFID Event Manager and the readers that you plan to use.
For this example, start the PMLReader.
The static client example shows the simplest way to write a client for the reader access web service. The static web service client makes method calls through a stub, a local object that acts as a proxy for the remote service. Because the stub is created at development time (as opposed to runtime), it is usually called a static stub.
|
1. Confirm that you have successfully complete the procedure, To Configure the Environment for the Web Services Client Examples.
2. Start the NetBeans 4.1 IDE.
3. Choose File  Open Project Folder.
The Open Project dialog box appears.
4. Navigate to the directory containing the static client.
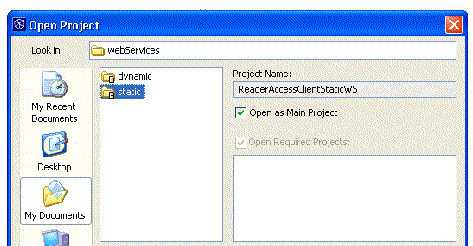
For example, if the directory where you downloaded and unzipped the RFID Software Toolkit is toolkit-dir. The static client is located at toolkit-dir/samples/readerAccess/webServices/static. The ReaderAccessClientStaticWS project is listed as shown in the following screen capture.
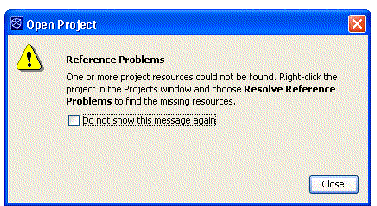
To resolve the reference problem described in the following message, create a library named jwsdp. See To Create the RFID Library for the Custom Component Examples for the general steps to use. Add the JAR files in the following locations:
6. In the Projects window, navigate to the following files and configure the URL with the correct host name and port number.
http://em-hostname:app-server-port/readeraccess/ReaderAccess
 Source Packages
  com.mcompany
  ReaderAccessClient.java
 Source Packages
  conf
conf  ReaderAccess-client-config.xml
7. In the Projects windows, right-click the static client project node and choose Run Project.
The IDE rebuilds and runs the project.
In contrast to the static web service client described in the preceding section, a dynamic client calls a remote procedure through a dynamic proxy. The dynamic proxy is a class that is created during runtime. Although the source code for the static stub client relies on an implementation-specific class, the code for the dynamic proxy client does not have this limitation.
|
1. Confirm that you have successfully complete the procedure, To Configure the Environment for the Web Services Client Examples.
2. Start the NetBeans 4.1 IDE.
3. Choose File  Open Project Folder.
The Open Project dialog box appears.
4. Navigate to the directory containing the dynamic web service client.
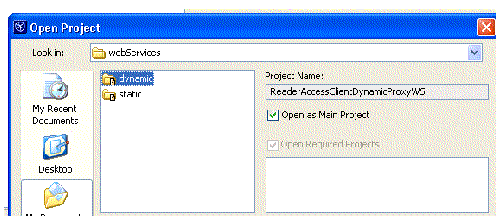
For example, if the directory where you downloaded and unzipped the RFID Software Toolkit is toolkit-dir. The dynamic client is located at toolkit-dir/samples/readerAccess/webServices/dynamic. The ReaderAccessClientDynamicProxyWS project is listed as shown in the following screen capture.
6. (Optional) To refresh the WSDL, use the following steps.
a. In the Projects window, expand the Web Service References node.
b. Select the ReaderAccess.wsdl node and right-click.
c. Choose Refresh WSDL from the contextual menu.
The Refresh WSDL for Web Service Client dialog box appears.
d. Change the Original WSDL location if necessary and click OK.
7. In the Projects window, navigate to the following files and configure the URL with the correct host name and port number.
http://em-hostname:app-server-port/readeraccess/ReaderAccess
8. Right-click the project node, ReaderAccessClientDynamicProxyWS, and choose Run Project from the contextual menu.
The IDE rebuilds the project and deploys it to your application server. The ReaderAccessClient servlet is invoked and a JSP appears in your web browser as shown in the following screen capture.
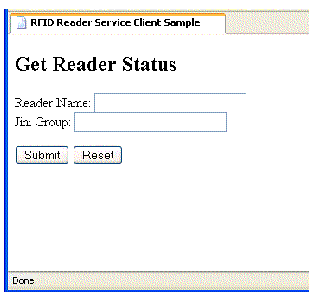
9. Type the Reader Name and the Jini Group and click Submit.
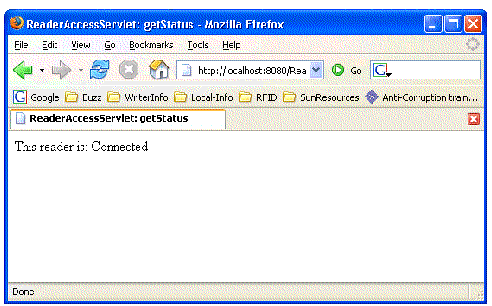
You see something similar to the following in your web browser.
Copyright © 2006, Sun Microsystems, Inc. All Rights Reserved.