|
|
| Sun ONE Integration Server, Secure Trading Agent 1.0 User's Guide |
Chapter 6 Editing ebXML Agreements
This chapter shows how to edit agreements using the Secure Trading Agent Agreement Editor. It contains information applicable to Secure Trading Agent administrators only. For information on how to create, import, deploy, and otherwise manage ebXML agreements, refer to Chapter 5, "ebXML Agreements".
Secure Trading Agent regular users should skip this chapter.
Editing Agreements
To edit an agreement, you launch the Agreement Editor from the Edit tab of the Communications Center.
To launch the Secure Trading Agent Agreement Editor to edit an agreement
- Log in to the Sun Management Center as administrator, and open the Communications Center, as described in "Starting the Communications Center".
You must be a Secure Trading Agent administrator to edit agreements.
- From the Agreements tab, select Edit.
The Communications Center displays a list of agreements in the system.
Figure 6-1 Communications Center, Agreement List

- Select the Edit link in the list of agreements for the agreement you want to edit.
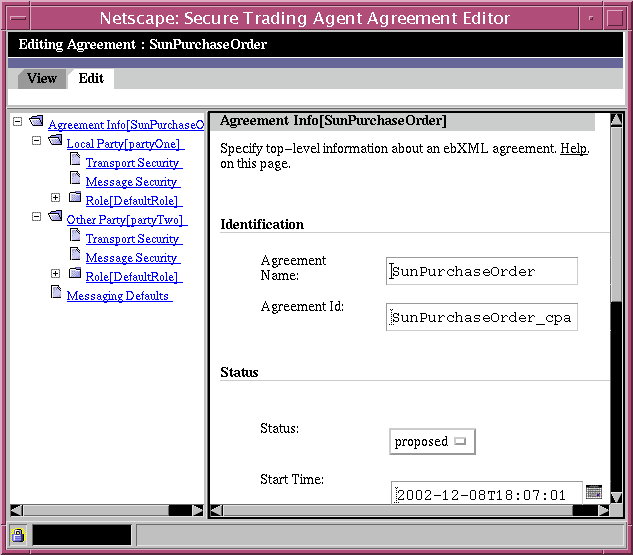
The Secure Trading Agent Agreement Editor opens, displaying the Agreement Information page for the agreement.
Figure 6-2 Agreement Editor, Agreement Information Page
General Editor Information
This section discusses general information about using the ebXML Agreement Editor.
View Mode/Edit Mode
The Agreement Editor has two modes, one for viewing a text version of the agreement and the other for editing the agreement.
To view a text version of the agreement
- In the Agreement Editor, select the View tab.
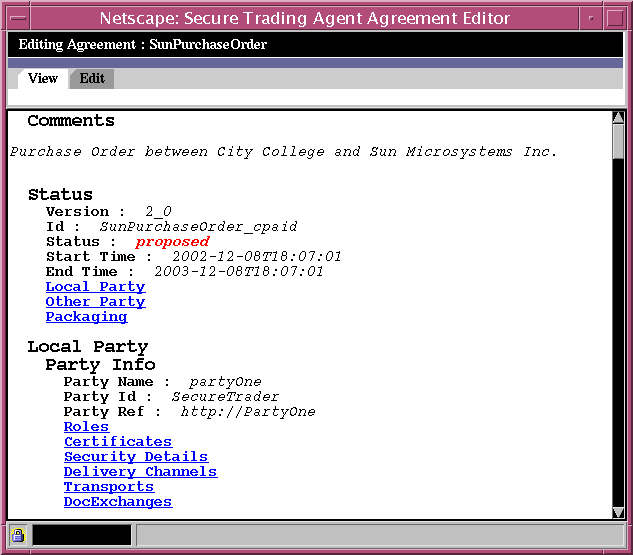
The Agreement Editor displays a text version of the agreement.
Figure 6-3 Agreement Editor, Viewing a Text Version
To return to Edit Mode for the agreement
- In the Agreement Editor, select the Edit tab.
Editing Pages
When editing an agreement, you select an editing page to view and modify the settings for a group of related agreement elements. Use the Agreement Tree in the leftmost frame to select an editing page. Modify the elements for that page in the editing fields displayed in the rightmost frame.
Although no particular order is enforced for editing these pages, you typically edit an agreement in the sequence outlined below:
- Agreement Information Page
- Local Party Page
- Party Roles Page
- Send Action / Receive Action Page
- Transport Security Page
- Message Security Page
- Messaging Defaults Page
Saving Your Changes
Each editing page has a Save button and a Reset button. Use the Save button to save any changes you make to that page. Use the Reset button to revert to the previous saved version for that page.
Caution
If you navigate to a new page without selecting Save, you will lose any edits that you make.
If you select Save on a page, you cannot use Reset to recover any prior edits.
Local Party / Other Party Editing
An ebXML agreement contains information about the two parties to the agreement. You are the local party and typically edit the agreement from that perspective. However, the agreement editor provides access to editing pages for the other party. This allows you to see the agreement from the perspective of the other party and also to modify some fields for the other party that have been generated by the editor.
As explained in the following sections, when you create an action (Send Action or Receive Action) for one party, the editor generates a corresponding action (Receive Action or Send Action) for the other party. You sometimes need to verify and edit the corresponding action and role names that the editor generates for the other party.
This manual focuses mainly on the editing pages available for the local party. However, you can make similar edits for the other party, as needed.
Agreement Information Page
The Agreement Information page allows you to specify top-level information about the agreement.
Figure 6-4 Agreement Editor, Agreement Information Page
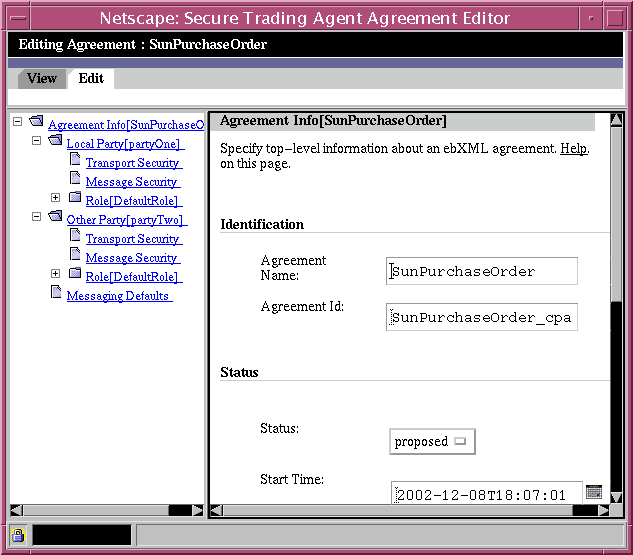
Table 6-1 describes the editing fields available for agreement identification. Table 6-2 describes the editing fields available for agreement status.
Table 6-2 Agreement Status Editing Fields
Field
Description
Status
An agreement status can be either Proposed or Agreed. Proposed indicates that the parties in the CPA have not yet agreed to activate the CPA. Agreed indicates the CPA has been successfully negotiated between the trading partners and can be deployed to enable the exchange of messages.
Caution: When a CPA status is set to Agreed and then deployed, it can no longer be edited. Refer to "Agreement Status" for more information.
Start Date
Specifies the date and time that the agreement takes effect. Secure Trading Agent interprets all times as Coordinated Universal Time (UTC).
End Date
Specifies the date and time that the agreement expires. Secure Trading Agent interprets all times as Coordinated Universal Time (UTC).
Local Party Page
The Local Party page allows you to specify endpoints (locations for receiving messages) for both the local party and the other party. You can also add or delete party roles from the Local Party page. You can use the Secure Trading Agent Control Panel to review the endpoints of your system. For more information, refer to "Configuring Secure Trading Agent".
Figure 6-5 Agreement Editor, Local Party Page
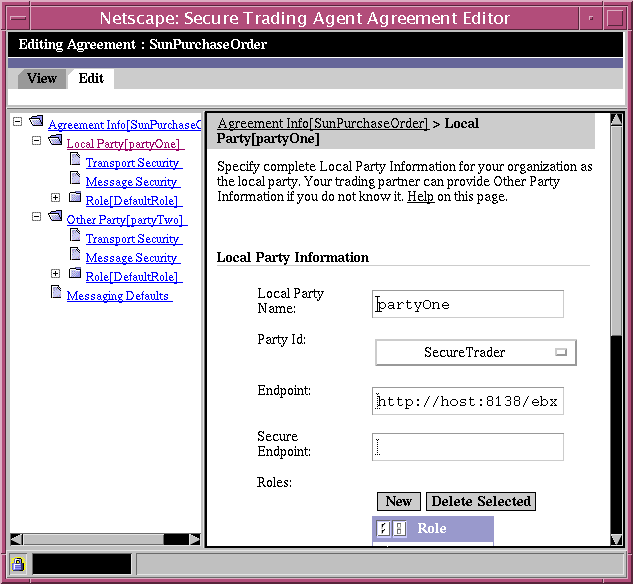
Table 6-3 describes the editing fields available from the Party Information Page.
Party Roles Page
The Party Roles page allows you to add or delete actions for a party role, and also to rename the role. This Beta release of Secure Trading Agent does not enforce party roles to an agreement.
Figure 6-6 Agreement Editor, Roles Page
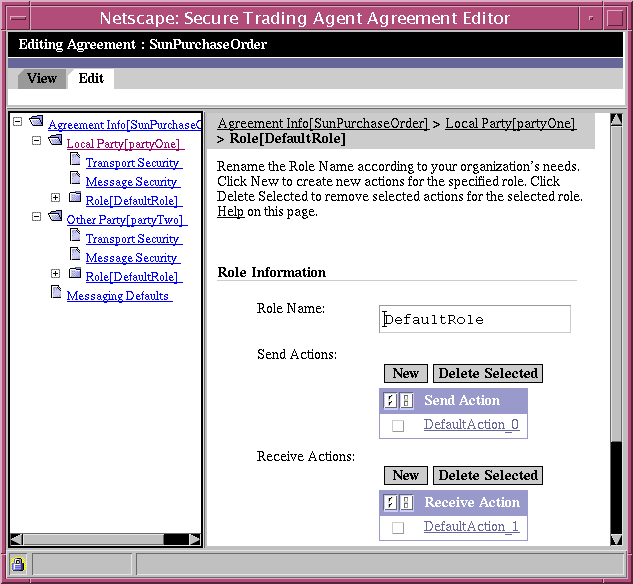
Table 6-4 describes the editing fields available from the Local Party Roles Page.
Send Action / Receive Action Page
There are two types of actions, Send Actions and Receive Actions. The Send Action and Receive Action pages allow you to specify the details of actions associated with a role. You can also specify secure transport for the action message and whether to enable reliable messaging.
A secure endpoint must be specified in the Party Information page before you can enable secure messaging. Similarly, reliable messaging information must be specified in the Messaging Defaults page before you can enable reliable messaging.
Figure 6-7 Agreement Editor, Action Page
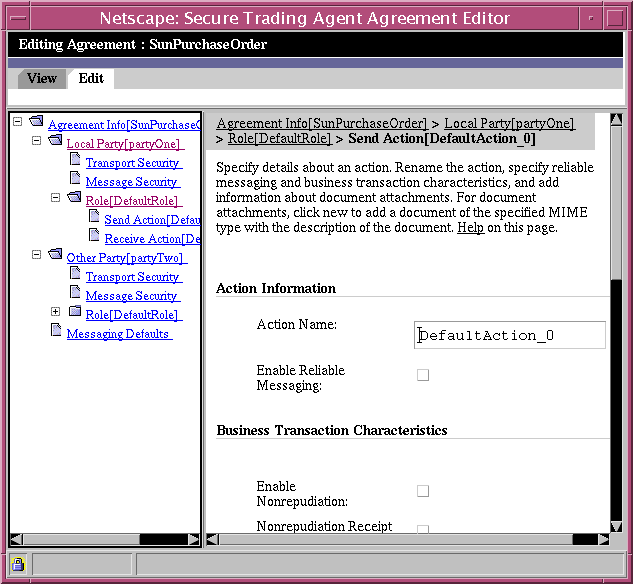
Table 6-5 describes the editing fields available from the Send Action/Receive Action Page.
Table 6-5 Send Action/Receive Action Editing Fields
Field
Description
Action Name
Generated from the information provided in the Role Information page. Edit this field to rename the action.
Reliable Messaging
Enables reliable messaging according to specifications in the Messaging Defaults page, as described in "Messaging Defaults Page".
Transaction Characteristics
Transaction characteristics specify nonrepudiation and security information for the action. Refer to Table 6-6 for more information.
Document Attachments
Specifies the MIME type of documents that are to be attached to the message. Specify a MIME type in the text box or select a type from the list. Provide a description of the document, and then select Add to add the selection to the list or Update to update an existing selection in the list.
Nonrepudiation
Nonrepudiation is the ability to prove that transactions between you and your partner occurred. There are two forms to nonrepudiation:
- Providing an audit of all messages and attached documents between you and your trading partner.
- Proving that messages sent were received by the intended party.
The first form basically means that a digital signature on a message authenticates the sender of the message and also that the document has not been tampered.
The second form, known as nonrepudiation of receipt, provides an acknowledgment of receipt of a message. This acknowledgement includes the following:
- Confirmation that the acknowledgment was authored by the sending party
- Confirmation that the contents of the acknowledgment were not changed in transit
- Confirmation that the original message (the digest of which is included in the acknowledgement) was received completely in an unadulterated form
For the first form of nonrepudiation, you can instruct Secure Trading Agent to retain all messages and attached documents. For the second form of nonrepudiation, instruct Secure Trading Agent to require a signed acknowledgement of messages received. Table 6-6 provides details on how to specify nonrepudiation.
Transport Security Page
The Transport Security page allows you to specify the keynames of certificates and trust anchors that will be used for the secure transport of messages. This page is available as a child node for both local party and the other party. You typically specify your own certificate information as the local party. Your trading partner (the other party) specifies their security information during the negotiation process, as described in "Negotiating Agreements".
Figure 6-8 Agreement Editor, Transport Security Page
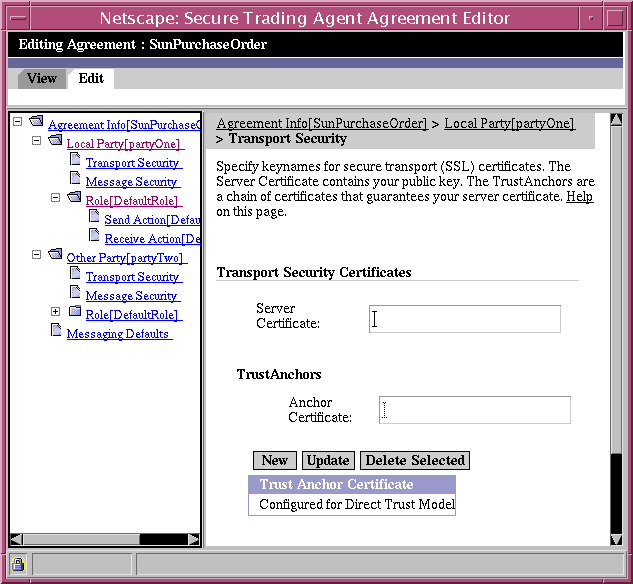
Note The Agreement Editor specifies keynames for the certificates and trust anchors. You must resolve the keynames to physical files using the Communications Center before you deploy the agreement. For more information, refer to "Resolving Certificate Keynames".
Table 6-7 describes the editing fields available from the Transport Security page. For more information on specifying certificate information in the Agreement Editor, refer to "Managing Security Certificates and Keystores".
Message Security Page
The Message Security page allows you to specify the keynames of certificates and trust anchors that will be used for the signing of messages. This page is available as a child node for both local party and the other party. You typically specify your own certificate information as the local party. Your trading partner (the other party) specifies their security information during the negotiation process, as described in "Negotiating Agreements".
Figure 6-9 Agreement Editor, Message Security Page
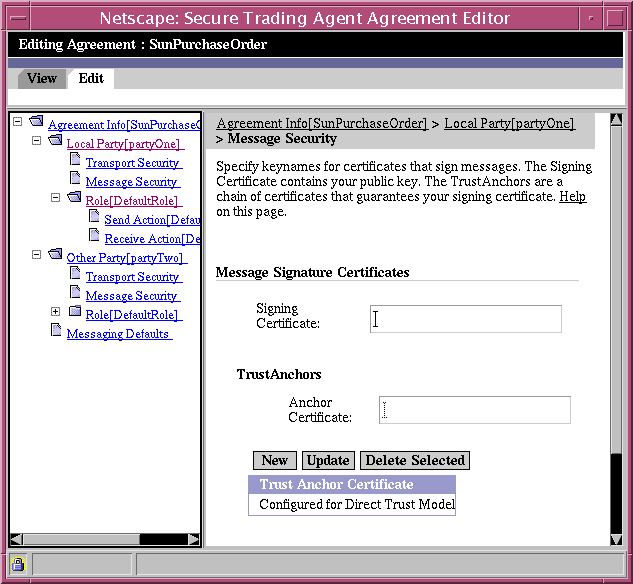
Note The Agreement Editor specifies keynames for the certificates and trust anchors. You must use the Communications Center to resolve the keynames to physical files before you deploy the agreement. For more information, refer to "Resolving Certificate Keynames".
Table 6-8 describes the editing fields available from the Message Security Page. For more information on specifying certificate information in the Agreement Editor, refer to "Managing Security Certificates and Keystores".
Messaging Defaults Page
The Messaging Defaults page allows you to specify default messaging information and reliability parameters for the agreement. The messaging information that you specify here applies to all Send and Receive Actions contained within the agreement. The reliable messaging information can be enabled or disabled on a per action basis.
To provide evidence of the receipt of messages, enable Acknowledgment Requested. You can also specify Signature Required to authenticate the sender of the message. Acknowledgements are typically sent synchronously. Enable Synchronous Signals if you specify Acknowledgement Requested.
Figure 6-10 Agreement Editor, Messaging Defaults Page
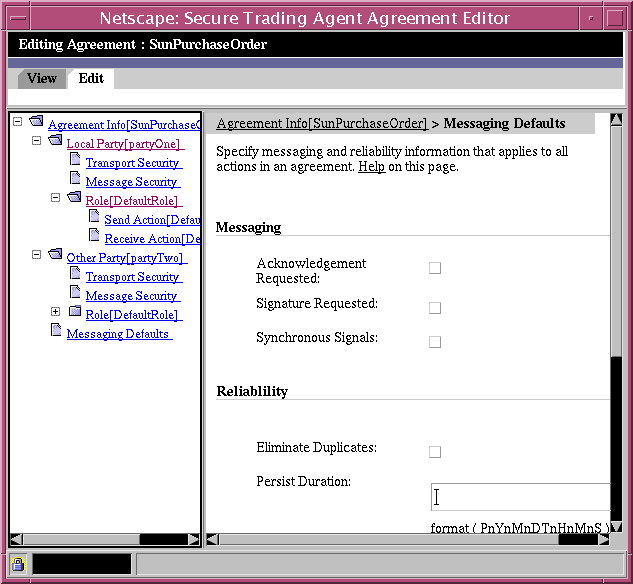
Table 6-9 describes the editing fields available for default messaging.
Reliable Messaging
Reliable messaging provides a guarantee that messages you send are received by your trading partner and are received once-and-only-once. This guarantee for reliable delivery depends on the options you specify. You can specify how many times to attempt delivery of a message and the time to wait between attempts. You can also eliminate duplicates to avoid having the same message delivered more than once. The Persist Duration specifies the length of time duplicate elimination can be guaranteed.
Table 6-10 describes the editing fields available for reliable messaging.