Using Floppy and CD Media
File Manager allows you to use removable media such as Floppy Disks or CD-ROM (Compact disk, read-only memory) on the WorkSpace. You can view your Floppy disks or CDs if you:
-
have a system with at least (1) floppy drive or (1) CD-ROM drive and are running Solaris 2.4
Refer to the documentation that came with your computer for information on how to insert a floppy disk or CD into the drive.
Using a Floppy Disk with File Manager
The following explains what to do with your floppy disk once you have inserted it into your drive. You may encounter these cases when you insert a Floppy disk:
-
The disk is formatted and labeled. In this case you see the window as shown in Figure 2-48. You can begin using the information on your disk.
-
The disk is unformatted. Refer to "Reformatting a Floppy Disk" for information on formatting a disk.
-
The disk is formatted and may contain data. If the data is in Macintosh format or unknown to this system, you may see the a popup as shown in Figure 2-53.
Checking for a Floppy Disk
-
Insert your floppy disk into the disk drive on (or attached to) your computer.
-
Select Check For Floppy from the File Menu.
If you inserted a formatted, labeled disk, you can move on to "Viewing a File from the Contents of a Floppy Disk or CD".
Note -You do not have to check for CDs.
Viewing a File from the Contents of a Floppy Disk or CD
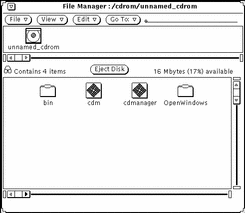
Once the File Manager window is displayed, you can view the contents of your floppy disk or CD.
Figure 2-48 The File Manager Floppy Disk Window
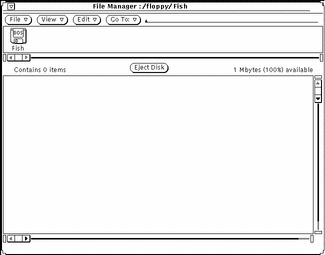
Figure 2-49 The File Manger CD Window
-
If necessary, scroll through the contents of floppy disk or CD until you find the file you want to view.
-
Select the file or folder to be viewed.
-
Choose File->Open.
You can now use File Manager windows and menus. If you close the window to an icon you see the following for floppy or CD as in Figure 2-50.
Figure 2-50 The Floppy Disk and CD icons


Removing a Floppy Disk or CD from the Disk Drive
-
From the floppy or CD window Select the Eject Disk Button.
-
Remove the disk or CD from the drive when it is ejected.
The drive is now free.
Note -On x86 or PowerPC machines, you must physically remove floppies by hand. After selecting the Eject Disk button, you will see a pop-up window telling you that you may manually eject the floppy. Do not remove the floppy without selecting Eject Disk first. If you do, the system will display a pop-up window telling you to reinsert the floppy. Reinsert it, select Eject Disk, and remove the floppy.
Ejecting Unrecognized Data Format CDs
To eject a CD that has an unrecognized data format (such as audio files):
Your disk should now be ejected from the drive.
Reformatting a Floppy Disk
If you are using a diskette for the first time or if you want to format your diskette, perform the following steps.
-
Insert the floppy disk.
-
Select Check For Floppy from the File Menu.
Note -If you inserted a correctly formatted disk, you see the window on the WorkSpace as shown in Figure 2-48.
If the diskette is not formatted, you see the window in Figure 2-51.
-
Choose Format Floppy from the File menu.
Make sure the floppy window is active.
Figure 2-51 The Floppy Format Disk Window
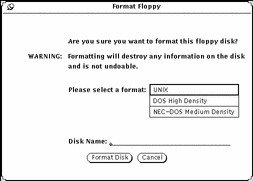
If you choose to Format the disk, this is your last chance to Cancel.
-
Click Format Disk.
When the initialization has been complete, you see the File Manager window on the WorkSpace as shown in Figure 2-48.
Unformatted Floppy
If you inserted an unformatted floppy disk, the following popup displays:
Figure 2-52 Unformatted Floppy Popup
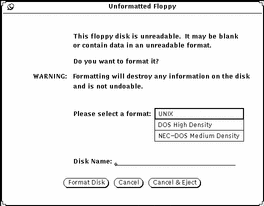
You can choose to:
-
format the disk, refer to "Reformatting a Floppy Disk" for information on reformatting the disk.
or
-
cancel the operation and dismiss the popup.
or
-
cancel the operation and eject the floppy.
Note -Macintosh, Sun TAR and Sun BAR formats are not recognized.
Unlabeled Floppy
If you inserted a floppy disk that is unlabeled, that is there is data on the disk but is not a recognized format, the following message displays:
Figure 2-53 Unlabeled (Unknown Data) Floppy Popup
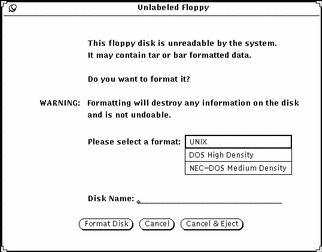
You can choose to:
-
format the disk, refer to "Reformatting a Floppy Disk" for information on reformatting the disk.
or
-
cancel the operation and dismiss the popup.
or
-
cancel the operation and eject the floppy.
Renaming a Floppy Disk
There are times when you would like to change the name of your disk.
-
Insert the disk to be renamed.
-
Select Check For Floppy from the File Menu.
-
Choose Rename Disk from the File menu.
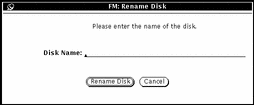
You see the rename disk window.
Figure 2-54 The Floppy Rename Disk Window
-
Type a new name for the disk.
You type over the existing disk name and it disappears when you have finished typing.
-
SELECT the Rename Disk button.
The disk is now ready to be used or ejected.
Dragging and Dropping Files from Floppy Disk or CD to File Manager
-
Open the floppy disk or CD into a window.
-
Select the file or folder icon and drag it from one window to the other.
For information on dragging and dropping, refer to Chapter 1, Introduction to the Solaris User Environment. The file is now copied to File Manager.
Copying Files from Floppy Disk or CD to Floppy Disk
You can copy files from a floppy disk (or CD) to another floppy disk.
- © 2010, Oracle Corporation and/or its affiliates
