Sending a Voice Mail Message
You can create an audio file from Mail Tool by selecting Attach Voice... in the Mail Tool Compose window. The audio file you create is automatically bound to Audio Tool and to an audio file glyph. The glyph is automatically attached to an electronic mail message when you notify the application that you have finished recording. The mail recipient can hear the contents of the audio file by double-clicking SELECT on the audio attachment glyph from Mail Tool. Refer to Chapter 4, Multimedia Mail Tool for information on using Mail Tool.
To record an audio file and attach it to a mail message, do the following:
-
Click SELECT on the Compose button in the Mail Tool control area, and address the mail.
-
Click SELECT on the Attach... -> Voice... button in the Mail Tool Compose window control area.
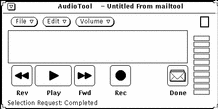
The Audio Tool window appears, as shown in Figure 11-9. Note that the mail button labeled "Done" appears only when Audio Tool is invoked from the Mail Tool Attach button.
Figure 11-9 Audio Tool Window Opened From the Mail Tool Compose Window

-
Record your voice message as described in the section, "Recording Sound".
-
Make any editing changes, as described in the section, "Editing an Audio File".
-
Click SELECT on the Done button.
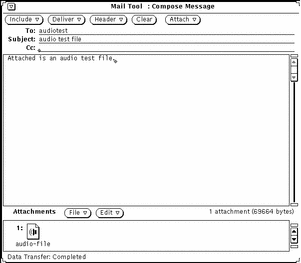
The audio attachment glyph appears in the Attachments window (Figure 11-10).
Note also that if you have a pre-recorded message in Audio Tool that you want to attach to a mail message, you can drag the file's glyph from Audio Tool's drag and drop target to the Compose window's Attachments subwindow.
Figure 11-10 Audio File Attached to a Mail Message

-
If needed, type in an additional message in the Compose text region.
-
Click SELECT on the Deliver button in the Mail Tool Compose window.
- © 2010, Oracle Corporation and/or its affiliates
