View Menu
Use the View menu item to control the position of the cursor and the way the line wrap is used.
Select Line at Number
Use the Select Line at Number item to display the Text: Line Number window, shown in Figure 3-2. Type the number of the line that you want selected, and click SELECT on the Select Line at Number button. The text on the specified line is selected, and the insert point is moved to the end of the selected text.
Figure 3-2 Text: Line Number Pop-up Window

What Line Number?
Use the What Line Number? item of the View menu to locate the line number where the selected text begins. The line number is displayed in a Notice. When there is no current selection in the Text Editor window, the Notice displays an error message instead of a line number.
Show Caret at Top
Use the Show Caret at Top item of the View menu to scroll the document so the line currently containing the caret is the third line from the top of the text pane.
Change Line Wrap
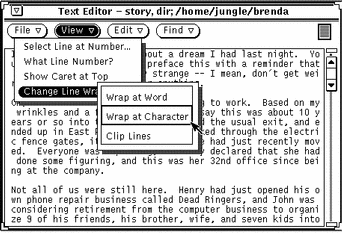
The Change Line Wrap submenu provides three choices for line wrapping: word, character, and clip lines. The text shown in Figure 3-3 is wrapped at a character, so words are broken at the end of lines.
Figure 3-3 Lines Wrapped at a Character

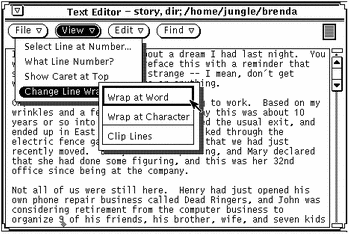
The most commonly used wrapping method is to wrap at the end of words. The text shown in Figure 3-4 is wrapped at the end of words.
Figure 3-4 Lines Wrapped at a Word

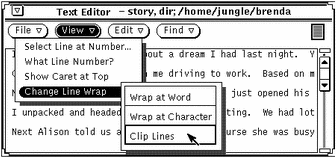
If you choose Clip Lines, the beginning of each line that ends with a Return is displayed. In Figure 3-5 each line represents a paragraph because there are no carriage returns embedded in the lines. Only carriage returns are at the end of each paragraph. That is,
Figure 3-5 Clipped Lines

- © 2010, Oracle Corporation and/or its affiliates
