|
|
| Sun ONE Connector Builder 2.0 Installation and Getting Started Guide |
Installing Sun ONE Connector BuilderThis module describes how to install and uninstall the Sun ONE Connector Builder and contains information about the following topics:
- Overview
- Software and Hardware Requirements
- Additional Software Needed for Deploying the Samples
- Preparing to Install the Connector Builder
- Installing Connector Builder on Windows NT/2000/XP
- Uninstalling Connector Builder on Windows NT/2000/XP
- Installing Connector Builder on Solaris or Linux
- Uninstalling Connector Builder on Solaris or Linux
- Sample Adapters and Application
Overview
The SunTM ONE Connector Builder is a set of tools, components and libraries that allows developers to build resource adapters - compliant with the J2EE Connector Architecture 1.0 - for Enterprise Information Systems (EIS) and legacy applications. The resource adapters built using Connector Builder provide J2EE applications an easy-to-use and standards-based way to access these external systems.
The generated resource adapters are accessed using the Common Client Interface (CCI) API as described in the J2EE Connector Architecture specification. Optionally, Connector Builder generated resource adapters can also be accessed using Simple Object Access Protocol (SOAP) services thus providing a web services solution to application integration.
Software and Hardware Requirements
The following table lists the hardware and software requirements for installing and running the Connector Builder. The left column lists the components and the right column lists the requirement.
Software and Hardware Requirements
Component
Requirement
Computer and Operating System
One of the following systems:
Memory
256 MB minimum, 512 MB recommended.
Disk space
17 MB for all platforms: Windows NT, Windows 2000, Windows XP, Solaris or Red Hat Linux 7.2
Software applications
Browser software
Netscape Browser, Version 6.2 or later.
Other software
Additional software is required to create and deploy the sample resource adapters. See "Additional Software Needed for Deploying the Samples".
Additional Software Needed for Deploying the Samples
The following table details the additional software that is needed to deploy and run the samples.
Preparing to Install the Connector Builder
Before installing the Connector Builder complete the following steps:
- Read the Sun ONE Connector Builder Release Notes for any last minute updates.
- Make sure that JDK (1.4) is installed.
- Make sure that IDE is installed and configured for JDK 1.4.
Note You must stop IDE before installing the Connector Builder.
- Make sure that the JAVA_HOME environment variable is set.
For Solaris:
export JAVA_HOME=<JDK_location>
export PATH=$JAVA_HOME/bin:$PATH
For Windows:
set JAVA_HOME=<JDK_location>
set PATH=%JAVA_HOME%\bin;%PATH%
User Privilege Requirement
The following table lists the hardware and software user privilege requirements. The left column lists the operating system. The right column lists the requirements.
Installing Connector Builder on Windows NT/2000/XP
The following procedures describe how to install and uninstall the Sun ONE Connector Builder on Windows NT/2000/XP.
To Install the Connector Builder on Windows NT/2000/XP
- Unzip the Connector Builder product bundle .zip file into a temporary local directory.
- Run setup.exe.
- Follow the instructions on the screen to progress through the installation.
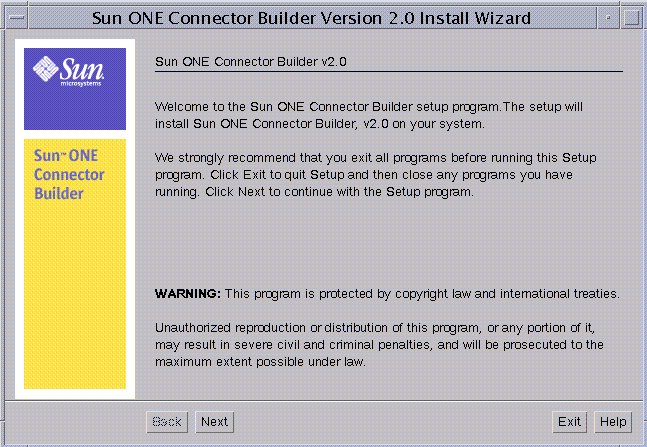
The following screen displays the Welcome message.
Welcome Message
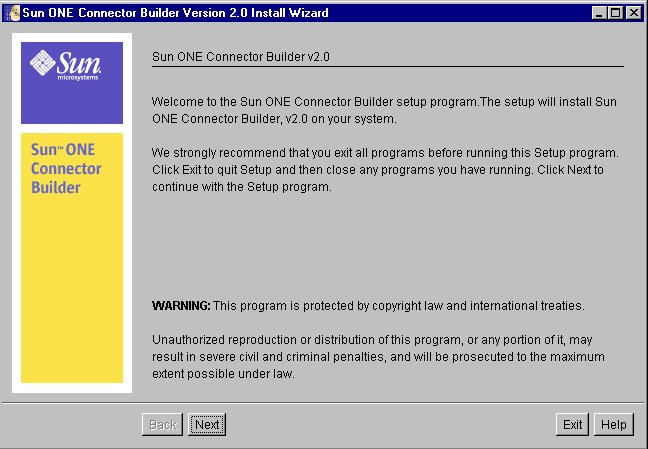
- Click Next to continue.
The following screen displays the Licensing Agreement.
Software License Agreement
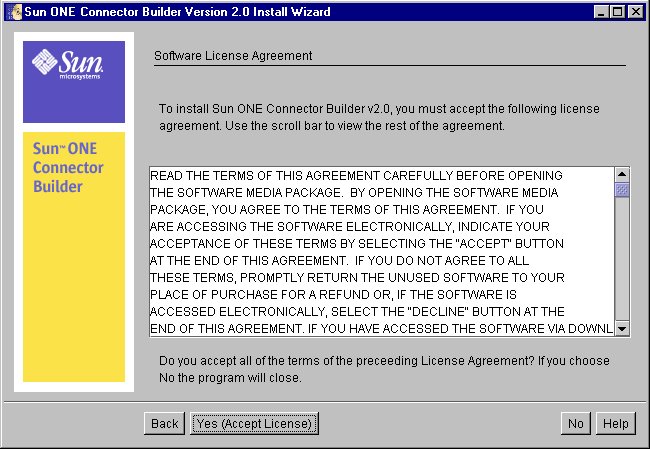
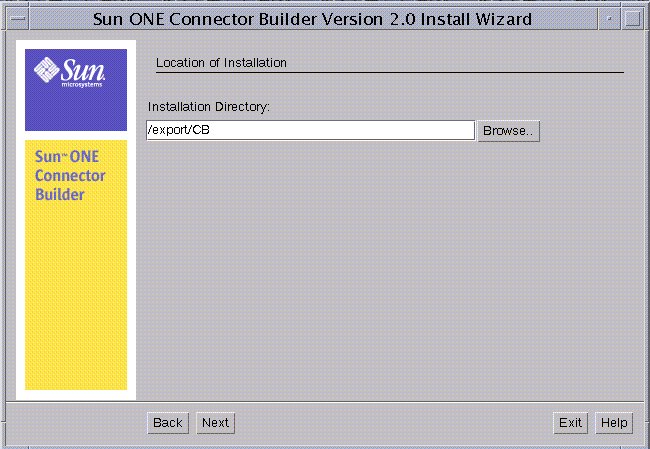
- Read the License Agreement and click Yes (Accept License) to continue. The following screen displays the prompt for creating a directory for the location of installation for the product.
Location of Installation
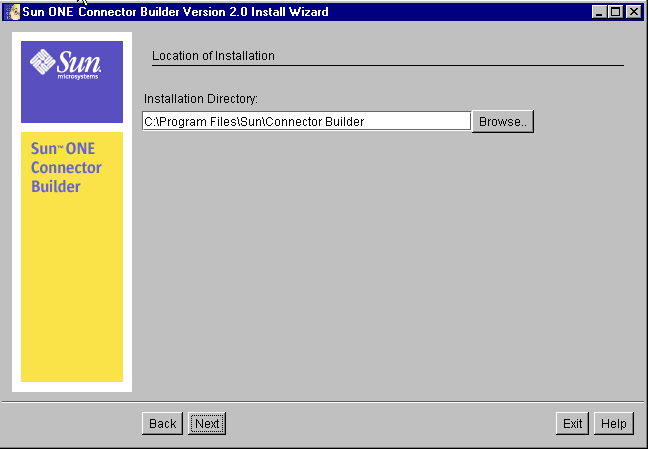
- Click Next to accept the default Installation directory, C:\Program Files\Sun\Connector Builder, or browse to select an alternative directory and then click Next.
Caution
You must NOT install the Connector Builder in the same directory as you used to install Sun ONE Studio 4.
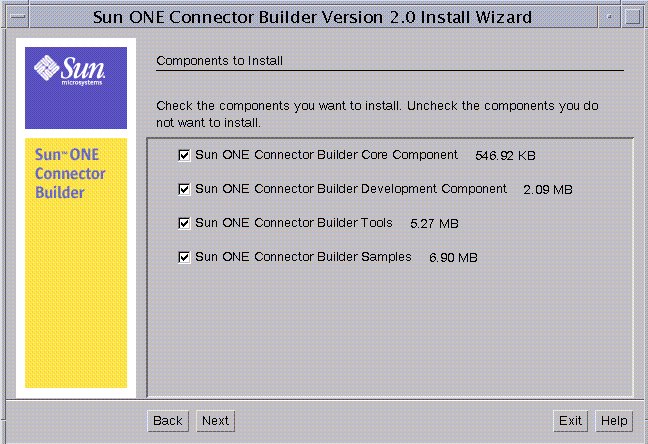
The following screen displays the Components to Install.
Components to Install
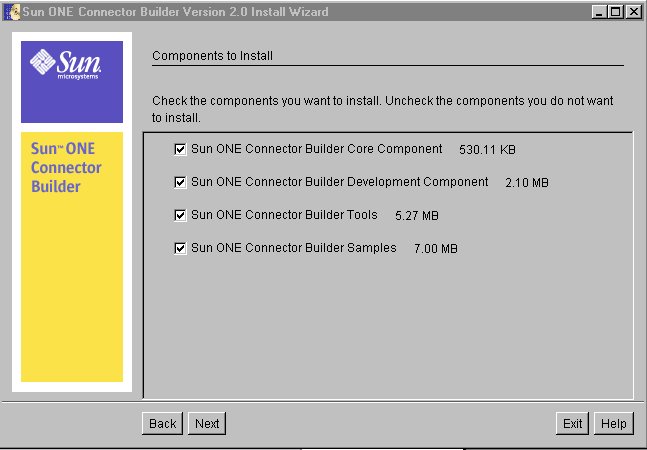
The Components to Install screen lists the various components that you can select when you install the Connector Builder. The following lists the contents of each component in the order which they appear:
- Connector Builder Core Components installs the common components for Connector Builder.
- Connector Builder Development Component installs the Sun ONE Studio 4 (IDE) module.
- Connector Builder Tools installs the Command Line Tools used for deployment and running the TestClient.
- Connector Builder Samples installs the COTS and DBMS Samples that are included with the Connector Builder software package.
- Select the components to install, see "Components to Install", and then click Next.
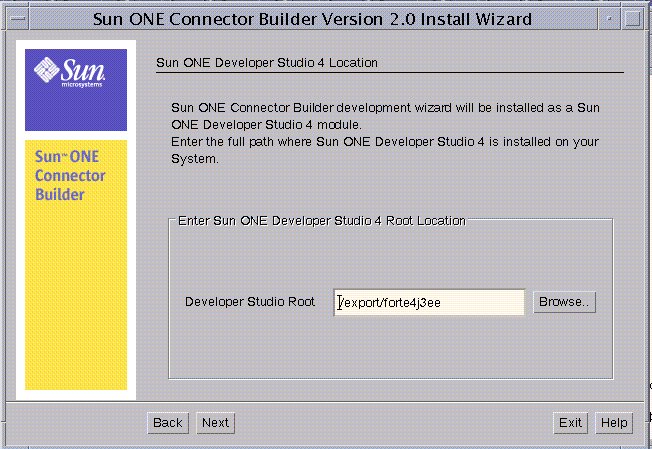
The Sun ONE Developer Studio 4 Location Root screen is displayed.
Sun ONE Developer Studio 4 Location

- Type in or browse to the location of Sun ONE Studio 4 and Click Next.
The following screen displays the Ready to Install message.
Ready to
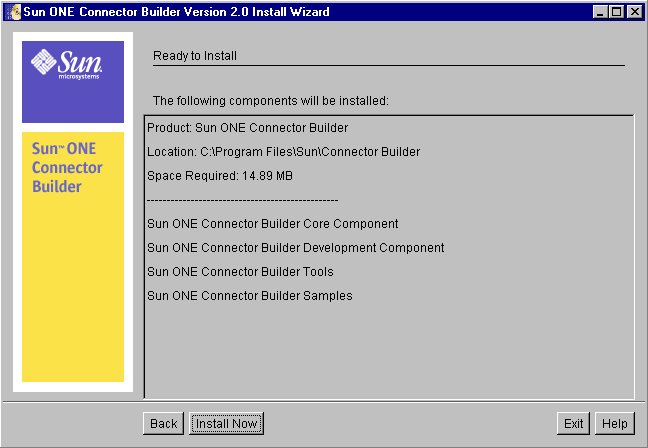
InstallVerify the items to be installed and then click Install Now. The System Update Screen is displayed.
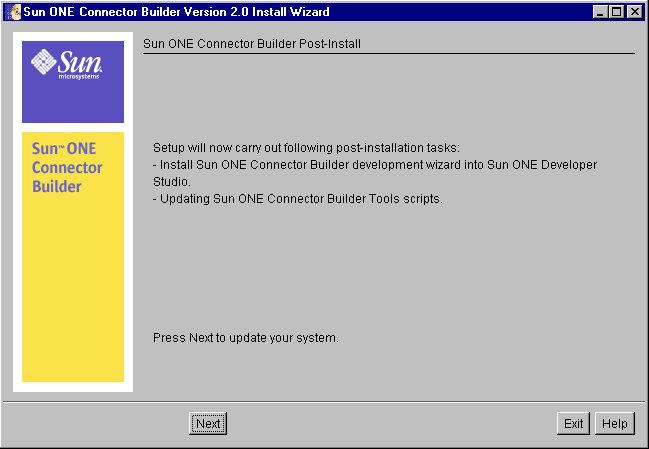
System Update Screen
- Click Next to continue. The Installation Summary screen is displayed.
Installation Summary

- Click Details to display the details of the logs generated.
The Details log is displayed.
Detail's Log of Installation
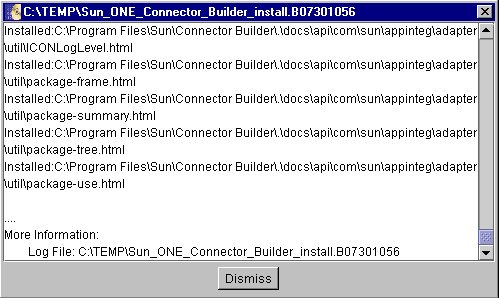
The Detail's log lists the files that were copied or installed during the installation.The first and last line describes the process and location of installation so you have a permanent record and can backtrack to a specific installation.
- Click Dismiss to return to the Installation Summary screen.
- Click Close to exit the installation.
You have now finished installing the Connector Builder.
Uninstalling Connector Builder on Windows NT/2000/XP
The following describes the procedure for uninstalling Connector Builder from Windows NT, Windows 2000 or Windows XP.
To Uninstall Connector Builder from Windows NT/2000/XP
- Select Start > Settings > Control Panel > Add/Remove Programs > Sun ONE Connector Builder 2.0 and then click Add/Remove.
The Uninstalling Sun ONE Connector Builder Window is displayed. See the Sun ONE Connector Builder Uninstall Window.
Sun ONE Connector Builder Uninstall Window
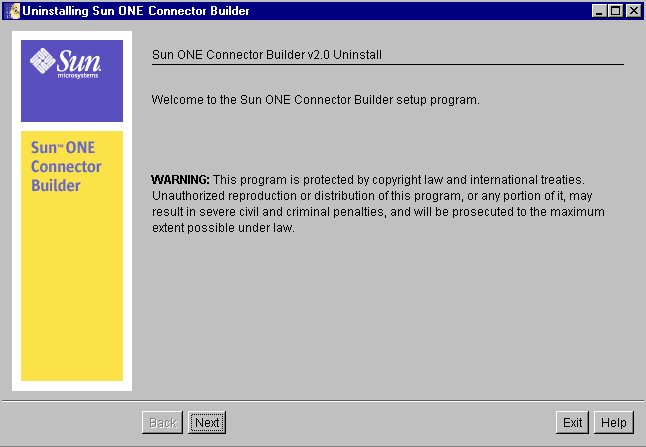
- Click Next. The Select Type of Uninstall window is displayed.
Select Type of Uninstall
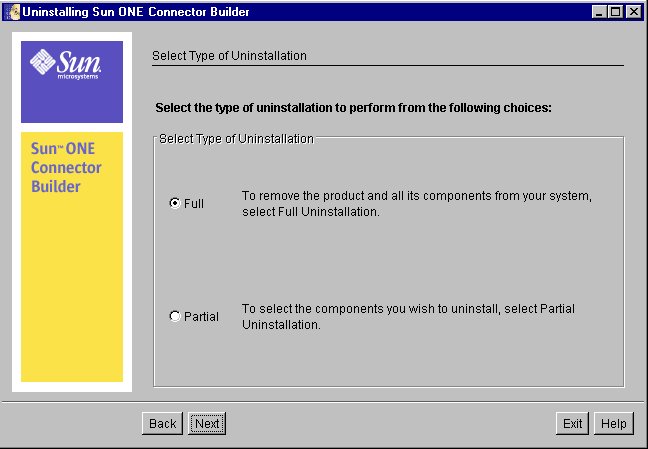
- Select the Full radio button and click Next.
The Components to Uninstall screen is displayed.
Components to Uninstall
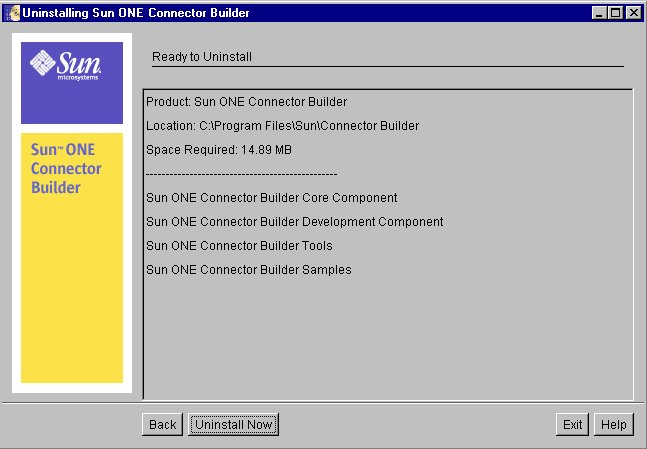
- Click Uninstall Now.
The Uninstallation Summary is displayed when the uninstallation is complete.
Uninstallation Summary
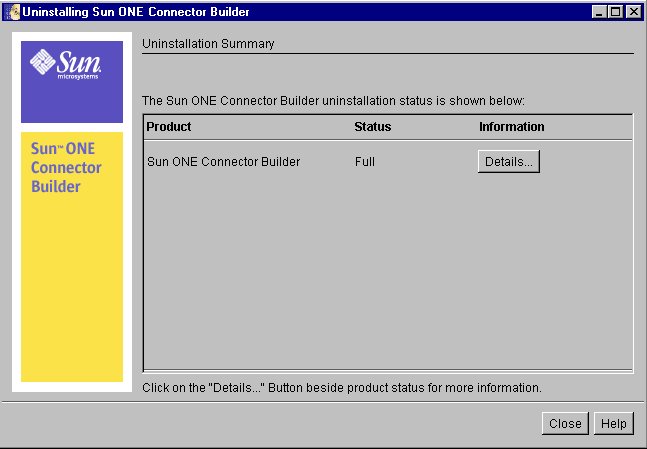
- Click Details to show the Uninstall Log of the components that have been removed, or click Exit.
Uninstall Log
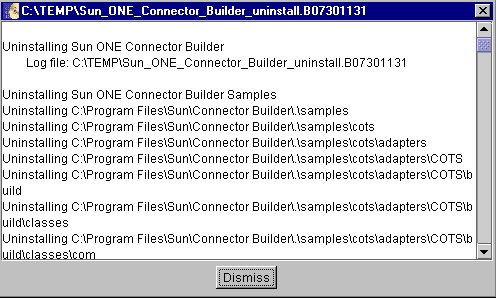
- Click Dismiss to return to the Uninstallation summary.
Installing Connector Builder on Solaris or Linux
The following procedure describes how to install the Sun ONE Connector Builder on Solaris and Linux operating systems. The procedures are very similar with only minor differences.
Preparing for Installing the Connector Builder on Solaris or Linux
You should check to ensure that JDK1.4.0 is installed on your machine. On Linux, JDK1.4.0 is automatically installed in directory /usr/java.
The files for installing the Connector Builder are shipped on the disk in compressed format.
To Uncompress the Files and Start the Installation on Solaris
- Untar the Connector Builder product bundle .tar file into a temporary local directory using the command /usr/bin/tar -xvf <product_bundle_name>.tar.
Use the tar utility that is provided with the Solaris installation (located under /usr/bin). Using any other tar utility may result in an incorrect installation.
- Run the command: java setup
To Uncompress the Files and Start the Installation on Linux
- Unzip the Connector Builder product bundle .zip file into a temporary local directory.
- Run the command: java setup
Installing the Connector Builder on Solaris or Linux
- Read the Welcome Message, and then click Next.
Welcome Message
- Read the license agreement and if you accept it, click Yes (Accept License), see Software License Agreement.
Software License Agreement

- Browse to locate your installation directory and click OK.
Selecting Installation Directory
- Click Next when you locate your installation directory.
Caution
You must NOT install the Connector Builder in the same directory as you used to install Sun ONE Studio 4.
Components to Install
The Components to Install lists the various components that you can select when you install the Connector Builder. The following lists the contents of each component:
- Connector Builder Core Components installs the common components for Connector Builder.
- Connector Builder Development Wizard Component installs the Sun ONE Studio 4 (IDE) module.
- Connector Builder Tools installs the Command Line Tools used for deployment and running the TestClient.
- Connector Builder Sample Adapters and Application installs the COTS and DBMS Samples that are included with the Connector Builder software package.
- Select the components to install and click Next.
Locate Directory Where Sun ONE Developer Studio 4 EE is Installed
- Browse to the location where Sun ONE Studio 4 is located and click Next.
Ready to Install
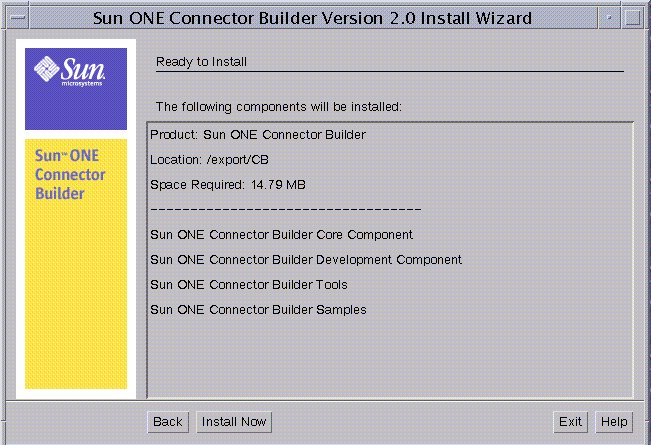
- Verify the items to be installed, see Ready to Install, and click Install Now. The following screen is displayed.
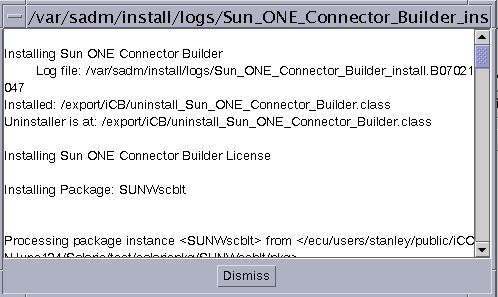
Installation Summary

- Click Details to show the log.
Details
- Click Exit, see Installation Summary, when the installation is completed.
You have now finished installing the Connector Builder.
Uninstalling Connector Builder on Solaris or Linux
The following section describes the procedure on how to uninstall the Connector Builder from your Solaris system.
To Uninstall Connector Builder from Solaris or Linux
- Go to the Connector Builder installation directory.
- Run the command: java uninstall_Sun_ONE_Connector_Builder
Sun ONE Connector Builder Uninstall Window
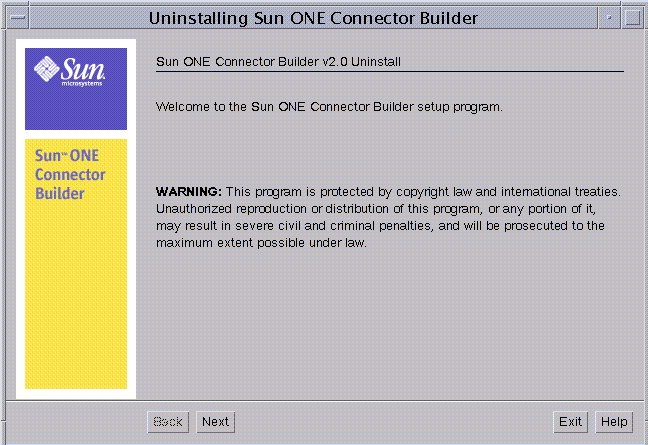
- Click Next to proceed with the uninstallation.
Select Type of Uninstallation
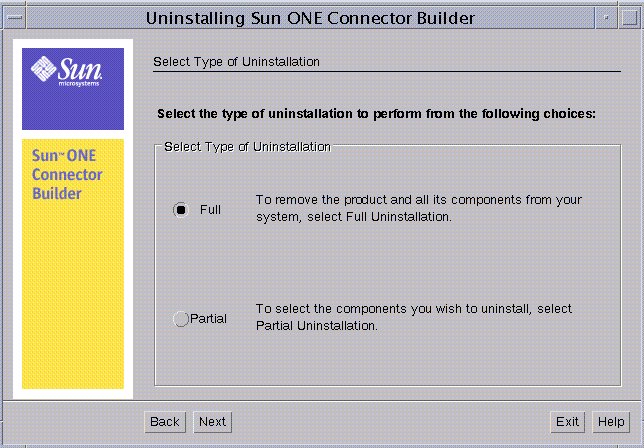
- Select Full radio button to completely uninstall Connector Builder or select Partial to uninstall components of the Connector Builder Software.
The Uninstalling Sun ONE Connector Builder screen shows the components that will be uninstalled.
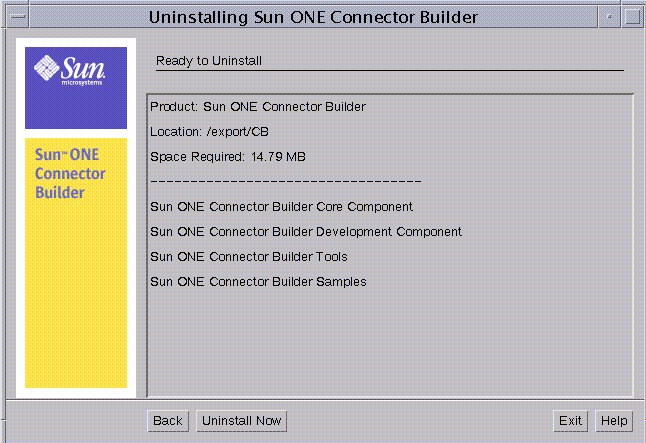
- Click Uninstall Now to uninstall Connector Builder.
- Click Details to see the log of the uninstallation.
Details
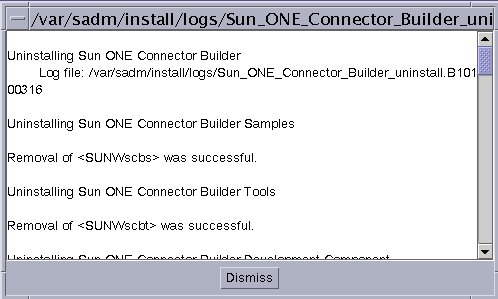
- Click OK to exit the log screen and then click Close to end uninstallation.
Sample Adapters and Application
The Connector Builder includes two comprehensive samples to illustrate the key features of Connector Builder product. The Customer Order Tracking System (COTS) sample includes a stubbed EIS, the resource adapter, and a web application. The DBMS sample includes a resource adapter based on the J2EE Reference Implementation sample cciblackbox adapter and sample programs.
These samples are copied during the installation process by selecting the `Connector Builder Sample Adapters and Application' option as displayed in "Components to Install" for Windows and "Components to Install" for Solaris. After you install the Connector Builder, you can either directly deploy the sample adapters (refer to "Deploying the COTS Sample Adapter" and "Deploying the DBMS Sample Adapter" for details) or walk through "Lessons for Creating a COTS Sample Resource Adapter" and "Lessons for Creating a DBMS Sample Resource Adapter" to understand how to create and deploy the sample adapters using Connector Builder. These two samples can be used as a reference to build other resource adapters.