
This chapter supplies the information necessary to install or replace a 1.3 GB IPI tray.

To install a 1.3 GB IPI tray, follow the instructions given in Section 2.2, "Installing a 1.3 GB IPI Tray."
To replace a 1.3 GB IPI tray, first follow the instructions given in Section 2.1, "Removing a 1.3 GB IPI Tray." Then follow the instructions given in Section 2.2, "Installing a 1.3 GB IPI Tray."
Note - There are systems in the field that differ from the majority of production units in several minor details. When these differences affect the remove-and-replace procedures, this text covers both the standard and the variation.
Note - If you are removing a tray with three or four 1.3 GB IPI disk drives installed in it, you must first remove the drive(s) from the rear of the tray before you can remove the tray. Follow the directions given in Section 3.1, "Removing a 1.3 GB IPI Disk Drive," to remove the 1.3 GB IPI disk drive(s) from the rear of the 1.3 GB IPI tray and to remove the tray from the cabinet.
If you have only two drives installed in your 1.3 GB IPI tray, follow these instructions to remove the tray:
Repeat this step for the right slide rail.

Figure 2-1 Removing the Screws at the Rear of the Tray
Follow the instructions in these sections to install a 1.3 GB IPI tray.
Caution -

Caution -

---------------------------------------------------------------------


Temperature Differential from Internal               Acclimation Time

 and External Temperatures
---------------------------------------------------------------------
Degrees (F)                             Degrees (C)  Hours

+/- 15                                  +/- 8.3      1

+/- 20                                  +/- 11.1     2

+/- 30                                  +/- 16.6     4

+/- 40                                  +/- 22.2     6

+/- 50                                  +/- 27.7     7

+/- 60                                  +/- 33.3     8

---------------------------------------------------------------------
Store or transport the IPI tray and individual drives in the right-side up position only or damage to drives may occur. Do not jostle the trays or bump the drives when moving them. Do not tilt the tray to extremes when unpacking them. Such physical shock or incorrect positioning can damage the drives.
After unpacking the tray, inspect it for evidence of damage. If damaged, keep all contents and packing materials for the carrier's agent to inspect. Save packing materials for future use.
Caution -

Note - An "Electro Static Discharge (ESD) Kit" is included with many options and upgrades shipped separately from the original system. This kit includes a wrist grounding strap which provides grounding between your body and the chassis ground. The kit also includes a Sun ESD mat on which to place the unit to prevent static charge from accumulating in the device.
Caution -

Note - If you already have slide rails for a 1.3 GB IPI tray installed in your cabinet, you can skip this section and begin reading Section 2.2.4, "Installing the Tray Assembly."
Follow these steps to install the slide rails in the cabinet:
This action releases the two-part portion.
The mounting holes are numbered up from the bottom beginning with one, and are stamped on the rail face at decade increments (10, 20, and so on).
Table 2-1gives the correct mounting holes for each tray assembly for the 56" Data Center Cabinet, and Table 2-2 gives the correct mounting holes for each tray assembly for the 56" Data Center Expansion Cabinet.
Table 2-1 Mounting Rail Holes on the 56" Data Center Cabinet
-------------------------------------


Mounting Rails       Mounting Holes
-------------------------------------
First (lowest) tray  Holes 4 and 5

Second tray          Holes 14 and 15

-------------------------------------
-------------------------------------


Mounting Rail        Mounting Holes
-------------------------------------
First (lowest) tray  Holes 4 and 5

Second tray          Holes 14 and 15

Third tray           Holes 25 and 26

Fourth tray          Holes 35 and 36

Fifth tray           Holes 46 and 47

Sixth tray           Holes 56 and 57

Seventh tray         Holes 67 and 68

Eighth tray          Holes 77 and 78

-------------------------------------
Note - If you have 1 GB or 911 MB IPI disk drives already installed in your cabinet, each set of drives (one or two drives) will take up as much vertical room as a single 1.3 GB IPI tray, so you can count each set of 1 GB or 911 MB IPI disk drives installed in your system as a single 1.3 GB IPI tray. For example, if you have four 1 GB IPI disk drives installed in your 56" Data Center Expansion Cabinet, these four 1 GB IPI disk drives would take up as much vertical room as two 1.3 GB IPI trays, which would mean that the correct mounting holes for the first 1.3 GB IPI tray for your system would be holes 25 and 26 (see Table 2-2). Position the two-part portion of the rail (with the bent bracket) in the chassis and orient it correctly to the hole positions (see Figure 2-2).

Figure 2-2 Securing the Slide Rails in the Cabinet
Caution -

Repeat this procedure for each slide rail you want to install.
If rails need to be removed, remove the tray as appropriate and remove the rail(s) by performing the steps above in reverse order.
Caution -

Mount the tray(s) on the slide rails using the following procedure:
Note - Install the first tray assembly on the bottom-most rails, the second tray assembly on the next higher rails, and so on.
Note - If you removed drives to install the 1.3 GB IPI tray, follow the instructions given in Section 3.2.3, "Installing a 1.3 GB IPI Disk Drive" to install the drives in the tray again.

Figure 2-3 Securing the Tray Assembly in the Cabinet
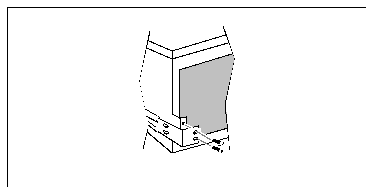
Figure 2-4 Securing the Tray Assembly in the Cabinet
Repeat these procedures for each tray assembly you want to install.
Follow these instructions to connect the power cord to the 1.3 GB IPI tray:
Figure 2-5 shows the location of the power receptacle for the tray.

Figure 2-5 I.3 GB IPI Tray Power Receptacle
Figure 2-6 shows the routing of the power cords for a fully-loaded 56" Data Center Expansion Cabinet.


Figure 2-7 Plugging the Tray into the Power Sequencer
Figure 2-8 shows which receptacle on the power sequencer you should plug your tray into for the 56" Data Center Cabinet, and Figure 2-9 and Figure 2-10 show which receptacle on the power sequencer you should plug your tray into for the 56" Data Center Expansion Cabinet.

Figure 2-8 Connections for a 56" Data Center Cabinet

Figure 2-9 Connections for a 56" Data Center Expansion Cabinet (230V Domestic Power Sequencer)

Figure 2-10 Connections for a 56" Data Center Expansion Cabinet (240V International Power Sequencer)
Repeat this procedure for every tray you installed.
The cabling procedures for the 1.3 GB IPI tray depends on the position of the tray in the daisy-chain and whether or not your system already has 1 GB or 911 MB IPI disk drives installed.
Note - You can only have a maximum of eight IPI disk drives connected to each ISP-80 disk controller, so you must install a new ISP-80 disk controller for every eight IPI disk drives you have installed in your system.
Note - To support new 1.3 GB IPI disk drives as add-on options to existing systems, new ISP-80 controller-enhanced firmware is required (see Section 1.2, "System Requirements," for more information).
New ferrite-choke controller cables (special shielded cables) may also be used, but are not required for add-ons to the 56" Data Center Cabinet or 56" Data Center Expansion Cabinet (the new ferrite-choke controller cables can be recognized by a short cylinder near the connectors at each end of the cable). The existing 56" Data Center Cabinet controller cables may be mixed with the new ferrite-choke controller cables.
Follow these instructions to cable between a 1.3 GB IPI tray and either a 1 GB IPI disk drive or a 911 IPI disk drive:
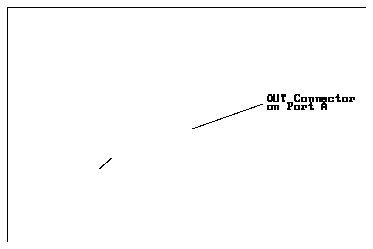

Figure 2-12 "IN" Connector on Port A

Figure 2-13 "OUT" Connector on Port A
Once you have finished cabling the 1.3 GB IPI tray, turn to Section 2.2.7, "What's Next," and follow the instructions given there to finish the cabling procedure.
Follow these instructions to cable the first 1.3 GB IPI tray in the daisy-chain:
Refer to the SPARCserver 490 Cardcage Slot Assignments and Backplane Configuration Procedures (P/N 813-2087-xx) or the 56-Inch Data Center Cabinet Service Manual (P/N 800-3259-xx) for the location of the ISP-80 disk controller in your system.
Note - If you do not have an ISP-80 disk controller available in your 56" Data Center Cabinet for the tray you just installed, you can order an ISP-80 disk controller from Sun Microsystems (P/N 501-1855). Follow the instructions given in the ISP-80 Disk Controller Installation and Configuration Procedures manual (P/N 813-1050-xx) to configure and install the board.
Note - You must have one or more ISP-80 disk controller boards with one of these dash numbers (the dash number is located on the back of the bar-code tag attached to the board ejector):
If the ISP-80 disk controller board(s) in your 56" Data Center Cabinet have one of these dash numbers:
then you must replace the EPROMs on the board(s) to use the 1.3 GB IPI disk drive. You can order the PROM Upgrade kit from the Price List for Customers (P/N X2085A). Follow the instructions given in the ISP-80 Controller PROM Upgrade manual (P/N 800-6089-xx) to upgrade the PROMs on your ISP-80 disk controller board.
If the ISP-80 disk controller board(s) in your 56" Data Center Cabinet have one of these dash numbers:
then contact your local Sun Sales Office for upgrade information.
If the tray is in a 56" Data Center Cabinet, skip to Step 9 If the tray is in a 56" Data Center Expansion Cabinet, proceed with Step 5
The cable will be routed between the bottom panel and the kick panel when you replace the kick panel.

The cable will be routed between the bottom panel and the kick panel when you replace the kick panel.

Note - You may want to use the tie wraps and "snap-ins" included in the kit you received with the 56" Data Center Expansion Cabinet as cable restraints for the data cables and power cords connected to the trays. Press a "snap-in" into any one of the holes located along the mounting rails or base of the 56" Data Center Expansion Cabinet, pass a tie wrap through the slit in the "snap- in," and secure the cable(s) in the wrap.

Figure 2-16 "IN" Connector on Port A
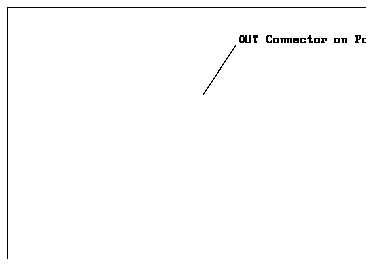
Figure 2-17 "OUT" Connector on Port A
Figure 2-18 shows the routing of data cables for a fully-loaded 56" Data Center Expansion Cabinet, and Figure 2-19 shows the routing of data cables for a fully-loaded 56" Data Center Cabinet.

Figure 2-19 Data Cable Routing for a 56" Data Center Cabinet
Once you have finished cabling the 1.3 GB IPI tray, turn to Section 2.2.7, "What's Next," and follow the instructions given there to finish the cabling procedure.
Follow these instructions to cable the second 1.3 GB IPI tray in the daisy-chain:

Figure 2-20 "OUT" Connector on Port A

Figure 2-21 "IN" Connector on Port A
Once you have finished cabling the 1.3 GB IPI tray, turn to Section 2.2.7, "What's Next," and follow the instructions given there to finish the cabling procedure.
If you have more 1.3 GB IPI trays to install in your system, refer to Section 2.2, "Installing a 1.3 GB IPI Tray," and follow the instructions to install that tray.
If you have no other trays to install in your system, follow the instructions in Chapter 5, "Replacing the Panels and Powering On the System".
