Using a Browser to Complete Initial Configuration
Whether you use the TTY or the diskette method for network-interface configuration, use a browser to perform the rest of the initial configuration. Use the data gathered in Table 1-2 to complete this procedure.
To Complete Initial Configuration
After using a browser to connect to the Netra Proxy Cache Server (as described in the preceding section), you receive the display of the Administration Password Dialog Box, as shown in Figure 2-3.
Figure 2-3 Administration Password Dialog Box

-
Enter setup in both the User ID and Password fields, then click OK.
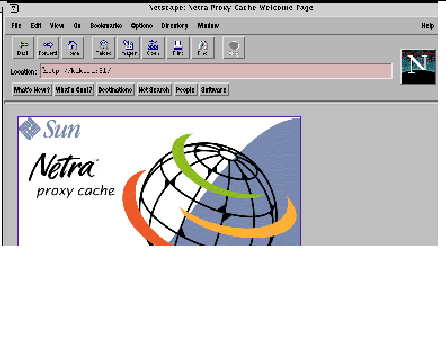
The Netra Proxy Cache Welcome page is displayed, as shown in Figure 2-4.
Figure 2-4 Netra Welcome Page
-
Click the Administration link.
The Initial Configuration page is displayed, as shown below.
Figure 2-5 Initial Configuration Page
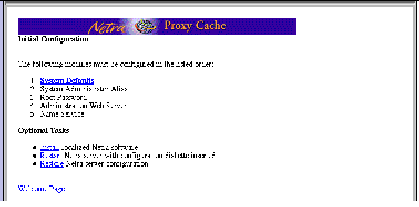
Because the Netra Proxy Cache Server is being configured for the first time, the Initial Configuration page takes the place of the Main Administration page until the listed modules are configured. During a complete initial configuration, the following modules are configured:
-
System Defaults
-
Host Name (only if you used the TTY, rather than the diskette, method of network-interface configuration)
-
System Administrator Alias
-
Root Password
-
Administration Web Server
-
Name Service
Note -If the initial configuration is being done on a partially configured server, all six modules might not be displayed. This is because the Netra Proxy Cache software has already interrogated the system and determined that a given module does not require configuration.
The examples in this manual show a complete initial configuration when configuring a Netra Proxy Cache Server for the first time.
Configure modules in the order listed in the Initial Configuration page. The link for the module to be configured next is highlighted in the web page.
-
-
Click System Defaults.
The System Defaults Administration page is displayed, as shown below.
Figure 2-6 System Defaults Administration Page
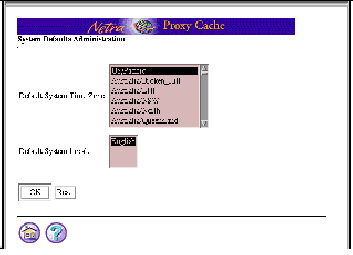
Use this page to configure the server's time zone and locale.
-
To set the time zone, scroll down the list and click the country/time zone appropriate for your location.
-
In the Default System Locale menu, click the appropriate country/language.
In the current release, there is only a single item in the menu, English. Additional locales will be supported in future releases.
At the bottom of the page are two circular icons, one a house, the other a question mark. These icons are links to the home page and to a help page, respectively. While performing the initial configuration, clicking the home icon returns to the Initial Configuration page. Following initial configuration, clicking the home icon returns you to Netra Main Administration page. The help icon in Figure 2-6 loads a help page for the System Defaults module. Most administration modules have a help page.
-
Click OK to enter the system defaults information.
A page indicating that the operation succeeded is displayed, as shown below.
Figure 2-7 System Defaults Administration Success
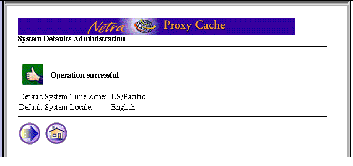
The "thumbs-up" page indicates that the System Defaults Administration module has been successfully configured with the displayed values.
At the bottom of the page is the home icon and a circular icon with a right-pointing arrow, called the forward-arrow icon. Clicking this link moves forward to the next task for the initial configuration.
-
Click the forward-arrow icon.
The page that is displayed next depends on whether you used the TTY or the diskette method of network-interface configuration:
-
If you used the TTY method, the Host Name Administration page is displayed. Proceed to Step 8.
-
If you used the diskette method, you have already configured your host name. The System Administrator Alias Administration page is displayed. Skip to Step 10.
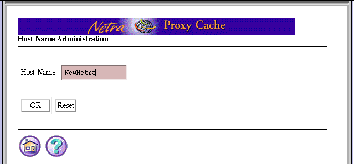
Figure 2-8 Host Name Administration Page
-
-
In the Host Name Administration page (shown in Figure 2-8), replace the name NewNetra with your machine's host name in the Host Name field and click OK.
A host name can be of 24 or fewer characters. Valid characters are:
0-9 a-z A-Z - _
The host name cannot end in a hyphen.
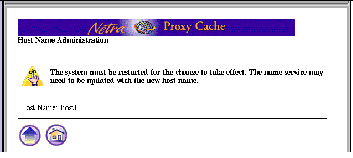
A reminder page is displayed (shown below) telling you that you must reboot your machine for the host name update to take effect. You will perform this reboot later in the procedure.
Figure 2-9 Host Name Reminder Page
-
Click the forward-arrow icon.
The System Administrator Alias Administration page is displayed, as shown below.
Figure 2-10 System Administrator Alias Administration Page
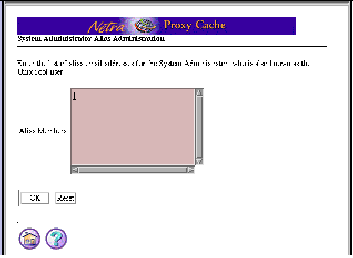
This page enables the addition of email addresses for users who will receive email addressed to root@<netra host name> or Postmaster@<netra host name>.
-
In the System Administrator Alias Administration page, click the Alias Members field and enter one email address per line.
You must enter at least one address. Press Return after entering an address to enter another address.
-
After entering one or more email addresses, click OK.
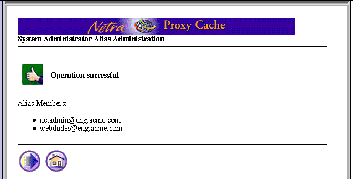
A success page is displayed, as shown below.
Figure 2-11 System Administrator Alias Administration Success Page
-
Click the forward-arrow icon.
The Root Password Administration page is displayed, as shown below.
Figure 2-12 Root Password Administration Page
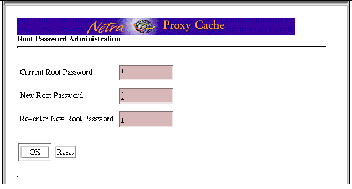
This page enables the changing of the root password. For initial configuration, the Current Root Password field is blank, as there is none.
Note -The password you enter is passed as clear text over the LAN to the Netra Proxy Cache Server.
-
Enter the new root password in the middle field and enter it a second time in the lower field.
-
Click OK.
The success page indicates that the root password has been changed.
Should an error icon be displayed, type the correct password where indicated and click OK.
-
In the success page, click the forward-arrow icon.
The Administration Password page is displayed, as shown below.
Figure 2-13 Administration Password Page
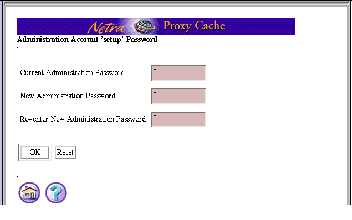
This page enables the changing of the administration password, which gives you access to the Netra Proxy Cache Main Administration page and the server setup account, described in "TTY Method".
-
Enter setup in the top field, Current Administration Password.
-
Enter a new administration password into the middle and lower fields and click OK.
Note -The password you enter is passed as clear text over the LAN to the Netra Proxy Cache Server.
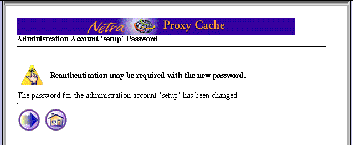
Following successful administration password configuration, the page shown in Figure 2-14 is displayed.
Figure 2-14 Reminder: Reauthentication May Be Required
-
In the page such as that shown in Figure 2-14, click the forward-arrow icon.
If you did not change the administration password, skip to Step 21.
-
If you changed the administration password (from setup), at this point, a pop up window is displayed, indicating that authorization failed and asking for a retry. Click OK in the pop up window.
-
In a second pop up window, you are prompted to login, with setup as the administration user. In the login pop up window, enter the administration password you just specified in Step 17 and click OK.
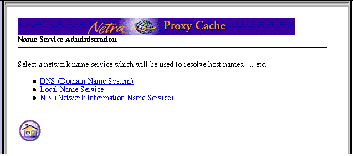
At this point, whether you changed the administration password or left it is as setup, the Name Service Administration page is displayed, as shown below.
Figure 2-15 Name Service Administration Page
-
Click the link for the name service you use.
Use the instructions appropriate for your name service selection.
Note -It is strongly recommended you use DNS or NIS and not a Local Name Service. You can use both DNS and NIS. If you choose DNS and/or NIS, do not configure the Local Name Service.
For the DNS:
-
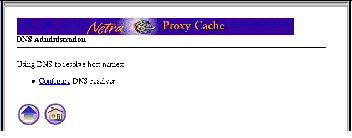
Click DNS. The page shown below is displayed.
Figure 2-16 DNS Administration Page
-
In the DNS Administration page, click Configure DNS Resolver.
The page shown below is displayed.
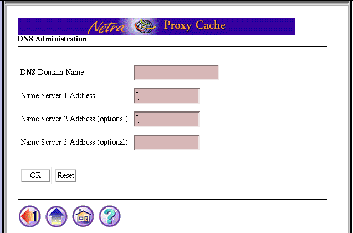
Figure 2-17 DNS Domain Name and Name Server Addresses
-
In the second DNS Administration page, enter the following:
-
The name of the DNS domain in which the Netra Proxy Cache Server resides.
-
The IP address of a DNS server in your enterprise. Make sure there is a route between your Netra Proxy Cache Server or Array and the DNS server you specify. If you are uncertain about network connectivity, from a machine on the same subnet as the Netra Proxy Cache Server, ping the DNS server to confirm the existence of a route between the two machines.
-
Optionally, IP addresses of two additional DNS servers in your enterprise.
Note -This host will be configured to use the Internet Domain Name System to resolve host names. The information you supply will be used to set up the resolv.conf configuration file. Please see the resolv.conf(4) man page for more information. The default domain is the domain considered local to the host. Normally, it is everything after the first period in the fully qualified domain name of the host. For example, the host name host1.acme.com implies a default domain of acme.com
-
-
Click OK.
A success page is displayed, showing your DNS entries.
-
Click the home icon.
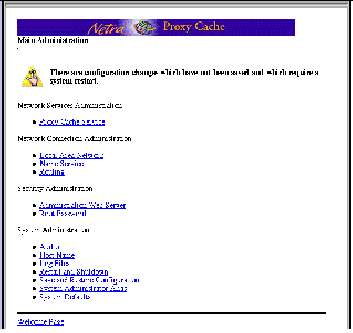
For the first time, the Netra Main Administration page, shown in Figure 2-18, is displayed.
In the Main Administration page note the line "There are configuration changes that have not been saved and which require a system restart." The word "save" refers to backing up your configuration. You perform this step in "Backing Up Your Configuration". You will restart (reboot) the server starting with Step 22, below.
Figure 2-18 Main Administration Page
For a local name service (/etc/hosts):
Note -It is not recommended that you rely on a local name service for a Netra Proxy Cache Array or Server.
-
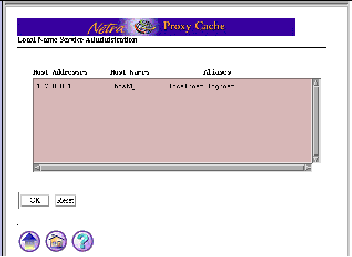
In the Name Service Administration page, shown in Figure 2-15, click Local Name Service. The page shown in Figure 2-19 is displayed.
Figure 2-19 Local Name Service Administration
-
In the editable field, arrange entries as follows:
127.0.0.1 localhost
<ip address> <netra host name> loghost
-
Click OK. A success page is displayed.
-
Click the home icon in the success page. For the first time, the Netra Main Administration page, shown in Figure 2-18, is displayed.
For the NIS:
-
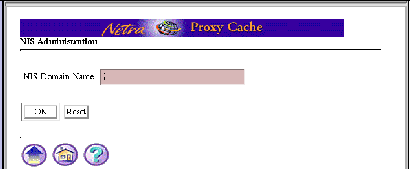
In the Name Service Administration page, shown in Figure 2-15, click NIS. The page shown in Figure 2-20 is displayed.
Figure 2-20 NIS Administration Page
-
Enter your NIS domain name.
-
Click OK. A success page is displayed.
-
Click the home icon in the success page. For the first time, the Netra Main Administration page, shown in Figure 2-18, is displayed.
If you want to configure a name service in addition to the one you just configured, click the Name Service link in the Main Administration page and follow the instructions for the additional name service in Step 21.
-
-
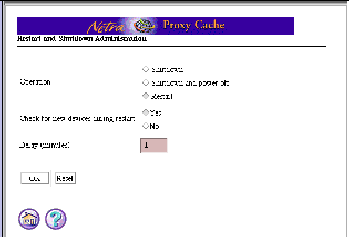
In the Main Administration page, click Restart and Shutdown under the System Administration heading.
The Restart and Shutdown Administration page is displayed, as shown in Figure 2-21.
Figure 2-21 Restart and Shutdown Administration Page
-
In the Restart and Shutdown Administration page, click Restart and click OK.
A success page is displayed. After a minute, the restart process begins. After about two minutes, you can reload the Main Administration page from just-configured Netra Proxy Cache Server. If you have a TTY connection to the Netra Proxy Cache Server, you can observe the progress of the restart. At the point at which the server displays the login prompt, you can reload the Main Administration page.
-
Confirm your initial configuration by checking your name service and host name.
In the Main Administration page, click the Name Service and Host Name links and examine the values displayed. If there are errors make the appropriate changes. If you change your host name, your NIS or DNS domain name, or your time zone, you must restart the server (see Step 22 and Step 23, above).
Upon completion of the reboot, your Netra Proxy Cache Server is operational as a proxy cache server with the following default values:
-
Listens for HTTP requests on port 8080
-
Listens for Inter Cache Protocol (ICP) requests on port 3031
-
No parent proxies configured.
If the preceding defaults do not meet your needs, proceed to Chapter 3, Proxy Cache Service Configuration," to complete the configuration of your Netra Proxy Cache Server.
- © 2010, Oracle Corporation and/or its affiliates
