Chapter 3 Proxy Cache Service Configuration
This chapter explains how to perform basic configuration of a Netra Proxy Cache Server.
Please fill out the tables in Chapter 1, Preparing for Installation and Configuration," before starting the procedures in this chapter.
At this point, your Netra Proxy Cache server is fully functional as a proxy cache machine with the following settings:
-
An email alias for proxy cache trouble reports of root
-
An HTTP port number of 8081, for listening to HTTP requests
-
An Inter Cache Protocol (ICP) port number of 3031, for listening to ICP requests
-
Configuration for being outside of a firewall; that is, no parent or sibling proxies
If these settings meet your needs, you can skip this chapter and consult the Netra Proxy Cache Server User's Manual, to read about the advanced configuration properties available for fine-tuning your proxy cache service.
If you want, you can perform the procedures described in this chapter using a command-line program, instead of using the web pages described here. See Chapter 4, Using a Serial Terminal to Configure a Netra Proxy Cache Server ," for instructions.
Starting the Proxy Cache Administration Server
-
On a remote machine (not your Netra Proxy Cache Server), point your browser at the Netra Proxy Cache Server, as follows:
http://<netra server>:81
where <netra server> is the host name of your Netra Proxy Cache Server. If the host name is not known to a network name service, you must specify the numeric IP address of the administrative host. Depending on the capabilities of your router, you might need to use the browser on a machine on the same subnet as the Netra Proxy Cache Server.
Upon successful connection, you receive a prompt for an administrator's name and password. Enter the password you specified in Step 17. Following successful login, the Netra Proxy Cache Main Administration page is displayed, as shown below:
Figure 3-1 Main Administration Page Following Initial Configuration

Regarding the reminder note at the top of the Main Administration page, you will backup you configuration later in the configuration procedure.
-
In the Main Administration page, click Proxy Cache Service.
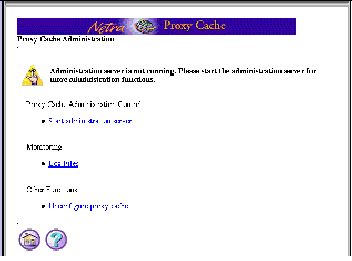
The Proxy Cache Administration page is displayed, as shown below.
Figure 3-2 Proxy Cache Administration Page: Server Stopped
-
In the Proxy Cache Administration page, click Start Administration Server.
-
A page indicating a successful operation is displayed. In this page, click the up-arrow icon to return to the Proxy Cache Administration page.
This time, the Proxy Cache Administration page displays a full set of options for configuration, as shown below.
Figure 3-3 Proxy Cache Administration Page (Server Started)
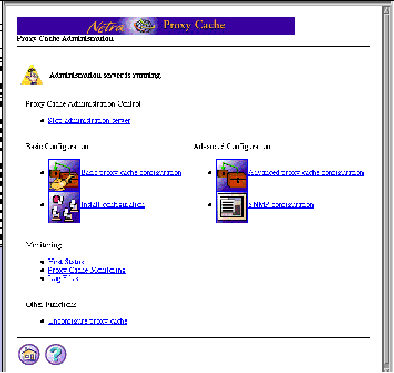
The remainder of this chapter covers the basic proxy cache configuration and install configuration links. Advanced proxy cache configuration and SNMP configuration are described in the Netra Proxy Cache Server User's Manual.
Proceed to the next section for instructions on configuring the proxy cache service.
Basic Proxy Cache Configuration
The procedure described here presumes you have started the proxy cache administration server on your administrative host, as instructed in "Starting the Proxy Cache Administration Server".
To Configure the Proxy Cache Service
To complete basic proxy cache configuration, use the data you gathered in Table 1-3 and Table 1-4.
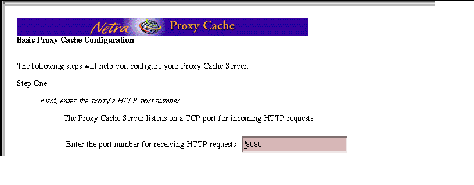
The Basic Proxy Cache Configuration page is displayed, the top part of which is shown in Figure 3-4.
Figure 3-4 Basic Proxy Cache Configuration: Step One
-
In the Step One segment, shown in Figure 3-4, enter an HTTP port number or accept the default of 8080.
-
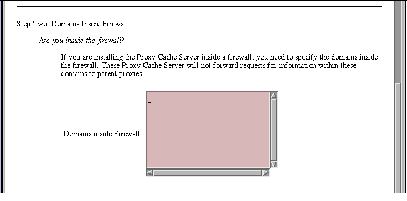
Scroll down (if necessary) to the Step Two segment of the page, shown in Figure 3-5.
Figure 3-5 Basic Proxy Cache Configuration: Step Two
-
If the Netra Proxy Cache Server is inside a firewall, you can list the domains that are inside the firewall.
For URLs containing domains not in this list, the Netra Proxy Cache Server always tries to fetch the object from a parent or sibling cache, if it does not have the object in its local cache. Domains added to this list are also added to the Local Domains property, described in Chapter 3 of the Netra Proxy Cache Server User's Manual.
-
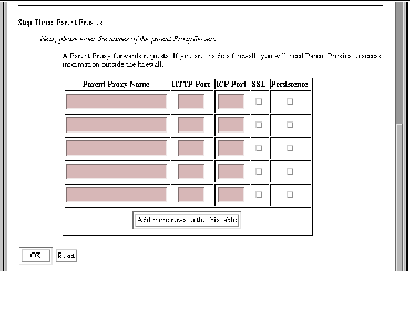
When you are finished entering domain names or if your server is outside of a firewall, scroll down to display the Step Three segment, shown in Figure 3-6.
Figure 3-6 Basic Proxy Cache Configuration: Step Three
-
If your Netra Proxy Cache Server has one or more parent proxy servers, enter the following data in the fields provided:
-
Name of parent proxy server
-
Port number at which the parent listens for HTTP requests
-
Port number at which the parent listens for Inter Cache Protocol (ICP) requests (if the parent supports ICP--a 0 in the field indicates non-support for ICP)
-
Whether the parent supports the tunneling of the Secure Socket Layer protocol
-
Whether the parent supports persistent connections
Use the data you gathered in Table 1-4 to fill in the parent proxy information.
Note that Netra Proxy Cache Servers support ICP, SSL tunneling, and persistent connections. If you are unsure whether a given proxy cache server supports SSL tunneling or persistence, do not click the check boxes. If you have more than five parent proxies, click the button to add additional rows to the table.
-
-
After adding all parent proxies, click OK.
If you make an error, either the same page or a special error page is displayed. In both cases, the error is cited on the page. If the same page is displayed, correct the error and click OK to proceed. If an error page is displayed, correct the error, the use the browser's back button to return to the Basic Proxy Cache Configuration page. In this page, click OK to proceed.
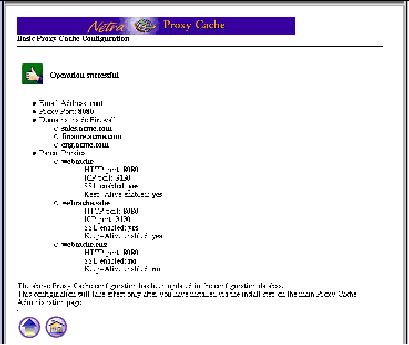
After you have submitted a correct set of proxy cache properties, a page is displayed indicating success and displaying your selections. An example of such a page is shown below.
Figure 3-7 Successful Basic Proxy Cache Configuration
-
In the success window, click the up-arrow icon to return to the Proxy Cache Administration page.
Install Configuration
Perform this procedure after you have completed the basic proxy cache configuration.
To Install Your Software Configuration
At this point, your proxy cache configuration is recorded in a configuration database. You need to install the configuration for your choices to take effect.
-
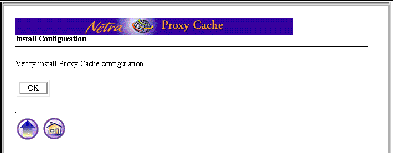
In the Proxy Cache Administration page, click Install Configuration. The following page is displayed:
Figure 3-8 Confirm Installation
-
Click OK to confirm installation of your proxy cache service configuration choices.
A page is displayed indicating successful installation. In the event of installation failure, consult the error logs.
To view error logs:
-
Click the home icon to load the Main Administration page.
-
Click Proxy Cache Service to load the Proxy Cache Administration page.
-
Under the Monitoring heading, click Log Files.
-
In the Proxy Cache Log Administration page, click View for the Administration Client Error log or the Configuration Installation Error log.
-
-
Following a successful installation, click on the home icon to return to the Main Administration page.
Proceed to the following section.
Backing Up Your Configuration
For this procedure, you need a formatted diskette. The procedure described here backs up your Solaris and proxy cache configuration.
To Backup a Netra Proxy Cache Server
-
Insert a formatted diskette in the drive of your Netra Proxy Cache Server.
The server detects the presence of a diskette in its drive and does not offer you the option of backing up to diskette unless the diskette is in place.
-
Point your browser at the URL for the Netra Welcome page on the machine in which you have inserted a diskette:
http://<netra server name>:81
-
Log in to the Netra Proxy Cache Server.
Enter user name setup and the administration password for that server.
-
In the Welcome page, click the Administration link.
-
In the Main Administration page, under the System Administration heading, click Save and Restore Configuration.
The Save and Restore Configuration Administration page is displayed, as shown below.
Figure 3-9 Save and Restore Configuration Administration Page
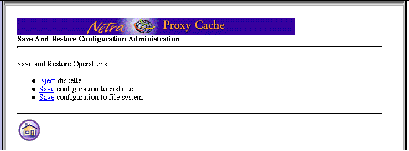
Because this is the first time the configuration is saved, there is no link for restoring a configuration.
-
Click Save configuration to diskette.
A confirmation page is displayed.
-
Click OK to confirm the save operation.
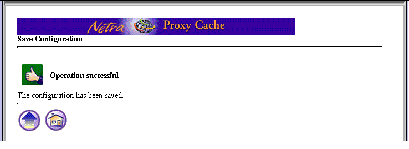
The copy operation begins. Upon completion, a success page, shown below, is displayed.
Figure 3-10 Successful Save Operation
-
Click the up-arrow icon to return to the Save and Restore Configuration page.
-
Click the Eject diskette link.
You are asked to verify the operation. Click OK. A success page is displayed.
-
In the success page, click the home icon to return to the Main Administration page.
It is recommended that you label the diskette, switch the read-write tab to the read-only position, and store the diskette in a safe place.
See Appendix A of the Netra Proxy Cache Server User's Manual for instructions on restoring a Netra Proxy Cache Server from diskette.
- © 2010, Oracle Corporation and/or its affiliates
