Advanced Array Member Configuration Page
The advanced array member configuration page enables you to change the host address, control address, and service address for any member of the array. The page also enables you to remove a host from an array.
To View or Modify Advanced Array Member Configuration Properties
-
In the Proxy Cache Administration page, click Advanced Array Configuration.
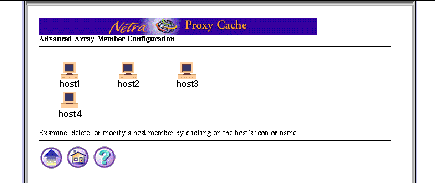
The Advanced Array Configuration page, shown in Figure 6-1, is displayed.
Figure 6-1 Advanced Array Member Configuration Page (All Array Members)

-
In the page shown in Figure 6-1, click the host name or the icon for the host you want to modify or remove from the array.
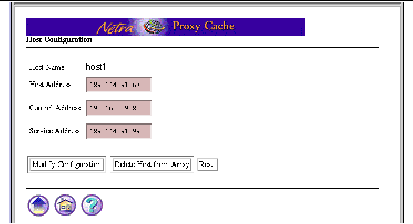
A page such as that shown in Figure 6-2 is displayed.
Figure 6-2 Advanced Array Member Configuration (Individual Member)

-
Make any changes you want to the addresses listed and click Modify Configuration, or click Delete Host from Array to remove the host.
The host, control, and service addresses are described in the Netra Proxy Cache Array Configuration Guide.
If you made a modification, a page is displayed indicating the success or failure of your change. If a change fails, the page is redisplayed with the error indicated. Correct the error and click OK again. With some errors a new page, containing an error message, is displayed. If this occurs, click the Back button on your browser to return to the category page.
If you clicked Delete Host from Array, a page asking you for confirmation is displayed. Click OK to confirm removal of the host from the array, or click the up-arrow or home icon to change pages.
The confirmation page reminds you that, in addition to removing the host from the array, you must shut down the proxy cache service on the host being removed.
If you click Reset, the values for the properties on the page revert to what they were when you first loaded the page.
-
After a successful change or deletion, click the up-arrow icon to return to the Proxy Cache Administration page.
Alternatively, you can click the home icon to return to the Netra Main Administration page.
-
If you make any changes to advanced array members properties, you must use the Install Configuration function to install the changes on the machine(s) whose configuration was changed. You access this function by clicking the Install Configuration link in the Proxy Cache Administration page.
See the Netra Proxy Cache Array Configuration Guide for instructions on the use of the Install Configuration function.
- © 2010, Oracle Corporation and/or its affiliates
