pcANYWHERE
Symantec's pcANYWHERE provides fast, easy access to office PCs from remote locations. After you have installed pcANYWHERE on an office system, you can control that system remotely from the Internet.
An evaluation version of pcANYWHERE 32 version 8.0 client software is included in the i-Planet software distribution on the "Contains 3rd Party Software Only" CD. You can purchase the full version from Symantec or through commercial software dealers, and can find more information on pcANYWHERE at the URL http://www.symantec.com/pcANYWHERE.
Note -
You must purchase a copy of pcANYWHERE for each desktop that you want to control remotely.
Installing the Trial Version Included With i-Planet
i-Planet application includes a 30-day trial version of pcANYWHERE on the i-Planet CD-ROM labelled "Contains 3rd Party Software Only." Follow the procedure below to install the trial version of pcANYWHERE.
To Install the 30-Day Trial Version of pcANYWHERE
-
Insert the i-Planet CD-ROM "Contains 3rd Party Software Only" in the CD-ROM drive of the computer to be controlled remotely.
-
Use Windows Explorer to copy the file pca_802.zip from the CD-ROM to a temp directory on the local hard drive (c:\windows\temp or c:\temp).
-
Use an unzip program (like WinZip) to decompress the file pca_802.zip.
Note -Be sure to choose to preserve the directory structure.
You see seven new subdirectories or folders (pcadisk1 through pcadisk7) under the temp directory.
-
Use Windows Explorer to browse to the pcadisk1 subdirectory, then double-click setup.exe.
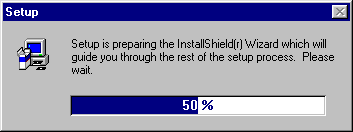
The installation begins with the dialog box shown in Figure C-1.
Figure C-1 Setup Wizard
-
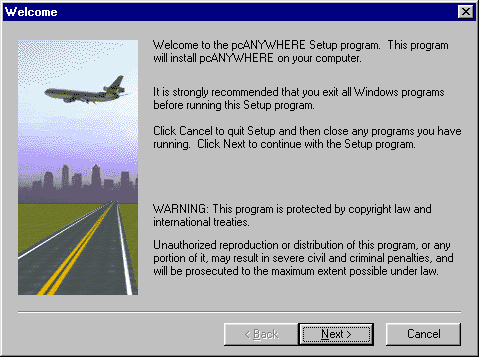
Read the introductory information on the first screen of the Setup Wizard shown in Figure C-2 and click Next.
Figure C-2 First Screen of the pcANYWHERE Setup Wizard
-
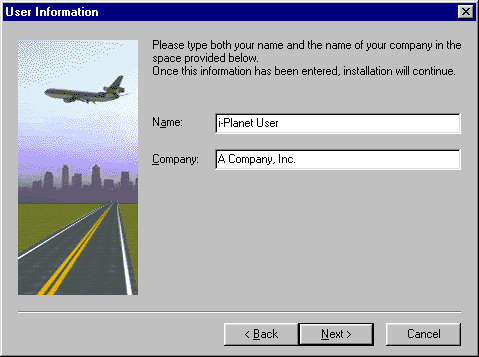
Fill in your name and the company name in the next dialog box shown in Figure C-3 and click Next.
Figure C-3 Identification Screen of the Setup Wizard
-
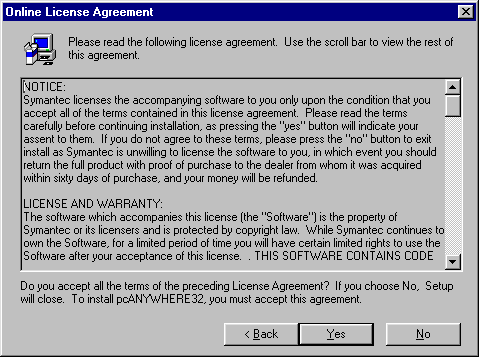
Read the license agreement shown in Figure C-4 and click Yes to accept it and continue.
Figure C-4 pcANYWHERE License Agreement
-
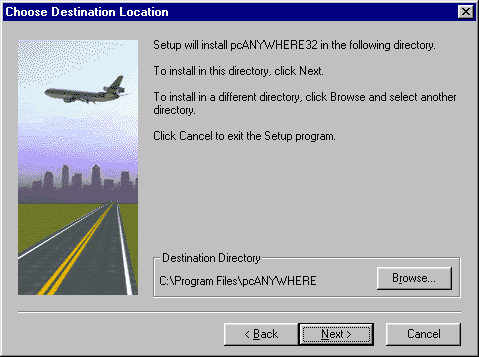
Confirm the location in which to install pcANYWHERE (or click Browse to choose a new location) shown in Figure C-5 and click Next to continue.
Figure C-5 Choose the pcANYWHERE Installation Folder
-
pcANYWHERE, as shown in Figure C-6, informs you of the setup processes and where it is being installed. Click Next to continue.
Figure C-6 pcANYWHERE Installation Information

-
Tell the Setup Wizard where to find the next folder of files, as shown in Figure C-7.
Figure C-7 Setup Wizard Asks the Location of Each Folder of Program Files

-
Read each of the four additional screens that appear from the Setup Wizard and click Next to continue.
-
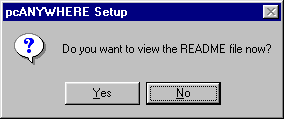
Choose No when asked if you want to view the Readme file shown in Figure C-8.
Figure C-8 Setup Wizard's Offer of the Readme file
-
At the end of the installation process, you are prompted to restart your computer, as shown in Figure C-9.
Figure C-9 pcANYWHERE Setup Completion Window
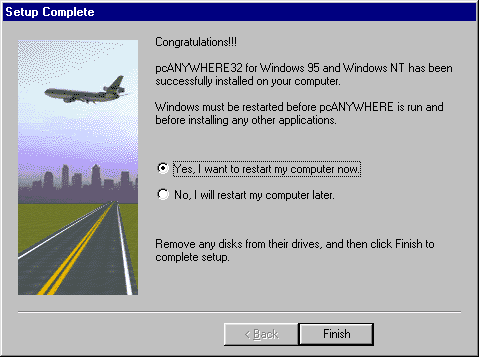
You can restart you computer immediately or later, but you cannot continue with the pcANYWHERE configuration until you have restarted your computer.
Configuring the Trial Version Included With i-Planet
Follow the procedure below to configure the trial version of pcANYWHERE.
To Configure pcANYWHERE
-
After restarting your computer, choose Start | Programs | pcANYWHERE32 | pcANYWHERE.
pcANYWHERE starts.
-
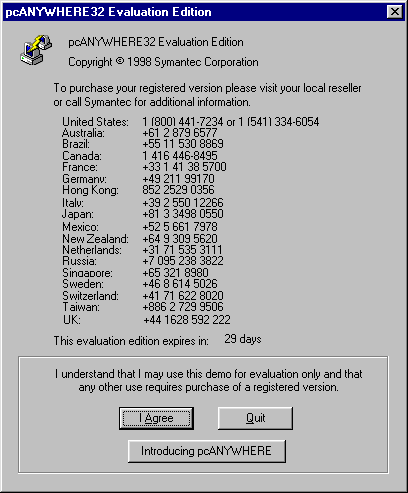
Click I Agree button to accept the evaluation license agreement shown in Figure C-10 to proceed to use pcANYWHERE.
Figure C-10 pcANYWHERE Evaluation Agreement
-
Click Cancel to exit from the Smart Setup Wizard.
The Smart Setup Wizard starts when you first run pcANYWHERE and configures items that are not necessary to run pcANYWHERE with the i-Planet product.
-
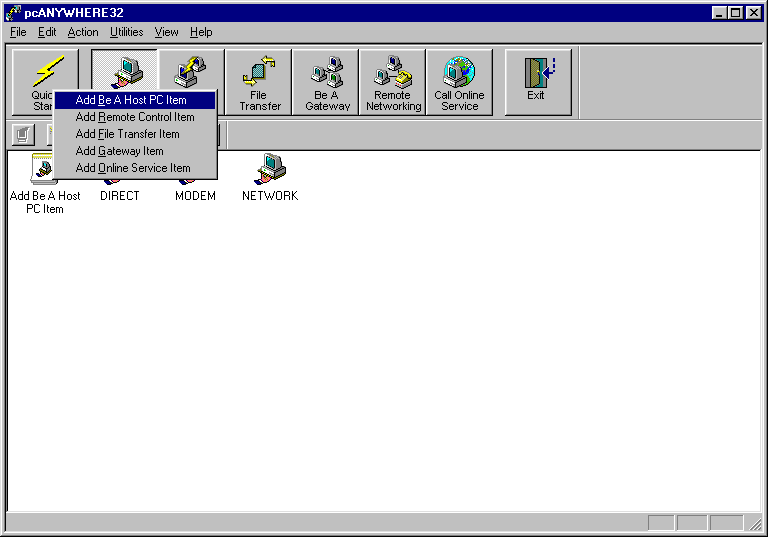
Choose Quick Start | Add Be a Host PC Item shown in Figure C-11.
The Quick Start wizard walks you through the configuration steps.
Figure C-11 Quick Start with Add Be a Host PC Item
-
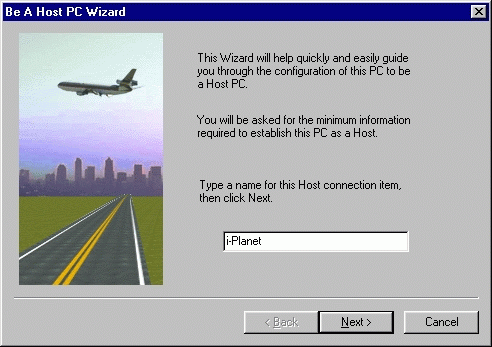
Provide a name (for example, i-Planet) for the connection as shown in Figure C-12 and click Next.
Figure C-12 Provide a Name for the Connection
-
Select TCP/IP for the connection device shown in Figure C-13 and click Next.
Figure C-13 Specify TCP/IP for the Connection Device
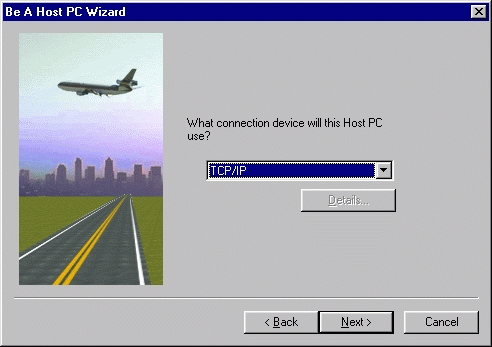
You must select TCP/IP from the dropdown list to use pcANYWHERE with i-Planet.
-
Click the Finish shown in Figure C-14 to complete the pcANYWHERE Wizard.
Figure C-14 Last Screen of the Quick Start Wizard

 Caution -
 Do not check the option Automatically Launch After Wizard.
The installation program returns you to the pcANYWHERE Main Window. You now must configure the properties for i-Planet.
-
Right-click the i-Planet icon and choose Properties from the pop-up menu.
 Caution -
 Do not double-click the i-Planet icon.
The i-Planet Properties window appears as shown in Figure C-15.
Figure C-15 i-Planet Properties Window

-
Verify that TCP/IP is checked and highlighted in the Device List.
If it is not checked and highlighted, click the box before TCP/IP to check and highlight it.
-
Click the Settings tab at the top of the i-Planet Properties window to move to the next set of options.
-
Configure the Settings shown in Figure C-16 according to Table C-1.
Figure C-16 Specify the Settings for Your Connection.
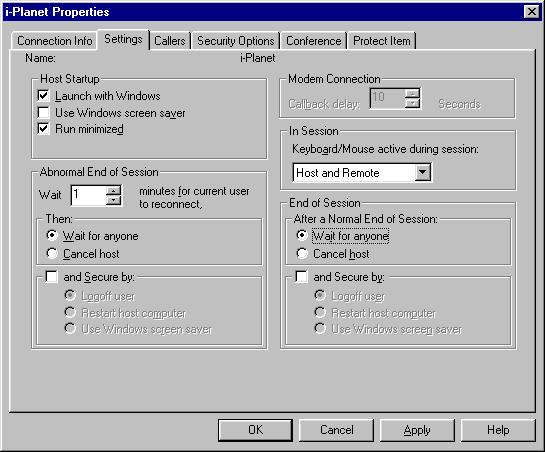 Table C-1 Required Choices for i-Planet Options
(Only the possible choices are shown)
Table C-1 Required Choices for i-Planet Options
(Only the possible choices are shown)Section
Option
Value
Host Startup
o Launch with Windows
Yes
o Use Windows screen saver
No
o Run Minimized
Yes
Abnormal End of Session
o Wait n Minutes for User to Reconnect
1
Then
o Wait for Anyone
Yes
In Session
o Keyboard/Mouse Active During Session
Host and Remote
After A Normal End of Session
o Wait For Anyone
Yes
-
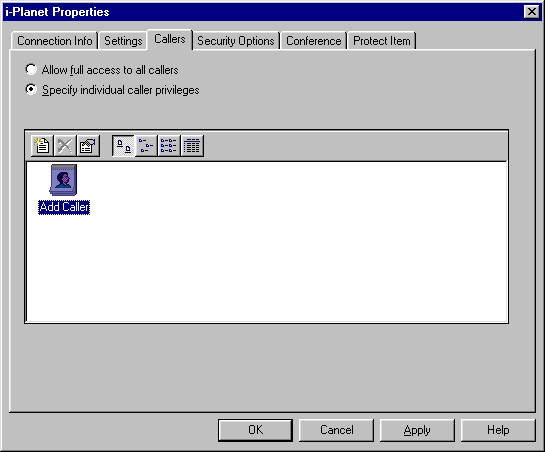
Click the Callers tab at the top of the i-Planet Properties window shown in Figure C-16 to move to the next tab.
-
Choose Specify individual caller privileges as shown in Figure C-17.
Figure C-17 Callers Tab for Individual Caller Privileges.
-
Double-click the Add Caller icon to start the Add Caller Wizard.
-
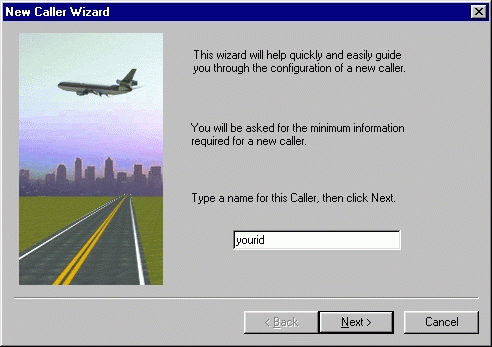
Type the caller's name shown in Figure C-18.
This is typically your user name for your system. It identifies you when you connect from the Internet.
Figure C-18 Specify the Name for the Caller.
-
Click Next.
-
Specify the caller's login name shown Figure C-19.
Figure C-19 Specify the Login name and Password.
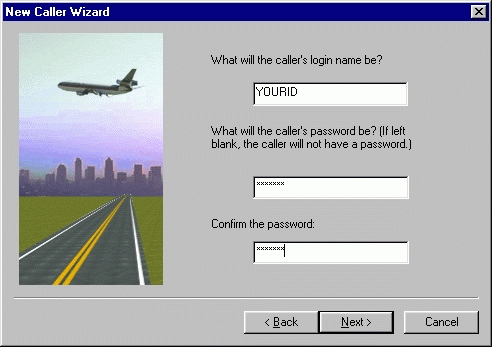
This is the same name or user ID that you typed in the screen shown in Figure C-18.
-
Type the password that you want to use, then confirm the password by typing it again in the next field shown in Figure C-19, and click Next when you have finished.
-
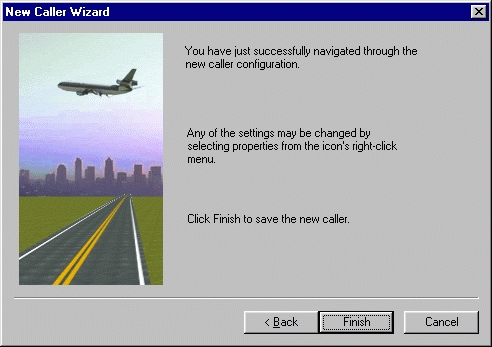
Click Finish to complete the New Caller Wizard as shown in Figure C-20.
Figure C-20 Last Screen of the New Caller Wizard.
-
Click the Security Options tab at the top of i-Planet Properties window.
-
Configure the Security Options shown in Figure C-21 according to Table C-2.
Figure C-21 Specify the Security Options for the Connection.
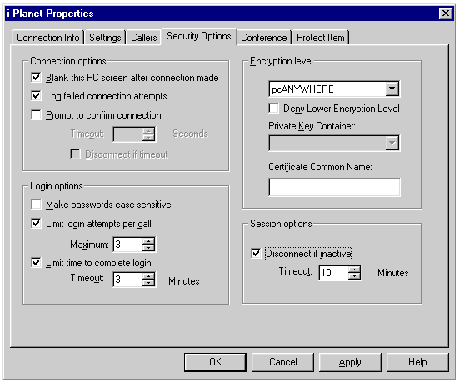 Table C-2 Required Choices for Security Options
(Only the possible choices are shown)
 -
Click OK.
-
Double-click the new i-Planet icon to start host mode on your PC and wait for connections.
Tip -Turn off any animated screen saver on the desktop PC: Using an animated screen saver will delay logging in because the PC has to send all the image data from it over the network.
Enabling pcANYWHERE Connections in i-Planet
In the Administration Console, you must enable pcANYWHERE in the Predefined Netlet Applications section of the Netlet frame and in the Remote Control Connections of the NetFile frame of the Administration Console so that the end users can use it.
To Enable pcANYWHERE
-
Start the Administration Console.
-
Click the Netlet link under Applications in the navigation frame.
-
Click the box beside pcANYWHERE to enable pcANYWHERE connections.
-
Click the Enter button at the bottom of the page.
-
Click the NetFile link under Applications in the navigation frame.
-
Click the box after Allow Remote Control Connections to show the check mark that means that Remote Control connections are enabled in the NetFile Configuration frame.
-
Click the Enter button at the bottom of the NetFile Configuration frame.
-
Open a terminal window on the i-Planet server.
-
As root, stop and restart the i-Planet server so that the changes will take effect.
# /opt/SUNWjeev/bin/iplanet_serv stop
# /opt/SUNWjeev/bin/iplanet_serv start
- © 2010, Oracle Corporation and/or its affiliates
