|
|
| Sun ONE Integration Server B2B, ECXpert 3.6.2 Installation Guide |
Chapter 5 Testing Your ECXpert Installation
This chapter explains how to test your ECXpert installation and helps you decide what your next step should be. Begin by reading the material that is appropriate for your platform:
Then, proceed to test your ECXpert installation as described in the section:
Finally, read the section "What's Next?" to determine what to do next.
Getting Ready to Test on Solaris
After you have installed ECXpert, it is a good idea to submit a test document to make sure you have installed and configured Oracle and ECXpert correctly.
Follow the steps below to submit a test document using the Input_810.txt document.
- Create a backup copy of the test document by entering the following commands:
# cd $BDGHOME/maps
# cp Input_810.txt /tmp/Input_810.txt
- If you have not already done so, start up your web browser.
You can be logged on as user root, system, or the ECXpert admin user. Then, enter the following commands:
- If you have not already done so, display the ECXpert Administration home page now.
If you created a bookmark for the ECXpert Administration home page, select it now, or enter the URL:
http://hostname:port#
where hostname is the name of the machine on which your web server resides and the port number is the number of the port on which the web server is listening.
The ECXpert main menu screen is displayed as shown in Figure 5-1.
Figure 5-1 ECXpert Main Menu
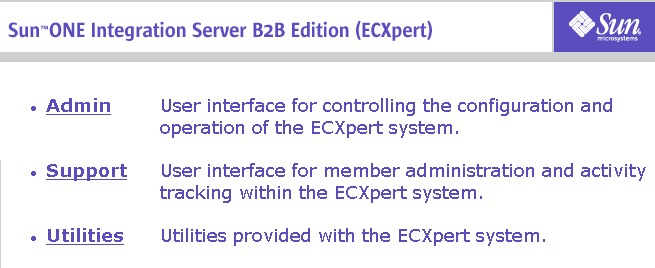
- Click the Support link to open the Product Administrative Interface Login window and proceed to the section "Testing ECXpert".
Getting Ready to Test on Windows
Before you test ECXpert on the Windows platform, you need to
- Resolve any problems associated with Windows directory names
- Install the FTP Server
- Get ready to test your installation
This section explains how you complete these tasks.
Troubleshoot Windows Directory Names
Windows allows spaces in directory names. If you install ECXpert in a directory with a space in the name you must modify your Sun™ ONE Web Server obj.conf file and your ECXpert ecx.ini file to refer to the directory by its MS-DOS name.
- From the Windows task bar select Start > Windows Explorer.
- Right-click the directory name to display the pop-up menu.
- Click Properties.
A window appears, listing various information about the directory name, including its MS-DOS name. For example, the Windows directory C:\ Program Files is known to MS-DOS as PROGRA~1, following the MS-DOS eight-character file and directory names with three-character extensions convention.
- Replace the Windows filename with the MS-DOS filename in all occurrences in the obj.conf and ecx.ini files.
Install the Windows FTP Server Service
If you want to receive incoming FTP requests, you must install the Windows NT FTP Server service as described in this section before continuing on to the instructions in the "Get Ready to Test ECXpert" section.
To install the Windows FTP server service
- From the Windows task bar select Start > Settings > Control Panel.
- Double-click Network.
- Click Services, click Add, and then click Microsoft Peer Web Services.
- Click OK, then type the path for the Windows NT source files.
For example, if you are using the Windows NT CD-ROM drive D:\, enter
D:\i386
- Click OK to start the Microsoft Peer Web Services Setup.
- The FTP Service is selected by default, but you may want to clear the check boxes for options you do not want to install.
The FTP Service, along with other Peer Web Service components, can be configured by using the Internet Service Manager tool.
- Start Microsoft Internet Service Manager:
- If you are using Windows NT Workstation 4.0, from the Windows task bar select Start > Programs > Microsoft Peer Web Services > Internet Service Manager.
- If you are using Windows NT Server 4.0, from the Windows task bar select Start > Programs > Microsoft Internet Server (common) > Internet Service Manager.
- If you are using Windows 2000, you will need to install FTP service from the main installation disk (Add-On Components). You can then access the Internet Services Manager by selecting Control Panel > Administrative Tools >Internet Services Manager.
- Click the FTP icon.
Select Properties > Service Properties. Deselect Allow only anonymous connections.
- Click Yes.
- Select Directories, and click Add to create directory aliases for use with ECXpert.
When you have finished creating all the directory aliases you need, click Apply, then click OK.
- Select Properties > Exit.
Get Ready to Test ECXpert
After you have installed ECXpert, it is a good idea to submit a test document to make sure you have installed and configured Oracle and ECXpert correctly.
To submit the test Input_810.txt document
- Create a backup copy of the test document. Navigate to the directory $BDGHOME\maps. Copy the file Input_810.txt to another file name.
- If you have not already done so, start your web browser. (You should be logged in as root, system, or the ECXpert admin user.)
- Open the bookmark to the ECXpert Administration home page, or enter the URL hostname/port_number, where hostname is the name of the machine on which your web server resides, and port_number is the number of the port on which your server is listening. The ECXpert Main Menu screen is displayed as shown in Figure 5-2.
Figure 5-2 ECXpert Main Menu

- Click Support to open the Product Administrative Interface Login window and proceed to the section "Testing ECXpert".
Testing ECXpert
The Product Administrative Interface Login window is shown in Figure 5-3.
Figure 5-3 Product Administrative Interface Login Window
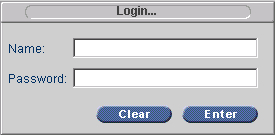
- Enter the default user name/password: ECX/ECX.
When you have entered your login information, click Enter. The ECXpert Support Administrative screen is displayed as shown in Figure 5-4.
Figure 5-4 ECXpert Support User Interface Main Screen
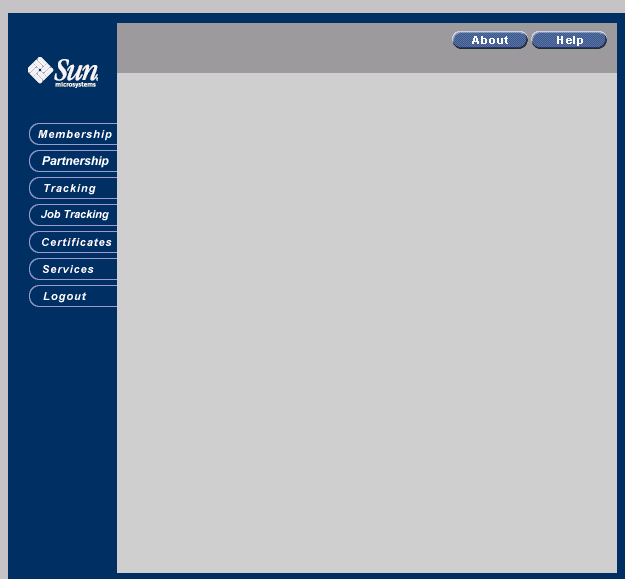
- Click the Partnership tab. The Partnership Administration screen appears, as shown in Figure 5-5.
Figure 5-5 ECXpert Partnership Administration Screen
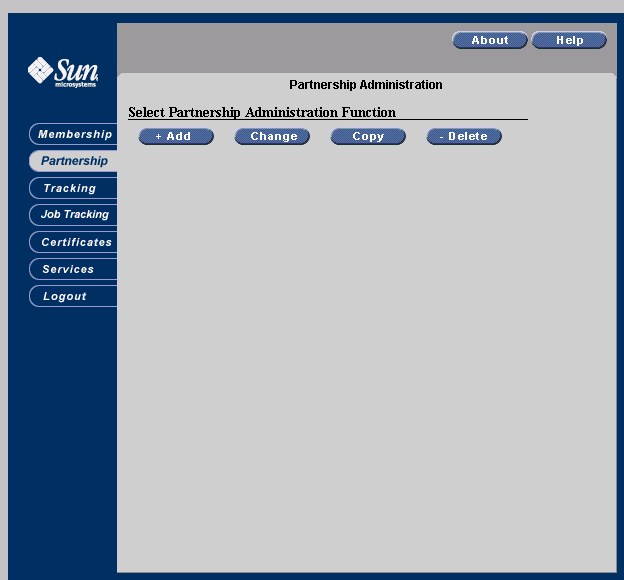
- Click Change. The Partnership Search screen appears, as shown in Figure 5-6.
Figure 5-6 ECXpert Partnership Search Screen

- Click Search. The Partnership Results screen appears as shown in Figure 5-7.
Figure 5-7 Partnership Search Results Screen

All of the available partnerships appear in the Partnership Results screen. Select the following partnership:
- Sender - PartnerA
- Receiver - ECX
- Doc Type - 810
- Version - 003020
Then click Retrieve (or double-click the highlighted partnership).
After briefly displaying the message `Please Wait......', the Partnership Info tab is displayed with the partnership details, as shown in Figure 5-8.
Figure 5-8 ECXpert Demo Partnership Info Tab

- Click the Protocols Tab to display the Outgoing Protocol page, as shown in Figure 5-9. The default protocol you will see is SMTP.
Figure 5-9 ECXpert Demo Partnership Outgoing Protocols Page

- Set up the demo trading partnership to use the FTP Protocol. From the Outgoing Protocol drop-down list, change the default value of SMTP and select FTP.
- Enter the following values, shown in Table 5-1, for the other fields on this page:
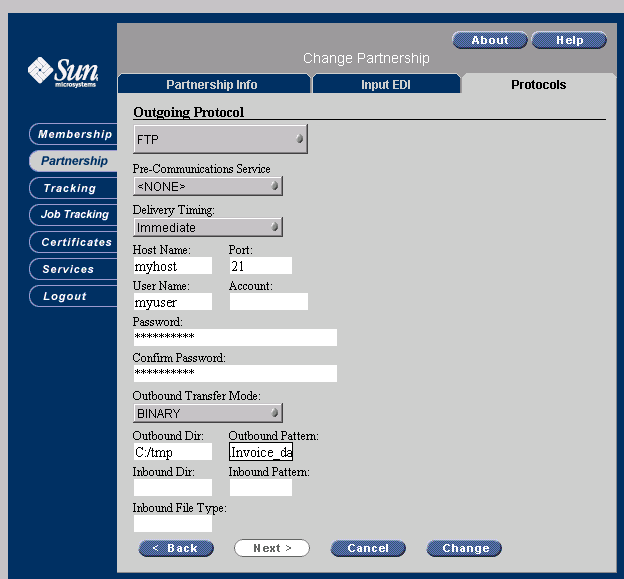
When you have finished filling in the Protocols tab, it should look similar to Figure 5-10 (with your values for host, port, user name, and account).
Figure 5-10 Completed Partnership Protocols Tab
- Click Change. On the verification window that appears, click Yes to verify the change. The change has been made when the Partnership Administration screen is displayed.
- Go to the ECXpert Main Menu, and click the Utilities link.
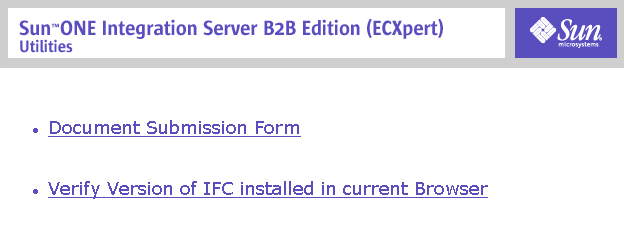
The Utilities screen appears, as shown in Figure 5-11.
Figure 5-11 ECXpert Utilities Window
- Click the Document Submission Form link. The Submission Information form is displayed, as shown in Figure 5-12.
- On Solaris™
Copy the test file
/Root_ECX_Install/NS-apps/ECXpert/maps/Input_810.txt
to /temp.
In place of Root_ECX_Install in the first path, specify the ECX install directory.
- In Windows
Copy the test file
drive:\ecx36\NS-apps\ECXpert\maps\Input_810.txt
to C:\temp.
In place of drive in the first path, specify the drive specifier for the location where you have ECXpert installed.
Figure 5-12 ECXpert Utilities Document Submission Screen

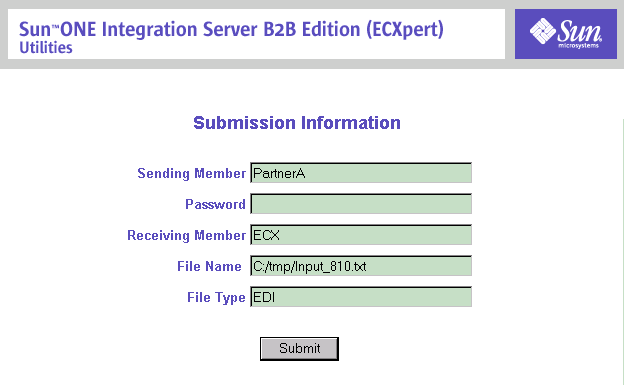
Enter the following information in the Submission Information form:
When you have finished filling in the Submission Information form, it should look similar to that shown in Figure 5-13.
Figure 5-13 Completed Submission Information Screen
- Click Submit. When the file has been submitted, a screen appears, shown in Figure 5-14, indicating registration of the file for submission and confirmation that the submission is done. If an error appears, proceed to step 16.
Note The screen showing completed submission used an internal working data path to the demo data versus the production data path specified in Table 5-2.
Figure 5-14 Submitted File Screen

- For any error messages that appear on the submittal screen, use the error and resolution descriptions provided in Table 5-3 to resolve common error messages. Once the document has been successfully submitted, continue with Step 13.
- Log onto the Product Administrative Interface again. Click the Support link. Then enter your login information in the Login window. The default user name/password is ECX/ECX.
When you have entered your login information, click Enter.
- Verify that the document was submitted without an error.
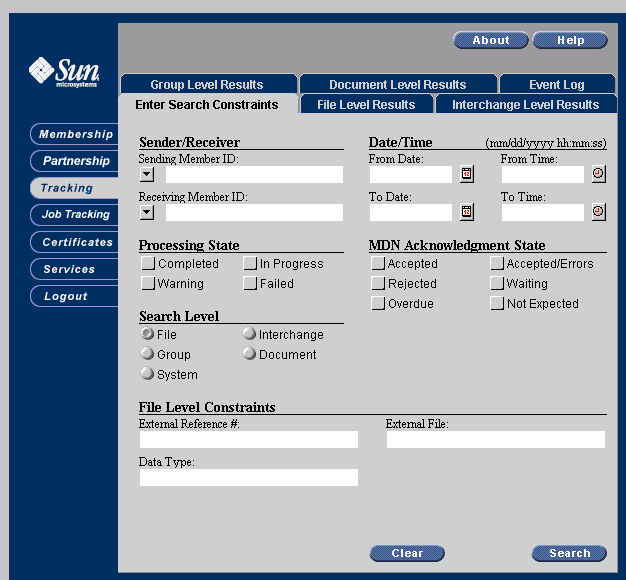
- Click the Tracking tab. The Enter Search Constraints tab appears, as shown in Figure 5-15.
Figure 5-15 ECXpert Support UI Tracking Tab File Constraints
- In the Date/Time portion of the screen, click the Calendar icon immediately to the right of the From Date: field. Today's date appears in the From Date: field. Click Search.
The File Level Results tab appears, displaying all of today's submissions. You can identify your submission by looking for the appropriate sender, receiver, and doc type.
If there is a green dot in the far left column of your submission, the test document was submitted correctly. Oracle and ECXpert have been installed and configured correctly.
What's Next?
Now that you have successfully installed ECXpert 3.6.2, use the information in the following table to determine what your next step should be: