|
|
| Sun ONE Integration Server B2B, ECXpert 3.6.2 Installation Guide |
Chapter 4 Installing ECXpert on Windows
This chapter describes how to use the ECXpert Installer to install ECXpert on the Windows NT and Windows 2000 platforms. It covers the following topics:
- "Installing ECXpert"
- "Post-Installation Tasks"
- "Starting the ECXpert Administration Server"
- "Enabling Special Features"
Refer to the Installation Worksheet in Table 2-8 as you perform these tasks. Make sure that you have installed all needed dependent software, as described in Chapter 2 "Preinstallation Tasks" before you install ECXpert.
All the instructions in this chapter are written for a new install of ECXpert. It is assumed ECXpert has either not been previously installed on the target system or that you have deleted all files and directories from any previous installation.
If you are migrating from a previous version of ECXpert, see Appendix A, "Upgrading to ECXpert 3.6.2."
If you are re-installing ECXpert Version 3.6.2, see Appendix B, "Reinstalling ECXpert."
Installing ECXpert
This section explains how you use the installer to install ECXpert.
- Log in as a user with administrative privileges.
- Make sure you have a valid host name and domain name.
Consult your system administrator if either your host name or domain name does not have a valid value.
- Select the CD drive in the Explorer.
- Start the ECXpert installer by double-clicking the setup.exe file.
A Setup dialog box appears momentarily while some installer files are copied temporarily to your hard drive from the CD.
Once the installer verifies IP address and memory information, finds the location of your browser, and makes sure Oracle is installed, the following welcome dialog box appears:
Figure 4-1 ECXpert Welcome Dialog Box

If, instead of seeing the Welcome dialog box, you see the error message:
Failed in call to get_machine_info - Code 1
you need to verify your network configuration:
- From the Windows task bar select Start > Settings > Control Panel.
- Double-click on Network.
- In the Network dialog box click the Protocols tab.
- Select TCP/IP Protocol and click Properties.
- Click the DNS tab.
- Make sure the Host Name and Domain fields contain correct values.
- Click OK.
- Continue from the Welcome to ECXpert dialog box.
Click Next.
If a Warning message is displayed regarding the amount of RAM installed, read the message and click OK to continue. The ECXpert installation can continue from this point, but you may not be able to operate in a high-volume production environment without the recommended amount of RAM.
If you are installing ECXpert for the first time on this machine, you will see the dialog box illustrated in Figure 4-2.
Figure 4-2 Choose ECXpert Base Directory Dialog Box, No Existing Version Detected

- To install ECXpert into a different directory than the default, click Browse to select the directory you want, and then click Next. Otherwise, simply click Next.
If you are upgrading ECXpert from a previous version you will see the dialog box illustrated in Figure 4-3.
Figure 4-3 Choose ECXpert Base Directory, Existing Version Detected

Caution
If you are upgrading from an earlier version of ECXpert do not simply install the current version over the old one.
If the installer has found your existing installation, click Browse to specify a different directory into which to install the new version. For more information on reinstalling ECXpert, see Appendix B
When you have selected the directory into which you want to install the new version of ECXpert, make sure that this directory appears in the Destination Directory field before you continue.
- Click Next to continue.
If you have correctly installed the Sun™ ONE Web Server and have restarted your machine, the dialog box illustrated in Figure 4-4 appears:
Figure 4-4 A valid HTTP Server is already installed... Dialog Box

You must specify the port number on which you installed your web server instance.
- Click Next to continue.
The Choose Destination Location dialog box appears. Use this dialog to specify the directory in which the web server is installed.
Figure 4-5 Choose Destination Location Dialog Box

- To select a different directory, click Browse. Once the directory you want is displayed in the Destination Directory field, click Next to continue.
The Database Configuration dialog box is displayed.
Figure 4-6 Database Configuration Dialog Box

- Fill in the fields. Consult the values you specified in Table 2-8.
- When you have filled in all the fields, click Next.
A command prompt window appears, as the installer attempts to log onto the Oracle database. If there are any errors, follow the instructions that appear on the screen. You can also check the C:\temp\ora\ora_testconnect.log file for further information on why the connection failed.
If the connection was successful, the Mail and Logfile Information dialog box appears.
Figure 4-7 Mail and Logfile Information Dialog Box
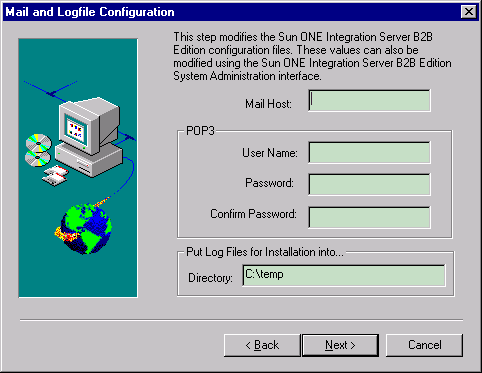
- Fill in the fields. Consult the values you specified in Table 2-8.
- Click Next to continue. The following two screens configure ECXpert to use Secure Trading Agent for sending and retrieving ebXML messages.
If you have not yet installed Secure Trading Agent or do not plan to use Secure Trading Agent to send and retrieve messages, leave the fields blank in these two screens and continue to Step 15.
If you plan to use Secure Trading Agent to send and retrieve ebXML messages, check your Installation Worksheet for actual values associated with ebXML message exchange.
The Secure Trading Agent configuration screen is displayed:
Figure 4-8 ebXML configuration (Secure Trading Agent)

Table 4-3 describes these fields.
- Click next to specify configuration parameters to enable ebXML messaging for B2B.
Figure 4-9 displays parameters to configure ECXpert to enable ebXML messaging. If you do not plan to enable ebXML messaging, leave all fields blank and click Next to proceed to Step 15.
Figure 4-9 ebXML Configuration (B2B)

Table 4-4 describes the values of these fields.
- Click next to continue.
The "Check your mail setup information" dialog box is displayed. This screen is read-only, allowing you to check values you have set thus far in the installation.
Figure 4-10 Check your mail setup information Dialog Box
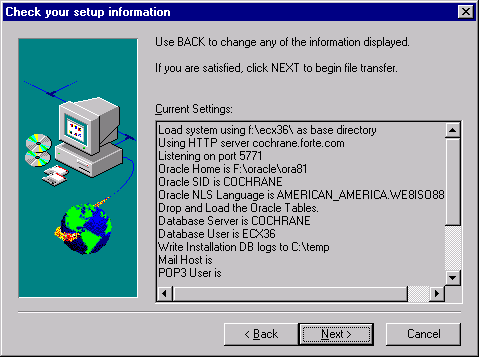
If you want to change something, use the Back button as many times as necessary to navigate back to the relevant dialog box.
- If you are satisfied with the settings, click Next to proceed with the installation.
The ECXpert files are now copied from the CD to the target directory. The Installer displays a screen title "Installing Sun ONE Integration Server B2B Edition (ECXpert) 3.6.2. The screen shows a progress bar for the copying of ECXpert files.
When the file transfer is complete, the installer displays the Modifying the HTTP Server's OBJ.CONF file dialog box. The obj.conf file is the file that contains configuration information for the web server.
Figure 4-11 Modifying the HTTP Server's OBJ.CONF file Dialog Box
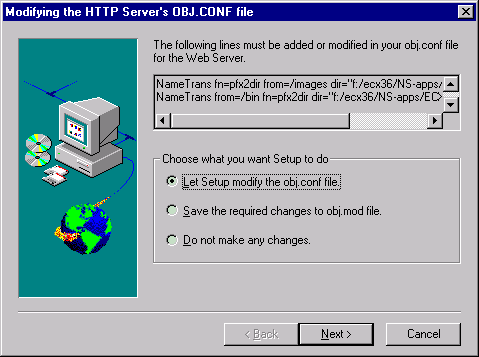
- Select one of the options for modifying the obj.conf file, and click Next.
- If you select the Do not make any changes option you must manually edit the obj.conf file or ECXpert will not function properly. Refer to "Edit the Web Server Configuration Files" for instructions.
- If you allow the installer to edit the obj.conf file, the following message is displayed.
Figure 4-12 Information Message Box

- Click OK when the Message Box is displayed.
- The Installer now displays a message asking if you want to modify the magnus.conf file. This file is also used to configure the web server. Indicate whether you want the installer to modify the file or whether you want to make changes manually. See "Configuring the Web Server" for instructions on making these changes.
- Click Next and then OK (in the following message box).
A Command Prompt window opens while the installer sets up your Oracle database tables. SQL script output scrolls through the window.
In addition to setting up the Oracle tables, the installer performs the following functions as it completes the installation:
- updates registry information
- constructs and updates ECXpert configuration files, and makes changes to your HTTP server's configuration files for use with ECXpert. See "Configuring the Web Server" for instructions on making these changes (if you have chosen to make these changes yourself).
- imports certificates
- updates the system path to point to the ECXpert libraries, following the next reboot
- copies the ECXpert Components folder to the ECXpert Components program group
- imports data about ebXML members if you are using Secure Trading Agent
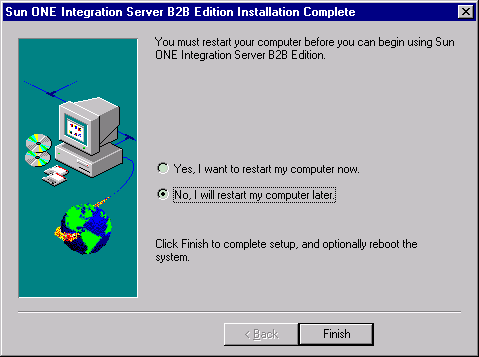
- Specify a restart option.
ECXpert installation is now complete, but you must restart your computer before you can use ECXpert.
Figure 4-13 ECXpert Installation Complete Dialog Box
Post-Installation Tasks
This section describes the tasks you must perform after installing ECXpert. These include
- Configuring the web server
- Applying configuration changes
- Setting environment variables
Configuring the Web Server
Configuring the web server involves two steps: editing the obj.conf file and magnus.conf file, and applying these changes.
- If you have let the installer edit the files for you, you can skip the section "Edit the Web Server Configuration Files".
- To apply changes to the obj.conf file (whether the changes were manual or done by the installer), follow the directions in "Apply Web Server Configuration Changes".
Edit the Web Server Configuration Files
If you have a lot of customization to do, you might want to manually edit the obj.conf and magnus.conf files. Whether you edit the file manually or you let the installer do it, you must explicitly apply the changes, as described in "Apply Web Server Configuration Changes".
To edit the obj.conf file
- Open the obj.conf file.
Using a text editor, such as Notepad, open the file
C:\SunONE\Servers\https-my_server\config\obj.conf
where C:\SunONE is the directory under which the Sun ONE Web Server is installed, and my_server is the name of your server.
- Comment out unnecessary content.
If either of the following lines appear in your obj.conf file, comment them out by typing the pound character ("#") as the first character in each line:
#NameTrans fn="pfx2dir" from="/help" /
dir="C:/SunONE/Servers/manual/https/ug"
#NameTrans fn="document-root" root="C:/SunONE/Servers/docs"
- Add the required lines to the obj.conf file.
If, during the installation, you selected Save the required changes to obj.mod file as the option in the Modifying the HTTP Server's OBJ.CONF File dialog box, open the following file:
C:\SunONE\Servers\https-my_server\config\obj.mod
where my_server is the name of your server. Paste the contents of the obj.mod file into the obj.conf file immediately above the first line that begins with NameTrans.
However, if you instead selected the Do not make any changes option, add the following lines to the obj.conf file, in the following order, immediately above the first line that begins with NameTrans. Specify the directory in which you have installed ECXpert for c:/SunOne in the following lines:
NameTrans fn="pfx2dir" from="/images"
dir="c:/SunONE/NS-apps/ECXpert/cgi-bin" name="cgi"
NameTrans from="/bin" fn="pfx2dir"
dir="c:/SunONE/NS-apps/ECXpert/cgi-bin" name="cgi"
NameTrans fn="document-root"
root="c:/SunONE/NS-apps/ECXpert/UI/html"
Note The forward slashes ("/") in the above lines are intentional, because the obj.conf file does not recognize back slashes. Do not change the forward slashes to back slashes.
- Save your changes.
To edit the magnus.conf file
- Open the magnus.conf file.
Using a text editor, such as Notepad, open the file
C:\SunONE\Servers\https-my_server\config\magnus.conf
where C:\SunONE is the directory under which the Sun ONE Web Server is installed, and my_server is the name of your server.
- Append the following lines to the magnus.conf file. Specify the directory in which you have installed ECXpert for c:/SunOne in the following lines
KernelThreads 1
Init fn="init-cgi" PATH="c:/SunONE/NS-apps/ECXpert/bin/Solaris_JRE_140/lib/sparc:
c:/SunONE/NS-apps/ECXpert/mercsdk/libs:
c:/SunONE/NS-apps/ECXpert/lib"
BDGHOME="c:/SunONE/NS-apps/ECXpert"
MERC_DO_NOT_CHDIR="TRUE" timeout="600"
- Add the following line before any line that begins with "Init".
KernelThreads 1
- Save your changes.
- Stop and then restart the Sun ONE Web Server.
- In the Windows task bar, select Start > Settings > Control Panel.
- Double-click the Services entry.
- Select the Sun ONE Web Server service and click Stop.
A message box appears, telling you that the system is stopping the service. When the message box disappears, click Start.
- Click Close.
Apply Web Server Configuration Changes
Whether you edit the web server configuration files manually or you let the installer do it, you must explicitly apply the changes, as described in this section.
- Start your web browser and go to the following URL.
http://machine_name:port#/admin-serv/bin/index
- Enter a user ID and password for a Netscape Enterprise Server user with administrative privileges.
- Apply any changes you made to the obj.conf file and magnus.conf file.
A message window appears telling you that you must apply your changes.
- Click OK.
- In the Netscape Enterprise Server bar at the top of the screen, click Apply. The Apply Changes screen appears.
- Click Load Configuration Files for the Sun ONE Web Server.
If the changes are successfully applied, a "success" message window appears. Click OK to continue.
- Exit your web browser.
Set Environment Variables
Parts of the installation process, as well as the routine operation of the ECXpert system, require the $BDGHOME environment variable be properly set.
To set the BDGHOME variable
- From the Windows NT or Windows 2000 task bar, select Start > Settings > Control Panel > System.
- In the System Properties window, select the Environment tab.
- In the Variable input field, type BDGHOME.
- In the Value input field, type the full path you specified for the directory into which you installed ECXpert (Root_ECX_Install), and append "\NS-apps\ECXpert" to the end of the path.
For example, if you had specified the path c:\foo\bar\mumble as the value of the Root_ECXInstall environment variable, you would set BDGHOME as
c:\foo\bar\mumble\NS-apps\ECXpert
You do not neet to reboot the machine to have these variable settings take effect; however, only new command-shell windows will see the changes.
Starting the ECXpert Administration Server
Follow the steps below to start the ECXpert Administration Server.
- Start the web browser.
- Display the ECXpert Administration home page.
Enter the URL hostname:port_number, where hostname is the name of the machine on which your web server resides, and port_number is the number of the port on which your web server is listening.
Note If you used port 80 when you installed ECXpert, you do not need to enter a port number.
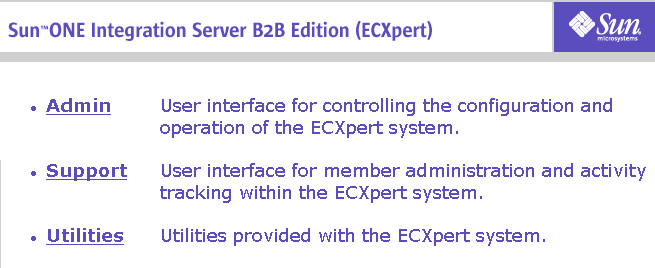
The ECXpert Main Screen appears, as shown in Figure 4-14.
Figure 4-14 ECXpert Main Menu
- Save the URL to the ECXpert Main Menu as a bookmark.
- Click Admin to display the ECXpert management screen.
The ECXpert Administration Server is not pre-configured with password protection. Use the Sun ONE Web Server Administration interface to enable this feature, if desired
Figure 4-15 ECXpert Management Screen Main Menu
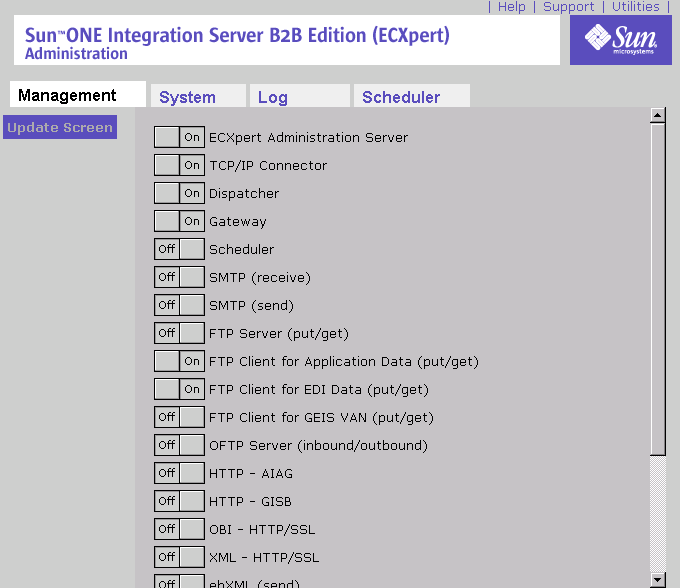
The Management screen appears, as shown in Figure 4-15, when the ECXpert Administration Server is On. If your screen shows the ECXpert Administration Server Off, click the On portion of the button's toggle to turn on the server. Then click the Update Screen button to refresh the screen.
- Continue to the next chapter, "Testing Your ECXpert Installation", to test your installation.
Enabling Special Features
The following sections explain how you do the following:
- Enable the Billing Code feature
- Enable expanded data fields
Enable the Billing Code Feature
To use the Billing Code feature
- Navigate to your Oracle directory:
C:\> cd %BDGHOME%\dbadmin\oracle
- Start sqlplus:
C:\> sqlplus myaccount/mypassword@myserver
where myaccount/mypassword@myserver is your configured account and its password.
- From the sqlplus prompt, run the script:
sqlplus> @ora_pkgbody.sql
- Restart ECXpert.
Enable Expanded Data Fields
ECXpert 3.6.2 supports larger data entry fields for the following parameters:
- senderid
- receiverid
Extract the script enlarge_email_addr.sql from the zip file %BDGHOME%\dbadmin\oracle\migration\30_to_35\30_to_35.zip.
To use this feature, run the following script as the ECXpert admin user from the Command Prompt:
%BDGHOME%\dbadmin\oracle\migration\30_to_35\enlarge_email_addr.sql
The ECXpert tables updated for char128 length are shown in Table 4-5: