|
|
| Sun ONE Integration Server B2B, ECXpert 3.6.2 Installation Guide |
Chapter 3 Installing ECXpert on Solaris
This chapter describes how to use the ECXpert Installer to install ECXpert on the Solaris™ platform. It covers the following topics:
- "Starting the ECXpert Installer"
- "Running the ECXpert Installer"
- "Post-Installation Tasks"
- "Starting the ECXpert Administration Server"
- "Enabling Special Features"
Refer to the Installation Worksheet in Table 2-8 as you perform these tasks. Make sure that you have installed all needed dependent software, as described in Chapter 2, "Preinstallation Tasks," before you install ECXpert.
All the instructions in this chapter are written for a new install of ECXpert. It is assumed that ECXpert has either not been previously installed on the target system or that you have deleted all files and directories from any previous installation.
If you are upgrading from ECXpert version 3.6.1, see Appendix A, "Upgrading to ECXpert 3.6.2."
If you are re-installing ECXpert Version 3.6.2, see Appendix B, "Reinstalling ECXpert."
Starting the ECXpert Installer
- You should already be logged in as the ECXpert admin user.
- Make sure that the Oracle database is running:
%ps -ef | grep ora
- If you are installing ECXpert remotely, from a C shell window, set your remote host to display on your local host.
On the local host, enter:
# setenv DISPLAY hostname:0.0
where hostname is the name of the machine on which you are physically located.
On the remote host, enter:
# /usr/openwin/bin/xhost +
- Make sure you have a valid host name and domain name.
To verify this, enter:
# /bin/hostname
# /bin/domainname
Consult your system administrator if either your host name or domain name does not have a valid value.
- Change to the /cdrom directory.
# cd /cdrom/ECXpert
If this command does not work, enter the following command:
# cd /cdrom/cdrom0
- Start the ECXpert Installer by running the setup_exe executable. Do not run setup_exe as a background process.
# ./setup_exe
The program starts up and immediately displays the following licensing agreement:
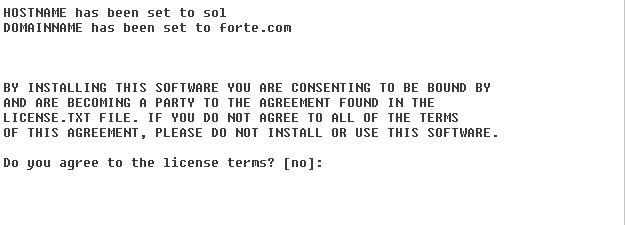
- Type y and press Enter to accept the licensing terms. The program prompts you for a path to the installation directory.

- Enter the install directory (Root_ECX_Install value).
Enter the full path of your installation directory from the Installation Worksheet and, when prompted, type y to confirm. If the directory you enter doesn't already exist, the program creates it for you.
After you supply the required information, the ECXpert installer builds the /NS-apps/ECXpert directory structure. For a description of that structure, see "Installed Directory Structure".
- Enter the ECXpert temporary installation port number. This port will be used by the web server instance used by the installer, which uses a browser interface.
Enter any unused port number that is greater than 1024. (See Table 2-8). It will be replaced by the one used by the Sun™ ONE Web Server. When prompted, enter y to confirm.
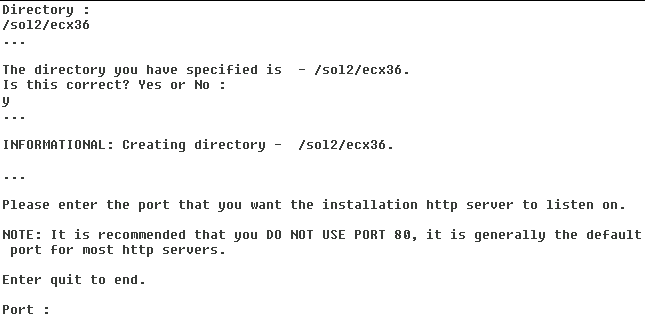
The files are unpacked into the destination directory you specified, and the installer does the following:
- Configures a temporary version of a Netscape web server. (The installer removes this server when installation is complete.)
- Starts the temporary web server
- Starts the Netscape web browser and displays the Sun license agreement.

- To continue with the installation, click Accept.
Running the ECXpert Installer
The rest of the installation process is browser-driven. Enter the information that you recorded in the Installation Worksheet in Table 2-8 when you are prompted to do so in the screens that follow.
- If you are migrating from ECXpert version 3.6.1, stop here and see Appendix A, "Upgrading to ECXpert 3.6.2."
- If you are re-installing ECXpert Version 3.6.2, stop here, and see Appendix B, "Reinstalling ECXpert."
Information in each Installer screen tells you the prerequisites, if any, for that step and what each step in the process is doing. The ECXpert Installer does not provide Back or Next buttons. To navigate between screens, use your browser's Back and Next buttons.
Step One: Begin the installation
- After you accept the terms of the license agreement, the installer displays the screen shown in Figure 3-1. Click Install ECXpert to begin the installation.
Figure 3-1 Step One: Start Installation

Step Two: Enter User and Group ID
- Enter the User ID and Group ID for the ECXpert Administrator user (typically ecxadmin). The screen provided shows the use of an alternate User and Group ID with both expressed as numeric values.
This is the user you created in "Create an ECXpert Admin User Account". The ECXpert administrator User ID and Group ID are the values you recorded in the Installation Worksheet.
- If the values shown are incorrect, change them to the correct values.
Figure 3-2 Step Two: User and Group ID

- When you are done, click Continue.
ECXpert will modify the configuration files to update the UserID and GroupID values. As this is done, the installer displays progress status messages, as shown in Figure 3-3.
Figure 3-3 Updating/Resetting Messages for UserId/GroupId

- When the process has completed, click Continue at the bottom of the screen to go to Step Three shown in Figure 3-4.
Step Three: Secure Trading Agent Configuration information
- Figure 3-4 and Figure 3-5 show the two parts of the screen provided for configuring ECXpert to use Secure Trading Agent for sending and retrieving ebXML messages.
- If you have not yet installed Secure Trading Agent or do not plan to use Secure Trading Agent to send and retrieve messages, leave the fields blank in these two screens and continue to Step 4.
- If you plan to use Secure Trading Agent to send and retrieve ebXML messages, check your Installation Worksheet for actual values associated with ebXML message exchange.
Figure 3-4 Step Three: Configuring ebXML Receive Agent
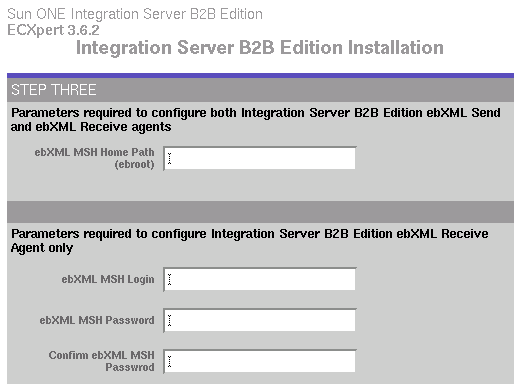
Table 3-1 describes the Receive Agent fields.
- Fill in the information for the Sender as explained in Table 3-2.
Figure 3-5 Step Three: Configuring ebXML Sender
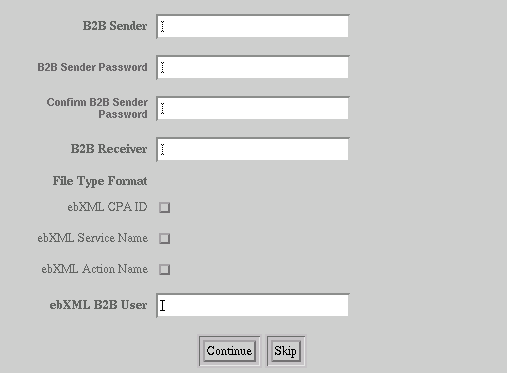
- Press Continue when you are done.
- If you have skipped the Secure Trading Agent configuration screens, the following screen is displayed:

- Press Continue to proceed with Step Four.
Step Four: Configure Partner Agent Server
If you plan to use the ECXpert Partner Agent server, you must enter the port numbers that the server will use. Proceed to Step 1.
If you do not use Partner Agent, you must still supply the port numbers as shown in Figure 3-6. These must be greater than 1024 and be unique. You can go ahead and use these ports for other purposes, but in order to proceed with ECXpert installation, you need to supply this information.
- Enter the ECXpert Partner Agent Server port information as shown in Figure 3-6. You can specify any port number that is not in use; the port number must be greater than 1024.
Figure 3-6 Step Four: Partner Agent Ports

A series of file-permission messages are displayed. Near the end of the message list will be numerous `changing permissions' messages, as shown in Figure 3-7.
Figure 3-7 Post Step Changing Permissions Messages

- Press the Continue button when the message postings have finished.
Step Five: Configure Database and Mailserver settings
As shown in Figure 3-8, Step Five of the ECXpert installation requires entries for your Oracle database and Mail Server parameter settings.
Figure 3-8 Step Five: Database and Mail Server

- For the Database entries, enter the values you recorded in the Installation Worksheet when you installed and configured your Oracle database.
If a value for Oracle Home is already listed, leave it as is. Otherwise, specify the directory where you plan to install Oracle.
- Enter values to configure the mail server: you have a choice of using SENDMAIL or POP3.
- If you choose Sendmail, you must supply a value for the Mail Host entry in the following format:
/var/mail/ECX_user_name
The Mail Spool file will default to the Mail Host directory if it is not specified. Make sure that the user specified as the ECX user is part of the mail group so that this user can send and receive mail.
- If you choose POP3, you must also specify the ECX user name and password. For example:
Figure 3-9 POP User Information
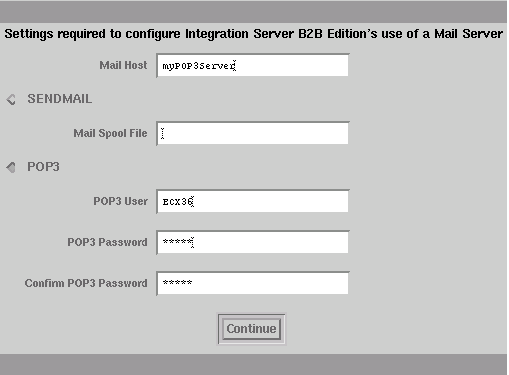
- Press Continue when finished.
The installer displays status like the following:
Figure 3-10 Database and Mail Server Messages

Step Six: Drop Existing Database Tables
As shown in Figure 3-11, Step Six automatically runs the SQL scripts that drop the database schema for the ECXpert database.
Caution
If you are upgrading or reinstalling ECXpert, stop here. If you Click Continue, your existing database will be overwritten.
- If you are migrating from ECXpert Version 3.6.1, skip Step Six and Step Seven. Then complete the rest of the steps and tasks described in this chapter. Resume with the upgrade procedure at Step 6.
- If you are re-installing ECXpert Version 3.6.2, skip Step Six and Step Seven. Then complete the rest of the steps and tasks described in this chapter. Resume with the reinstall procedure at Step 6.
Figure 3-11 Step Six: Drop Existing Database tables

- Click Continue to drop the database tables.
As the process runs, the installer displays progress status messages, as shown in Figure 3-12.
- When the process has completed, click Continue to go to the next step.
Figure 3-12 ECXpert Database Tables Dropped and Related Messages
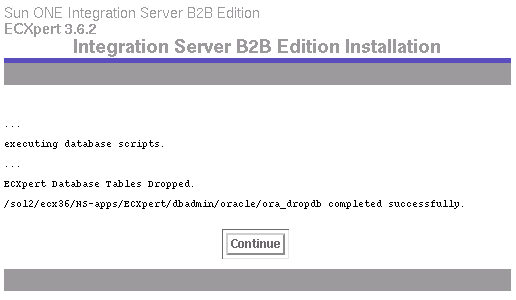
If you are overwriting an earlier installation of ECXpert (not preserving your ECXpert database), you may get the following error when dropping the Certificates table:
ORA-02266: unique/primary keys in table reference by enabled foreign key
To proceed, complete the following steps either before or after Step Six:
- In a terminal window, log in to svrmgrl as system/manager.
- Enter the following command sequence to drop and re-add the Oracle ECXpert user:
SVRMGRL> drop user ECX36 cascade
SVRMGRL> create user ECX36 identified by ECX36
default tablespace USERS temporary tablespace TEMP;
SVRMGRL> grant connect, resource to ECX36;
In the above commands, specify the user name you provided when creating the ECXpert Oracle user "Create the Oracle ECXpert User Account". This name and password is also noted in your Installation Worksheet.
- Resume the ECXpert installation where you left off (either Step Six or Step Seven).
Step Seven: Load the New Database
As shown in Figure 3-13, Step Seven creates and loads new ECXpert database tables. This step automatically runs the SQL scripts that create the database schema for the ECXpert database in the Oracle RDBMS, and encrypts and inserts member passwords.
Caution
You must SKIP this step if you are upgrading or reinstalling ECXpert!
Figure 3-13 Step Seven: Load New Database

- The action you take depends on whether this is a new install:
- If this is a new install, click Continue for Step Seven. As the process runs, the Installer displays a process log screen, as shown in Figure 3-14.
- If you are upgrading or re-installing the product, click Skip and do the following:
- If you are migrating from ECXpert Version 3.6.1, proceed normally for installer Steps Eight through Ten and complete the rest of the tasks described in this chapter. Continue with the upgrade procedure at Step 6.
- If you are re-installing ECXpert Version 3.6.2, proceed normally for installer Steps Eight through Ten and complete the rest of the tasks described in this chapter. Continue with the reinstall procedure at Step 6.
Figure 3-14 ECXpert Installer Step Seven Messages
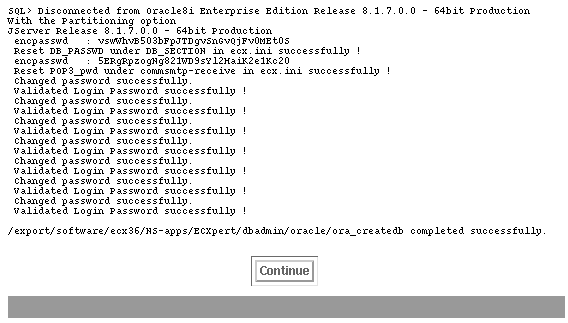
- When the process has completed, click Continue to go to Step Eight.
Step Eight: Initialize Certificates
As shown in Figure 3-15, Step Eight initializes certificates.
- Click Continue to perform this process.
Figure 3-15 Step Eight: Initialize Certificates

The Installer initializes VeriSign certificate files. As the process runs, the Installer displays process status messages, as shown in Figure 3-16.
- When the process has completed, click Continue to go to the next step.
Figure 3-16 ECXpert Installer Step Seven Messages
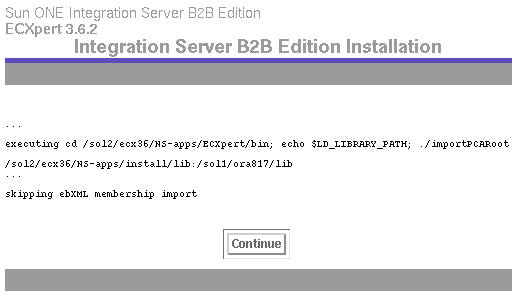
If you want to use certificates from other certificate authorities (CAs), add them manually after installation.
Step Nine: Clean up Files
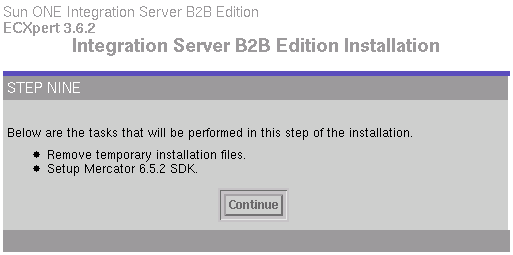
As shown in Figure 3-17, Step Nine cleans up the files from the temporary installation directory and installs the Mercator 6.5.2 SDK.
- Click Continue to perform this process.
Figure 3-17 Step Nine: Clean up Files
After the Installer completes its cleanup process, a message is displayed regarding the removal of all Template Files, as shown in Figure 3-18.
Figure 3-18 ECXpert Installer Step Nine Message
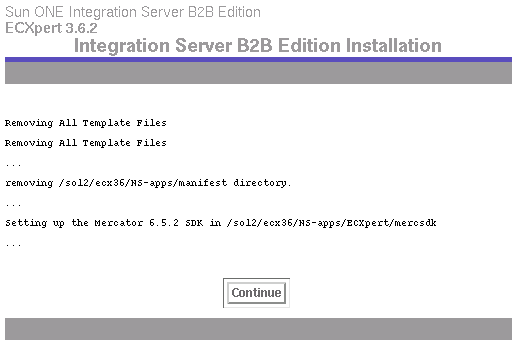
- Press Continue to advance to the next step.
Step Ten: Complete the Installation
As shown in Figure 3-19 Step Ten completes the ECXpert installation process, and cleans up the installation.
Figure 3-19 Step Ten: Complete Installation

To configure the Sun ONE Web Server
The ECXpert Installer displays the message INSTALLATION IS COMPLETE, as shown in Figure 3-20. It also displays instructions that you must follow to modify three configuration files: magnus.conf and obj.conf, for the Sun ONE Web Server and the jvm12.conf, for the Web Server's version 1.2 of the Java™ Virtual Machine. Information in these files is used to support the browser-based ECXpert Administration interface.
Figure 3-20 ECXpert Installer Step Ten Messages

- Follow the instructions shown in Figure 3-20 to edit the files magnus.conf, obj.conf, and jvm12.conf. In order for these changes to take effect, you will need to shut down and restart the Web Server. See the section "Apply Web Server ConfigurationFile Changes" to apply the configuration changes to the Web Server.
- Exit the browser.
- Eject the installation disk.
eject
If you get a "Device is busy" message, you may need to find other terminal windows which may have the directory /cdrom or /cdrom0 as the current working directory.
Otherwise, you may have been in the /cdrom or /cdrom0 directory when you issued the su command and the previous terminal session is still using the CD-ROM's directory as its current working directory. If so, issue the exit command to leave the shell for the new userid and go back to the previous userid's shell.
If you still cannot eject the ECXpert CD from the CD-ROM drive, check with your Unix System Administrator about stopping and restarting the Volume Manager.
Post-Installation Tasks
This section describes the tasks you must perform after installing ECXpert. These include
- Applying configuration changes
- Setting environment variables
Apply Web Server ConfigurationFile Changes
Follow these steps to apply the changes you have made to the web server configuration files obj.conf, magnus.conf, and jvm12.conf.
- Start your web browser and go to the following URL.
http://machine_name:port#/admin-serv/bin/index
- Enter the user ID and password.
Enter a user ID and password for a Sun ONE Web Server user with administrative privileges.
- Apply any changes you made to the web server configuration files.
- A message window appears telling you that you must apply your changes. Click OK.
- In the Sun ONE Web Server bar at the top of the screen, click Apply. The Apply Changes screen appears.
- Click Load Configuration Files for the Sun ONE Web Server.
- If the changes are successfully applied, a "success" message window appears. Click OK to continue.
- Exit your web browser.
Set Up Environment Variables
The routine operation of the ECXpert system, require the BDGHOME environment variable be properly set.
The value of BDGHOME is
Root_ECX_Install/NS-Apps/ECXpert
Root_ECX_Install is the directory that you specified as the directory for ECXpert at installation time.
You must set the BDGHOME variable explicitly if you plan to start ECXpert from the command shell. If you start ECXpert from a browser, you do not need to set the variable.
To set the BDGHome environment variable
- Change to the ECXpert Administrator user. For example:
# su - ecxadmin
- Determine the environment file to edit.
# echo $SHELL
The output of this command determines which environment file you must edit:
Output
Shell Being Used
Environment File
/sbin/sh
Bourne
.profile
/sbin/csh
C
.cshrc
/sbin/ksh
Korn
.profile or .kshrc
- Edit the definition of BDGHOME into the shell startup file according to the following instructions:
- If you are using the C shell, add the following line:
# setenv BDGHOME Root_ECX_Install/NS-apps/ECXpert
- If you are using the Bourne or Korn shell, add the following line:
# set BDGHOME=Root_ECX_Install/NS-apps/ECXpert
- Save the file and exit the text editor.
- Enable the BDGHOME environment variable.
Adding the BDGHOME to the environment file for the ECXpert Administrator user ensures that it is enabled every time the ECXpert Administrator user logs in. You can now enable BDGHOME by switching to another user and then switching back. For example:
# su - root
# su - ecxadminAlternatively, you could restart your system and log in as the ECXpert Administrator user.
Starting the ECXpert Administration Server
To start the ECXpert Administration Server
- Start up the browser and enter the following commands.
(Make sure you are logged in as the ECX admin user.)
- Display the ECXpert Administration home page.
Enter the URL:
http://hostname:port#
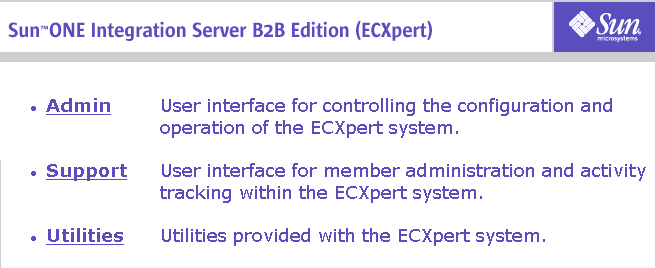
The ECXpert Main Screen appears, as shown in Figure 3-21.
Figure 3-21 ECXpert Main Menu
- Save the URL to the ECXpert Main Menu as a bookmark.
- Click Admin to start the ECXpert Administration Server.
The ECXpert Administration Server is not pre-configured with password protection. Use the Sun ONE Web Server Administration interface to enable this feature, if desired.
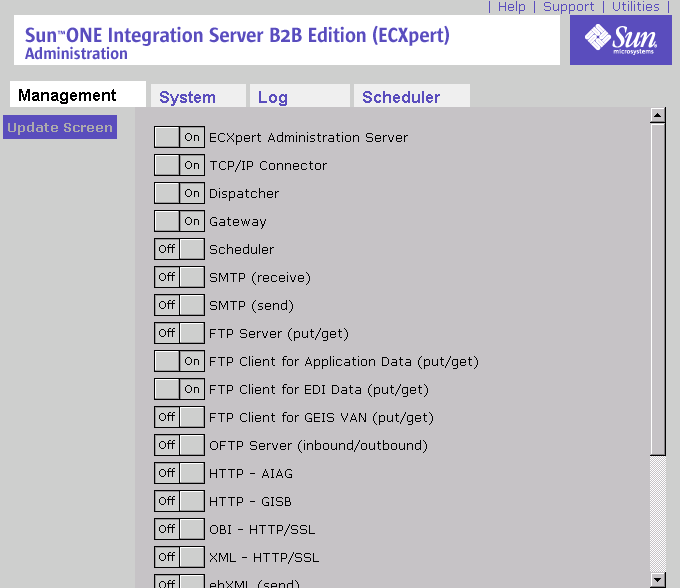
The Management screen appears, as shown in Figure 3-22 when the ECXpert Administration Server is On. If your screen shows the ECXpert Administration Server Off, click the On portion of the button's toggle to turn on the server.
Figure 3-22 ECXpert Administration Screen: Main Menu
- Click the UpdateScreen button to refresh the screen.
- Check that the following buttons are turned on. If they are not, turn them on now.
- ECXpert Admin Server
- TCP/IP connector
- Dispatcher
- Gateway
- FTP Client for Application Data
- Click Support in the top right corner.
- Enter the default ECXpert user name and password (ECX, ECX) as directed.
This will confirm that the directory server and database connections are functioning properly.
- Continue to the next chapter, Chapter 5, "Testing Your ECXpert Installation," to test your installation.
Enabling Special Features
The following sections explain how you do the following:
- Enable the Billing Code feature
- Enable the AIAG feature
- Enable expanded data fields
Enable the Billing Code Feature
To use the Billing Code feature
- The billing code feature in this release requires customers to update the database stored procedure. To do this, run the ora_pkgbody.sql script:
cd $BDGHOME/dbadmin/oracle
Start sqlplus using a command line the following:
sqlplus myaccount/mypassword@myserver
For example:
sqlplus ECX36/ECX36@myHost
- From the sqlplus prompt, run the script:
sqlplus> @ora_pkgbody.sql
- Restart ECXpert.
Enable the AIAG Feature
ECXpert 3.6.2 supports the AIAG E-5 2000 protocol standard on the Solaris platform. If your site uses this standard for business document processing, you will need to install support for documents exchanged with this protocol. The AIAG_setup.sh script creates or purges the AIAGTransaction Table, based on which option you specify. The syntax for invoking the AIAG_setup.sh script from a Bourne shell command line is:
% AIAG_setup.sh oracle_userame oracle_password tns_alias {create|purge}
Where:
- oracle_username is the login name used to login to oracle (e.g. oracle)
- oracle_password is the password used to log in to the oracle database. (e.g. oracle.sunone)
- tns_alias is the TNS alias string used to identify the oracle instance (e.g. ORAINST.SUNONE)
- {create|purge} where the create option creates the AIAG Transaction table if it does not exist, and the purge option deletes all records from AIAGTransaction Table
Enable Expanded Data Fields
ECXpert 3.6.2 supports larger data entry fields for the following parameters:
- senderid
- receiverid
To use this feature, run the following script as user ecxadmin from the UNIX prompt:
$BDGHOME/dbadmin/oracle/migration/35_to_36/enlarge_email_addr.sql
The ECXpert tables that are updated for char128 length are shown in Table 3-3: