|
|
| Sun ONE Integration Server B2B, ECXpert 3.6.2 Installation Guide |
Chapter 2 Preinstallation Tasks
This chapter describes the tasks you must perform before you can install ECXpert. ECXpert depends upon a number of external software systems, and these systems must be in place before you can install ECXpert.
Before you install ECXpert, you must do the following:
- "Verify Hardware and Operating System Requirements"
- "Verify Disk Space Requirements"
- "Verify TCP/IP Connectivity"
- "Create an ECXpert Admin User Account"
- "Set Up and Verify Oracle Support"
- "Install and Configure an LDAP Directory Server"
- "Install the Web Server"
- "Install the Sun ONE Messaging Server"
- "Install the Sun ONE Secure Trading Agent"
- "Installation Worksheet"
- "Where To Go Next"
The following sections describe these tasks in greater detail and provide instructions that are specific to each installation platform.
Note Print out the section "Installation Worksheet" and complete the information required in Table 2-8 as you complete the tasks described in this section. You will need this information during installation.
Verify Hardware and Operating System Requirements
This section describes the hardware and operating system requirements for installing ECXpert. See Table 1-1 for other software requirements.
Solaris Platform
Table 2-1 shows the hardware and operating system requirements for installing and using ECXpert in the Sun™ Solaris™ operating environment.
Table 2-1 Hardware and Operating System Requirements for Solaris
Hardware Platform
Operating System
Memory
Sun workstation
For the Mercator's Mercator Map Authoring System: Intel-based workstation running Windows 95, 98 or Windows NT.
Sun Solaris 2.6 (OS version 5.6) plus the patches listed in "Solaris 2.6 Patches".
-or-
Sun Solaris Version 2.7 (OS version 5.7) plus the patch cluster listed in "Solaris 2.7 Patches".
-or-
Sun Solaris Version 2.8 (OS version 5.8) - plus the patch cluster listed in "Solaris 2.8 Patches".
256 MB RAM (recommended) for each ECXpert machine.
For hard disk space requirements, see "Verify Disk Space Requirements".
Windows Platform
Table 2-2 shows the minimum hardware and operating system requirements for installing and using ECXpert in the Windows operating environment.
For hard disk space requirements, see "Verify Disk Space Requirements."
Verify Disk Space Requirements
Before you install ECXpert, make sure that you have sufficient disk space to run the application and its supporting Oracle data base. Disk space requirements include the following:
- 500 MB for ECXpert
- 1 GB for Oracle (Oracle does not have to be installed on the same host as ECXpert).
In addition, for Oracle, you must allocate sufficient disk space for tablespace and rollback management.
Tablespace management Use the following formula to estimate the Oracle tablespace size needed:
2.5 KB x dailyDocs x daysRetained
where
dailyDocs specifies the number of documents you expect to receive daily
daysRetained specifies the number of days you must retain these documents
For example, if you receive 5000 documents daily and you retain them for thirty days, you would calculate the required tablespace size as follows:
Rollback Segment Estimate 1.5 - 2 times the largest tablespace.
2.5 x 5000 x 30= 375,000 KB
Disk Space on Solaris
Use the following command to see the available volumes and their disk usage:
# df -k
The resulting output is similar to the following:
File system kbytes used avail capacity Mounted on
/dev/dsk/c0t3d0s0 401389 12499 348760 4% /
/dev/dsk/c0t3d0s6 105486 87205 7741 92% /usr
/proc 0 0 0 0% /proc
fd 0 0 0 0% /dev/fd
/dev/dsk/c0t3d0s4 106012 21457 73955 23% /var
/dev/dsk/c0t3d0s7 419319 9 377380 1% /export/home
/dev/dsk/c0t3d0s5 1253167 72516 1155341 92% /opt
/dev/dsk/c0t3d0s3 236816 106458 106678 50% /usr/openwin
/dev/dsk/c0t0d0s2 1952573 1137822 619501 65% /disk00
/dev/dsk/c0t1d0s2 14631 10595 2576 81% /disk01
/dev/dsk/c0t2d0s2 1952573 1625123 132200 93% /disk02
swap 414240 248 413992 1% /tmp
Make a note of the volumes you plan to use in the installation process. The ECXpert directory structure is shown in "Installed Directory Structure". This structure requires that the directories be created on a local device or an NFS-mounted device.
The initial installation of ECXpert creates all of the subdirectories below the installation location you specify (referred to as Root_ECX_Install).
After installing ECXpert, you may change the configuration to move certain directories to other device locations, for performance reasons and to provide better fault tolerance.
Disk Space on Windows
To determine available disk space on Windows, do the following:
- Open an MS-DOS window (Windows NT) or a Command Prompt window (Windows 2000).
- Change directories (if necessary) to make the disk you want information about your current directory.
- Assuming you're planning to install on the C drive, enter the following command:
C: dir
The output of this command specifies the amount of free disk space on the C drive (at the end of the directory listing).
Verify TCP/IP Connectivity
To be sure you have TCP/IP networking properly installed, the following conditions must be met:
- A permanent, static IP address is assigned to your machine (not a DHCP IP address).
- TCP/IP is bound to the actual network card
- DNS is configured (your machine's host name and domain names must be valid DNS entries)
Note On Solaris, the ECXpert Installer uses the domain name in /etc/resolv.conf, not an NIS domain name.
Connectivity on Solaris
To verify that your system is properly configured on Solaris
- Open a terminal window.
- Determine what your IP address is by entering the following command:
# ifconfig -a
Information similar to the following is displayed in response:
lo0: flags=849<UP,LOOPBACK,RUNNING,MULTICAST> mtu 8232
inet 127.0.0.1 netmask ff000000
hme0: flags=863<UP,BROADCAST,NOTRAILERS,RUNNING,MULTICAST> mtu 1500
inet 192.18.112.147 netmask fffffe00 broadcast 192.18.113.255
ether 8:0:20:d1:2c:2f
The internet address is specified by the inet value. In the sample reply above, the internet address for the machine is 192.18.112.147.
- Determine what your host name is by entering the command:
# /bin/hostname
The name for this machine's host is displayed.
- Determine what your domain name is. Type the command:
# /bin/domainname
The name for your machine's domain is displayed.
- Ping your host by entering the command:
# /usr/sbin/ping hostname
where hostname is the name of your host computer.
If your TCP/IP connectivity is working properly, the feedback from the ping command is:
hostname is alive
Connectivity on Windows
To verify that your system is properly configured on Windows
- Open an MS-DOS window (Windows NT) or a Command Prompt window (Windows 2000).
- Get configuration information by entering the following command at the prompt:
C:\ ipconfig /all
Or, you can enter this command to ping your host:
C:\> ping host
where host is the host name of your computer.
If your TCP/IP connectivity is working properly, the ping command should return a response like the following. In the output below, host_URL is the URL of your computer and host_IP_address is the IP address of your computer.
Pinging host_URL [host_IP_address] with 32 bytes of data:
Reply from host_IP_address: bytes=32 time<10ms TTL=64
Reply from host_IP_address: bytes=32 time<10ms TTL=64
Reply from host_IP_address: bytes=32 time<10ms TTL=64
Reply from host_IP_address: bytes=32 time<10ms TTL=64
C:\>
Create an ECXpert Admin User Account
Please follow the instructions given in the User Guide documentation for your platform to create a user account with administrative privileges. This will be the account under which you install and administer (startup and shut down) ECXpert.
Please note the user names and password that you create for your platform in the Installation Worksheet (Table 2-8). The name and password pair used in examples in this book are ecxadmin, ecxadmin.
Set Up and Verify Oracle Support
This section describes ECXpert's data storage needs and explains how you set up and verify Oracle support.
Data Storage in ECXpert
Two types of data are used in ECXpert: static data, which is read frequently but modified infrequently, and dynamic data, which is read and modified frequently. For example, in ECXpert, static data is used to record information about individual members; dynamic data is used for metadata about the data files received from a communications agent and processed by the system.
Dynamic data needs to be stored in a way that allows for fast and easy modification. Static data does not need to be updated often, and so the primary concern is speed of access.
- Relational database management systems (RDBMS) are used to modify data records and are well suited for storage of dynamic data. The RDBMS used in ECXpert is Oracle. (Oracle can also handle the storage of static data.)
- Lightweight Directory Access Protocol (LDAP) defines a directory-based data storage model, and is implemented as an API for constructing such a directory system. The directory-based storage model provides for fast and efficient data access, but does not offer much support for data modification. Thus, it is well-suited for storage of static data. ECXpert 3.6.2 supports LDAP directories for static data. See "Install and Configure an LDAP Directory Server" for more information.
Because Oracle can meet your needs for both dynamic and static data, you do not need LDAP storage. However, you might want to use LDAP to store information about individual members in those cases where that information must be shared with other systems that expect a directory structure. If you do decide to use an LDAP store, you need to determine whether ECXpert will act as the authority in maintaining, updating, and synchronizing data stored in Oracle with LDAP data; or whether your LDAP store should be read-only, leaving it to other software to make sure that data shared by LDAP and Oracle is properly updated in the Oracle database.
Working With Oracle
ECXpert depends upon the support of a relational database management system (Oracle 8.1.7). If you don't already have an Oracle installation, Appendix C "Installing Oracle" explains how you install Oracle on the Solaris and Windows platforms. Please review this appendix and make sure that your Oracle database is installed and properly configured to support ECXpert.
When setting up your Oracle database, you might also be interested in configuring a multi-threaded server (MTS). This is a server that allows many user processes to share a few server processes, thus maximizing the number of users that can be supported. With MTS configuration, many user processes connect to a dispatcher that directs multiple incoming network session requests to a common queue. An idle shared server process from a shared pool of server processes can then pick up a request from the queue. This allows a small pool of server processes to serve a large number of clients.
It is recommended that MTS be turned on when you install Oracle. Consult with your data base administrator to determine the compatibility of MTS with other Oracle instances.
On the Solaris platform, if you are planning to use a character set other than american_america.US7ASCII, you must take extra steps to make sure that ECXpert and Oracle can communicate. For additional information, see "Set Up Support for Foreign Character Sets".
Oracle on Solaris
After installing Oracle, as described in Appendix C "Installing Oracle", you must complete the following tasks:
- Increase the Size of the Oracle Tablespaces
- Edit the initECX.ora file
- Create the Oracle ECXpert user account
- Set up support for foreign character sets if needed
- Set up and test database connectivity
These tasks are described in the following sections.
Increase the Size of the Oracle Tablespaces
You might need to increase the Oracle tablespace USER_DATA from its default size to a size that will accommodate the volume of ECXpert transactions you anticipate generating. The section "Verify Disk Space Requirements" provides a formula you can use to estimate tablespace size requirements.
It is recommended that you allocate at least 100 MB for your USER_DATA tablespace. When setting the tablespace size, you should also enable the Oracle Auto-Extend feature, and set its value to approximately one fourth of the size you allocated for your tablespace. This ensures that your Oracle database will function properly with ECXpert.
Edit the initECX.ora File
You should open (and edit, as needed) the initECX.ora file to verify the use of the LARGE default values generated during the Oracle Enterprise Server installation process. Recommended values are indicated by the parameters shown in Table 2-3.
Create the Oracle ECXpert User Account
Follow these steps to create the Oracle ECXpert user account:
- Log onto Solaris with your Oracle account. For example:
login: oracle
password: oracle
- Launch the Oracle Server Manager utility.
# svrmgrl
SVRMGR> connect system/manager
The default password is manager; yours may differ.
- Create an ECXpert Oracle user; the following command creates the user account ECX36:
SVRMGR> create user ECX36 identified by ECX36
default tablespace USERS temporary tablespace TEMP;
SVRMGR> grant connect, resource to ECX36;
SVRMGR> grant unlimited tablespace to ECX36;
SVRMGR> exit
Server Manager Complete
#Set Up Support for Foreign Character Sets
Some ECXpert components are compiled with Oracle 7 libraries. This has no impact if you use the american_america.US7ASCII character set, but will prevent your being able to install the product on the Solaris platform if you use the WEISO8859P1 character set (which supports European special marks and characters). To solve this problem, you need to make the Oracle 7 *.nlb files available to your version of Oracle and then you need to set certain environment variables to point to them. This section explains how you do this.
- Locate the .nlb files from your Oracle 7 installation. These might be located as follows:
- In the $ORACLE_HOME/ocommon/nls/admin/data directory of your Oracle 7 installation
- In the directory you have saved the .nlb files from that installation.
- In the Oracle7nlb.tar.gz file on your ECXpert distribution disk.
- Copy these files to your Oracle 8 installation.
- Create a new directory Oracle7nlb in the directory $ORACLE_HOME/ocommon/nls/admin/data of your Oracle 8 installation.
- Copy the old Oracle 7 .nlb files (from Step 1) to this new directory.
- In the environment under which ECXpert and Oracle operate, set the NLS_LANG variable to american_america.WE8ISO8859P1.
- In the login environment for the Oracle 8 user, set the following variables as follows:
- ORA_NLS to point to $ORACLE_HOME/ocommon/nls/admin/data
- ORA_NLS33 to point to $ORACLE_HOME/ocommon/nls/admin/data
- ORA_NLS32 to point to $ORACLE_HOME/ocommon/nls/admin/data/Oracle7nlb
- Add the following lines to the ORACLE_ENV section of your $BDGHOME/config/ecx.ini file. For Oracle_Home_Path, specify the Oracle installation directory.
- NLS_LANG = american_america.WE8ISO8859P1
- ORA_NLS = Oracle_Home_Path/ocommon/nls/admin/data
- ORA_NLS33 = Oracle_Home_Path/ocommon/nls/admin/data
- ORA_NLS32 = Oracle_Home_Path/ocommon/nls/admin/data
Set Up and Test Database Connectivity
Before you install ECXpert, set up and test your database to be sure that user root has access to the database, so that you can successfully install ECXpert. If user root does not have database access, you will get error messages during ECXpert installation.
- Log in as user root.
# su - root
- Determine the shell that root uses.
# echo $SHELL
The output of this command identifies the shell that root uses, which determines its associated environment file:
Output
Shell Being Used
Environment File
/sbin/sh
Bourne
.profile
/sbin/csh
C
.cshrc
/sbin/ksh
Korn
.profile or .kshrc
- Determine the shell that oracle uses.
# cat /etc/passwd | grep oracle
The output of this command lists the shell at the end, as in the example below:
oracle:x:50004:10003::/export/home/oracle:/bin/csh
where the shell is csh.
- Get into the oracle shell.
Locate the shell in the "Output" column of the table in Step 2 above, then look up the entry in the "Environment File" column for the same row.
- If you are using the C shell, type the following command:
# source ~oracle/.cshrc
- If you are using the Korn shell or the Bourne shell, type the following command:
# . ~oracle/your_environment_file
where oracle is the Oracle user and your_environment_file is the name of your environment file.
- Check the environment settings.
# env
The following sample output of this command lists the environment variables that must be set:
In addition to the values above, on Solaris 2.6, you must also set the TNS_ADMIN variable as follows:
TNS_ADMIN = $ORACLE_HOME/network/admin
- Correct environment variable definitions as necessary.
If any of the above environment variables are not properly defined:
- Change to user oracle .
# su - oracle
- Open the environment file that you referenced in Step 4 above in a text editor and add or modify the definitions as necessary.
- Save the environment file and exit the text editor.
- Enable changes in environment variable definitions.
If you made changes in the environment file in Step 6 above, enable those changes now by switching to another user and then switching back:
# su - root
# su - oracleAlternatively, you could restart your system and log in as the Oracle user.
- Check your tnsnames.ora file.
Check your tnsnames.ora file to make sure it contains the correct information. For example:
SX = ECX36
(DESCRIPTION =
(ADDRESS = PROTOCOL = TCP) (Host=bobo) (Port=1521)
(CONNECT_DATA = (SID = ECX36)
- Connect to the database from the UNIX command line.
# sqlplus ECX36/ECX36@your_connect_string
If this test fails, skip to Step 11.
- Repeat the test from inside SQL*Plus:
SQL> connect ECX362/ECX362@your_connect_string
SQL> exit
- Correct any connectivity problems.
If you have successfully connected to the database using SQL*Plus, you will be able to connect during the ECXpert installation. If you cannot connect to the database using this method, you definitely will not be able to connect during the ECXpert installation.
For further Oracle troubleshooting tips, refer to the ECXpert Operations Reference Guide.
Oracle on Windows
After installing Oracle, as described in Appendix C "Installing Oracle", you must complete the tasks described in this section in order to do the following:
- Increase the size of Oracle tablespaces
- Edit the initECX.ora file
- Create the Oracle ECXpert user
- Set up and test database connectivity
Increase the Size of the Oracle Tablespaces
You might need to increase the Oracle tablespace USER_DATA from its default size to a size that will accommodate the volume of ECXpert transactions you anticipate generating. The section "Verify Disk Space Requirements" provides a formula you can use to estimate tablespace size requirements.
It is recommended that you allocate at least 100 MB for your USER_DATA tablespace. When setting the tablespace size, you should also enable the Oracle Auto-Extend feature, and set its value to approximately one fourth of the size you allocated for your tablespace. This ensures that your Oracle database will function properly with ECXpert.
For the other tablespaces the following size allocations are recommended:
These are general guidelines, and may not suit the requirements of your particular operating environment. Consult with your Oracle database administrator to evaluate the precise requirements for your site.
Edit the initECX.ora File
It is recommended that you review values stored in the initECX.ora file and edit these values if necessary. The file resides in the following directory:
drive:\Oracle\admin\host_name\pfile\
Specify the drive where your installed Oracle for drive; specify the name of the machine where you installed oracle for host_name.
These LARGE default values are generated during the Oracle Enterprise Server installation process. These default values are specified by the parameters shown in Table 2-5.
Create the Oracle ECXpert User
Use this procedure to create the user that will be accessing ECXpert database tables:
- Log onto a Windows Oracle account that has Oracle superuser privileges.
- Start SQL*Plus.
Select Start > Programs > Oracle - OraHome81 > Application Development > SQL Plus. This invokes the Oracle logon screen. See Figure 2-1.
Figure 2-1 Oracle SQL*Plus Login Screen
- In the User Name field, enter system.
- In the Password field, enter manager.
- At the SQL prompt, enter the following three SQL commands:
SQL> create user ECX36 identified by ECX36 default tablespace USERS temporary tablesapce TEMP;
SQL> grant connect, resource to ECX36;
SQL> grant unlimited tablespace to ECX36;Set Up and Test Database Connectivity
Follow the steps below to create a tnsnames.ora file. A sample tnsnames.ora file is in the directory C:\ORANT\NETWORK\NET80\ADMIN\SAMPLE, and you should use this file as a template for creating your own tnsnames.ora file.
Note In all examples of directories, "C:\" is used as the drive specifier. If you have installed Oracle on a drive other than C:\ you should use that drive specifier instead of C:\.
To create a tnsnames.ora file
- Using Notepad, open the file:
C:\ORANT\NETWORK\NET80\ADMIN\SAMPLE\TNSNAMES.ORA.
- Copy the following section from that file into a new ASCII text file:
myHost.world =
(DESCRIPTION =
(ADDRESS_LIST =
(ADDRESS =
(COMMUNITY = qa.world)
(PROTOCOL = TCP)
(HOST = sol)
(PORT = 1521)
)
)
(CONNECT_DATA =
(SID = OracleHost)
(GLOBAL_NAME = myHost.world)
)
)
- In the first line of the above text, substitute the name of your server for the word myHost. For instance:
my_ecx_server.world=
Make sure the server name you use here is exactly the same as the one you enter during the installation, when the installer asks you for the name of your server.
- Delete the following line from the file:
(COMMUNITY=tcp.world)
- Enter the real name of the host on which you are installing ECXpert.
In the seventh line, change the word sol to the name of the machine on which you are performing the installation. For example:
(HOST=my_ecx_server)
- Change the port number.
In the eighth line, change the port number to the number of the port on which your server will be listening. For example:
(PORT=5000)
- In the line
(SID = OracleSID)
change OracleSID to your Oracle SID.
- Save the new tnsnames.ora file.
Whatever text editor you used to create the file, make sure you save the file in ASCII format.
Now that you have a new, correctly edited tnsnames.ora file, you can test connectivity on your system.
- In the Windows NT task bar, select Start > Programs > Oracle for Windows NT > Select Application Development > SQL Plus.
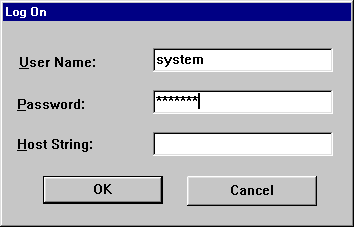
- In the SQL*Plus Log On dialog box, enter the username and password you created for your ECXpert account. In the Host String field, enter the host name you used in the tnsnames.ora file.
Figure 2-2 Log On Dialog Box

If everything is working correctly, the Oracle server will return with the following status message:
Connected to:
Oracle8 Enterprise Edition Release 8.1.7 - Production
With the Partitioning and Objects options
PL/SQL Release 8.1.7 - ProductionIf you don't see the above message (or one similar to it), or you get an error message, check both the tnsnames.ora file and the listener.ora file to make sure all the values are correct. Repeat Step 1 and Step 2 above. If everything is correct you will see the above status message. If you don't, or you see an error message, go back and make sure you have set everything up correctly.
For further Oracle troubleshooting tips, refer to your Oracle documentation and the ECXpert Operations Reference Guide.
Install and Configure an LDAP Directory Server
You have the option of using an LDAP server. ECXpert supports the use of LDAP directory servers for storage of static data, such as membership information. You can also use Oracle to store membership information and other static data. If you prefer to use LDAP, you must install it and configure it as explained in the documentation provided by your LDAP provider. (If you are using the Sun ONE Directory Server as your LDAP provider, you must install the Sun ONE Directory Server before you install the Sun ONE Web Server.)
Once you configure ECXpert for use with LDAP, any changes to the LDAP repository will also be applied to the Oracle database, however, ECXpert will use the LDAP repository for membership information retrieval and authentication. When using ECXpert's graphical administration interface or ECXpert's API, both reporistories are kept in sync, but the LDAP respository is the primary source.
For information about ECXpert's use of dynamic and static data, see "Data Storage in ECXpert".
If you already have an LDAP server installed, you will need to restart it in order for the server to be properly configured. The ECXpert installer will add some predefined membership information to this directory at installation time if LDAP is installed and properly configured.
Refer to the iPlanet Directory Server 5.1 Installation Guide for complete information on installing the Sun ONE Directory Server.
For instructions on configuring an LDAP directory server, refer to Chapter 5 of the ECXpert Administrator's Guide, as well as the iPlanet Directory Server Administrator's Guide.
Refer to the ECXpert Administrator's Guide for configuration information for both Sun ONE Directory Server and the Sun ONE Web Server.
Table 2-6 lists information you will need if you install an LDAP server.
Restarting and Configuring LDAP on Solaris
To configure and restart the LDAP server on Solaris
- Shut down the LDAP server (if any).
# ./LDAP_Install_dir/slapd-conf/stop-slapd
where LDAP_Install_dir is your LDAP server installation directory.
- Copy the files ECXpert_user_at.conf and ECXpert_user_oc.conf (in the $BDGHOME/dbadmin/oracle/ directory) to the directory LDAP_Install_dir/slapd-hostname/config.
- Make the following entries in the file LDAP_Install_dir/ns-schema.conf:
include LDAP_Install_dir/slapd-host/config/ECXpert_user_at.conf
include LDAP_Install_dir/slapd-host/config/ECXpert_user.oc.conf
- Restart the LDAP sever:
# LDAP_Install_dir/slapd-host/restart-slapd
Restarting and Configuring LDAP on Windows
To configure and restart the LDAP server on Windows
- Shut down the LDAP server (if any).
In a Command shell window, type:
C:\> .\LDAP_Install_dir\slapd-conf\stop-slapd
where LDAP_Install_dir is your LDAP server installation directory.
- Copy the files ECXpert_user_at.conf and ECXpert_user_oc.conf (in the BDGHOME\dbadmin\oracle\ directory) to the directory LDAP_Install_dir\slapd-host\config
- Add the following lines to the LDAP_Install_dir\ns-schema.conf file:
include LDAP_Install_dir\slapd-host\config\ECXpert_user_at.conf
include LDAP_Install_dir\slapd-host\config\ECXpert_user.oc.conf
- Restart the LDAP sever.
In the Command window type:
C:\> LLDAP_Install_dir\slapd-host\restart-slapd
Install the Web Server
ECXpert's administration GUI uses a web server to provide a browser-based administration interface. If you do not have a web server installed on your machine, you need to install it before installing ECXpert. (For ECXpert 3.6.2, you will need to install the Sun ONE WebServer version 6, service pack 5.)
- On the Solaris platform, install the Sun ONE Web Server, Enterprise Edition by following the instructions provided with the software.
When you install the Sun ONE Web Server, be sure to create an Enterprise Server instance with Server User set to the same user ID as the one you specified in "Create an ECXpert Admin User Account".
- On the Windows platform, install the Sun ONE Web Server, Enterprise Edition by following the instructions provided with the software.
When you install the Sun ONE Web Server, be sure to log onto your Windows machine using the ECXpert admin user account you created in "Create an ECXpert Admin User Account".
Install the Sun ONE Messaging Server
If you are planning to use SMTP as one of your communications protocols, you should install the Sun ONE Messaging Server. For installation instructions, refer to the iPlanet Messaging Server Installation Guide for your platform.
- On Solaris, ECXpert 3.6.2 supports either POP3 (which requires the Sun ONE Messaging server) or SendMail. If you use the SendMail interface, then you don't have to install the messaging server.
- On Windows, you must install the Sun ONE Messaging server to use SMTP.
Install the Sun ONE Secure Trading Agent
This release of ECXpert includes Sun Open Net Environment (Sun ONE) Integration Server, Secure Trading Agent, which provides an environment for deploying ebXML agreements and exchanging ebXML messages with trading partners based on those agreements. (Secure Trading Agent is supported on Windows 2000 and Solaris version 8.)
When you install ECXpert, you can configure it to retrieve ebXML messages from and send ebXML messages to a Secure Trading Agent installation.
Installing Secure Trading Agent.
To install Secure Trading Agent, follow the instructions in the Secure Trading Agent Installation Guide. Secure Trading Agent and the Secure Trading Agent Installation Guide are available on the Secure Trading Agent CD provided with your ECXpert distribution.
For information on how to configure ECXpert so it can access a Secure Trading Agent installation, refer to the manual ECXpert Support for ebXML Messaging, which is an addendum to the ECXpert Administrator's Guide.
Configuring ECXpert to Work with Secure Trading Agent
When installing ECXpert the ECXpert installer prompts you for the following information about your Secure Trading Agent installation:
Installation Worksheet
Please fill out the following Installation Worksheet table. You will need this information when you install ECXpert.
Table 2-8 Installation Worksheet (1 of 6)
item
Value
Install Directory
or
Destination Directory
Enter the full path name for Root_ECX_Install, that is, the directory in which you installed ECXpert.
Solaris example: /disk1
Windows example: c:\Apps
Enter your value here:
Temporary Installation Port for Installer (Solaris only)
This port is used by the web server instance used by the installer, which uses a browser interface. Enter any unused port number except 80.
To see what port numbers are already in use enter the following command:
# netstat -an | grep -i `listen'
Enter your value here:
Web Server Instance Port and Host Name
If the Windows installer detects a web server (http server) on your machine, it displays the port number associated with that server and the name of the host on which it runs. If you want ECXpert to use a different web server, specify its port number and host name.
For example:
1055
joannahost
Enter your values here:
Web Server Instance destination location
The directory where your web server instance is located.
Windows: c: \apps\myWS
Enter your value here:
ECXpert Admin User
This is the information you entered when you completed the tasks in "Create an ECXpert Admin User Account".
Solaris: note the User ID and Group ID.
Windows: note the User ID and Password.
Enter your value here:
Oracle Information
Oracle Home
(ORACLE_HOME)
Enter the directory that contains the Oracle software. This is the ORACLE_HOME path name. Instructions for installing Oracle are given in "Installing Oracle".
Solaris: /oracle/ora81
Windows: D:\oracle\ora81
Enter your value here:
Oracle SID
(ORACLE_SID)
Enter the Oracle SID, which is the name of the Oracle Server Instance. To get this value, see "Installing Oracle".
Solaris: myOracleSID
Windows: myOracleSID
Enter your value here:
NLS Language
Enter the NLS _LANG character set. To get this value, see Table C-1. By default, the value is american_america.US7ASCII.
Note that the character set specified by this value must match the character set specified for your Oracle installation. If these values do not match, you will not be able to install ECXpert.
On the Solaris platform, if you want to use the character set american_america.WE8ISO8859P1, you must also complete the steps described in "Set Up Support for Foreign Character Sets".
Enter your value here:
SQL*Net TNS Alias
(Solaris)
Server (Windows)
Find this value in the tnsnames.ora file. This value is also known as the SQL*Net Connect String.
Enter your value here:
ECXpert Oracle User
(Windows)
Database user
(Solaris)
Enter the name of the user who owns the ECXpert tables in the database.
Solaris: Specify the value you used when you created the Oracle user in "Create the Oracle ECXpert User Account".
Windows: Specify the value you used when you created the Oracle user in "Create the Oracle ECXpert User".
Enter your value here:
Database password
Enter the password of the user who owns the ECXpert tables in the database.
Solaris: Specify the value you used when you created the Oracle user password in "Create the Oracle User".
Windows: Specify the value you used when you created the Oracle user password in "Create the Oracle User".
Enter your value here:
Secure Trading Agent Information
EBROOT
(Secure Trading Agent Home Path)
The path to your installation of Secure Trading Agent. The default paths for Solaris and Windows platforms are as follows:
Solaris: /opt/SUNWebXML/S1ISSTA
Windows: C:\Sun\SUNWebXML\S1ISSTA
Specify the default path or your custom path if you modified the defaults.
Enter your value here:
ebXML User
Id and Password
The user Id and password for the Secure Trading Agent user that has access to send and retrieve messages. This user can be a Secure Trading Agent administrator or simply a Secure Trading agent normal user.
Secure Trading Agent uses the system user Id and system password to authenticate Secure Trading Agent administrators and regular users. Refer to the Secure Trading Agent documentation for more information.
Enter your values here:
ebXML B2B User
The ebXML B2B user corresponds to a Secure Trading Agent user role. You define the name of the Secure Trading Agent user role in Secure Trading Agent.
If you have not yet defined a user role in Secure Trading Agent, pick a name for the ebXML B2B user here and use that name later to define the user role in Secure Trading Agent.
Enter your value here:
B2B Sending Member and Password
All documents retrieved by the ebXML Communication Agent are submitted with this member as the sending member. Specify the user name of the sending member and the member's password.
Enter your values here:
B2B Receiving Member
All documents retrieved by the ebXML Communication Agent are submitted with this member as the receiving member. Specify this user's name.
Enter your value here:
File Type Format
Select one or more fields to identify the B2B file type format for retrieving ebXML messages. The Receive Communication Agent uses the file type format to construct the filetype submission parameter when submitting retrieved messages.
By default, ebXML CPA ID and ebXML Action Name are selected. If you do not know what to specify here, accept the defaults.
Enter your value here:
Partner Agent Information (Solaris only)
PAS Admin Port
If you are using Partner Agent, specify the port number you want assigned to this port. If you are not using Partner Agent, you must still assign a port number to complete your installation of ECXpert; however, the port will not be used and will be available for your use. The port number must be greater than 1024 and be unique.
Enter your value here:
PAS Agentd Port
If you are using Partner Agent, specify the port number you want assigned to this port. If you are not using Partner Agent, you must still assign a port number to complete your installation of ECXpert; however, the port will not be used and will be available for your use. The port number must be greater than 1024 and be unique.
Enter your value here:
PAS FTPD Port
If you are using Partner Agent, specify the port number you want assigned to this port. If you are not using Partner Agent, you must still assign a port number to complete your installation of ECXpert; however, the port will not be used and will be available for your use. The port number must be greater than 1024 and be unique.
Enter your value here:
PAS HTTPD Port
If you are using Partner Agent, specify the port number you want assigned to this port. If you are not using Partner Agent, you must still assign a port number to complete your installation of ECXpert; however, the port will not be used and will be available for your use. The port number must be greater than 1024 and be unique.
Enter your value here:
PAS HTTPSD Port
If you are using Partner Agent, specify the port number you want assigned to this port. If you are not using Partner Agent, you must still assign a port number to complete your installation of ECXpert; however, the port will not be used and will be available for your use. The port number must be greater than 1024 and be unique.
Enter your value here:
Mail Server Information
POP3 User
Enter the user id for the POP3 user. (This is the user account created in the POP3 SMTP server.)
Enter your value here:
POP3 Password
Enter the password for the POP3 user. (This is the user account created in the POP3 SMTP server.)
Enter your value here:
Mail Host
Enter your mail host name. If you are using, Sendmail, this is the name of the machine you are receiving mail on. If you are using POP3, this is the name of the SMTP server.
Enter your value here:
Mail Spool File
(SendMail only)
Enter the path to your mail directory.
Solaris example: /var/mail/ecxadmin
Enter your value here:
Where To Go Next
You are now ready to install ECXpert.
- For installation instructions on the Solaris platform, see "Installing ECXpert on Solaris".
- For installation instructions on the Windows platform, see "Installing ECXpert on Windows".