| Skip Navigation Links | |
| Exit Print View | |

|
Oracle Identity Synchronization for Windows 6.0 Installation and Configuration Guide |
| Skip Navigation Links | |
| Exit Print View | |

|
Oracle Identity Synchronization for Windows 6.0 Installation and Configuration Guide |
Part I Installing Identity Synchronization for Windows
Creating a Sun Java System Directory Source
To Create a New Sun Java System Directory Source
Preparing Sun Directory Source
To Prepare your Directory Server Source
Creating an Active Directory Source
To Configure and Create Windows Active Directory Servers in a Network
Creating a Windows NT SAM Directory Source
To Deploy Identity Synchronization for Windows on Windows NT
Selecting and Mapping User Attributes
Selecting and Mapping Attributes
To Select and Map Attributes for Synchronization
Creating Parameterized Default Attribute Values
To Change the Default Schema Source
Propagating User Attributes Between Systems
Specifying How Object Creations Flow
To Specify How Object Creations Should Flow Between Directory Server and Active Directory Systems
Specifying New Creation Attributes
Specifying How Object Modifications Flow
Configuring and Synchronizing Object Activations and Inactivations
Specifying Configuration Settings for Group Synchronization
Configuring and Synchronizing Account Lockout and Unlockout
Prerequisites for Account Lockout
Using the Account Lockout Feature
To Specify how Deleted Entries Flow Between Directory Server and Active Directory Systems
Creating Synchronization User Lists
To Identify and Link User Types Between Servers
To Save your Current Configuration from the Console Panels
6. Synchronizing Existing Users and User Groups
9. Understanding Audit and Error Files
Part II Identity Synchronization for Windows Appendixes
A. Using the Identity Synchronization for Windows Command Line Utilities
B. Identity Synchronization for Windows LinkUsers XML Document Sample
C. Running Identity Synchronization for Windows Services as Non-Root on Solaris
D. Defining and Configuring Synchronization User Lists for Identity Synchronization for Windows
E. Identity Synchronization for Windows Installation Notes for Replicated Environments
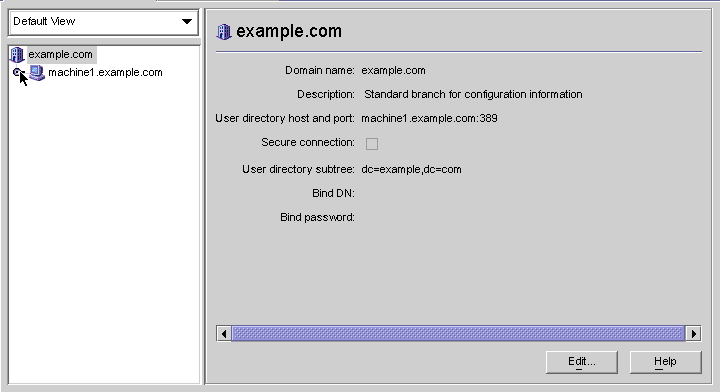
The Sun Java System Server Console window lists all of the servers and resources under your control and provides information about your system.
Figure 4-2 Sun Java System Server Console

Note - If you have not logged into the Sun Java System Server Console yet, return to Figure 3-9 for instructions.
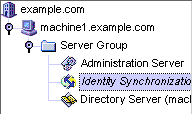
Figure 4-3 Expanding the Server Group

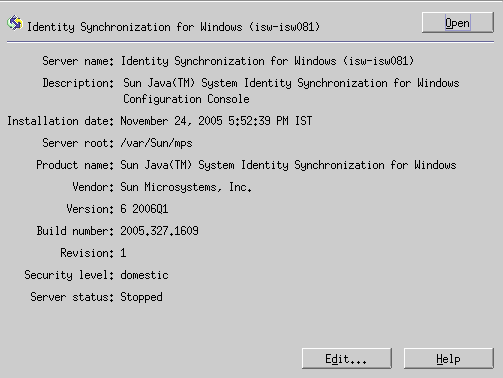
The information panel changes to provide information about Identity Synchronization for Windows and your system.
Figure 4-4 Information Panel

Note - The Edit button (located at the bottom of the panel) enables you to edit the Server name and Description.
The Identity Synchronization for Windows Console is displayed, as follows:
Figure 4-5 Console: Tasks Tab

This window contains three tabs:
Tasks (Default): Use this tab to stop and start synchronization between your Sun and Windows systems. (Information about starting and stopping services is provided in Starting and Stopping Synchronization)
Note - Do not confuse starting and stopping Synchronization Services with starting and stopping Windows services.
To start or stop Windows services, you must do so from the Windows Console by selecting Start -> Console -> Administrative Tools -> Computer Management -> Services.
Configuration: Use this tab to configure your systems for synchronization.
Status: Use this tab to do the following:
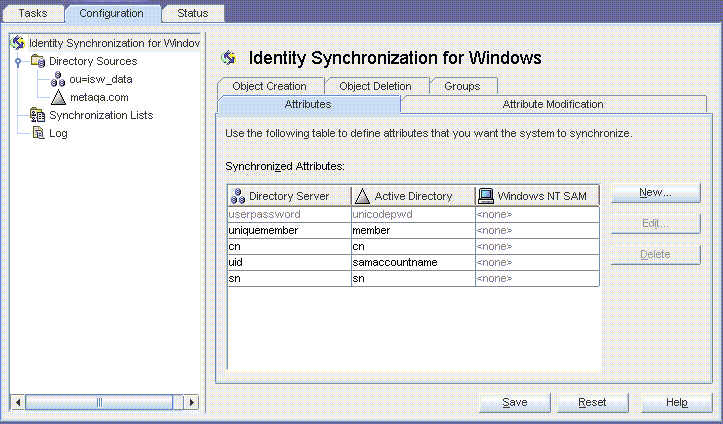
Figure 4-6 Console: Configuration Tab

The Configuration panel consists of the following tabs:
Attributes: Use this tab to specify the attributes you want to synchronize between systems.
Attribute Modification: Use this tab to specify how passwords, attribute modifications, and object disablements are propagated between systems.
Object Creation: Use this tab to specify how newly created passwords and attributes are propagated between systems, and to specify initial values for the objects created by Identity Synchronization for Windows during synchronization.
Object Deletion: Use this tab to specify how deleted passwords and attributes are propagated between systems.
You must configure at least one Sun Java System Directory Server directory source, and at least one Windows server directory source (either Active Directory or Windows NT). Proceed to the next section for instructions.