JavaScript is required to for searching.
Skip Navigation Links
Exit Print View
Configuring SAP R/3 for the Oracle Java CAPS SAP BAPI Adapter     Java CAPS Documentation
search filter icon
search icon

Document Information

Configuring SAP R/3 for the SAP BAPI Adapter

Creating the RFC Destination for the Adapter

To Create the RFC Destination for the Adapter

Configuration Needed in SAP R/3 to Send and Receive IDocs

Configuring the Distribution Model

To Name the Logical System

To Specify the Distribution Model

Configuring Communications

To Define the Communications Port

To Create a Partner Profile

To Configure a Partner Profile

Configuring the Distribution Model

You need to complete the following in SAP R/3 to run a RFC BAPI inbound.

Figure 9 SAP R/3 System Window
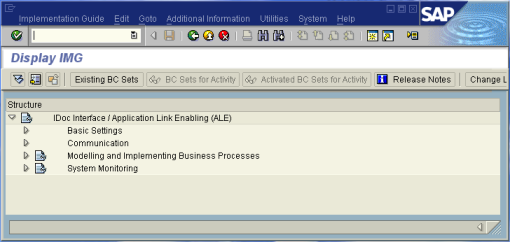
image:SAP R/3 System Window

To Name the Logical System

Transaction: SALE

  1. In the SAP R/3 System home window (shown above), type SALE into the command field and click Enter.

    The Distribution (ALE) Structure window appears.


    image:Distribution (ALE) Structure
  2. Expand IDoc Interface / Application Link Enabling (ALE) > Basic Settings > Logical Systems > Define Logical System.
  3. Click the Activity button and select Define Logical System.

    The Logical Systems Overview window appears.

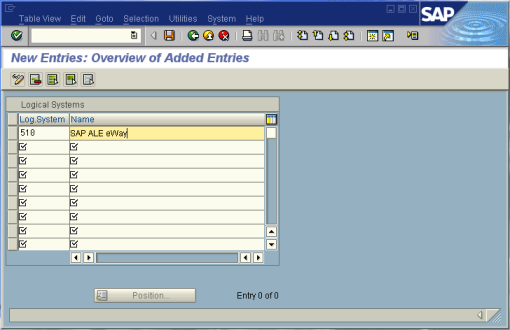
  4. Click the New entries button.

    The New Entries window appears.

  5. Enter the logical name for your SAP Adapter using capital letters and a brief descriptive name.
    image:New Entries Window
  6. Click Save.

    The Change Request Entry window appears.


    image:Change Request entry window
  7. Click the Create request button.

    The Create Request window appears.

  8. Enter a short description (for example, Adapter Test) and click Save.

    The Change Request entry window appears.

  9. Click Enter to add the new data into the system.

    You are now returned to the Logical Systems Overview window, and the new Logical System appears in the list.

  10. Click Save and select the Back button repeatedly until the SAP R/3 System window appears

To Specify the Distribution Model


Caution

Caution - It is recommended that you use the Z prefix when defining a name. This prefix is reserved for external use, and will not conflict with any SAP naming conventions. Using the Z prefix will also prevent any interference with standard SAP functionality or conflicts with standard SAP terminology.

Transaction: SALE


  1. In the SAP R/3 System home window, type SALE into the command field and click Enter.

    The Distribution (ALE) Structure window appears.
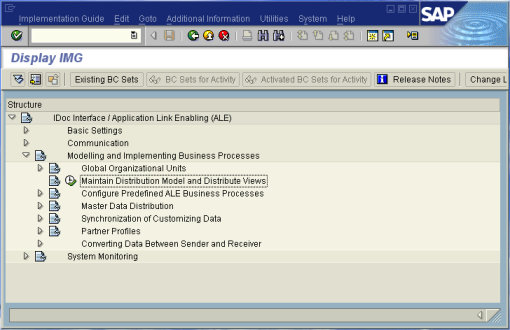

    image:Distribution Structure Model
  2. Click the Activity button next to Maintain Distribution Model and Distribute Views.

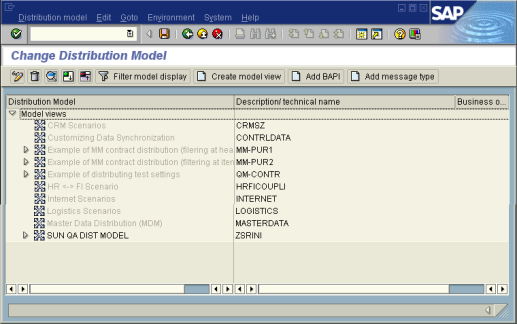
    The Maintain Distribution Model window appears.
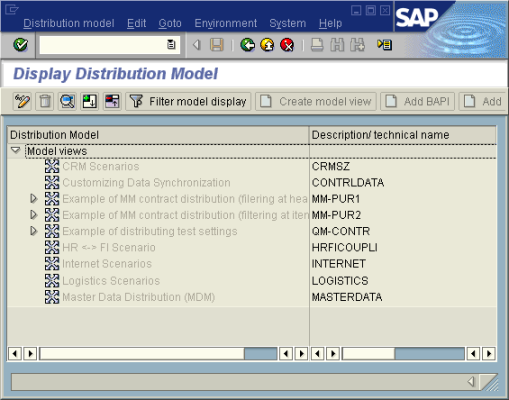

    image:Maintain Distribution Model
  3. Select the Menu path Edit > Model View > Create.

    The Create Model View dialog box appears.
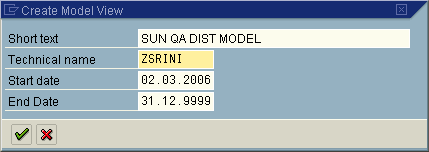

    image:Create Model View
  4. Enter the logical name you want for the new Distribution Model View, along with a brief descriptive name or message (for your own use).
  5. Click Continue (Enter), which returns you to the previous window. Your new Model View now appears in the tree, as shown in the following figure.
    image:Maintain Distribution Model Tree
  6. Highlight the new entry and select Add Message Type.

    The Add Message Type dialog box appears.
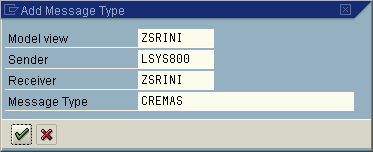

    image:Add Message Type
  7. Type the desired values for the four parameters into the text boxes, or select them from the drop-down menus.

    For example, CREMAS is the message type used for Creditor Master Data.

  8. Select Continue (Enter), which returns you to the previous window.

    The values you select now appear in the Distribution Model tree, as shown in the following figure.
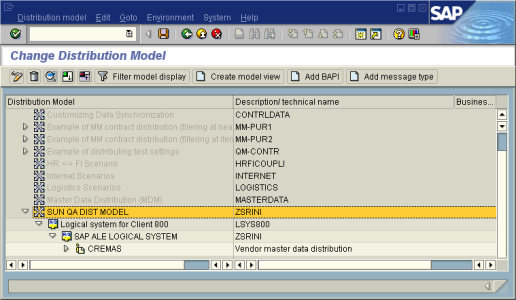

    image:Distribution Tree Model
  9. Save your entry, click Back and then Cancel to return to the Distribution Structure window.