JavaScript is required to for searching.
Skip Navigation Links
Exit Print View
Configuring SAP R/3 for the Oracle Java CAPS SAP BAPI Adapter     Java CAPS Documentation
search filter icon
search icon

Document Information

Configuring SAP R/3 for the SAP BAPI Adapter

Creating the RFC Destination for the Adapter

To Create the RFC Destination for the Adapter

Configuration Needed in SAP R/3 to Send and Receive IDocs

Configuring the Distribution Model

To Name the Logical System

To Specify the Distribution Model

Configuring Communications

To Define the Communications Port

To Create a Partner Profile

To Configure a Partner Profile

Configuring Communications

This section describes the following communication configuration tasks.

Figure 10 SAP R/3 System Window

image:SAP R/3 System Window

To Define the Communications Port

The Communications Port defines the type of connection with the Partner (see To Create a Partner Profile). This task is used to specify the outbound file name, directory path, and any associated function modules.

Transaction: WE21

  1. In the SAP R/3 System home window, type WE21 into the command field and click Continue (Enter).

    The WF-EDI Port Definition window appears.
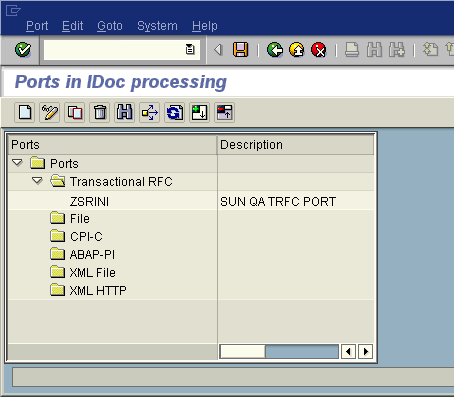

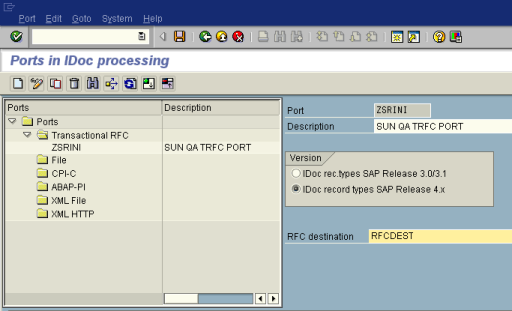
    image:WF-EDI Port Definition tree
  2. Expand the tree under Transactional RFC to display the currently-defined Ports.
  3. Select the desired Port from the list, or select Change to display the Port Definition for Asynchronous RFC Overview window.
    image:Port Details Window
  4. Enter a Version (to specify the IDoc record type), Logical destination, and Description, matching the entries made previously.
  5. Select Enter.

    The Change Request Query dialog window appears. Note that you must have CTS (Correction and Transport System) turned on for this screen to appear.

  6. Select Create Request.

    The Create Request dialog window appears.

  7. Enter a Short description and click Save.
  8. Select Back repeatedly to return to the SAP R/3 System window.

To Create a Partner Profile

This task is used to demonstrate how to create the Partner for the Logical System you created earlier. Note that the LS Partner Type is used for all ALE distribution scenarios.

Transaction: WE20

  1. In the SAP R/3 System home window, type WE20 into the command field and then click Continue (Enter).

    The Partner Profile: Initial Screen window appears.
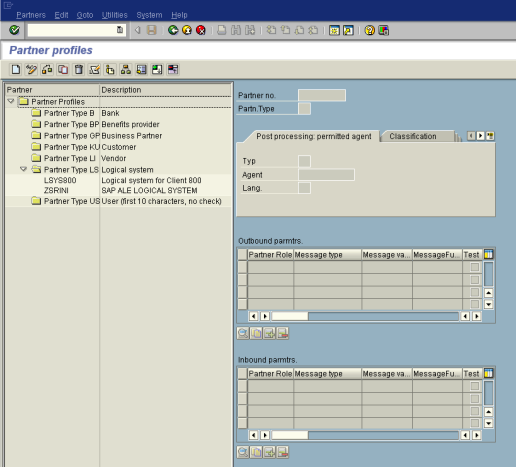

    image:Partner Profile Initial
  2. Enter the name of the logical system created previously in the Partner number field, select LS for the Partner type, and select Create.

    The Partner is created and the Create Partner Profile <Partner Number> window appears.
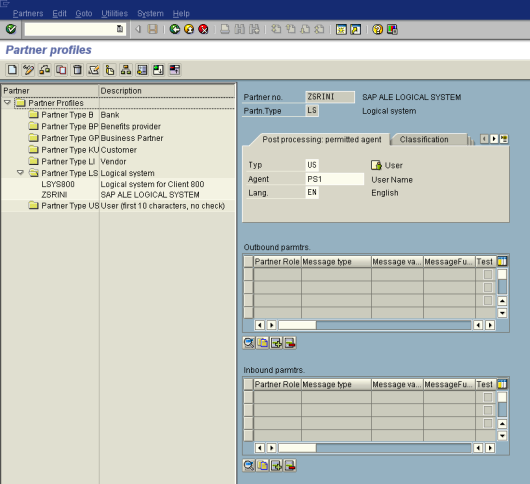

    image:Create Partner profile
  3. Under the Classification tab, select ALE for the Partner class and A (Active) for the Partner status, then Save.

    You now have created the Partner, and need to continue to the next section to configure the Partner Profile.

To Configure a Partner Profile

This task is used to demonstrate how you configure the Inbound/Outbound Parameters in the Partner Profile.

Transaction: WE20
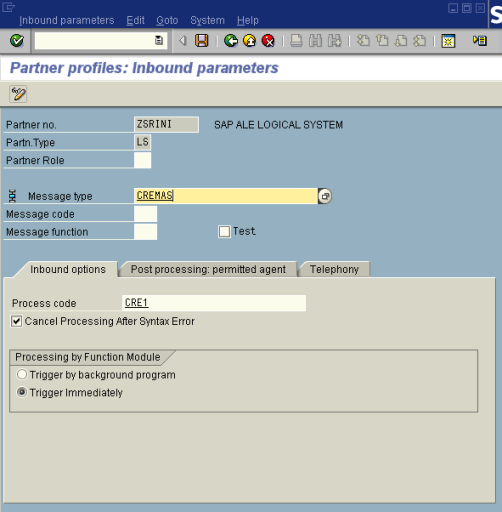
  1. In the Partner Profile: Initial Screen window, select the desired Partner Number, for example ZSRINI.
  2. Select the Inbound parameters.
    image:New Entry Details
  3. Select CREMAS as a Message type and CRE1 as a Process code from the drop-down menus, then click Save.

    The entries now appear in the list in the EDI Partner Profile: Inbound Parameters Overview window.
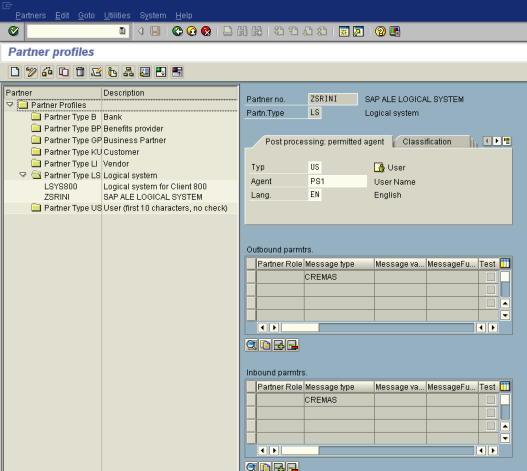
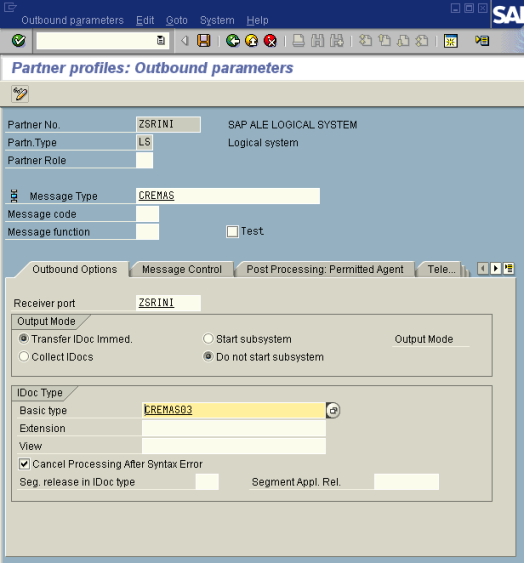
    image:EDI Partner Profile
  4. Follow the same procedure for Outbound parameters, as seen in the following figure.
    image:EDI Outbound Parameters
  5. After making your entries, click Save and then click Back to get to the main SAP R/3 System window.