| Skip Navigation Links | |
| Exit Print View | |

|
Oracle Java CAPS Scheduler Binding Component User's Guide Java CAPS Documentation |
| Skip Navigation Links | |
| Exit Print View | |

|
Oracle Java CAPS Scheduler Binding Component User's Guide Java CAPS Documentation |
Using the Scheduler Binding Component
About the Scheduler Binding Component
Scheduler Binding Component Features
Using the Scheduler Binding Component in a Project
Steps to Create the BPEL Project
Create a Scheduler Binding Component
Create a File Binding Component
Create a Composite Application
Using the Scheduler Control and Triggers Wizard
Accessing the Scheduler Control and Triggers Wizard
Understanding the Scheduler Wizard
Using the Add New Simple Trigger Editor
Using the Add New Cron Trigger Editor
Using the Add New Hybrid Trigger Editor
Example Hybrid Trigger Configuration
Adding Triggers and Editing an Existing Scheduler Project
Accessing the Configure Scheduler Binding Wizard
Scheduler Binding Component Properties
Runtime Properties for the Scheduler Binding Component
Scheduler Binding Component Loggers
Using the Trigger Properties Editor
Trigger Configuration Properties
Scheduler BC Normalized Message Properties
Scheduler Application Configuration
Using Scheduler Binding Component Application Configuration
Defining the Scheduler Application Configuration for a Project
Scheduler Binding Component Application Variables
Using Application Variables in a Trigger Message
Creating and Using Application Variables
Using Admin Console and asadmin to Create Application Variables
Configuring Redelivery and Throttling for the Scheduler Binding Component
Configuring Redelivery for an Endpoint
Configuring Throttling for an Endpoint
The Scheduler Application Configuration property allows you to change the settings for a trigger, such as start date and time, end date and time, without changing a projects business logic. The Scheduler Binding Component is designed to be configured at deployment.
To configure your projects Scheduler Binding Components for application configuration, do the following:
The CASA Editor opens.
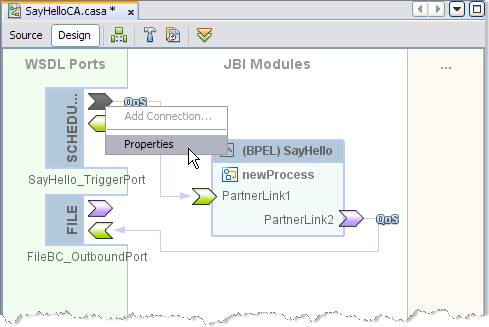
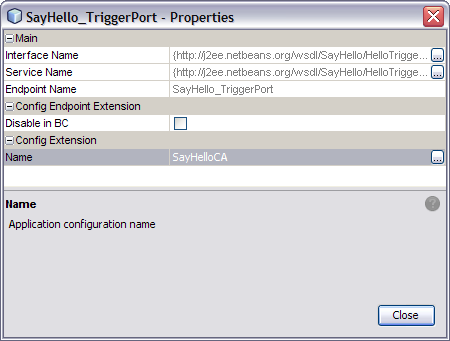
The Scheduler TriggerPort Properties Editor appears.
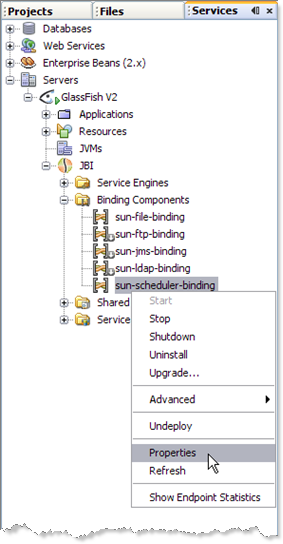
The sun-scheduler-binding Properties Editor appears.
The sun-scheduler-binding Application Configuration Editor appears.
Name: Specifies the name of your binding profile
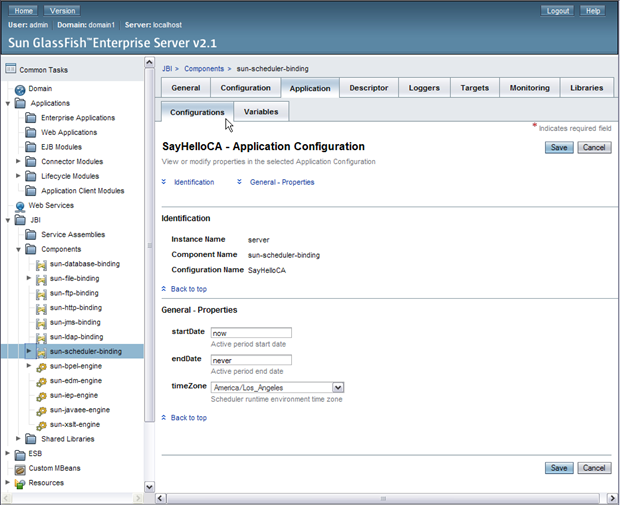
endDate: Specifies the trigger end date as a String literal, either never, or the date, conforming to the format specified in the Scheduler Control and Triggers Wizard.
startDate: Specifies the trigger start date as a String literal, either now, or the date, conforming to the format specified in the Scheduler Control and Triggers Wizard.
timeZone: Specifies the appropriate time zone for the environment where the deployed scheduler runs.
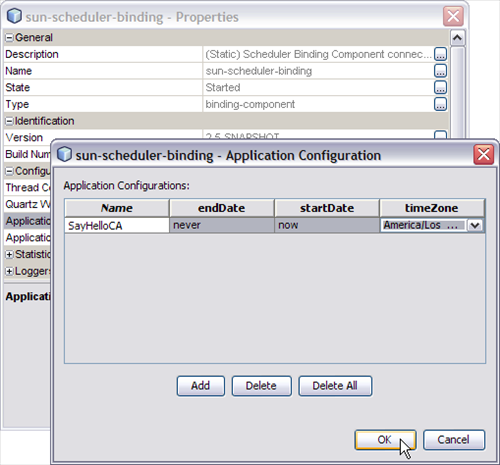
When the composite application is deployed, the Scheduler Binding Component will use the new application configuration that has been defined for the respective endpoint.
In addition to the NetBeans IDE, you can also use these other tools to edit the Scheduler Binding Component Application Configuration.
GlassFish Admin Console: To access the Admin Console, from the NetBeans Services window, right-click GlassFish V2 under Servers and choose View Admin Console from the pop-up menu. You can also access the Admin Console at http://localhost:4848/login.jsf, if this setting was retained during installation.
To open the Application Configuration window from the Admin Console, select the sun-scheduler-binding, under Common Tasks -> JBI -> Components. Select the Application tab and the Configuration sub-tab.
asadmin Command Line Interface: For information on using the Command Line Interface (CLI) to create, edit, or delete and application, see create-jbi-application-configuration, update-jbi-application-configuration, or delete-jbi-application-configuration.