To see a list of the workflows that already exist in your system, select Workflow from the main menu and then select the type of workflow you want to view (in the example at the beginning of this chapter, either Registration or Expense Reports). The Workflow window appears as shown below:
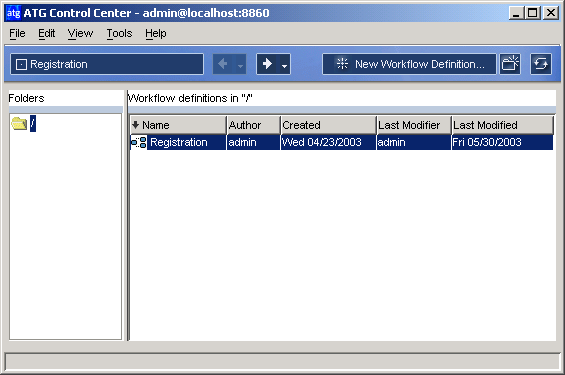
Workflow window
The window has the following features:
The panel on the left shows a list of folders containing the workflows of the specified type (in the example, Registration) that have already been created for your Web site. Workflows are identified by the
 icon.
icon.The panel on the right panel shows all workflows in the selected folder. You can add new workflows to this list by clicking the New Workflow Definition button on the toolbar. For more information, see Creating a New Workflow.
The Name column shows the name of each workflow in the selected folder. The arrow next to the column title shows how workflows are sorted in this list; clicking the column title reverses the sort order.
The Author column shows the ATG Control Center user name of the person who created the workflow, and the Created column shows the date on which he or she created it.
The Last Modifier column shows the ATG Control Center user name of the person who last saved changes to the workflow, and the Last Modified column shows the date on which those changes were saved.
To edit an existing workflow, click the name of the workflow you want to change. The Workflow Editor window appears, as shown below, and the workflow you selected is opened for editing:
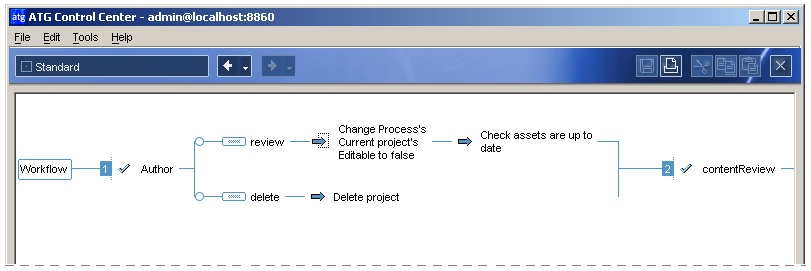
Workflow Editor
For information on editing the elements that make up a workflow, see Using Workflow Elements.
