2 Oracle Access Manager Server
This chapter contains these topics:
2.1 Understanding Oracle Access Manager
Oracle Access Manager 11g provides a full range of Web perimeter security functions that include Web single sign-on, authentication and authorization, policy administration, auditing, and more.
Single sign-on (SSO) enables users and groups of users to access multiple applications after authentication. SSO eliminates multiple sign-on requests. Oracle Access Manager 11g is the Oracle Fusion Middleware 11g single sign-on solution.
Oracle Access Manager 11g is a Java Platform, Enterprise Edition (Java EE) based enterprise-level security application that provides restricted access to confidential information and centralized authentication and authorization services.
A web server, application server, or any third-party application must be protected by a webgate that is registered with Oracle Access Manager as an agent. To enforce policies, the agent acts as a filter for HTTP requests. Oracle Access Manager enables administrators to define authentication and authorization policies.
-
Create local user ID and password credentials.
-
Log into the machine that will contain your OAM components.
-
Install a supported database level. For example: 11.2.0.1
Note:
Check the EnterpriseOne Minimum Technical Requirements for supported database level if this database is also used for EnterpriseOne. -
Create database schemas using Repository Creation Utility (RCU) 11.1.1.5.0. See Create Database Schemas with Repository Creation Utility.
-
Install Oracle WebLogic Server 10.3.5 with a 64-bit JDK. You do not need to create a domain. You create a domain during the OAM/OID installation. See Installing WebLogic Server.
-
Install the base version of Oracle Internet Directory 11.1.1.2; Oracle Internet Directory 11.1.1.5 is a patchset installer. You must install Oracle Internet Directory prior to installing Oracle Access Manager 11g.
2.2 Installing Oracle Internet Directory
Before installing Oracle Access Manager 11g, you must have Oracle WebLogic Server and Oracle Internet Directory 11.1.1.5 installed and configured.
First, you install Oracle Internet Directory (OID), version 11.1.1.2. After you install this version, you upgrade to version 11.1.1.5. After installing and upgrading OID to the appropriate version, you verify the installation.
2.2.1 Installing Oracle Internet Directory 11.1.1.2.0
Use these steps to install OID 11.1.1.2.0.
-
Download and unzip ofm_idm_<platform>_11.1.1.2.0_64_disk1_1of1.zip.
-
Open the OID download directory.
-
Launch the installer:
-
On Windows: setup.exe with Run as administrator option.
-
On UNIX: ./runInstaller as a non-root user.
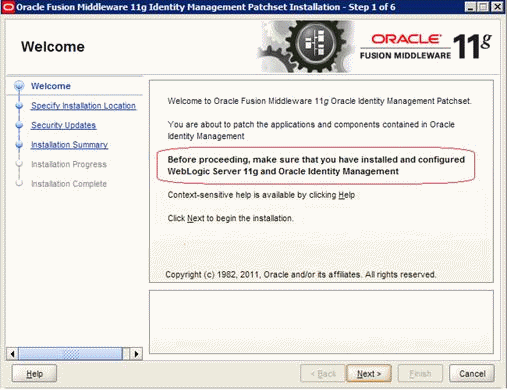
This action starts the Oracle Universal Installer.
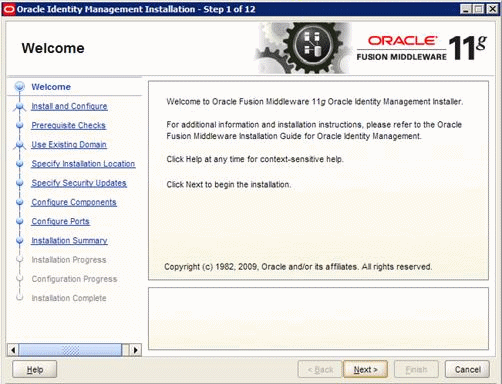
Description of the illustration image004.gif
-
-
Select Install and Configure type.
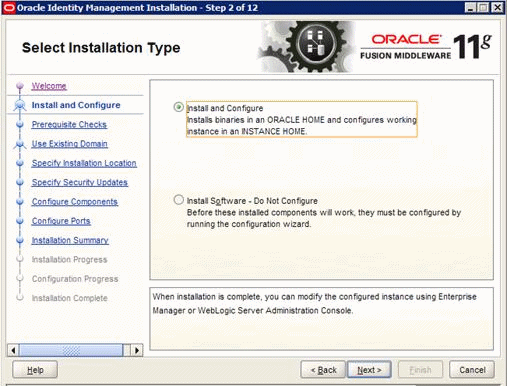
Description of the illustration image005.gif
-
Click Next.
-
The installer performs prerequisite checks. Be sure to correct any failures before continuing.
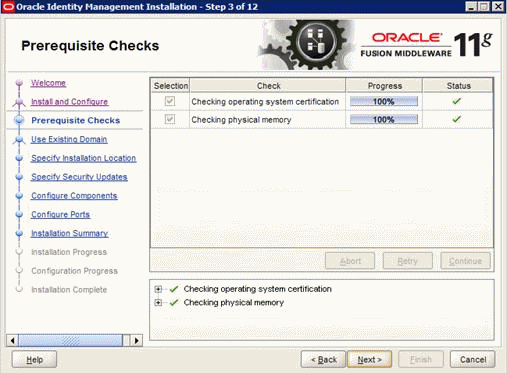
Description of the illustration image006.gif
-
Click Next.
-
Select Create New Domain and enter the Domain Name, User Name, and Password.
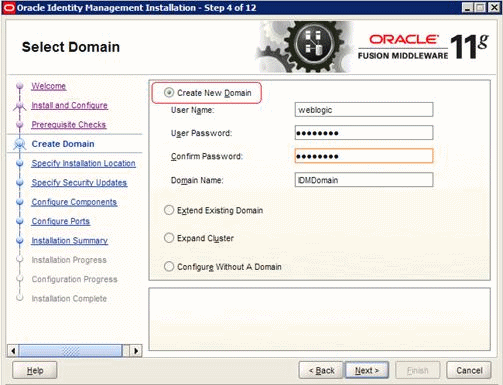
Description of the illustration image007.gif
-
Click Next.
-
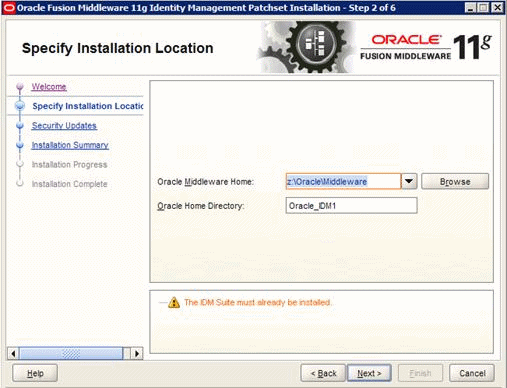
Specify the installation location.

Description of the illustration image008.gif
-
Click Next.
-
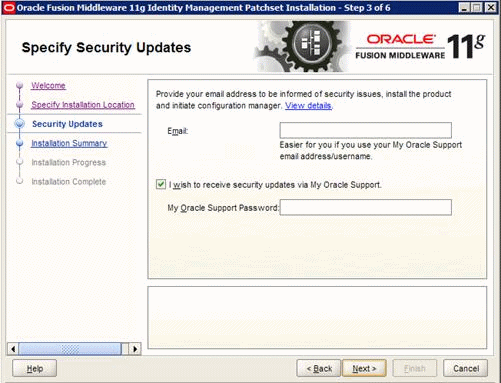
Specify the Security Update option. Oracle recommends enabling this option to receive any security updates.
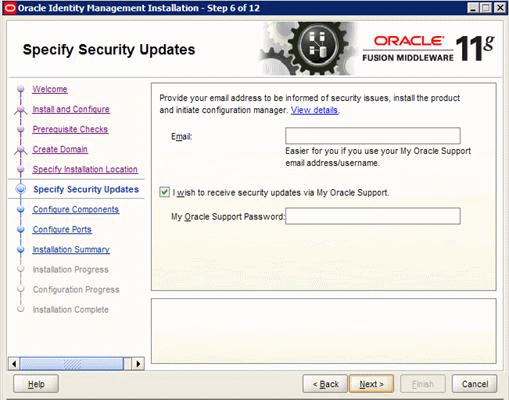
Description of the illustration image009.gif
-
Click Next.
-
Clear any components that you do not want the installer to configure.
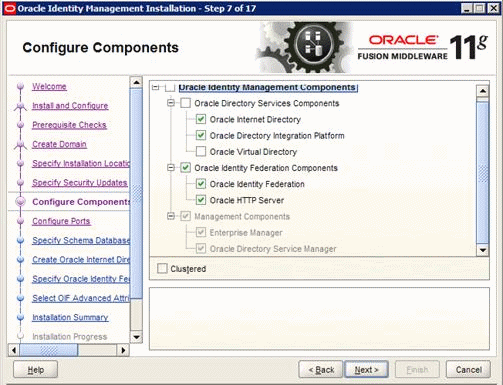
Description of the illustration image010.gif
-
Click Next.
-
Select Auto Port Configuration.
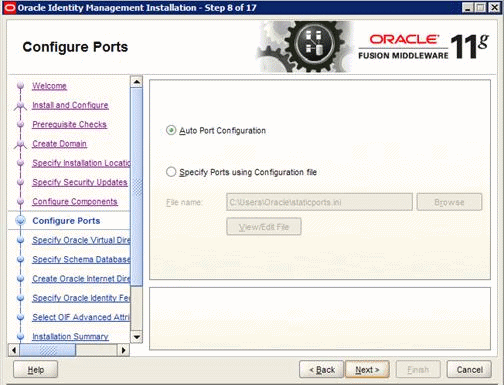
Description of the illustration image011.gif
-
Click Next.
-
On Specify Schema Database page, enter the appropriate information for the following fields:
-
Database connect String
-
Schema Name = Default to ODS
-
Password
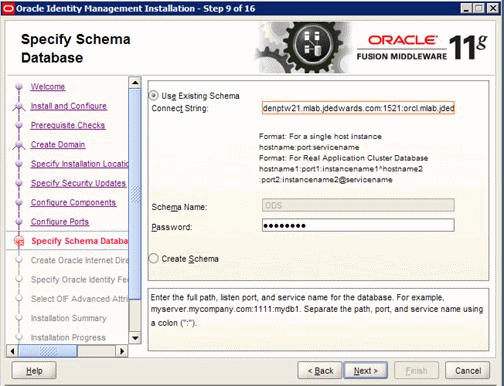
Description of the illustration image012.gif
-
-
Click Next.
-
In the Realm field, enter the domain address of your Oracle Internet Directory.
-
Enter Oracle Internet Directory Administrator User Password. The default administrator user is cn=orcladmin.
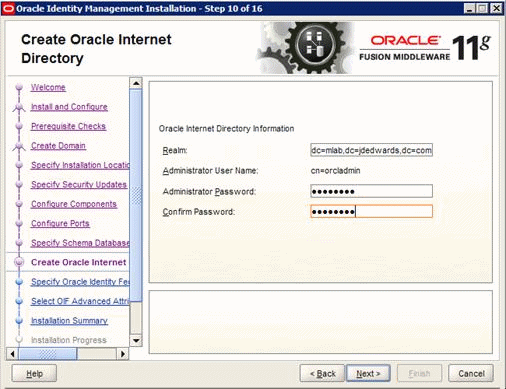
Description of the illustration image013.gif
-
Click Next.
-
Enter the Federation Details if you have selected this component to be configured.
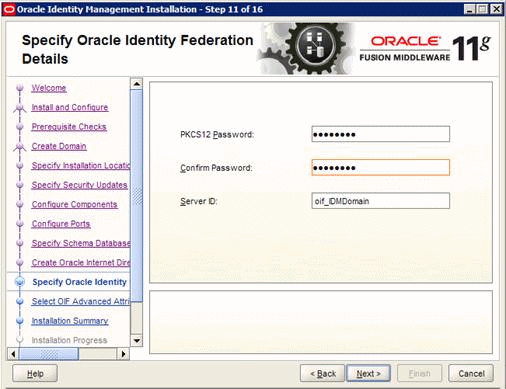
Description of the illustration image014.gif
-
Click Next.
-
Accept the default values on the following page.
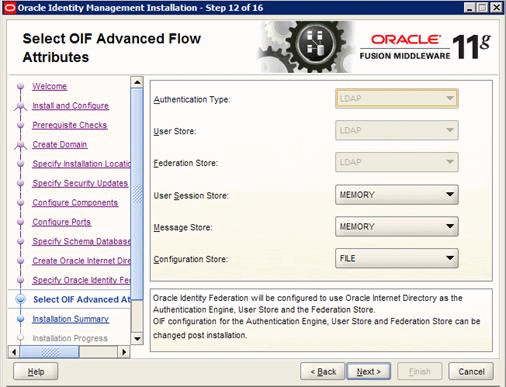
Description of the illustration image015.gif
-
Click Next.
-
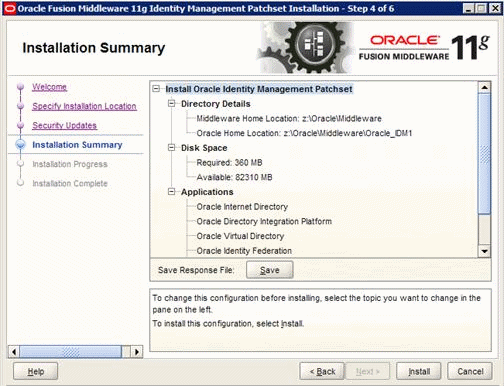
Review the Install Summary.
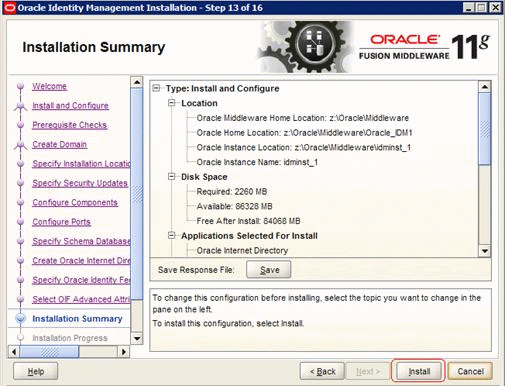
Description of the illustration image016.gif
-
Click Install.
-
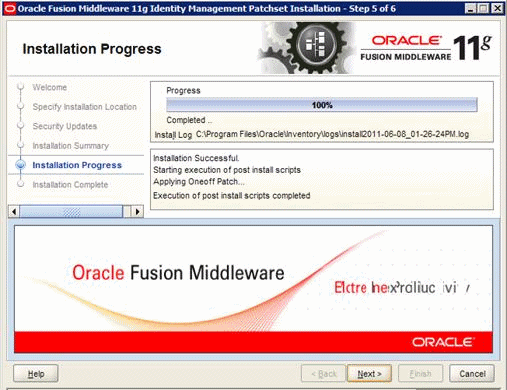
Click Next when the installation process is completed.
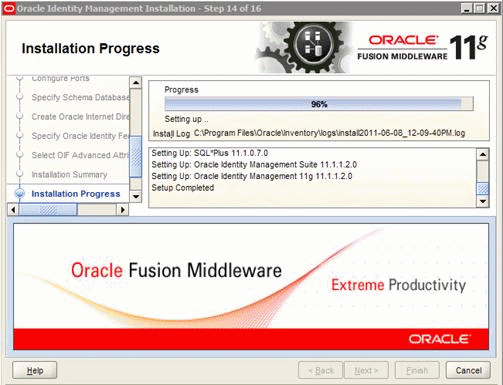
Description of the illustration image017.gif
-
The Configuration Progress begins.
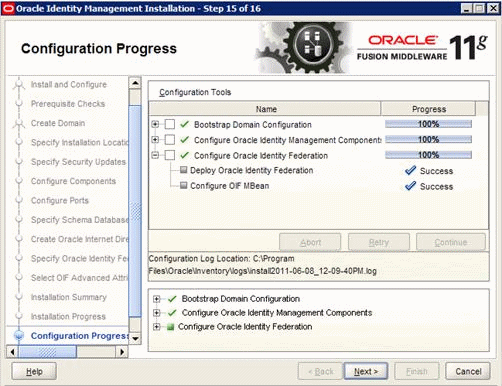
Description of the illustration image018.gif
-
Click Next.
-
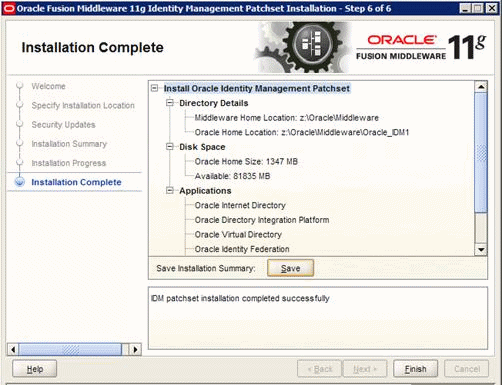
On Installation Complete, you can click Save to create an Installation Summary for future reference.
Also ensure you have noted all of the passwords you entered during the installation.
-
Click Finish.
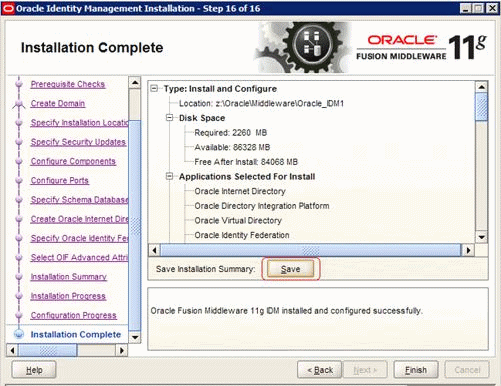
Description of the illustration image019.gif
2.2.2 Upgrading to Oracle Internet Directory 11.1.1.5
After you successfully install Oracle Internet Directory version 11.1.1.2, run Patch to upgrade Oracle Internet Directory to version 11.1.1.5. Use these steps to upgrade OID 11.1.1.2.0. to OID 11.1.1.5.
-
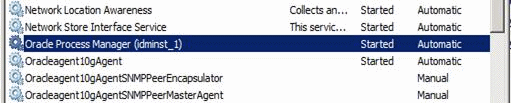
Stop the Oracle Process Manager using OPMN:
-
On Windows, open the Windows Services and stop the OID process.
-
On Unix/Linux, go to <MW_Home>/<oid_instance_name>/bin and enter this command:
./opmnctl stopall
Description of the illustration image020.gif
-
-
Download and unzip p12395123_oim_111150_<Platform>.zip.
-
Open the Oracle Internet Directory 11.1.1.5 directory.
-
Double click setup.exe (with Run as administrator) or runInstaller.
This action starts the Oracle Universal Installer.
-
On Oracle Universal Installer Welcome, click Next.
Description of the illustration image021.gif
-
Specify the existing Middleware Home and Oracle Internet Directory Home.
Description of the illustration image022.gif
-
Click Next.
-
Specify the Security Updates information.
Description of the illustration image023.gif
-
Click Next.
-
Review the Installation Summary.
Description of the illustration image024.gif
-
Click Install.
-
Click Next when the Installation process is completed.
Description of the illustration image025.gif
-
Review the install process or save the installation summary.
Description of the illustration image026.gif
-
Click Finish to exit the installer.
-
Stop and restart the Oracle Process Manager using OPMN:
-
On Windows, open the Windows Services and stop and restart the OID process.
-
On Unix/Linux, go to <MW_Home>/<oid_instance_name>/bin and enter these commands:
./opmnctl stopall
./opmnctl startall
-
2.2.3 Verifying Oracle Internet Directory Installation
After you upgrade Oracle Internet Directory to 11.1.1.5, use these steps to verify the installation.
-
Verify the Oracle Directory Server Manager (ODSM) is active:
-
Open the WebLogic Administration Console.
-
Navigate to Servers.
-
Verify wls_ods1 is in a running status.
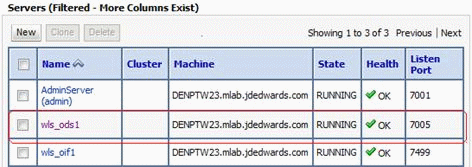
Description of the illustration image027.gif
-
-
Open an Internet Browser and enter the ODSM URL:
http://server:port/odsm
For example:
http://denptw23.mlab.jdedwards.com:7005/odsm
Description of the illustration image028.gif
-
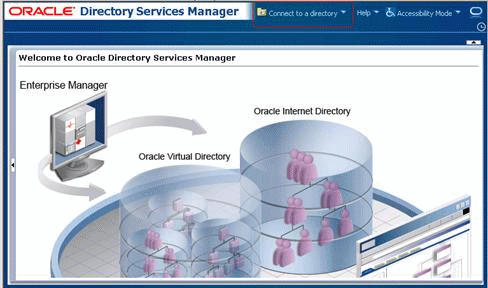
Click Connect to a directory to create a new connection.
-
Click Create A New Connection.
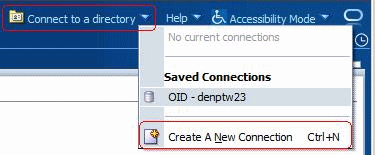
Description of the illustration image029.gif
-
Enter the Admin user and password.
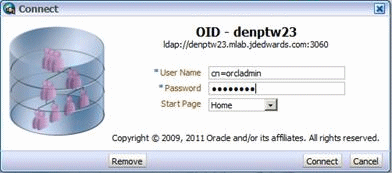
Description of the illustration image030.gif
-
The Oracle Directory Server Manager appears.
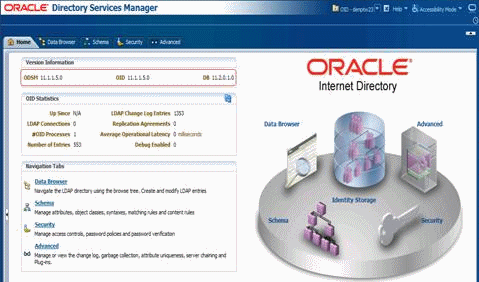
Description of the illustration image031.gif
-
Select the Data Browser tab to view user information.

Description of the illustration image032.gif
-
Upon successful installation verification, close Directory Manager.
2.3 Installing Oracle Access Manager 11g
Use these steps to install the Oracle Access Manager (OAM) 11.1.1.5.
-
Download and unzip ofm_iam_generic_11.1.1.5.0.zip file.
-
Change directory to Disk 1.
-
Execute this command:
-
On Windows, run setup.exe with the Run as Administrator option.
-
On UNIX/Linux, run runInstaller.
-
-
Enter the JRE/JDK location.
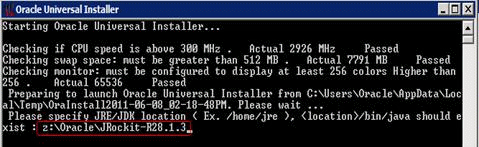
Description of the illustration image033.gif
-
On the Welcome page, click Next.
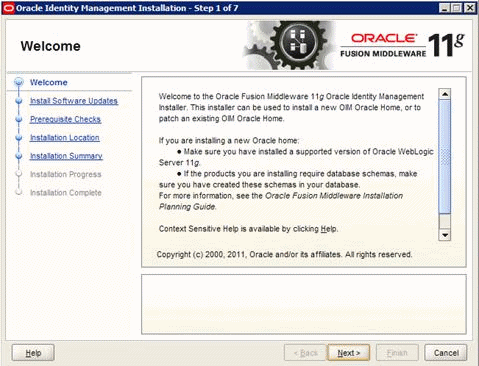
Description of the illustration image034.gif
-
Select Skip Software Updates option.
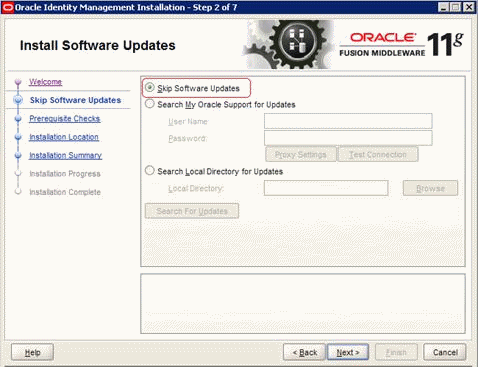
Description of the illustration image035.gif
-
Click Next.
-
The install performs Prerequisite Checks.
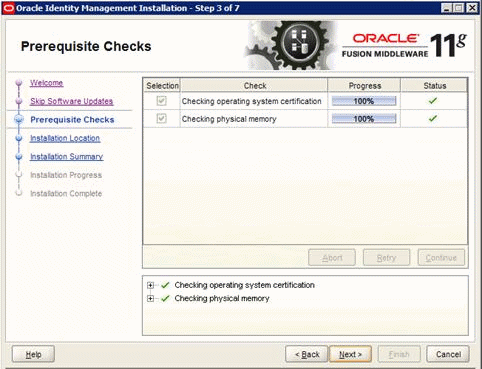
Description of the illustration image036.gif
-
Specify the Oracle Middleware Home and the Oracle Access Directory Home. The default home is Oracle_OAM.
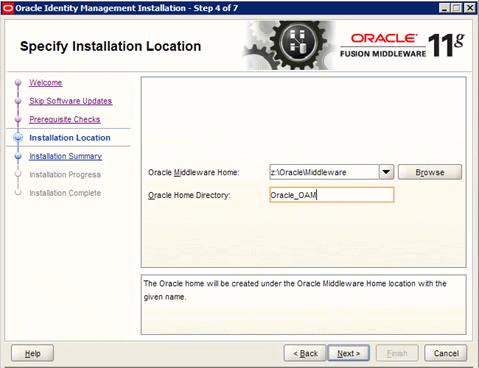
Description of the illustration image037.gif
-
Click Next.
-
Review the Installation Summary.
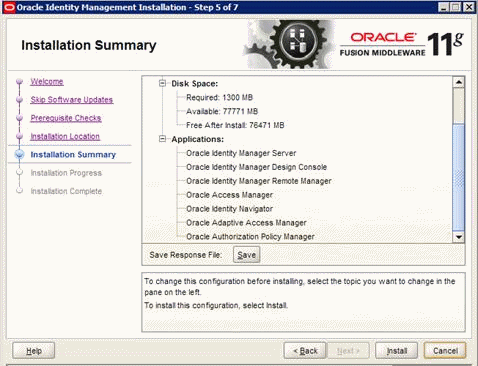
Description of the illustration image038.gif
-
Click Install.
-
Wait for the installation process to complete.

Description of the illustration image039.gif
-
Click Next.
-
Review the installation location.
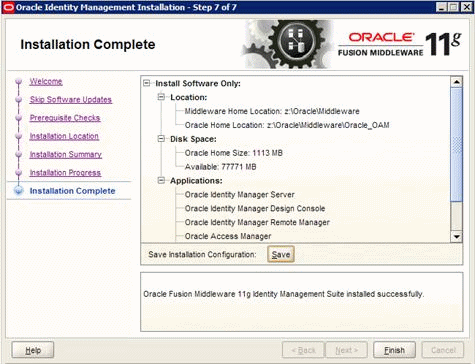
Description of the illustration image040.gif
-
Click Finish to exit the installer.
-
Run the domain configure from <MW_Home>/Oracle_OAM/common/bin
-
On Windows = config.cmd
-
On UNIX = config.sh
-
-
The Fusion Middleware Configuration Wizard screen appears.
-
Select Create a new WebLogic domain option.
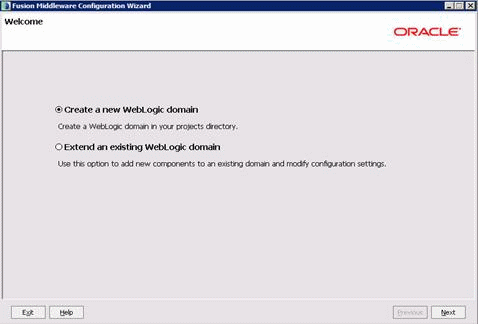
Description of the illustration image041.gif
-
Click Next.
-
Select the components to configure.
For OAM Server, you need Oracle Access Manager with Database Policy Store and Oracle Enterprise Manager. Oracle JRF - 11.1.1.0 is selected by default.
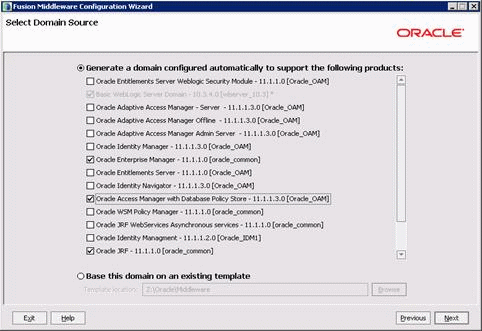
Description of the illustration image042.gif
-
Click Next.
-
Enter a domain name and accept the default locations.

Description of the illustration image043.gif
-
Click Next.
-
Enter the Administrator User Name and Password.
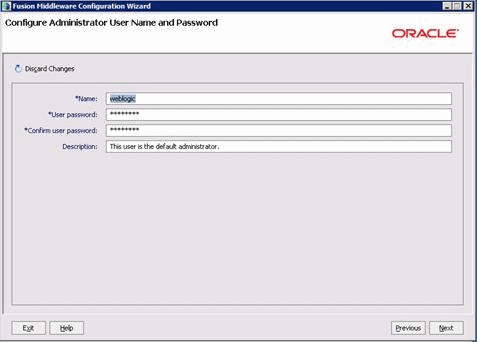
Description of the illustration image044.gif
-
Click Next.
-
Select Production Mode and verify the JDK version and location.
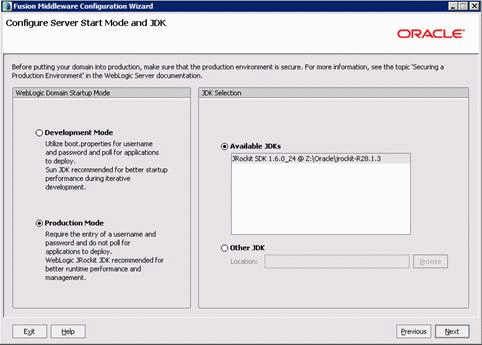
Description of the illustration image045.gif
-
Click Next.
-
Enter the JDBC Component Schema, complete these fields:
-
DBMS/Service
-
Host Name and Port
-
Schema Password
-
Schema Owner
If you are not using the default schema prefix (Dev), you must select each schema component individually and modify the prefix only.

Description of the illustration image046.gif
-
-
Click Next.
-
The installer verifies all of the component schema connections.
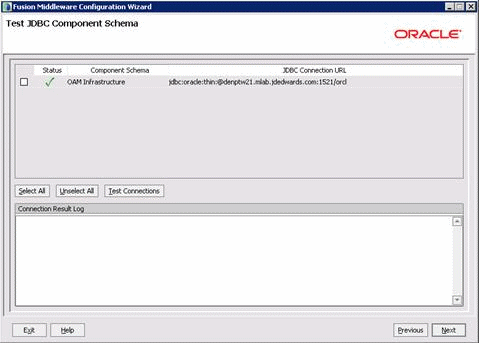
Description of the illustration image047.gif
-
Click Next.
-
Select Administration Server and Managed Servers, Clusters and Machines options.
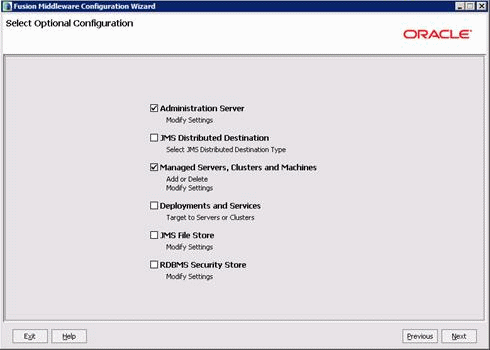
Description of the illustration image048.gif
-
Click Next.
-
Enter the Administration Server Name; for example, AdminServerOAM
Do not accept the default listen port (7001) if you have Oracle Internet Directory Server already installed because it might have used the default port. Enter a unique listen port for this OAM server. For example, port 8001.
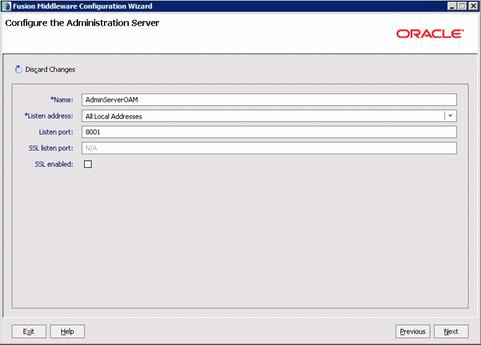
Description of the illustration image049.gif
-
Click Next.
-
Accept the default values on the Configure Managed Servers page.
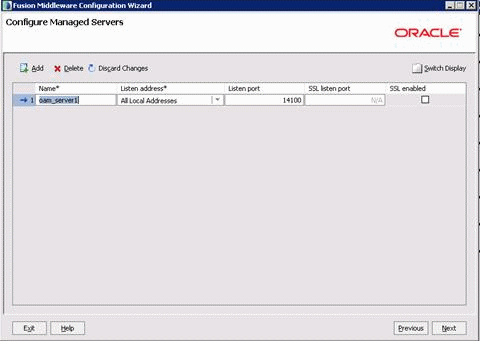
Description of the illustration image050.gif
-
Click Next.
-
The Configure Clusters page appears.
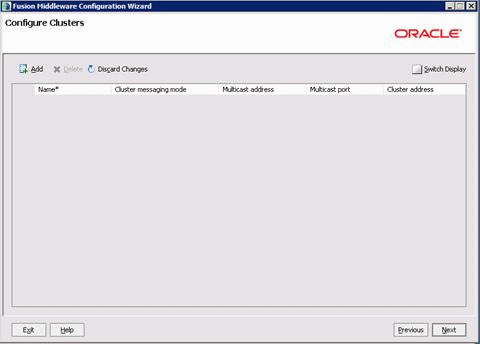
Description of the illustration image051.gif
-
Click Next.
-
Select the Machine Type:
-
On Windows select the Machine tab.
-
On UNIX and Linux, select the UNIX Machine tab.
-
-
Select the Add tab.
-
Enter a logical machine name.
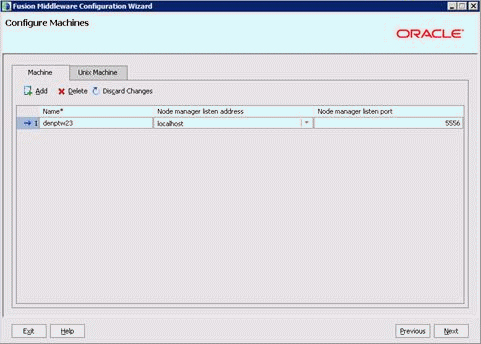
Description of the illustration image052.gif
-
Click Next.
-
Assign the servers to this logical machine.
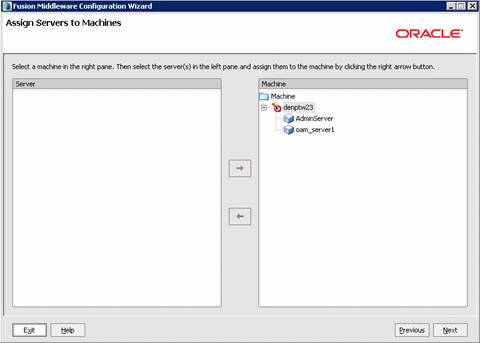
Description of the illustration image053.gif
-
Click Next.
-
Review the Configuration Summary.
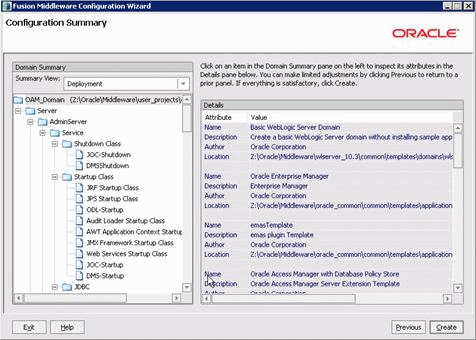
Description of the illustration image054.gif
-
Click Create.
-
Click Done once the domain creation is completed.

Description of the illustration image055.gif
-
Start the Admin Server:
-
On Windows, open a command window, change the directory to <MW_Home>\user_projects\domains\OAMdomain\bin
Run startWebLogic.cmd
-
On UNIX, run startWebLogic.sh from <MW_Home>/user_projects/domains/OAMdomain/bin
-
-
Connect to the OAM Domain Administration console
http://full-qualified-oamserver:domain-port/console
-
Select the Servers and start the oam_server1 managed server.
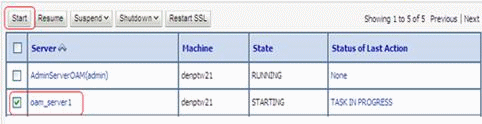
Description of the illustration image056.gif
-
Verify the OAM installation by opening the OAM Admin Console
http://full-qualified-oamserver:oamport/oamconsole
Note:
The oamport is the same as the WebLogic Console port.
Description of the illustration image057.gif
2.4 Configuring Oracle Access Manager to Use the External LDAP Server
Oracle Access Manager 11g by default uses the Oracle WebLogic embedded LDAP Server. You must create a custom User Identity Store to use the external LDAP Server.
-
Log on to the OAM Administration Console.
-
Select the Data Sources from the System Configuration tab.
-
Open the UsereIdentityStore1 from User Identity Stores.
This is the default embedded LDAP server.
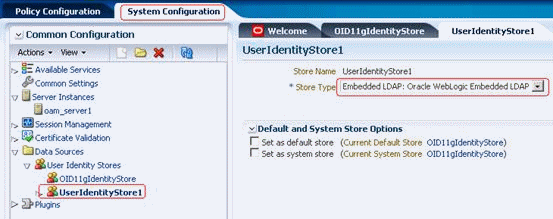
Description of the illustration image058.gif
-
To create a new user identity store, focus on User Identity Stores and click the Create button.
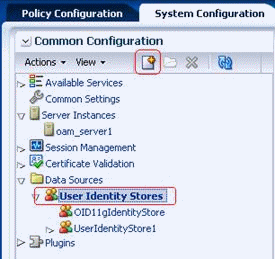
Description of the illustration image059.gif
-
Enter your LDAP information, and then click Test Connection.
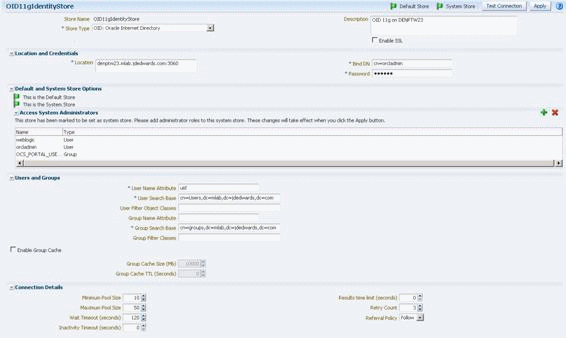
Description of the illustration image060.gif
-
Set this newly created store to the Default and System Store.
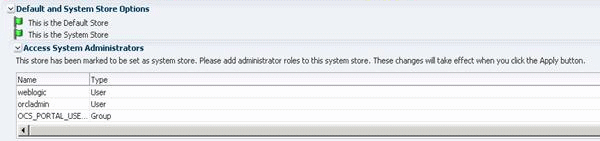
Description of the illustration image061.gif
Also you might want to add the additional system administrators.
-
Restart the OAM Server.