3 Oracle WebCenter Spaces
This chapter contains these topics:
-
Section 3.3, "Configuring the WebLogic Domain for Oracle Access Manager"
-
Section 3.5, "Configuring Oracle HTTP Server for WebCenter Spaces"
-
Section 3.6, "Registering the WebGate Agent for WebCenter Spaces"
3.1 Understanding WebCenter Server
The WebCenter server ensures the SSO credentials are valid without the user logging in again.
-
Install WebCenter Database Schemas (See Appendix A)
-
Install WebLogic Server (See Appendix B)
Important: The WebCenter database schemas must be created, and the WebLogic Server must be installed before you install Oracle WebCenter Spaces.
3.2 Installing Oracle WebCenter Spaces
You install Oracle WebCenter Spaces 11.1.1.5.0.
When you install the WebCenter components on your machine, be sure to enter the correct data (machine name, ports, and so on) for your configuration. When you download the software from Oracle Technology Network (OTN) note the directories to which you downloaded the software and replace the directory location specified in this chapter with your directory locations. Be sure to install the executable files for your platform.
Use these steps to install Oracle WebCenter spaces 11.1.1.5.0.
-
Download and unzip the WebCenter installation file:
ofm_wc_generic_11.1.1.5.0_disk1_1of1.zip
-
Execute the install process from Disk1 folder:
-
On Windows: setup.exe with Run as administrator option
-
On UNIX: ./runInstaller as a non-root user
-
-
Review the Welcome page information, and then click Next.
-
Select your Software Updates option.
-
The installer performs prerequisite checks.
-
Enter a Middleware Home and a WebCenter Home Directory.
Description of the illustration image062.gif
-
Select the application server.
Note:
EnterpriseOne supports only a WebLogic Server as the application server.
Description of the illustration image063.gif
-
Click Next.
-
Review the Install Summary.
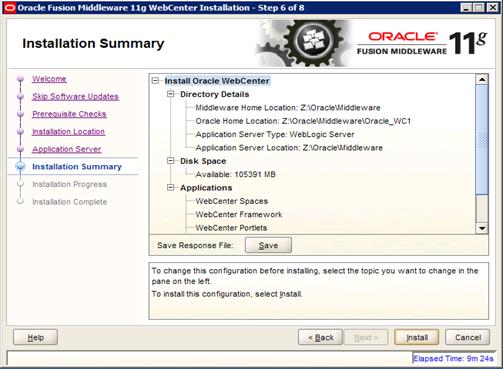
Description of the illustration image064.jpg
-
Click Install to start the install process.
Description of the illustration image065.gif
-
Click Next to continue.
Description of the illustration image066.gif
-
Click Finish when the install process is completed.
-
Run config.cmd (.sh) from <MW_Home>\Oracle_WC1\common\bin folder to create the WebCenter domain.
-
Select Create a new WebLogic domain option.
-
Select the products to be part of this domain. You can add more products later.
Description of the illustration image067.gif
-
Click Next.
-
Enter the domain name.
Description of the illustration image068.gif
-
Enter the domain Administrator user and password.
-
Select Production Mode.
-
Verify the available JDK.
Description of the illustration image069.gif
-
Enter the JDBC Component Schema database connection.
Description of the illustration image070.gif
-
Test JDBC Schema connection.
Description of the illustration image071.gif
-
Select the Administration Server and Managed Server, Cluster and Machine.
-
See Appendix B to complete the domain creation.
3.2.1 Post Installation Configuration
-
Start the WebCenter Admin Server (startWebLogic.cmd (.sh)) from <MW_Home>\user_projects\domains\<webcenter_domain>\bin folder.
-
Start WebLogic NodeManager (startNodeManager.cmd/sh) from <MW_home>\wlserver_10.3\server\bin.
-
The startNodeManager process creates a nodemanager.properties file in <MW_home>\wlserver_10.3\common\nodemanager folder.
-
Once the file is created, run setNMProps.cmd/.sh from <MW_home>oracle_common\common\bin folder.
Note:
Another option is that you can edit the nodemanager.properties by opening the file with an editor and change StartScriptEnabled to true.Important:
WebCenter Spaces will not start correctly if this value is not set. -
After the value is changed, you must stop and restart NodeManager.
-
Start the domain Admin Server and WC_Spaces.
Description of the illustration image072.gif
-
After the Admin Server is started, you can access the domain console, Enterprise Manager, and WebCenter Spaces.
-
http://server:7001/console (Enterprise Manager)
-
http://server:7001/em (Domain Console)
Description of the illustration image073.gif
http://server:8888/webcenter
Description of the illustration image074.gif
-
-
Click About WebCenter Spaces on the bottom right to verify the version level.
Description of the illustration image075.gif
3.3 Configuring the WebLogic Domain for Oracle Access Manager
Configuring the WebLogic Domain for OAM consists of these tasks:
-
Configuring the Oracle Internet Directory Authenticator
-
Configuring the OAM Identity Asserter
3.3.1 Configuring the Oracle Internet Directory Authenticator
Assuming Oracle Internet Directory is backing the Oracle Access Manager (OAM) identity store, an Oracle Internet Directory authenticator (OracleInternetDirectoryAuthenticator) should be configured for the LDAP server that is used as the identity store of OAM, and the provider should be set to SUFFICIENT.
Use these steps to configure the Oracle Internet Directory Authenticator.
-
Log in to the WebCenter WebLogic Server Administration Console.
-
From the Domain Structure pane, click Security Realms
Description of the illustration image076.gif
-
Select the realm entry for which to configure the OID authenticator.
-
Select the Providers tab.
-
Click New to create a provider.
Description of the illustration image077.gif
-
Enter a name for the new provider (for example, OID Authenticator), select OracleInternetDirectoryAuthenticator as the type, and then click OK.
-
On the Providers tab, click the newly added provider. The common setting pane appears.
Description of the illustration image078.gif
-
Set the control flag to SUFFICIENT and click Save.
-
Open the Provider Specific tab.
Description of the illustration image079.gif
-
Complete the fields as shown in the table below. Leave the rest of the fields set to their default values.
Field Value Comment Host: The host ID for the LDAP server Port: The LDAP server port number Principal: The LDAP administrator principal Credential: <password> The administrator principal password Confirm Credential: <password> User Base DN: User Search Base - this value should be the same as for the OAM Access Manager setup. All User Filter: (&(uid=*)(objectclass=person)) User Name Attribute uid Group Base DN: Group search base - same as user base DN Use Retrieved User Name as Principal Checked User login IDs are usually case insensitive. This flag is required so that the subject established contains the user name as stored in the OID. -
Click Save.
3.3.2 Configuring the OAM Identity Asserter
In a WebLogic Server domain where JRF is installed, the JRF template is present as part of the domain in an Oracle Fusion Middleware product. In this case, the OAM Identity Asserter and OAM Authentication Provider are automatically available for configuration. If JRF is not installed in your WebLogic domain, you must add the OAMAuthnProvider.jar to a specific location in your domain.
Configuring the OAM Identity Asserter consists of these tasks:
-
Adding the OAM Identity Asserter
-
Configuring the Default Authenticator and Provider Order
-
Adding an OAM Single sign-On Provider
Confirm the required JAR and WAR files as follows:
-
Confirm the location of required JAR files in the following Fusion Middleware path:
<MW_Home>/oracle_common/modules/oracle.oamprovider_11.1.1/oamAuthnProvider.jar
-
Locate the console-extension WAR file in the following path:
<MW_Home>/oracle_common/modules/oracle.oamprovider_11.1.1/oamauthenticationprovider.war
-
Copy the WAR file to the following path in the WebLogic Server home:
<MW_Home>/wlserver_10.3/server/lib/console-ext/autodeploy/oamauthenticationprovider.war
3.3.2.1 Adding the OAM Identity Asserter
An OAM identity asserter must be configured with the provider control flag set to required.
Use these steps to add the OAM Identity Asserter.
-
Log in to the WebCenter WebLogic Server Administration Console.
-
From the Domain Structure pane, click Security Realms.
-
Click the realm entry for which to configure the OAM identity asserter.
-
From the Providers tab, click New.
-
Enter a name for the new provider (for example, OAM ID Asserter), select OAMIdentityAsserter as its type and click OK.
-
On the Providers tab, click the newly added provider.
Description of the illustration image081.gif
-
Set the control flag to REQUIRED and check that OAM_REMOTE_USER and ObSSOCookie are set for Active Types.
-
Click Save to save your settings.
3.3.2.2 Configuring the Default Authenticator and Provider Order
After configuring the OAM identity asserter, ensure that the default authenticator's control flag is set to SUFFICIENT and reorder the providers.
Use these steps to configure the default authenticator and provider order.
-
Navigate to the Provider Settings pane.
-
Open the Default Authenticator and set the control flag to SUFFICIENT.
-
Do the same for any providers other than the two you just created.
-
On the Setting Pane, reset the provider order to:
-
OAMIdentityAsserter(REQUIRED)
-
OracleInternetDirectoryAuthenticator (SUFFICIENT)
-
DefaultAuthenticator (SUFFICIENT)
-
DefaultIdentityAsserter
Description of the illustration image082.gif
Note:
On Windows platform, if your WebLogic user is not part of the OID Administrators group, you will not be able to restart the WebLogic Admin Server.You can use these steps to add an Administrators group and add your user in it.
-
Connect to Oracle Directory Manager
-
Create a new Group, Administrators. You can use the Create Like option.
-
Add your admin user to this group
Description of the illustration image083.gif
Now, you should able to start the WebLogic Admin Server.
3.3.2.3 Adding an OAM Single Sign-On Provider
After checking that the default authenticator's control flag is set correctly and that the order of the providers is correct, add an OAM SSO provider and restart all servers.
-
Connect to the WebLogic domain using WLST and run the following command:
Start WLST.cmd or WLST.sh from <MW_Home>oracle_common\common\bin folder
Connect ('admin-user','admin-password','t3://localhost:7001')
addOAMSSOProvider (loginuri="/${app.context}/adfAuthentication",logouturi="/oamsso/logout.html")
-
Exit the tool.
-
Restart all servers.
3.4 Installing Oracle WebGate
Next, you install Oracle WebGate 11.1.1.5.
Oracle HTTP Server WebGate is a web server plug-in that is shipped out-of-the-box with Oracle Access Manager. The Oracle HTTP Server WebGate intercepts HTTP requests from users for web resources and forwards them to the Access Server for authentication and authorization. Oracle HTTP Server WebGate installation packages are found on media and virtual media that is separate from the core components.
Install Oracle HTTP Server (See Appendix C)
-
If you are installing Oracle HTTP Server 11g WebGate for Oracle Access Manager on a Linux or Solaris operating system, you must download and install third-party GCC libraries on your machine.
You can download the appropriate GCC library from the following third-party website:
Operating System Architecture GCC Libraries Required Library Version Linux 64-bit x64 libgcc_s.so.1 libstdc++.so.6
3.4.6 Solaris 64-bit SPARC libgcc_s.so.1 libstdc++.so.5
3.3.2 -
If you are using Windows 2008 64-bit operating systems, you must install Microsoft Visual C++ 2005 libraries on the machine hosting the Oracle HTTP Server 11g WebGate.
The libraries are included in the Microsoft Visual C++ 2005 SP1 Redistributable Package (x64), which can be downloaded from the following website:
Use these steps to install Oracle HTTP 11g WebGate.
-
Download and unzip ofm_oam_webgates_generic_11.1.1.5.0_disk1_1of1.zip.
-
Launch the installer:
-
On Windows: setup.exe with Run as administratoroption.
-
On UNIX: ./RunInstaller as a non-root user.
-
-
Specify JRE/JDK location.
Description of the illustration image084.gif
-
Click Next on the Welcome page.
Oracle HTTP WebGate supports Oracle HTTP version 11.1.1.2 or 11.1.1.3. EnterpriseOne configuration supports version 11.1.1.5. See Appendix A to upgrade to Version 11.1.1.5.
-
The installer performs prerequisite checks.
Description of the illustration image085.gif
This image shows the prerequisite checks on Linux operating system:
Description of the illustration image086.gif
-
Specify the Middleware Home and WebGate Home Directory.
Description of the illustration image087.gif
-
Review the installation Summary.
Description of the illustration image088.gif
-
Click Install.
Description of the illustration image089.gif
-
Click Next when the installation is completed.
Description of the illustration image090.gif
-
Click Finish when the installation is completed.
3.4.1 Post-Installation Steps
You must complete the following steps after installing Oracle HTTP Server 11g WebGate for Oracle Access Manager:
-
Move to the following directory under your Oracle Home for WebGate:
-
On UNIX operating systems:
<webgate_home>/webgate/ohs/tools/deployWebGate
-
On Windows operating systems:
<webgate_home>\webgate\ohs\tools\deployWebGate
-
-
On the command line, run the following command to copy the required bits of agent from the Webgate_Home directory to the WebGate instance location:
-
On UNIX operating systems:
./deployWebgateInstance.sh -w <Webgate_Instance_Directory> -oh <Webgate_Oracle_Home>

Description of the illustration image091.gif
-
On Windows operating systems:
deploy WebgateInstance.bat -w <Webgate_Instance_Directory> -oh <Webgate_Oracle_Home>
Description of the illustration image092.gif
Where <Webgate_Oracle_Home> is the directory where you have installed Oracle HTTP Server WebGate and created as the Oracle Home for WebGate.
For example: <MW_Home>/Oracle_OAMWebGate1
The <Webgate_Instance_Directory> is the location of WebGate Instance Home, which is same as the Instance Home of Oracle HTTP Server.
For example: <MW_Home>/Oracle_WT1/instances/instance1/config/OHS/ohs1
-
-
Run the following command to ensure that the LD_LIBRARY_PATH variable contains <Oracle_Home_for_Oracle_HTTP_Server>/lib:
-
On UNIX operating systems:
Export LD_LIBRARY_PATH=$LD_LIBRARY_PATH:<Oracle_Home_for_Oracle_HTTP_Server>/lib
-
On Windows operating systems:
Set the <Webgate_Installation_Directory>\webgate\ohs\lib location in the PATH environment variable.
-
-
From your present working directory, move up one directory level:
-
On UNIX operating systems:
<webgate_home>/webgate/ohs/tools/setup/InstallTools
-
On Windows operating systems:
<webgate_home>\webgate\ohs/tools\editHttpConf
-
-
On the command line, run the following command to copy the apache_webgate.template from the Webgate_Home directory to the Webgate Instance location (renamed to webgate.conf) and update the httpd.conf file to add one line to include the name of webgate.conf:
-
On UNIX operating systems:
./EditHttpConf -w <Webgate_Instance_Directory> [-oh <Webgate_Oracle_Home>] [-o <output_file>]

Description of the illustration image093.gif
-
On Windows operating systems:
EditHttpConf.exe -w <Webgate_Instance_Directory> [-oh <Webgate_Oracle_Home>] [-o <output_file>]

Description of the illustration image094.gif
Note:
The [-oh <Webgate_Oracle_Home>] and [-o <output_file>] parameters are optional.
-
-
Verify the updated httpd.conf.
-
The following line is added to the bottom of the file:

Description of the illustration image095.gif
Note:
Do not restart the Oracle HTTP server until the WebGate agent is registered for WebCenter Spaces; errors will continue to display in the command line if the Oracle HTTP server processes are restarted. -
3.5 Configuring Oracle HTTP Server for WebCenter Spaces
After you install and configure Oracle HTTP Server and Oracle HTTP WebGate, you configure the Oracle HTTP server for WebCenter Spaces.
Use the following example to configure mod_wl_ohs.conf. Verify that WebLogic port numbers match your configuration.
Description of the illustration image096.gif
After you edit mod_wl_ohs.conf, restart the HTTP server.
Now you can access WebCenter using the HTTP port; for example,
http://denptw21.mlab.jdedwards.com:7777/webcenter
If you added (optional) the domain console and enterprise manager connections, then the HTTP URL will be:
http://denptw21.mlab.jdedwards.com:7777/console
http://denptw21.mlab.jdedwards.com:7777/em
3.6 Registering the WebGate Agent for WebCenter Spaces
You must register the WebGate Agent for WebCenter Spaces.
-
Install and configure Oracle HTTP Server and WebGate.
-
Install and configure OID and OAM Server.
-
Install and configure Oracle WebCenter Spaces.
3.6.1 Registering the WebGate Agent
Use these steps to register the WebGate Agent.
-
Open an internet browser and connect to Oracle Access Manager.
-
Open the OAM console.
http://oamserver:oamport/oamconsole
-
Enter the Admin user and Password.
-
Select New OAM 11g Webgate option.
Description of the illustration image097.gif
-
Enter a WebGate agent name and select the Open security option.
-
Enter your WebCenter URL in Base URL.
Description of the illustration image098.gif
-
Click Apply to create the agent. Authorization and authentication policies will be created.
Description of the illustration image099.gif
-
A Host Identifier and an Application Domain is generated as well.

Description of the illustration image100.gif
Description of the illustration image101.gif
-
Create the Resource URL from the Resources option
-
Click the Create button
Description of the illustration image102.gif
-
Enter the following information:
-
Type = HTTP
-
Host Identifier = Select your Host Identifier
-
Resource URL = /webcenter
-
Protection Level = Protected
-
Authentication Policy = Protected Resource Policy
-
Authorization Policy = Protected Resource Policy
Description of the illustration image103.gif
-
-
Repeat the above step and add the resource URL = /console and /em (if you plan to use SSO on the Admin Console and Enterprise Manager.)
-
Double-click the Protected Resource Policy.
You should see the newly added resources listed.
Description of the illustration image104.gif
-
Review all registered agents.
-
Select the System Configuration tab.
-
Open the Access Manager Settings section and open the SSO Agents option.
-
Double-click OAM Agents, and then click the Search button.
The system displays a list of registered agents.
Description of the illustration image105.gif
-
The agent registration creates a cwallet.sso and ObAccessClient.xml file.
-
Copy these two files to the WebCenter server:
<MW_HOME>/user_projects/domain/OAMDomain/output/<Agent_name> location
<MW_Home>Oracle_WT1/instances/instance1/config/OHS/ohs1/webgate/config directory
A system property tells WebCenter that the application is configured in SSO mode and some special handling is required.
-
To set this property, edit the setDomainEnv.sh (.cmd) script located in your <domain>/bin directory, and add an entry similar to the following at the end of the file:
EXTRA_JAVA_PROPERTIES="-Doracle.webcenter.spaces.osso=true ${EXTRA_JAVA_PROPERTIES}"
export EXTRA_JAVA_PROPERTIES
-
After changing the property, restart all the WebCenter Services: Admin Server, WC_Spaces server.
-
Stop and restart the Oracle HTTP server process using OPMN:
-
On Windows, open the Windows Services and stop and restart the Oracle HTTAP server process.
-
On Unix/Linux, go to <MW_Home>/<oid_instance_name>/bin and enter these commands:
./opmnctl stopall
./opmnctl startall
-
-
Test your SSO with the WebCenter URL:
http://denptw21.mlab.jdedwards.com:7777/webcenter
The SSO process switches to the Oracle Access Manager and display the SSO page.
Description of the illustration image106.gif
-
Log in with your WebCenter user name and password.