Transactions
This chapter covers the following topics:
- Overview of Inventory Transactions
- Receiving Transactions
- Using the Receiving Page
- Overview of Return to Vendor Transactions
- Transferring Between Subinventories
- Performing Miscellaneous Transactions
- Inter-organization Transfers
- Transferring Material Between Organizations
- Planning Transfer Transaction
- Transferring Consigned and VMI Material
- Shortage Alerts and Shortage Notifications
- Viewing Potential Shortages
- Overview of Movement Statistics
- Defining Movement Statistics Parameters
- Setting Up Movement Statistics
- Automatically Generating Movement Statistics
- Viewing and Maintaining Movement Statistics
- Viewing Material Transactions
- Viewing Message History
- Viewing Transaction Summaries
- Viewing Accounting Lines
- View Accounting Windows
- Drilling Down to Inventory from Oracle General Ledger
- Viewing Pending Transactions
- Pending Transactions Folder Window Available Fields
- Viewing and Updating Transaction Open Interface Activity
- Transaction Interface Folder Window Available Fields
- Purging Transaction History
- Transactions Reports
Overview of Inventory Transactions
Oracle Inventory, with Oracle Order Management, Oracle Purchasing, and Oracle Work in Process, provides you with a complete set of transactions and reports for maintaining inventory control. This allows you to control the flow of material from the time you receive items to the time you ship finished goods to the customer. You can:
-
Process miscellaneous issues and receipts. See: Performing Miscellaneous Transactions.
-
Transfer material between subinventories. See: Transferring Between Subinventories.
-
Move material from a shipping organization to a destination organization and move material to intransit inventory before it reaches its final destination. See: Transferring between Organizations.
-
Track lots and serial numbers for an item. See: Assigning Lot Numbers and Assigning Serial Numbers.
-
Generate shortage alerts and shortage notifications. See: Material Shortage Alerts and Shortage Notifications.
-
Enter and maintain movement statistics information. See: Entering Movement Statistics
-
View material transactions. See: Viewing Material Transactions.
-
View material transaction accounting distributions. See: Viewing Material Transaction Distributions, Oracle Cost Management User's Guide.
-
View summarized transactions for a range of dates. See: Viewing Transaction Summaries.
-
View pending transactions. See: Viewing Pending Transactions.
-
View pending transaction interface activity. See: Viewing and Updating Transaction Open Interface Activity.
-
Purge transaction history. See: Purging Transaction History.
-
View serial genealogy. See: Viewing Serial Genealogy.
Important: Inventory transactions and on hand balance supports decimal precision to 5 digits after the decimal point. Oracle Work in Process supports decimal precision to 6 digits. Other Oracle E-Business Suite applications support different decimal precision. As a result of the decimal precision mismatch, transactions another Oracle Application passes may be rounded when processed by Inventory. If the transaction quantity is rounded to zero, Inventory does not process the transaction. It is therefore suggested that the base unit of measure for an item is set up such that transaction quantities in the base unit of measure not require greater than 5 digits of decimal precision.
Related Topics
Receiving Transactions
You must perform the following setup steps before you can perform receiving transactions:
-
Define purchasing options for your organization, such as approval or control options, in the Purchasing Options window.
-
Define options that govern receipts in the Receiving Options window.
You can receive all or a partial list of open lines on any purchase order by using the Receipts window. You can also receive substitute items and goods or services you have not ordered. Oracle Inventory allows you to match goods you receive on the receiving dock to a purchase order they might be fulfilling. You can then record transfers and deliveries in the Receiving Transactions window, record inspections in the Inspections window, record Returns in the Returns window, and record adjustments and corrections in the Corrections window.
Using the Receiving Page
The Receiving page provides a tablet-optimized, centralized workspace where warehouse supervisors can manage inbound receipts against purchase orders, requisitions, advanced shipment notices (ASNs) and so on. Warehouse supervisors can identify exceptions and take quick receiving actions to:
-
Quickly receive materials while verifying quantities.
-
View the buyer/initiator to confirm who ordered the material.
-
Putaway and deliver receipts to appropriate subinventories/locators.
-
View all overdue expected receipts and manage receipt exceptions.
Using the simplified Receiving user interface you can receive packed material for specific distribution into separate LPNs for a multi-distribution PO. This enables you to track the transaction flow of items at the project level and the LPN level. This applies to the receipt routing options Standard and Inspection. You can put away these LPN receipts using the MSCA UI.
You can customize the WHERE conditions of the SQL query for the infotiles using the API RCV_CUSTOM_PUB. This procedure lets you increase or decrease the number of infotiles on the simplified Receiving UI up to 10. In addition, the procedure can modify the infotile name, color, and query the WHERE condition. For example, to customize the infotiles for the Deliver page, use RCV_CUSTOM_PUB.Get_Deliver_Infotile_Count.
In the Receiving page, click the task icon that corresponds to the action you desire:
| Task Icon | Description |
|---|---|
|
|
View and manage all the documents for current and expected receipt dates and for internal, external, and advance ship notices (ASNs). |
|
|
View and inspect receipts for WMS-enabled and non-WMS-enabled organizations. |
|
|
View and manage receipts for pending deliveries and for internal and external parties. |
|
|
View and manage receipts for defined time frames, and receipts for internal and external parties. |
|
|
View and manage all the receipts to perform returns. |


Prerequisites
- When you first navigate to the Receiving page, select an organization in the Context Settings page. The Organization field displays all the organizations available for your particular user/responsibility combination. Click Apply to save your selection.
To manage transactions on the Receive page
Use the Receive page to view and manage all the documents for current and expected receipt dates and for internal, external, and advance ship notices (ASNs).
-
Click the Receive icon to display the Receive page.
-
Click one of the following queries:
Query Name Description Expected Today Displays the documents that have an expected receipt date of the current day Overdue Displays the documents that have an expected receipt date in the past Internal Displays expected receipts for inter-org and internal requisition shipments External Displays the expected receipts for purchase orders (POs) and external requisitions ASNs Displays the expected receipts for advance ship notices (ASNs) -
The query displays the following information:
Field Name Description Document The document number Class The respective source for the document like PO, shipment, or RMA Type The type of document such as a standard PO, blanket PO, internal shipment, RMA Type, and so on Source Information about the party where the documented originated, such as the supplier, customer, or source organization Requester The name of the person who created the document Order Date The date when the document was created Progress The percentage of the document that has been processed. This is the average percentage of each PO line's receipt quantity over shipment quantity. -
Click Actions and then Directed to display the Directed Receipt page, on which you can enter details for each deliverable receipt line. You can enter details like Quantity, Supplier Lot, Destination, UOM, and so on. On the Directed Receipt page, you can confirm or cancel the individual lines.
-
Click Actions and then Quick to display the Quick Receipt page, where you can quickly receive purchase orders, shipments, and RMAs.
-
Click the + icon next to the Receipt Number field to generate a receipt number from an internal sequence. Alternatively, to add to an existing receipt, click the Find icon to search for an existing receipt then add to that receipt.
-
Optionally, enter Subinventory and Locator values at the header level to default these values to the rows in the table (if the subinventory or locator fields in the rows are blank). To change existing Subinventory or Locator values in a row, complete the following step.
-
In the Actions column, choose one of the following actions:
-
Click the Action icon to display the Receipt Details page. You can enter or update receipt details like the subinventory, locator, or destination. Then click Apply to save your changes.
-
Click the X icon to remove the selected line from the receipt.
-
-
After you have completed your entries, click Receive to complete the receipt into the specified subinventory and locator.
To manage transactions on the Inspect page
Use the Inspection Details section of the Transaction Details page to inspect items and review detailed information about your receiving transactions.
You can reinspect receipts where the entire quantity of a receipt has already been inspected. Search for such receipts on the Inspection Search page and then perform the inspection. In the Receiving Transactions window, if you search for receipts that have to be inspected, the UI displays receipts that have been inspected, can be reinspected and delivered. However, in the Receiving HTML UI, the inspected receipts are not displayed on the info tiles page. For example, if four receipts require inspection and all four have been inspected then, the inspect tiles number is displayed as 4 in the Receiving Transactions window and as 0 in the Receiving HTML UI.
-
Click the Inspect icon.
-
Click one of the following queries:
Name Description Pending Inspection Lists all receipts that require inspection Internal Lists internal receipts that require inspection External Lists external receipts that require inspection ASNs Lists Advance Shipment Notice (ASN) receipts that require inspection -
The Inspect page displays the following data about the documents:
Name Description Receipt The receipt number LPN The license plate number Class The source for the document, such as purchase order (PO), shipment, or RMA Type The type of document, such as standard PO, blanket PO, internal shipment, RMA Type, and so on Source The party where the document originated, such as supplier or customer Received By The name of the receiver Receipt Date The date when the document was received -
Click a Receipt link to display the Receiving Transactions: Receipt page. This page displays the receipt lines that can be inspected.
-
In the Actions column, click the icon to display the Transaction Details page where you can enter inspection details.
-
The Transaction Details page contains the Inspection Details section, which displays various details about the receipts, such as Status, Quantity, UOM, Inspection Date, and so on.
-
Select a status and enter values in the other fields to complete the inspection process.
-
Click OK to return to the Receiving Transactions: Receipt page where the Inspected column indicates whether the item has been inspected.
Prioritize Inspections of Receipts Using Machine Learning
You can use Machine Learning to prioritize inspection of receipts. Machine learning calculates an inspection failure probability for each inbound line using past inspection results and returns transaction history for items, receipt sources, and carriers. This process helps in understanding rejection probability of items in the receiving area.
For more information about machine learning, see Oracle Machine Learning for SQL User's Guide.
Steps to generate the Rejection Probability of Items in the Receiving Area:
-
Run the concurrent program Receiving Inspection Analytics. This concurrent program:
-
Prepares the training data in the required format from the transaction history.
-
Builds and trains the machine learning model.
Ensure that this program completes successfully.
Receiving Inspection Analytics Concurrent Program
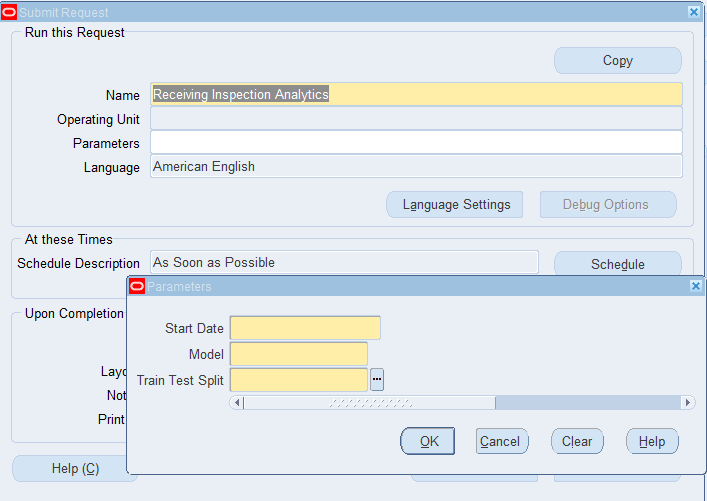
Parameters:
-
Start Date: The date from which the transactions will be used to train the Machine Learning Model.
-
Model: The regression algorithm that is used to build the model.
Model Window
-
Train Test Split: The data split percentage or ratio that will be used to train and to test the model.
Train Test Split Window
-
-
Run the concurrent program Receiving Inspection Recommendations. You can schedule this program to run periodically.
This concurrent program:
-
Identifies the items present in the Receiving area.
-
Generates rejection probabilities for such items using the trained model.
Ensure that this program completes successfully.
Receiving Inspection Recommendations Concurrent Program
Parameter:
Organization Code: The organization code for which the concurrent program must be run.
-
-
To view the predictions, navigate to the Inspect page and view the column Rejection Probability. The receipts are sorted in the order of decreasing rejection probability percentage.
Inspect Page - Rejection Probability Column
Click the links in the Receipt column to drill down to the rejection probability percentage of the items in that receipt.
Receipt Page - Rejection Probability Column
To manage transactions on the Deliver page
Use the Deliver page to view information about receipts pending delivery, and expected receipts for internal, external, and advance shipping notices (ASNs).
-
Click the Deliver icon to display the Deliver page.
-
Click one of the following queries:
Query Name Description Pending Deliver Displays expected deliveries Internal Displays expected receipts for inter-org and internal requisition shipments External Displays the expected receipts for purchase orders (POs) and external requisitions ASNs Displays the expected receipts for advance ship notices (ASNs) -
The query displays the following data about the documents:
Field Name Description Receipt The receipt document number Class The respective source for the document like purchase order (PO), shipment, or RMA Type The type of document such as a standard PO, blanket PO, internal shipment, RMA Type, and so on Source Information about the party where the documented originated, such as the supplier, customer, or source organization Received By The name of the person who received the document Order Date The date when the document was created Progress The percentage of the document that has been processed. This is the average percentage of each purchase order line's receipt quantity over shipment quantity. -
Click Actions and then Directed to display the Directed Deliver page, on which you can enter details for each deliverable receipt line. You can enter details like Quantity, Supplier Lot, Destination, Transaction Date, UOM, and so on. On the Directed Deliver page, you can go to the next item, skip, confirm, or cancel the individual lines.
-
Click Actions and then Quick to display the Quick Deliver page. This page uses pre-filled data to provide a quick way to receive purchase orders, shipments, and RMAs.
-
Optionally, enter Subinventory and Locator values at the header level to default these values to the applicable rows in the table (those rows with blank subinventory and locator values). To change existing subinventory/locator values for a row, complete the following step.
-
In the Actions column, choose one of the following actions:
-
Click the Action icon to enter or update receipt details like subinventory, locator, or destination.
Click Apply to save your changes.
-
Click the X icon to remove the selected line from the receipt.
-
-
Click Deliver to complete the deliver process.
To manage transactions on the Return page
Use the Return page to view receipt lines available for items and to view receipt lines available for items. The simplified Return user interface enables you to return material from an organization that is different from the receiving organization even though Oracle Shipping is not interfaced with Oracle Inventory.
-
Click the Return icon to display the Return page.
-
Click one of the following queries:
Name Description Rejected Lists all the documents that have failed inspection Returned to Receiving Lists receipts with return to receiving transactions and transaction type as Receive and Accept Today's Receipts Lists all the receipts for today's date -
The Return page displays the following data about the documents:
Field Name Description Receipt The receipt number Class The source for the document, such as purchase order (PO), shipment, or RMA Type The type of document, such as standard PO, blanket PO, RMA Type, and so on Source The party where the document originated, such as supplier or customer Received By The name of the first receiver Receipt Date The date when the document was received -
Click a receipt to display the Receiving Returns page. Receipt lines that can be returned are displayed on this page.
-
Enter values in the Quantity, UOM, and Return To fields. Add attachments, if required.
-
In the Actions column, do one of the following:
-
Click the Action icon to enter return details such as RMA Number, Supplier Lot, and so on. Then click Apply to save your changes.
-
Click the X icon to remove the selected line from the receipt.
-
Click the +L/S button to enter the Lot/Serial details. This button is enabled for lot or serial controlled items.
-
-
Click Return to complete the return process.
Set the profile option RCV: Track Shipments for Return To Vendors value to Yes to display the Missing Receipt button on the Return page. Click Missing Receipt to open the Receiving Returns: Missing Receipt Transactions page. On this page you enter details and return the items that do not have receipts.
To manage transactions on the Receipts page
Use the Receipts page to view receipt details such as receiver or receipt dates of the receiving transactions.
-
Click the Receipts icon to display the Receipts page.
-
Click one of the following queries:
Name Description Today's Receipts Lists all the receipts for today's date Weekly Late Lists all the receipts that were delayed last week Weekly Early Lists all the receipts that were early last week Weekly External Lists all the receipts that came from external parties (supplier and customer) last week Weekly Internal Lists all the receipts that came from internal parties (other warehouses) last week -
The query displays the following data about the documents:
Field Name Description Receipt The receipt document number Received By The first receiver if there are multiple receivers Receipt Date The date when the document was received Class Source for the documents such as purchase order (PO), shipment, or RMA Type The type of document such as standard PO, blanket PO, internal shipment, RMA Type, and so on Source The party where the document originated such as supplier, customer, or source organization Actions The action you can perform is receipt corrections. -
Click a receipt to display the Receiving Transactions page.

-
Click the arrow in the Transaction column to view the transactions for the receiving record, such as accept, reject, return to receiving, return to supplier, and deliver.
-
Click Done.
Overview of Return to Vendor Transactions
The return to vendor process enables you to create unique return orders and to ship the return order back to the vendor (supplier). After the return order is created and the material has been picked, you can create deliveries and check for export compliance, and then ship the return order with any required shipping documents.
Important: The return to vendor feature can be accessed from the Return window and from the simplified Return user interface.
You can return items that were received through a purchase order or an internal sales order shipment.
The return to vendor (RTV) process begins with a requirement to return an item to a vendor, and consists of the following steps to complete the return:
Additional Information: For items under lot, serial, or revision control you must specify the lots, serial, and revision as appropriate. If the material resides in a locator-controlled subinventory, you must also specify the locator. (If Oracle Quality module is installed, you can enter information about quality.)
-
The initial step involves requesting a returns material authorization (RMA) from the vendor, then creating a return order in the system.
-
A return order confirmation is sent to the vendor.
-
The return delivery is sent to the shipping department where the item(s) are picked and shipped back along with a delivery note.
Note: During ship-confirm, the inventory is decremented from the system which changes the available on-hand quantity.
-
A debit memo is sent to the vendor for the return.
The returns to vendor process also provides the ability to:
-
Return material to a vendor which differs from the receipt organization.
The return to vendor process enables you to return material from an organization which differs from the receipt organization.
-
Create returns without referencing a purchase order or receipt.
In some situations, you may need to return a specific component to a supplier but you do not have a backing document for the receipt of the item [such as a tracking purchase order (PO) number]. This situation may arise, for example, if the:
-
PO was cancelled.
-
The item received was a final assembly but you only need to return a component and not the entire assembly.
In the preceding situations, you can create a new return shipment without a reference document.
The following example describes a situation where a return may be required without referencing a purchase order or receipt:
-
SmartBuy (a fictitious company) purchases a server from a supplier and ships it to Customer B.
-
Customer B finds that the item is faulty, and returns it to SmartBuy.
-
SmartBuy investigates the issue and finds that only one component is faulty.
Note: In this scenario, there is no purchase order or receipt to return against. You do not have a purchase order because you are returning only a component and not the entire server; however, there would be a purchase order for the original server.
-
SmartBuy issues the material to send to the vendor using the RTV transaction type.
-
-
Track the status of the return orders, print shipping documents, enforce export compliance, and ship returns to vendors.
Oracle returns are integrated with shipping so you can query return orders in shipping, and create deliveries, check compliance, and ship materials.
-
Return Order Reservations: When the return order is created, the inventory is reserved so that it cannot be picked by any other demand.
-
Pending returns displayed in the Transaction Status window cannot be deleted.
Process Flow for Returns
You can perform a return by identifying the receipt shipment, creating the return order, selecting the document printing options (and export compliance documents, if required) then shipping the return order. In this example, returns are completed from the same organization as the receipt organization. The following steps outline the return to vendor process:
-
Identify the receipt shipment.
-
Create the return order shipment.
Note: This process is performed in Oracle Purchasing.
-
Print documents, export compliance, and shipping.
Note: This process is performed in Oracle Shipping Execution.
You can also perform a return from a different organization to the receipt organization using the simplified Return user interface.
Return of Items Received Through an Internal Sales Order Shipment
Use the Return on Internal Sales Order Shipment feature to return an internal shipment. You can return the internal shipment to the source organization or to a different organization that belongs to the same operating unit as the source organization.
The following section provides an overview of the process flow in the following applications: Oracle Inventory, Oracle Order Management, Oracle Purchasing, Oracle Shipping Execution, and Oracle Warehouse Management.
-
Ship material from one organization to another organization using an internal sales order (ISO). The destination organization receives this material through an ISO shipment.
-
To return items received through an ISO shipment, create a return order by searching for the internal requisition on the Returns page.
-
The return order creates delivery details in Oracle Shipping Execution.
-
The return order populates the Order Management interface tables to create an internal RMA. The Order Import concurrent program creates this internal RMA.
-
Oracle Shipping Execution logs shipping exceptions for the return order lines to prevent the lines from being shipped prematurely or in error.
-
If the internal RMA uses the Order Header approval workflow, then Oracle Order Management removes the shipping exceptions after the internal RMA is approved. If the internal RMA does not use the Order Header approval workflow, then the application removes the shipping exceptions when the internal RMA is created.
-
After you ship and interface the delivery details, Oracle Inventory creates a return ASN for the internal RMA.
-
The source organization receives the material using this return ASN shipment number.
-
You can perform corrections to the return ASNs.
-
You can return the material to a different destination organization in the same operating unit as the source organization.
Prerequisite
For the organization that receives the material through return ASN, set the value of the profile option RCV: Return Order Type for Internal RMA. Set the profile option at the source operating unit level for Oracle Order Management (OM) to use the profile value as the return order type of the internal RMA.
To return an internal shipment, complete the following steps:
-
Navigate to Inventory, Inbound, and then Receiving.
-
Select the organization from which you want to return the material.
-
On the Receiving Returns page of your receipt:
-
Select the quantity that you want to return.
-
In the Return To field, the organization value is automatically displayed. Select a value for the Organization, if required.
For items that are lot controlled, serial controlled, or plain, you can perform the following actions:
-
Return
-
Receive
-
Corrections for positive and negative values
-
-
Select the items that you want to return and click Return. The application generates and displays a return order number.
-
In Oracle Shipping Execution, navigate to the Shipping Transactions Form window. In the Search for region of Query Manager, select Lines. In the Source System field, select Returns. This creates the delivery details with an exception that you must resolve before you ship the delivery.
-
Run the concurrent program Order Import to create an internal RMA. Enter the following parameter values:
-
Order Source: Internal Return
-
Order Reference: Return order number
-
-
The organization that is receiving the RMA must approve it before the organization that is returning the RMA ships it. If the RMA is approved, the Oracle Order Management workflow removes the exception and the RMA is created.
-
Navigate to the Shipping Transactions window, Actions list, select Auto-create Deliveries, and click Go.
-
Click Ship Confirm and run the concurrent program Interface Trip Stop, which triggers the concurrent program Receiving Transaction Processor. This step in turn creates the return ASN that is the same as the delivery name.
-
To receive this shipment, navigate to the Receive infotile of Oracle Purchasing. The number in the Document column is the delivery name or the return ASN number.
-
In the Actions column, select the mode of receipt as Quick, Directed, or Item. If you select Directed, the Directed Receipt: Return ASN page appears.
-
Select the quantity that you want to receive.
-
Click Confirm.
-
Click Receive. The application generates and displays a receipt number.
-
On the Deliver infotile, enter the required details and click Deliver.
To receive the receipts:
-
Navigate to Inventory, Transactions, Receiving, and then Receipts.
The Find Expected Receipts window appears.
-
On the Customer tab, in the Return ASN field select a value from the list, and then click Find.
The Receipts window appears.
-
Enter Quantity. In the Receiving Transactions window, you can deliver the required quantity.
-
Run the concurrent program Receiving Transaction Processor.
From the Receiving Corrections window, you can perform corrections only to the lines that are received but not yet delivered.
The return flow generates two transactions:
-
A Return to organization transaction in the buying organization that is initiating the return and an Internal RMA receipt transaction in the organization that will receive back the returned goods.
-
Oracle Cost Management ensures that the accounting generated in the forward flow against the Intercompany accrual, Intercompany COGS, Profit in Inventory, and Inventory valuation accounts is reversed using the same rate at which the shipment and receipt in the forward flow were costed.
Note: The return flow for internal order shipments is not supported for intercompany transfers involving:
-
Process manufacturing organizations
-
Global procurement and drop shipment
-
Expense items
-
Expense subinventories
-
Expense destination
-
Periodic costing organizations
-
Project manufacturing organizations
-
Encumbrance accounting
Canceling an ISO Shipment
You can cancel an ISO shipment and shipment lines from the Manage Shipments window.
Prerequisites
-
The shipment must be in transit or partially received at the destination organization.
-
Use the Application Developer responsibility to set the parameter ALLOW_CANCEL to Y for the Manage Shipments window (Function Name is RCV_RCVSHESH ).
-
The shipment must not have any Receiving Transactions Interfaces (RTIs).
To cancel an ISO shipment, complete the following steps:
-
In the destination organization, navigate to the Manage Shipments window.
The Find In-Transit Shipments window appears.
-
In the Supplier and Internal tab’s Shipment field, enter the shipment number that you want to cancel.
-
Click Find.
-
Place your cursor in the shipment header or line.
-
From the Tools menu, select Cancel.
If you cancel a shipment at the header level, then all the individual lines are automatically canceled. You can cancel shipment lines with the status Expected or Partially Received. To cancel a shipment line that is partially received, deliver the received quantity before initiating cancellation.
In WMS-enabled organizations, if you cancel a shipment line, then the application unpacks the line quantity from the corresponding LPN.
-
Click OK.
A confirmation message appears with the cancel order reference number.
-
Click OK.
This action initiates the Order Import concurrent program to import the internal RMA. After the concurrent program completes successfully, search for the same shipment to view the internal RMA number at the line level. When you cancel a shipment line, a new internal RMA number is generated for the same.
-
From the Tools menu, select Generate Return ASN.
A confirmation message appears with the return ASN number.
If you generate a return ASN at the header level, then all the lines will display the same return ASN number. To generate separate return ASN numbers, repeat the step at the line level.
In WMS-enabled organizations:
-
At the header level, if you cancel a shipment and generate a return ASN, then the application updates the status of the corresponding LPNs from Intransit to In transit for Return ASN.
-
At the line level, if you generate a return ASN, then the application unpacks the line quantity from the corresponding LPN.
-
-
Click OK.
This action initiates the Receiving Transaction Processor concurrent program to import the return ASN. After the concurrent program completes successfully, search for the same shipment to view the return ASN number at the line level.
Important: Internal RMA and Return ASN are folder fields. With the cursor in the shipment lines region, you can show or hide them from the Folder menu.
-
Verify that the Status column displays Canceled or Partially Canceled.
To search for the internal RMAs that are created when an ISO shipment is canceled:
-
Navigate to the Order Organizer window.
The Find Orders/Quotes window appears.
-
In the Quote/Order Information tab, enter the following values:
-
Order Source: Internal In-Transit Return
-
Order Reference: Cancel order reference number
-
-
Click Find.
Canceling an Inter-Organization Transfer Shipment
You can cancel an inter-organization transfer (IOT) shipment and shipment lines from the Manage Shipments window.
Prerequisites
-
The shipment must be in transit or partially received at the destination organization.
-
Use the Application Developer responsibility to set the parameter ALLOW_CANCEL to Y for the Manage Shipments window (Function Name is RCV_RCVSHESH ).
-
The shipment must not have any Receiving Transactions Interfaces (RTIs).
To cancel an IOT shipment, complete the following steps:
-
In the destination organization, navigate to the Manage Shipments window. The Find In-Transit Shipments window appears.
-
In the Supplier and Internal tab’s Shipment field, enter the shipment number that you want to cancel.
-
Click Find.
-
Place your cursor in the shipment header or line.
-
From the Tools menu, select Cancel. If you cancel a shipment at the header level, then all the individual lines are automatically canceled.
In WMS-enabled organizations, if you cancel a shipment line, then the application unpacks the line quantity from the corresponding LPN.
-
Click OK.
A confirmation message appears.
-
Click OK.
-
From the Tools menu, select Generate Return ASN.
A confirmation message appears with the return ASN number.
In WMS-enabled organizations:
-
At the header level, if you cancel a shipment and generate a return ASN, then the application updates the status of the corresponding LPNs from Intransit to In transit for Return ASN.
-
At the line level, if you generate a return ASN, then the application unpacks the line quantity from the corresponding LPN.
-
-
Click OK.
Search for the same shipment to view the return ASN number at the line level.
Additional Information: Return ASN is a folder field. With the cursor in the shipment lines region, you can show or hide it from the Folder menu.
-
Verify that the Status column displays Canceled or Partially Canceled.
Cancel ISO or IOT Shipment That is Lost During Transit
If a shipment is lost during transit, then the source or the destination organizations cannot receive the material, however the order can be canceled. Because the lost shipment cannot be accounted for, a write off of the material is required.
To do this, you must set up a nonquantity tracked expense subinventory and then cancel the lost shipment.
To define the expense subinventory and locator, complete the following set up steps:
In the Subinventories window, Main tab do the following:
-
Deselect these two parameters: Quantity Tracked and Asset Subinventory
-
Set up the locator control as required.
-
Ensure that the subinventory Status is set to Active: Not Available for Netting, ATP and Reservations.
-
Verify that the following parameters Status Attributes are disabled: Include in ATP, Allow Reservation, and Nettable.
To set up the expense subinventory or locator for receiving the lost material, navigate to the Organization Parameters window, Inter-Org Information tab, and then Lost In-Transit Shipment Processing Controls region.
To cancel a lost shipment which is in transit, complete the following steps:
-
In the destination organization, navigate to the Manage Shipments window.
The Find In-Transit Shipments window appears.
-
In the Supplier and Internal tab’s Shipment field, enter the shipment number that you want to cancel.
-
Click Find.
-
Place your cursor in the shipment header or line.
-
From the Tools menu, select Cancel Lost Shipment.
This action automatically initiates the concurrent request Process Cancellation of Lost Shipment. This request marks the lost items as canceled and their receipt will be registered in the expense subinventory or locator.
Important: You cannot cancel a lost shipment line if the item is shipped as consigned.
Receiving and Delivering Material in Inventory MSCA
When receiving or delivering material, verify the source to distinguish the return ASN of the shipment type; for IOT shipments the return ASN source is Inventory and for ISO shipments the return ASN source is Customer.
To receive material in Inventory MSCA:
-
Navigate to the Materials & Mfg responsibility, Receiving, and then Receipts.
The Receipts page appears.
-
Select Return ASN.
-
Select the organization where you want to receive the material.
-
Enter or select values for the fields Return ASN and Item.
-
Enter or select values in the other required fields.
-
Click Next Item or Done to receive the material.
To deliver material in Inventory MSCA:
-
Navigate to the Materials & Mfg responsibility, Receiving, and then Deliver.
The Deliver page appears.
-
Select Return ASN.
-
Select the organization where you want to deliver the material.
-
Enter or select values for the fields Return ASN and Item.
-
Enter or select values in the other required fields.
-
Click Next Item or Done to deliver the material.
Canceling a Return Order
To cancel a return order
-
Navigate to the Transactions Status Summary window.
The Find Transaction Statuses window appears.
-
In the Supplier and Internal tab, enter the number in the Return Order field.
-
Click Find.
The Transaction Statuses window appears.
-
In the Transactions tab, select the lines that you want to return.
-
From the Tools menu, select Cancel Return Shipment Lines.
Reversing an ISO Shipment Cancellation
To reverse the ISO shipment cancellation, cancel the internal RMA using the Order Manager responsibility.
To reverse the ISO shipment cancellation:
-
Navigate to the Order Organizer window.
-
Search for the internal RMA to reverse the cancellation.
-
From the Tools menu, select Cancel. To reverse the ISO shipment or line level cancellation, cancel the internal RMA at the header or line level. Complete this task to receive the shipment line at the destination organization.
For more information, see Creating an RMA Against Internal Sales Order, Oracle Order Management Implementation Manual.
Reversing an IOT Shipment Cancellation
To reverse the IOT shipment cancellation, cancel the return ASN.
To reverse the IOT shipment cancellation:
-
Navigate to the Find In-Transit Shipments window in the source organization.
-
In the Supplier and Internal tab’s Shipment field, search for the return ASN for which you want to reverse the cancellation.
-
From the Tools menu, select Cancel. To reverse the IOT shipment or line level cancellation, cancel the return ASN at the header or line level. Complete this task to receive the shipment line at the destination organization.
-
Search for the same return ASN.
-
Verify that the Status column displays Canceled.
Related Topics
For information about the return to vendor process in Oracle Purchasing, see Oracle Purchasing User's Guide, Returns chapter.
For information about the return to vendor process in Oracle Shipping Execution, see Oracle Shipping Execution User's Guide, Miscellaneous Shipments.
Transferring Between Subinventories
You can transfer material within your current organization between subinventories, or between two locators within the same subinventory. You can transfer from asset to expense subinventories, as well as from tracked to non-tracked subinventories. If an item has a restricted list of subinventories, you can only transfer material from and to subinventories in that list. Oracle Inventory allows you to use user-defined transaction types when performing a subinventory transfer.
To enter a subinventory transfer
-
Navigate to the Subinventory Transfer window.
-
Enter the date and time of entry for the transaction.
The date you can enter is controlled by the INV: Transaction Date Validation profile option. See: Oracle Inventory Profile Options.
-
Enter a transaction type for the subinventory transfer. This can either be a predefined system type or one you defined. See: Defining Transaction Types.
-
Optionally, enter the source of the transaction type. See: Defining and Updating Transaction Source Types.
-
Optionally, indicate if inventory information should be defaulted from the serial number.
To enter the item to transfer
-
Choose Transaction Lines in the Subinventory Transfer window. The Transaction Lines Detail folder window appears.
-
Enter an inventory item to transfer. If you choose to default inventory information from the serial number, enter a serial number.
-
Optionally, enter the revision for the item. You must enter a value here if the item is under revision control.
-
Enter the subinventories from and to which to transfer material. Enter the same subinventory in the Sub and To Sub fields to transfer material between locators.
-
Optionally, enter the locators from and to which to transfer the item. You must enter a value here if you established locator control.
You can enter a new value in the To Locator field only if you defined locator control as dynamic entry.
-
Optionally, enter a lot number for the item. If you want to enter multiple lot numbers, complete the remaining steps, then choose the Lot/Serial button to display the Lot Entry window.
-
Enter a unit of measure. This can be the primary unit of measure (the default) or any valid alternate unit of measure.
If you enter an alternate unit of measure, Oracle Inventory issues the quantity you specify in this unit of measure. Oracle Inventory also converts the quantity to the primary unit of measure so that it can correctly update the on-hand quantity.
-
Enter the quantity of the inventory item to transfer, based on the unit of measure you specified. If the item is under dual unit of measure control, the secondary unit of measure and the secondary quantity populate automatically in the Secondary UOM and Secondary Quantity fields
-
Optionally, enter a reason code for the transaction. For example, you can use reason codes to allow you to mark exceptional charges to support a quality data collection and reporting system. See: Defining Transaction Reasons.
-
Optionally, enter up to 240 characters of free text that describes the transaction.
To enter lot or serial number information.
Click the Lot/Serial button. See: Assigning Lot Numbers and Assigning Serial Numbers.
To view quantity available and quantity on hand values
-
Review the following fields:
Available: Displays the quantity available to transfer, based on the unit of measure you specified. The available quantity is the quantity on hand less all reservations for the item. This amount could include the amount you have reserved if you enter a transaction source that has reservations against it. The available quantity includes reservations against current transaction source. The available quantity is specific to the revision level, lot number, From subinventory, and From locator you specify for the transfer.
Secondary Available: Displays the quantity available to transfer in the secondary unit of measure if the item is under dual unit of measure control.
On hand: Displays the current on-hand quantity for the item, based on the unit of measure you specified. The on-hand quantity is specific to the revision, lot number, From subinventory, and From locator you specify for the transfer. On-hand includes quantities for pending transactions in the MTL-MATERIAL-TRANSACTIONS table.
Secondary On hand: Displays the current on-hand quantity of the item in the secondary unit of measure if the item is under dual unit of measure control.
To process the transaction
-
Save your work.
Related Topics
Customizing the Presentation of Data, Oracle E-Business Suite User's Guide
Performing Miscellaneous Transactions
With a miscellaneous transaction you can issue material to or receive material from general ledger accounts in your current organization. This allows you to issue material to groups that are not inventory, receiving, or work in process such as a research and development group or an accounting department. You can also make manual adjustments to the general ledger by receiving material from one account to inventory, and then issuing that material from inventory to another account.
You can use your user-defined transaction types and sources to further classify and name your transactions. You can use this feature to issue items to individuals, departments, or projects; or to issue damaged items to expense accounts such as scrap. You can perform the receipts for items that were acquired by means other than a purchase order from a supplier. You can also use this feature to load all item on-hand quantities when you start implementing Oracle Inventory.
You will receive a material shortage alert while performing a miscellaneous transaction if you have enabled shortage alerts for the miscellaneous transaction type being performed. Also, a miscellaneous transaction can trigger a shortage notification to be sent to various pre-defined individuals. See: Material Shortage Alerts and Shortage Notifications.
To enter a miscellaneous transaction
-
Navigate to the Miscellaneous Transaction window.
-
Enter the date and time of entry for the transaction.
The date you can enter is controlled by the INV: Transaction Date Validation profile option. See: Oracle Inventory Profile Options.
-
Enter a miscellaneous transaction type for the transfer. This can either be a predefined system type or one you defined. See: Defining Transaction Types.
-
Optionally, enter the source of the transaction type. See: Defining and Updating Transaction Source Types.
-
Optionally, enter the general ledger account against which the material is issued or received.
-
Optionally, indicate if inventory information should be defaulted from the serial number.
To enter the item to transfer
-
Choose Transaction Lines in the Miscellaneous Transaction window. The Transaction Lines Detail folder window appears.
-
Enter an inventory item to issue or receive. If you choose to default inventory information from the serial number, enter a serial number.
-
Enter the revision for the item to issue or receive. You must enter a value in this field if the item is under revision control.
-
Enter a subinventory. For an issue transaction, you cannot enter a subinventory that does not have Quantity Tracking turned on.
-
Enter a locator. You must enter a value here if you established locator control for the item.
-
Optionally, enter a lot number for the item. If you want to enter multiple lot numbers, complete the remaining steps, then choose the Lot/Serial button to display the Lot Entry window.
-
Optionally enter a transfer location for the item.
Note: If you enabled the Location Required parameter for this transaction type on the Transaction Types window, this field is mandatory.
-
Enter a unit of measure. This can be the primary unit of measure (the default) or any valid alternate unit of measure.
If you enter an alternate unit of measure, Oracle Inventory issues the quantity you specify in this unit of measure. Oracle Inventory also converts the quantity to the primary unit of measure so that it can correctly update the on-hand quantity.
-
Enter the quantity of the inventory item to issue or receive, based on the unit of measure you specified. If the item is under dual unit of measure control, the secondary unit of measure and the secondary quantity populate automatically in the Secondary UOM and Secondary Quantity fields.
-
If using average costing, enter the unit cost of the item to receive or issue. Leave this field blank to use the system average cost at the time of the transaction.
-
Optionally, enter a reason code for the transaction. For example, you can use reason codes to allow you to mark exceptional charges to support quality data collection.
-
Optionally, enter up to 240 characters of free text that describe the transaction.
-
Enter a general ledger account for the item to use in the transaction. You can change this account only for miscellaneous issue/receipt or user-defined transaction types.
-
Optionally, enter the owning party if the owner controls the item.
-
Optionally, enter the planning party if a vendor has planning authority for the item.
Note: You can view fields that do not appear on the default miscellaneous transaction window. You can also hide unused fields. See Customizing the Presentation of Data, Oracle E-Business Suite User's Guide.
To enter lot or serial number information
Choose the Lot/Serial button. See: Assigning Lot Numbers and Assigning Serial Numbers.
To view quantity available and quantity on hand values
-
Review the following fields:
Available: Displays the quantity available to transfer, based on the unit of measure you specified. The available quantity is the quantity on hand less all reservations for the item. This amount could include the amount you have reserved if you enter a transaction source that has reservations against it. The available quantity includes reservations against current transaction source. The available quantity is specific to the revision level, lot number, From subinventory, and From locator you specify for the transfer.
Secondary Available: Displays the quantity available to transfer in the secondary unit of measure if the item is under dual unit of measure control.
On hand: Displays the current on-hand quantity for the item, based on the unit of measure you specified. The on-hand quantity is specific to the revision, lot number, From subinventory, and From locator you specify for the transfer. On-hand includes quantities for pending transactions in the MTL-MATERIAL-TRANSACTIONS table.
Secondary On hand: Displays the current on-hand quantity of the item in the secondary unit of measure if the item is under dual unit of measure control.
-
Save your work to process the transaction.
Related Topics
Customizing the Presentation of Data, Oracle E-Business Suite User's Guide
Inter-organization Transfers
You can define multiple inventories, warehouses, and manufacturing facilities as distinct organizations. With Oracle Inventory you can perform inter-organization transfers as direct or intransit shipments.
You can transfer one or more items in a single transaction. You can also transfer partial quantities of the same item to different subinventories and locators in a single transaction. The items you transfer must exist in both organizations. You can also transfer expense and asset items from one organization to another using intransit inventory.
Direct Inter-organization Transfers
You can use a direct inter-organization transfer to move inventory directly from a shipping organization to a destination organization.
The validity of a transfer transaction depends on the controls you have defined in both the shipping and destination organizations for the items you want to transfer. For example, you can transfer item A from organization X to organization Y, even though item A is under lot control only in organization X (you can specify the lot numbers for item A in organization X during the transfer transaction). However, you cannot transfer item B from organization X to organization Y if item B is under lot control only in organization Y (you cannot specify lot numbers for item B in the destination organization because you are performing a direct transfer).
The following tables present direct, inter-organization transfers.
Dual Unit of Measure Control
| Shipped Item | Destination Item | Allowed |
|---|---|---|
| None | None | OK |
| None | Fixed | OK |
| None | Default | OK |
| None | No Default | OK*** |
| Fixed | None | OK |
| Fixed | Fixed | OK |
| Fixed | Default | OK |
| Fixed | No Default | OK*** |
| Default | None | OK |
| Default | Fixed | OK |
| Default | Default | OK |
| Default | No Default | OK*** |
| No Default | None | OK |
| No Default | Fixed | OK |
| No Default | Default | OK |
| No Default | No Default | OK*** |
*** Apply default UOM conversion from destination organization.
Revision Control
| REVISION CONTROL | Off (Shipping Organization) | On (Shipping Organization) |
|---|---|---|
| Off (Destination Organization) | OK | OK |
| On (Destination Organization) | - | OK |
Lot Control
| LOT CONTROL | Off (Shipping Organization) | On (Shipping Organization) |
|---|---|---|
| Off (Destination Organization) | OK | OK |
| On (Destination Organization) | - | OK |
Grade Control
| Grade Control | Off (Shipping Organization) | On (Shipping Organization) |
|---|---|---|
| Off (Destination Organization) | OK** | OK |
| On (Destination Organization) | OK | OK* |
* The Shipped lot grade does not override the destination lot grade
** Grade Defaults from item master
Process Manufacturing Lot Attributes
| OPM Lot Attributes | Not Used (Shipping Organization) | Used (Shipping Organization |
|---|---|---|
| Not Used (Destination Organization | OK | OK |
| Used (Destination Organization) | OK** | OK* |
* The Shipped lot grade does not override the destination lot grade
**Lot attributes default from the item master for new lots.
Serial Number Control
| SERIAL NUMBER CONTROL | Off (Shipping Organization) | On (Shipping Organization) |
|---|---|---|
| Off (Destination Organization) | OK | OK |
| On (Destination Organization) | - | OK |
Asset Expense Subinventory
| Destination Org Shipping Org | Expense sub and/or Expense item | Asset sub and Asset item |
|---|---|---|
| Expense sub and/or Expense item | OK | - |
| Asset sub and Asset item | OK | OK |
Unit of Measure Conversions
When you transfer items under dual UOM control between organization, the system honors the UOM conversion of the destination organization. Consequently, the system could potentially recalculate the secondary quantity for the item if the conversions differ between the shipping organization and the destination organization. The system always processes transaction quantities in the primary UOM.
You must apply UOM conversions in both the shipping and destination organization before the system can process the transaction.
Inter-Organization Transfers via Intransit Inventory
You usually transfer material to intransit inventory when transportation time is significant. When you perform the transfer transaction, you do not need to specify the delivery location. You only need to enter the subinventory you are shipping from, a shipment number, the freight information, and, depending on the inter-organization transfer charge that applies between the organizations, a percentage of the transaction value or a discrete amount that Oracle Inventory uses to compute transfer charges.
If the FOB point is set to Receipt in the Shipping Networks window, the destination organization owns the shipment when they receive it. If it is set to Shipment, the destination organization owns the shipment when the shipping organization ships it, and while it is intransit.
While your shipment is intransit, you can update shipping information such as the freight carrier or arrival date in the Maintain Shipments window. See: Managing Shipments, Oracle Purchasing User's Guide.
At the time of shipment, you must define your receiving parameters for the destination organization. You can receive and deliver your shipment in a single transaction or you can receive and store your shipment at the receiving dock. See: Receipts, Oracle Purchasing User's Guide.
The validity of a transfer transaction depends on the controls you have defined in both the shipping and destination organizations for the items you want to transfer. For example, you can transfer item A from organization X to organization Y, even though item A is under lot control only in organization X (you can specify the lot numbers for item A in organization X during the transfer transaction). You can also transfer item B from organization X to organization Y if item B is under lot control only in organization Y (you can specify lot numbers for item B in the destination organization when you perform the receiving transaction).
The following tables present inter-organization transfers via intransit inventory.
Dual Unit of Measure Control
| Shipped Item | Destination Item | Allowed Intransit |
|---|---|---|
| None | None | OK |
| None | Fixed | OK |
| None | Default | OK |
| None | No Default | OK |
| Fixed | None | OK |
| Fixed | Fixed | OK |
| Fixed | Default | OK |
| Fixed | No Default | OK |
| Default | None | OK |
| Default | Fixed | OK |
| Default | Default | OK |
| Default | No Default | OK |
| No Default | None | OK |
| No Default | Fixed | OK |
| No Default | Default | OK |
| No Default | No Default | OK |
Revision Control
| REVISION CONTROL | Off (Shipping Organization) | On (Shipping Organization) |
|---|---|---|
| Off (Destination Organization) | OK | OK |
| On (Destination Organization) | Receive any revision | Receive only the revision you ship |
Lot Control
| LOT CONTROL | Off (Shipping Organization) | On (Shipping Organization) |
|---|---|---|
| Off (Destination Organization) | OK | OK |
| On (Destination Organization) | OK | OK |
Grade Control
| Grade Control | Off (Shipping Organization) | On (Shipping Organization) |
|---|---|---|
| Off (Destination Organization) | OK** | OK |
| On (Destination Organization) | OK | OK* |
* The Shipped lot grade does not override the destination lot grade
** Grade Defaults from item master
Process Manufacturing Lot Attributes
| OPM Lot Attributes | Not Used (Shipping Organization) | Used (Shipping Organization |
|---|---|---|
| Not Used (Destination Organization | OK | OK |
| Used (Destination Organization) | OK** | OK* |
* The Shipped lot grade does not override the destination lot grade
**Lot attributes default from the item master for new lots.
Serial Number Control
| SERIAL NUMBER CONTROL | Off (Shipping Organization) | On (Shipping Organization) |
|---|---|---|
| Off (Destination Organization) | OK | OK |
| On (Destination Organization) | OK | OK |
Asset Expense Subinventory Item
| Item Type | Asset Subinventory | Expense Subinventory |
|---|---|---|
| Asset item | OK | - |
| Expense Item | OK | OK |
Unit of Measure Conversions
When you transfer items under dual UOM control between organization, the system honors the UOM conversion of the destination organization. Consequently, the system could potentially recalculate the secondary quantity for the item if the conversions differ between the shipping organization and the destination organization. The system always processes transaction quantities in the primary UOM.
You must UOM conversions in both the shipping and destination organization before the system can process the transaction.
Related Topics
Transferring Between Organizations
Transferring Material Between Organizations
You can transfer material from your current organization to another organization, or from your current organization to intransit inventory.
Material in intransit inventory belongs to the organization identified by the FOB point. See: Defining Inter-Organization Shipping Networks.
Prerequisites
- Define an inventory item that is common to both organizations. See: Defining Items and Assigning Items to Organizations.
- Define at least two organizations, one of which is valid to receive material from the other. See: Creating an Organization, Oracle HRMS Enterprise and Workforce Management Guide and Defining Organization Parameters.
- Set up inter-organization relationships and their corresponding accounts. See: Defining Inter-Organization Shipping Networks.
- For direct transfers, if the item to transfer is under serial number control, the item must have the same unit of measure in each organization. See: Defining Items.
To enter the information to perform a transfer between organizations
-
Navigate to the Inter-organization Transfer window.

-
Enter the date of entry for the transaction.
The date you can enter is controlled by the INV: Transaction Date Validation profile option. See: Oracle Inventory Profile Options.
-
Enter an organization to which to transfer the material. You must first define this organization as valid to receive material from your current organization. See: Defining Inter-Organization Shipping Networks.
In addition, if this organization uses intransit inventory, Oracle Inventory stores the material as intransit inventory when you transfer any material to this organization. You must then move the material from intransit inventory to this organization with an intransit inventory receipt.
-
Enter a transaction type. This can be either a predefined system type or one you defined. See: Defining and Updating Transaction Types.
Optionally, you can enter the source of the transaction type. See: Defining and Updating Transaction Source Types.
-
Indicate if inventory information should be defaulted from the serial number.
-
Enter any optional Shipment information.
Optionally, you can enter the following Shipment information:
-
A shipment number to uniquely identify an item or group of items to transfer. When the To Org uses intransit inventory, you must enter a value here.
The freight carrier for the transfer.
A waybill or airbill number for the transfer.
The number of containers in which the material is stored for the transfer.
The date you expect to receive the material at the destination organization. You must enter a date equal to or later than the current date. Oracle Inventory uses this date for reporting purposes only.
To enter the items to transfer
-
Choose Transaction Lines from the Inter-organization Transfer window.
-
Enter an inventory item to transfer.
You can transfer the same item more than once. For example, you can specify an item more than once to transfer partial quantities to different subinventories or stock locators.
-
For a direct transfer, if the item is under revision control in either organization, enter a revision that is common to the item in both organizations.
-
Enter a subinventory from which to transfer the material.
-
Optionally, enter the subinventory to which to transfer the material. You must enter a value in this field for direct inter-organization transfers.
-
If you established locator control for the item, enter from and to locators.
-
Enter a lot number for the item. If you want to enter multiple lot numbers, complete the remaining steps, then choose the Lot/Serial button to display the Lot Entry window.
For receipt transactions, if you enter a lot number, enter the date the lot expires. You can enter a value here only if the Lot Expiration (Shelf Life) Control attribute is set to User-defined Expiration Date.
-
Enter a unit of measure. This can be the primary unit of measure (the default) or any valid alternate unit of measure.
If you enter an alternate unit of measure, Oracle Inventory issues the quantity you specify in this unit of measure. Oracle Inventory also converts the quantity to the primary unit of measure so that it can correctly update the on-hand quantity.
-
Enter the quantity of the item to transfer. If the item is under dual unit of measure control, the secondary unit of measure and the secondary quantity populate automatically in the Secondary UOM and Secondary Quantity fields.
-
Optionally enter a reason code for the transaction. For example, you can use reason codes to allow you to mark exceptional charges to support a quality data collection and reporting system.
You can also enter up to 240 characters of free text in the Reference field that describe the transaction.
To enter internal transfer charges to assign to the To organization
-
Enter a value in the Added Value field that represents the transfer charge. You can enter a value here only if you entered Requested value in the Inter-Organization Transfer Charge field in the Organization Parameters window.
-
Enter the percent of the transaction value that represents the transfer charge. You can enter a value here only if you entered Requested percent in the Inter-Organization Transfer Charge field in the Organization Parameters window. Defining Inter-Organization Information.
To enter freight information costs to assign to the From (current) organization:
-
Enter the transportation cost to physically transfer the material; that is, the freight carrier charges.
-
Enter the general ledger account to which to charge the value you entered in the Transportation Cost field. Oracle Inventory displays the account you defined for the freight carrier as the default. See: Defining Freight Carriers, Oracle Order Management Implementation Guide.
To enter a unit number
If Oracle Project Manufacturing is installed and if you have enabled its end item model/unit effectivity feature, you can enter a unit number for the item. See: Model/Unit Effectivity, Oracle Project Manufacturing Implementation Manual.
Note: The Unit Number field is visible only if you have installed Project Manufacturing.
To enter lot or serial number information.
Click the Lot/Serial button. See: Assigning Lot Numbers and Assigning Serial Numbers.
To view quantity available and quantity on hand values:
Review the following fields:
| Field | Description |
|---|---|
| Available | Displays the quantity available to transfer, based on the unit of measure you specified. The available quantity is the quantity on hand less all reservations for the item. This amount could include the amount you have reserved if you enter a transaction source that has reservations against it. The available quantity includes reservations against current transaction source. The available quantity is specific to the revision level, lot number, From subinventory, and From locator you specify for the transfer. |
| Secondary Available | Displays the quantity available to transfer in the secondary unit of measure if the item is under dual unit of measure control. |
| On hand | Displays the current on-hand quantity for the item, based on the unit of measure you specified. The on-hand quantity is specific to the revision, lot number, From subinventory, and From locator you specify for the transfer. On-hand includes quantities for pending transactions in the MTL-MATERIAL-TRANSACTIONS table. |
| Secondary On hand | Displays the current on-hand quantity of the item in the secondary unit of measure if the item is under dual unit of measure control. |
To process the transaction
Save your work.
To record movement statistics:
Use either of the following methods to record and maintain information associated with the movement of goods:
-
Navigate to the Movement Statistics window and record information manually. See: Entering Movement Statistics.
-
Automate the collection of this information by setting up parameters in the Movement Statistics Parameters and Economic Zones windows. See: Defining Movement Statistics Parameters and Defining Economic Zones.
Planning Transfer Transaction
Vendor Managed Inventory is a procurement and planning practice in which you delegate key inventory management functions to one or more suppliers. Under this arrangement, the supplier determines the items, quantities, and delivery schedules on your behalf based on information the supplier receives from your inventory and procurement systems.
Planning transfers enables you to assume the planning responsibility from the supplier. This transaction does not move goods, it changes the planning organization from the supplier site to the internal organization that holds the goods. After you perform a planning transfer and run collection, your supplier can no longer see the transferred quantity in the on hand quantity column.
To enter a planning transfer transaction
-
Navigate to the Planning Transfer window.
-
Enter the date and time of entry for the transaction.
The date you can enter is controlled by the INV: Transaction Date Validation profile option. See: Oracle Inventory Profile Options.
-
Select Transaction Lines.
-
Enter an inventory item to issue or receive. If you choose to default inventory information from the serial number, enter a serial number.
-
Enter the revision for the item to issue or receive. You must enter a value in this field if the item is under revision control.
-
Enter the Subinventory. This is the subinventory where the vendor managed inventory resides.
-
Enter the Supplier. This is the supplier from which you receive the consigned inventory.
-
Enter the Supplier Site. This is the location from which you receive the consigned inventory.
-
Enter a unit of measure. This can be the primary unit of measure (the default) or any valid alternate unit of measure.
If you enter an alternate unit of measure, Oracle Inventory issues the quantity you specify in this unit of measure. Oracle Inventory also converts the quantity to the primary unit of measure so that it can correctly update the on-hand quantity.
-
Enter the quantity of the inventory item to issue or receive, based on the unit of measure you specified. If the item is under dual unit of measure control, the secondary unit of measure and the secondary quantity populate automatically in the Secondary UOM and Secondary Quantity fields.
-
Optionally, enter a reason code for the transaction. For example, you can use reason codes to allow you to mark exceptional charges to support quality data collection.
-
Optionally, enter up to 240 characters of free text that describe the transaction.
To enter lot or serial number information.
-
Choose the Lot/Serial button. See: Assigning Lot Numbers and Assigning Serial Numbers.
To view quantity available and quantity on hand values
-
Review the following fields:
Available: Displays the quantity available to transfer, based on the unit of measure you specified. The available quantity is the quantity on hand less all reservations for the item. This amount could include the amount you have reserved if you enter a transaction source that has reservations against it. The available quantity includes reservations against current transaction source. The available quantity is specific to the revision level, lot number, From subinventory, and From locator you specify for the transfer.
Secondary Available: Displays the quantity available to transfer in the secondary unit of measure if the item is under dual unit of measure control
On hand: Displays the current on-hand quantity for the item, based on the unit of measure you specified. The on-hand quantity is specific to the revision, lot number, From subinventory, and From locator you specify for the transfer. On-hand includes quantities for pending transactions in the MTL-MATERIAL-TRANSACTIONS table.
Secondary On hand: Displays the current on-hand quantity of the item in the secondary unit of measure if the item is under dual unit of measure control.
To process the transaction
-
Save your work.
See: How do I set up Collaborative Planning with Oracle Advanced Supply Chain Planning or another Oracle ERP system? Oracle Collaborative Planning Online Help.
Transferring Consigned and VMI Material
Use the Consigned Transaction window to transfer ownership of consigned inventory. You can transfer ownership of consigned material to or from a supplier. Material can also be returned to the consigned status after the material is consumed and the consumption advice and/or invoice is generated.
Additional Information: Serial and lot transaction information (if applicable) is also tracked during Transfer to Regular and Transfer to Consigned transactions. If you transfer the ownership of the material back to supplier from inventory using the Transfer to Consigned procedure, then the lot and serial controlled information is also transferred.
To create a transfer transaction:
-
Navigate to the Consigned Transactions window.
-
Choose a transaction type that defines the type of material transfer:
-
Transfer to Regular: Transfers ownership of the material from the supplier.
-
Transfer to Consigned: Transfers ownership of the material to the supplier.
-
-
Optionally, enter the transaction Source.
-
Select the Serial-Triggered check box if the part number is serialized.
-
Click Transaction Lines to open the detail window.

-
Select an item from the list of values.
-
Enter the revision number if necessary.
-
Select the Subinventory where the inventory resides from the list of values.
-
Enter locator information if necessary.
-
Enter the Lot and Serial information if necessary.
-
Select the Owning Party form the list of values.
-
Select the Consumption Transaction ID of the material for which the consumption advice was generated.
Note: If the material is consumed and the consumption advice is created, the Consumption Transaction field displays the eligible records that fall within the dates defined in the form function parameter
CONS_INV_RTN_DAYS. For example, if the parameter value is 30, then the system displays only those records from the last 30 days. However, if the consumption advice is not created, all the records for that material appear regardless of the form function parameter setting. -
Change the default UOM if necessary.
-
Enter the Item Quantity. If the item is under dual unit of measure control, the secondary unit of measure and the secondary quantity populate automatically in the Secondary UOM and Secondary Quantity fields.
-
Optionally, select the appropriate transaction reason.
-
Optionally, enter a reference comment.
-
Save your work.
Additional Notes about Consumption Advice and Debit Memos
-
If the debit memo cannot be created for some reason, then the Transfer to Consigned transaction is not committed and the system displays an error message.
-
If the consumption advice and invoice were created for the consumed material, then a debit memo is generated for the quantity that is returned to the consigned status. Note:
Note: The Auto Create Debit Memo from RTS Transaction check box must be selected in the Supplier Site window and an invoice must exist. If not selected, then a workflow notification is sent to the buyer to create the debit memo manually (it will not be created automatically).
-
A debit memo is raised if the material transferred back to consigned has already been invoiced. This occurs when the Create Debit Memo from RTS Transaction check box is selected in the Supplier Site. If this parameter is not selected or the returned quantity is greater than quantity billed on the invoice, then a workflow notification should be raised to create the debit memo manually.
-
To view quantity available and quantity on hand values
-
Review the following fields:
Available: Displays the quantity available to transfer, based on the unit of measure you specified. The available quantity is the quantity on hand less all reservations for the item. This amount could include the amount you have reserved if you enter a transaction source that has reservations against it. The available quantity includes reservations against current transaction source. The available quantity is specific to the revision level, lot number, From subinventory, and From locator you specify for the transfer.
Secondary Available: Displays the quantity available to transfer in the secondary unit of measure if the item is under dual unit of measure control
On hand: Displays the current on-hand quantity for the item, based on the unit of measure you specified. The on-hand quantity is specific to the revision, lot number, From subinventory, and From locator you specify for the transfer. On-hand includes quantities for pending transactions in the MTL-MATERIAL-TRANSACTIONS table.
Secondary On hand: Displays the current on-hand quantity of the item in the secondary unit of measure if the item is under dual unit of measure control.
Related Topics
Defining Consumption Transaction Rules
Shortage Alerts and Shortage Notifications
A material shortage occurs whenever unsatisfied demand exceeds available quantity for incoming supply of material. Oracle Inventory checks, during a receipt transaction, to see if the material received is needed elsewhere in the organization. If a shortage exists, the system notifies you, either by a real-time, material shortage alert or a workflow-based notification.
Forms Generating Shortage Alerts and Notifications
The following receipt transaction forms generate shortage alerts and notifications when receiving items for which the system has detected a shortage.
-
Receipts
-
Receiving Transactions
-
Miscellaneous Transactions
-
WIP Material Transactions
-
WIP Completions
-
Work-Orderless Completions
The shortage alert appears in the window during the transaction. It gives you the option to go to the View Potential Shortages form, which shows where demand exists in the organization.
Notifications are sent to pre-specified individuals.
Sources of Demand
In generating shortage alerts and notifications, the system considers the following to be sources of demand:
-
WIP jobs
-
WIP schedules
-
Sales order lines that have been pick released and allocated but for which adequate quantity was not sourced
Supply Types
You can specify which inventory transactions trigger a shortage alert or notification. The system considers only the transaction types you select to be supply for the unsatisfied demand. Shortage alerts and notifications are triggered for system-defined and user-defined transaction types that have transaction actions of:
-
Receipt into stores
-
Intransit receipt
-
Direct organization transfer
-
Assembly completion
-
Negative component issue
Setting Up Shortage Alerts and Shortage Notifications
-
Define the shortage parameters the system uses to detect material shortages see: Defining Shortage Parameters
-
Define the transaction action types that trigger shortage alerts and notifications see: Defining and Updating Transaction Types
-
Define which items trigger a shortage alert of notification when they are in demand. see: Defining Items and Inventory Attribute Group
-
Define the individuals to be notified. see: Defining Shortage Parameters
Viewing Potential Shortages
You can view potential shortages of items for which there is an outstanding demand in the organization. (You configure the work orders to be considered as unsatisfied demand in the shortage parameters.)
Prerequisites
- You must define the shortage parameters, as well as the transaction action types and items that will trigger shortage alerts and notifications
To view potential shortages
-
Navigate to the View Potential Shortages window. The Find Potential Shortages window appears.
-
Enter search criteria. The View Potential Shortages window appears, displaying a summary of the shortage.
Note: The View Potential Shortages window displays the demand for work in process and order entry (depending on the parameters selected in the Shortage Parameters window). The shortage displays only if the total available quantity is less than the total open work in process and order entry demand.
-
Select the Detail button to see detailed shortage information about a particular item.
-
Select the Supply/Demand button to see supply and demand information about a particular item.
Note: Potential shortages for jobs and schedules display only when the starting date on the work order or schedule exists in the manufacturing calendar.
Related Topics
Overview of Movement Statistics
Oracle Inventory provides the functionality for collecting statistics associated with the movement of material across the border of two countries. You can collect statistics to satisfy the European Union's reporting requirements for INTRASTAT, the declaration for imports and exports between countries belonging to the European Union, and EXTRASTAT, the declaration for imports and exports between a country belonging to the European Union and a country external to the European Union. This functionality is also a feature of Oracle Purchasing.
Movement statistics features allow you to:
-
Automatically generate movement statistics records based on ship-from and ship-to information, without user intervention.
-
Report your company's legal entity information, including name, address, and tax registration information.
-
Capture, maintain, calculate, and report information associated with the movement of material between statistics gathering countries. This includes the ability to record and report corrections.
-
Run the Movement Statistics Exception Report to validate that all movement statistics records in a period are accurate and ready for reporting.
-
Capture the invoice value from accounts receivables and accounts payables for material movement. If the invoice information is not available, the system captures the statistical value from the movement transaction.
-
Freeze statistical information after review and report the information to a government agency.
-
Create an audit trail between statistical information and the associated material transactions.
-
Generate EDI messages out of movement statistics records.
Major Features
You can automatically generate movement statistics records by running the Movement Statistics Processor, a concurrent program that analyzes all the transactions that occur in the system, based on legal entity. You can then validate the records and, for INTRASTAT and EXTRASTAT, create official reporting documents. See: Automatically Generating Movement Statistics Records.
The Movement Statistics Processor analyzes the following transaction types:
-
Purchase Receipt
-
RTV
-
Sales order
-
RMA
-
Supplier drop shipment
-
Multi-org intercompany drop shipment
-
Inventory inter organization movements
-
Canceled inventory inter organization in transit movements
-
Internal requisition
-
Internal return
-
Internal sales order
Important: The system does not analyze Oracle Inventory miscellaneous receipts and issues because these transactions are considered inventory updates, not material movements.
To enable the system to automatically generate movement statistics records you define parameters in the Economic Zones and Movement Statistics Parameters windows. See: Setting Up Movement Statistics.
Note: ISO and European Union country codes are supported. See: Territories Window, Oracle System Administrator's Guide.
Statistics Setup
You can capture and report movement statistics by legal entity. You can specify parameters such as calendar, currency conversion type, weight unit of measure, tax office name, and tax office information.
Validate Movement Statistics Records
You can use the Movement Statistics Exception Report to validate that all movement statistics records in a period are accurate and ready for reporting. You can identify missing or incomplete entries and make corrections before freezing the information. See: Movement Statistics Exception Report.
Review and Report Movement Statistics
You can generate both summary and detail reports for movement statistics, including hard copies for government agencies and your own files. See: Movement Statistics Report.
Freeze Movement Statistics
The Movement Statistics Report provides a run time parameter which allows you to freeze movement information for official INTRASTAT and EXTRASTAT reporting. This option updates the database with any information calculated at report run time to provide a complete history of information reported. This option also allows you to assign a reference number for the information processed by the particular run of the report. Only records that have been frozen can be used to generate EDI messages.
Reset Movement Statistics Status
After you freeze movement statistics records for official INTRASTAT and EXTRASTAT reporting, you can run the Movement Statistics Reset Status program to reset their status to open. This option allows you to add missing information to records that are frozen. See: Movement Statistics Reset Status.
Integrate with Legacy Systems
Movement statistics functionality provides the ability to integrate with Legacy systems in order to capture material movements from other logistics applications.
EDI Support
You can generate EDI messages from movement statistics records. These messages are EDIFACT compliant.
Link Movement Statistics to Financial Documents
Movement statistics records are automatically linked to various financial documents based on the transaction type. For example, purchase order receipts are linked to payables invoices, RTVs and RMAs with credit memos, and sales order shipments with receivables invoices.
Track Multiple Values
You can capture the invoice value from accounts receivables and accounts payables for material movement. If the invoice information is not available, the system captures the statistical value from the movement transaction.
Automatic Weight Calculation
Oracle Inventory calculates the weight of a material movement by converting the transaction quantity and unit of measure to the appropriate weight and weight unit of measure for the item.
Manually Enter Movement Information
You can manually enter movement information associated with material transactions that are not captured by Oracle Inventory and Purchasing, such as fixed assets. See: Viewing and Maintaining Movement Statistics.
Defining Movement Statistics Parameters
Use the Movement Statistics Parameters window to define the parameters for gathering movement statistics. Oracle Inventory uses this information to validate the entry of statistical movement transactions and to properly report the information. You can automate the movement statistics feature by defining parameters in the Movement Statistics Parameters and Economic Zones windows. See: Overview of Movement Statistics and Defining Economic Zones.
To define movement statistics parameters
-
Navigate to the Movement Statistics Parameters window.
-
Select a legal entity.
-
In the Economic Zone block, select an economic zone.
-
Save your work.
-
Click Statistical Type Usage to display the Statistical Type Usages window.
-
On the Statistical Type Usages window, select the desired values:
Field Values Usage Type Internal: Movement of goods within countries of the economic zone.
External: Movement of goods from a country of one economic zone to a country outside the zone.Statistical Type Intrastat: Declaration of imports and exports within European Union borders.
Extrastat: Declaration of imports and exports between a member of the European Union and a country external to the European Union.Period Set Select a period set to use for statistical movement reporting.
You can select any period set that has been defined in your system. You can also define a calendar to use for statistical reporting purposes that is independent of the accounting calendar for your organization's ledger.Period Type Select a Period Type (from LOV) to use for reporting. Note: The calendar that you use for statistical reporting purposes is independent of the accounting calendar for your organization's set of books.
Start Period / End Period Assign the first period for which the Usage / Statistic type assignment is valid.
Optionally, enter the last period for which this assignment is valid.Weight UOM Select the weight unit of measure to use for movement transactions calculations. For example, the European Union requires kilogram as the weight unit of measure for the official INTRASTAT and EXTRASTAT declaration. Precision Enter the number of decimals (0 to 5) that the total weight should be rounded to. The default value is 0 (zero) meaning the weight will be rounded to the nearest digit. Reporting Rounding Select how the calculated weight will be rounded: -
Normal (default value): Weight is rounded to the nearest value with number decimals as defined by the precision setting.
-
Truncate: Weight is truncated to the number of decimals as defined by the precision setting.
-
Up: Weight is rounded to the highest value with number decimals as defined by the precision setting.
Entity Branch Reference Select the name of the legal entity branch in the Entity Branch Reference field. This reference is printed on the European Union INTRASTAT and EXTRASTAT declaration as required. Conversion Type Select the currency conversion type to use to convert foreign currency amounts to the ledger currency of your organization's ledger. Conversion Option Select the currency conversion option to be used by the Movement Statistics Report to convert foreign currency document amounts to the ledger currency of your organization's ledger.
Daily: The daily conversion rate on the date of the movement transaction.
Last Day of Period: The conversion rate and type of the last day of the reporting period.Category Set Select the category set to use with your movement statistics transactions. Oracle Inventory uses the list of categories defined in this category set to associate your items with defined codes. For INTRASTAT and EXTRASTAT reporting, select the Intrastat category set to use the appropriate European Union designated commodity codes. Tax Office Code, Tax Office, Name, Tax Office Location Code Enter the code, name, and location code for the tax office to which your legal entity reports. INTRASTAT and EXTRASTAT reporting require the name, code, and address of the tax office to which a legal entity reports to appear on the declaration. The full address associated with this location is displayed on the Movement Statistics Report. Attribute Rule Set Code Enter the validation rule set code. The default rule set is Standard Validation. You may define your own rule set. Alternate UOM Rule Set Code This parameter is optional. You will need to define an Alternate UOM Rule Set. Triangulation Mode The triangulation mode determines how the Movement Statistics Processor will process Triangulation (drop-shipments): -
Invoice Based: the processor will process movement transactions based on the flow of the invoice.
-
Shipment Based: the processor will process movement transactions based on flow of goods.
Reference Period Rule Select one of the following options: -
Shipment Based: the date that the transaction took place.
-
Invoice Based: the date the transaction was invoiced.
Pending Invoice Days Enter the number of days the processor should look for an invoice in the period following the movement transaction. Advance Invoice Days Enter the number of days the processor should look for an advance invoice. Returns Processing Select a value for the Returns Processing field. Returns processing determines if you want to aggregate return movement transactions within a reporting period: -
Separate Returns (default value): If you select this option, the movement transactions will not be netted. A separate movement record will be created for all source types, including purchase orders, return to vendor, sales orders, and customer returns.
-
Aggregate Returns: If you select this option, the movement statistics processor will:
-
Aggregate sales order shipments with customer returns within a period (if the sales order shipment has not been declared). If the sales order shipment has been declared, customer returns will not be aggregated.
-
Aggregate purchase order receipts with return to vendor (if the purchase order receipt has not been declared). If the purchase order receipt has been declared, returns to vendor will not be aggregated.
-
Note: Additional Notes for Aggregate Returns
-
For Customer Return (RMA) transactions, unless you enter the sales order reference number and order line number information on the return order line, the RMA and corresponding Sales Order will not be aggregated. A separate movement record with negative movement amount, quantity, and invoice of type dispatch adjustment will be created for the customer return movement transaction.
-
Arrival movement records (with a source type of purchase order) and a movement status of Open, Verified, or Ignore will be aggregated with return to vendor transactions that occur within the same period.
-
Movement records with a status of Frozen, Export, or EDI will not be aggregated. For example, if the arrival movement record has a status of Frozen and a return to vendor transaction is processed, the return will not be aggregated with the arrival movement record. The processor will create a separate dispatch movement record.
-
Dispatch movement records (with a source type of sales order) and a movement status of Open, Verified, or Ignore will be aggregated with customer return transactions that occur within the same period.
-
If the return transaction does not occur in the same period as the original arrival or dispatch, a separate adjustment movement record with negative movement amount, quantity, invoice amount and invoice quantity will be created.
Dispatch KIT Method Indicates how movement records should be created for KIT dispatches: -
KIT: Movement records will be created for the KIT items.
-
Shipped Components: Movement records will be created for the child shippable items.
Include All Organizations Select Yes to include all organizations, or No to restrict to the current organization. -
-
Save your work.
Related Topics
Movement Statistics Parameters, Oracle Inventory Movement Statistics User's Guide
Site Locations, Oracle Human Resource Management System User's Guide
Creating an Organization, Oracle HRMS Enterprise and Workforce Management Guide
Defining Calendars, Oracle General Ledger User's Guide
Defining Conversion Rate Types, Oracle General Leger User's Guide
Setting Up Movement Statistics
-
Define a commodity code category set and assign commodity codes to items
Before capturing and/or reporting movement statistics using commodity codes, you must establish a category set to store commodity codes for inventory items. Once the category set has been defined, you assign the proper commodity code to items.
For INTRASTAT and EXTRASTAT reporting, you must assign an appropriate Intrastat category set to items in inventory. Once the category set has been assigned, choose from the Category Set list of values on the Movement Statistics Parameters window to assign the item a European Union-designated commodity code.
-
Define calendars in General Ledger
You can create a calendar and define periods for which to collect movement statistics records. The period you use to collect movement statistics records can also be your manufacturing or accounting calendar.
-
Define economic zones
Use the Economic Zones window to define economic zones and associate these zones with specific countries.
-
Define legal entity and movement statistics parameters
Use the Movement Statistics Parameters window to record information associated with any legal entity for which you are gathering and reporting movement statistics.
Automatically Generating Movement Statistics
You can automatically generate movement statistics records, based on legal entity, by running the Movement Statistics Processor. You can then validate the records and, for INTRASTAT and EXTRASTAT, create official reporting documents.
Prerequisites
- Define Economic Zones
- Define Movement Statistics Parameters
To automatically generate movement statistics records
-
Run the Movement Statistics Processor by navigating to the Movement Statistics Reports window. See: Movement Statistics Processor.
-
Optionally, review the results of the Movement Statistics Processor by navigating to the Movement Statistics Summary window. If necessary, update the movement statistics records. See: Viewing and Maintaining Movement Statistics.
-
Run the Movement Statistics Exception Report to check for missing data. See: Movement Statistics Exception Report. After you run this report, the status of the movement statistics records changes to Verified. To view this result, navigate to the Movement Statistics Summary window. Fix any exceptions and rerun the report. You can rerun this report as many times as is necessary. See: Viewing and Maintaining Movement Statistics.
-
Run the Movement Statistics Report in summary and detail format. See: Movement Statistics Report. If necessary, update the movement statistics records.
-
Run the Movement Statistics Report in Official Summary format. See: Movement Statistics Report. After you run this report, the status of the movement statistics records changes to Frozen.
Note: You can reset the status of Frozen to Open by running the Movement Statistics Reset Status report. See: Movement Statistics Reset Status.
Viewing and Maintaining Movement Statistics
Use the Movement Statistics window to view and maintain information associated with the movement of goods. You can automate the collection of this information through the Movement Statistics Parameters and Economic Zones setup windows.
You can also link movement statistics to financial transaction information, such as document numbers and invoices. See: Overview of Movement Statistics.
You can also manually enter movement information associated with material transactions that are not captured by Oracle Inventory and Purchasing, such as fixed assets.
Defaults in the Movement Statistics Window
The following defaults are used within the Movement Statistics window. The default value has the appropriate country prefix. If the new country-specific default is valid, it is displayed. If the constructed country-specific default is not valid, there is no default.
-
Transaction Nature: Purchase order receipts line transaction reason code.
-
Delivery Terms: Purchase order receipts header free-on-board
-
Transport Mode: Purchase order receipts header freight carrier
Prerequisites
- Define movement statistics parameters see: Setting Up Movement Statistics
- Define economic zones see: Defining Economic Zones
-
Navigate to the Movement Statistics Summary window. The Find Movement Statistics window appears.
-
Enter search criteria to find an existing movement statistics record or close the Find Movement Statistics window to enter a new record. The Movement Statistics window appears.
If you searched for an existing record, the following information is displayed at the top of the window:
Movement ID: When you save the movement statistics information, the system assigns a unique movement number to identify it. This creates a movement statistics entry. You can use the number to view specific movement statistics entries.
Status: The status of the entry, Open, Unprocessed, or Frozen. If the status is Frozen, you cannot change information associated with the entry.
Report Reference: The number entered when this entry was officially reported and frozen.
Report Period: The date this entry was officially reported and frozen.
-
Select the movement type.
Arrival: Report arrival movement statistics.
Arrival Adjustment: Report adjustments to prior period arrival movement statistics.
Dispatch: Report dispatch movement statistics.
Dispatch Adjustment: Report adjustments to prior period dispatch movement statistics.
-
Enter the amount that appears on the material movement transaction document.
-
Select the document source type.
-
Enter the name of the legal entity associated with this record.
-
Enter the currency.
To enter source detail information
-
Select the Source Details tabbed region. When you access this window from the Tools menu, default information in this region is supplied from your window of origin.
-
When the movement type is arrival and the source type is inventory, enter the organization from which the goods were sent in the From Organization field. If the movement type is dispatch, the current organization is displayed as the default.
-
When the movement type is dispatch and the source type is inventory, enter the organization to which the goods were sent in the To Organization field. If the movement type is arrival, the current organization is displayed as the default.
-
When the source type is sales order, enter the customer's name, number, and location.
When the source type is purchase order, enter the supplier's name, number, and site.
-
Enter the source document number and line number for the selected source type. For example, if you entered a source type of purchase order, enter the corresponding purchase order number and line number.
-
Enter the shipment number and shipment line number associated with the movement.
-
Enter the pick slip number associated with the movement.
-
Enter the receipt number associated with the movement.
To enter invoice details information:
-
Select the Invoice Details tabbed region. This region is not available for the source type Inventory.
-
When the source type is sales order, enter the customer bill-to name, customer number, and customer site.
-
Enter the invoice batch, invoice number, and invoice line number associated with the invoice information.
-
Enter the quantity of this movement invoice. The default is the transaction quantity if it has been entered. When the source type is sales order, the movement quantity is displayed.
-
Enter either the unit price or the extended value. Oracle Inventory calculates the other value.
To enter movement details information:
-
Select the Movement Details tabbed region. When you access this window from the Tools menu, default information in this region is supplied from your window of origin.
-
For adjustment transactions only, enter the adjustments to movement number.
-
Enter the transaction date.
-
Enter the inventory item number or, if you have not entered an item number, the item description.
-
Enter the transaction UOM.
-
If a category set to hold commodity codes and a commodity code exists for the item, it is displayed. If no default exists, or if you want to override the default value, enter the appropriate commodity code. If you do not enter a commodity code, you can enter a commodity code description.
-
Enter the transaction quantity for this movement.
To enter country detail information
-
Select the Country Details tabbed region.
-
Enter the dispatch country in the Dispatch field. Oracle Inventory displays your country for dispatches. For arrivals, it displays either the supplier's or customer's country, depending on the transaction.
-
Enter the destination country in the Destination field. Oracle Inventory displays your country for arrivals. For dispatches, it displays either the supplier's or customer's country, depending on the transaction.
-
Enter the country of origin in the Origin field. Inventory displays either the dispatch or destination country based on the transaction.
-
Enter the transaction code.
-
Enter the delivery terms code.
-
Enter the transport mode.
-
Enter the port where the goods entered the country for arrivals or left the country for dispatches.
-
Enter the area where the goods entered the country for arrivals or left the country for dispatches.
-
Enter the statistical type for the movement. This can also be the import type, the regime, or a user-defined type.
-
Enter the unit weight or total weight for the item, and Oracle Inventory will calculate the other value. If you leave both weight fields blank, Inventory calculates the weight at report time using the item unit of measure conversions.
To enter additional movement details
-
Select the More Movement Details tabbed region.
-
Enter either an adjustment percentage or an adjustment amount. Oracle Inventory calculates a statistical value by applying the adjustment percentage or adjustment amount to the transaction value.
-
If you entered an adjustment percentage or amount, Oracle Inventory calculates the statistical total value for you. You can also enter the total value without entering an adjustment percentage or amount. If you do not enter any of the statistical value information, the report calculates the total value using a country specific routine.
-
Enter comments associated with the movement.
-
Enter an alternate quantity other than the transaction quantity to represent the amount of goods moved. If you enter an alternate quantity, you can record the alternate UOM code for the goods moved. For example, alcohol can be sold be sold by the case, but the alternate quantity can be the amount of pure alcohol in hectoliters.
-
Select the outside price code. You can enter Repair, Process, or Other.
-
Enter either the outside unit price or the outside extended value. Oracle Inventory calculates the other value.
-
Save your work.
Related Topics
Overview of Movement Statistics
Defining Movement Statistics Parameters
My Oracle Support Knowledge Document 2746198.1, Oracle E-Business Suite - Update Intrastat Reporting for UK Withdrawal from the European Union or Brexit
My Oracle Support Knowledge Document 3022847.1, Oracle E-Business Suite - German Intrastat Regulations 2023
Oracle Inventory Movement Statistics User's Guide
Viewing Material Transactions
You can view detail associated with inventory transactions. You can search for transaction information by entering a combination of search criteria.
To view detail associated with inventory transactions
-
Navigate to the Material Transactions folder window. The Find Material Transactions window appears.
-
Include Logical Transactions check box: Logical transactions are used for intercompany invoicing.
-
Supplier field: When you enter PO Receipt as the Transaction Type, the Supplier field becomes available with a list of values for supplier/site. However, the Suppler field applies only to consigned stock and regular ownership transfer (not for common PO transactions).
-
-
Enter any combination of search criteria and choose Find. The results display in the Material Transactions folder window.
-
View information in the following tabbed regions:
Location: Displays the item, subinventory, locator, material classification code, revision, transfer locator, transfer subinventory, transfer organization, transaction date, transaction type information, location, transaction UOM, primary UOM primary quantity, secondary UOM, and secondary quantity.
If you have Oracle Warehouse Management installed, and you are working with a WMS enabled organization (See: Defining Default Inventory Parameters), this form will also display LPN (LPN unpacked), Put Away Rule, Put Away Strategy, Pick Strategy, Pick Rule, Transfer LPN (LPN packed), and Content LPN (LPN transacted) information. See: Explaining License Plate Management, Oracle Warehouse Management User's Guide.
Intransit: Displays the item, shipment number, waybill/airbill number, freight code, container, quantity, and transaction type information.
Reason, Reference: Displays the item, transaction reason, transaction reference, costed indicator, supplier lot, source code, source line ID, and transaction type information.
Transaction ID: Displays the item, transfer transaction ID, transaction header number, receiving transaction ID, move transaction ID, transaction UOM, completion transaction ID, department code, operation sequence number, transaction quantity, transaction ID, transaction date, source type, source, transaction type, source project number, source task number, project number, task number, to project number, to task number, expenditure type, expenditure organization, error code, and error explanation information.
Transaction Type: Displays the item, source, source type, transaction type, transaction action, transaction UOM, transaction quantity, transaction ID, and transaction date information.
Consumption Advice: Displays the Revision, From Owning Party, Creation Status, and Error Explanation information.
To view message history for XML adjustment transactions
You can review the message history for each XML message generated by the Warehouse Inventory Adjustment Advice concurrent program. (XML messages are generated for receipt transactions that affect inventory such as miscellaneous receipt/issue, subinventory transfer, direct-organization transfer, and work in process transactions.
-
From the Tools menu of the Material Transactions window, select View Message History to display the View Message History window.
-
In the View Message History window, you can review information about the entity and transaction details for the selected XML message.
For more information, see Viewing Message History.
To view lot/serial number information for a transaction:
-
Select a transaction and choose the Lot/Serial button.
-
View information on lot/serial numbers, quantities, and locations.
-
Click Serial to view the related transaction serial numbers for a selected lot.
Note: For serial tagged items, you can view the serial numbers that were tagged during the issue transactions.
To view transaction distribution information:
Choose the Distributions button. See: Viewing Material Transaction Distributions, Oracle Cost Management User's Guide.
To view Oracle Quality results:
If Oracle Quality is installed and if quality results exist for the current line, click the Quality button to open the View Quality Results window.
Related Topics
Overview of Inventory Transactions
Customizing the Presentation of Data in a Folder, Oracle E-Business Suite User's Guide
Viewing Message History
The Warehouse Inventory Adjustment Advice concurrent program generates XML messages about the receipt transactions that affect inventory (such as miscellaneous receipt/issue, subinventory transfer, direct-organization transfer, and work in process transactions). In the View Message History window, you can review the history for each generated XML message that contains data about adjustment transactions.
To view message history for XML adjustment transactions
-
Navigate to the Material Transactions window.
-
From the Tools menu, select View Message History to display the View Message History window.
-
In the Entity region, you can view the following information:
-
Number: Identifies the receipt number.
-
Type: Identifies the lookup type for the receipt confirmation.
-
Organization: Identifies the inventory organization.
-
-
In the Transactions region, you can view the following information:
-
Type: The type is Inventory Adjustment.
-
Direction: The status OUT identifies an outbound transaction.
-
Document Number: Identifies the transaction that generates the XML message.
-
Trading Partner ID: Indicates the ID of the trading partner.
-
Action: Identifies the action related to the inventory transaction. For example, an Add action indicates that XML transactions are added for each adjustment transaction affecting inventory.
-
Status: Identifies the status of the XML transaction such as Process, Error, or Sent.
-
Event Name: Identifies the business event that is associated with the XML message generation transaction.
-
Event Key: Identifies the event key that is specific to the workflow process execution.
-
To view workflow monitor and workflow status
-
Navigate to the View Message History window.
-
From the Tools menu, select one of the following items to view the corresponding information:
-
Workflow Monitor
-
Workflow Status
-
Viewing Transaction Summaries
You can view transaction summaries for items transacted within a specified date range. You can use search criteria to further narrow the focus of the information summarized. You can use this information for input/output and transaction history analysis.
To view transaction summaries
-
Navigate to the Summarize Transactions window.
-
Enter the date range to summarize.
-
Enter an item or a subinventory. If you do not enter an item, the search includes all items with transactions falling within the date range specified.
-
Optionally, enter additional search criteria to narrow the focus of the summarized information.
-
Choose the Summarize button. The results appear in the Item Transaction Summaries window.
Values displayed for each item include the unit of measure, net quantity, net value, volume (number of transactions), absolute quantity, and absolute value. Transaction totals include total value in, total volume in, total value out, total volume out, and net value. These values are for the date range you specified.
Note: The Net Value amount in the Transaction Summaries window is rounded based on the currency precision of the organization; the same rounded value is used for general ledger (GL) distributions.
-
Select from the different tabbed regions to view the summary information by Items Only, Source Type, Action, Transaction Type, and Source/Transaction Type.
To view detail information for an item in the Item Transaction Summaries window
-
Select an item.
-
Choose the Transaction Details button. See: Viewing Material Transactions.
To view detail accounting lines
-
Choose View Accounting from the Tools menu to open the View Material Accounting window. In this window, you can view the detail accounting lines for the transaction in the form of a balanced accounting entry (where debits equal credits). You can also choose to view the detail accounting as t-accounts. See: Viewing Accounting Lines.
Viewing Accounting Lines
When you query a material transaction in Inventory, you can choose to view the detail accounting lines for the queried transaction in the form of a balanced accounting entry (where debits equal credits). You can also choose to view the detail accounting as t-accounts. Use these features to see how a transaction will affect the account balances in your general ledger.
To view accounting lines
-
Query the material transaction for which you want to view accounting lines.
-
Choose View Accounting from the Tools menu.
The View Material Accounting window will appear.
See: View Accounting Windows, below.
-
(Optional) To view the accounting detail as t-accounts, choose the T-Accounts button.
See: Viewing T-Accounts, Oracle General Ledger User's Guide
View Accounting Windows
The first time you open the View Material Accounting window, the following information will be displayed for the detailed accounting lines:
-
Account
-
Accounted Credit
-
Accounted Debit
-
Accounting Date
-
Cost Element
-
Curr Conversion Rate
-
Entered Credit
-
Entered Curr
-
Entered Debit
-
GL Batch
-
Item
-
Line Type
-
Locator
-
Operation Sequence
-
Primary Quantity
-
Reference
-
Subinventory
-
Revision
-
Trans Reason
-
Trans Source Type
-
Trans Source
-
Transaction Date
-
Transaction Type
-
Unit Cost
-
UOM
When you select a detailed accounting line, the system displays the following information at the bottom of the View Material Accounting window:
-
Account Desc
-
Description
-
Item
-
Quantity
-
Revision
-
Unit Cost
-
UOM
Customizing the View Accounting Window
The View Material Accounting window is a folder. You can easily customize the information that is displayed in the window, as described in the Oracle E-Business Suite User's Guide.
See: Customizing the Presentation of Data, Oracle E-Business Suite User's Guide
When customizing the View Material Accounting window, you can hide the columns that normally appear in the window and you can choose to display any additional columns that are available.
When you select a detailed accounting line, the system displays additional information at the bottom of the View Material Accounting window.
Following is a list of all the hidden columns that you can choose to display:
-
Account Description
-
Curr Conversion Date
-
Curr Conversion Type
-
Item Description
-
Line Reference
-
Trans ID
-
Transferred to GL
Drilling Down to Inventory from Oracle General Ledger
From General Ledger, you can drill down to subledger details from the Account Inquiry, Journal Entry Inquiry, or Enter Journals windows for journals that have specific journal sources assigned to them. For example, if a journal source is Inventory, you can drill down to the transaction details in Oracle Inventory.
When you drill down from General Ledger, the Inventory Accounting Lines window will open. The first time you open this window, the following information will be displayed:
-
Accounting Date
-
Cost Element
-
Credit
-
Currency
-
Curr Conversion Rate
-
Debit
-
Entered Credit
-
Entered Debit
-
GL Batch
-
Item
-
Line Type
-
Locator
-
Operation Sequence
-
Primary Quantity
-
Reference
-
Rev
-
Subinventory
-
Trans ID
When you select a detailed accounting line, the system displays the following information at the bottom of the window:
-
Description
-
Item
-
Quantity
-
Revision
-
Unit Cost
-
UOM
When you drill down from General Ledger, the Inventory Accounting Lines window will open. When you select a detailed accounting line, the system displays additional information at the bottom of the related window.
Customizing the Drilldown Window
The drilldown window is a folder. You can easily customize the information that is displayed in the window, as described in the Oracle E-Business Suite User's Guide.
The drilldown window is a folder. You can easily customize the information that is displayed in the window.
See: Customizing the Presentation of Data, Oracle E-Business Suite User's Guide
When customizing the drilldown window, you can hide the columns that normally appear in the window and you can choose to display any additional columns that are available.
Following is a list of all the hidden columns that you can choose to display:
-
Account
-
Account Description
-
Curr Conversion Date
-
Curr Conversion Type
-
Item Description
-
Line Reference
Drilling Down Further
From the Inventory Accounting Lines window, you can drill down even further to view detail transactions or you can choose to view the underlying transaction accounting.
-
From the Inventory Accounting Lines window, select a detail accounting line.
-
Choose the Show Transaction button to view detail transactions.
-
Choose the Show Transaction Accounting button to view the transaction accounting.
Related Topics
Viewing Pending Transactions
You can view, edit, and correct pending transactions before validation. These include transactions received through the transaction interface or those processed with the background processing option. Using the folder or single row windows, you can choose how to view the information appropriate for a particular transaction. You can also resubmit transactions for processing.
To view pending transactions
-
Navigate to the Pending Transactions folder window. The Find Pending Transactions window appears.
-
Enter search criteria for the pending transactions you want to view. You can search for transactions based on processing information, source, or item details.
-
Choose Find to start the search. The results display in the Pending Transactions window.
-
Select a tabbed region to display a type of information:
Error: Pending transaction error information.
Location: Pending transaction location information.
Source: Pending source information
Intransit: Pending intransit shipping information.
Others: Miscellaneous header and costing information.
Note: For a list of the available fields, you can display in each tabbed region see: Pending Transactions Folder Window Available Fields.
To view lot/serial number information for a transaction:
-
Select a transaction and choose the Lot/Serial button.
-
View information on lot/serial numbers, quantities, and locations.
To resubmit transactions to the demand manager for processing:
-
Check the Submit option next to the transactions you want to resubmit or choose Resubmit All from the Tools menu.
To resubmit multiple transactions, use the Resubmit All option to select all transactions for processing and then selectively deselect individual transactions that you do not want to resubmit.
-
Save your work to submit the transactions for processing.
Related Topics
Customizing the Presentation of Data, Oracle E-Business Suite User's Guide
Pending Transactions Folder Window Available Fields
The Pending Transactions folder window allows you to view detailed information about pending transactions. Using folder options, you can display certain fields for each tabbed region. See: Viewing Pending Transactions.
Fields Shared by All Tabbed Regions
-
Item: Inventory item referenced by the line item.
-
Transaction Date: Date the transaction was entered for processing.
-
Transaction Qty: Quantity of the transaction.
-
Transaction Type: Displays the transaction type
-
Transaction UOM: Unit of measure used in the transaction.
Error Tabbed Region
-
Error Code: Code describing the error on the last attempt to process the line item.
-
Error Explanation: Full explanation of the error that occurred when attempting to process the line item.
-
Process Flag: Indicates whether this row has been processed by the concurrent manager.
-
Transaction Header ID: Number used to group transactions in the concurrent manager.
-
Transaction Mode: Method used to process the line item, such as concurrent processing
-
Transaction Temp ID: Identifier used to group line items. This is optionally provided by the product generating the internal transaction.
-
Secondary Quantity: Transaction quantity in secondary unit of measure if the item is under dual of unit of measure control.
-
Secondary UOM. Secondary unit of measure if the item is under dual unit of measure control.
-
Transaction Status: Status of the transaction: Select Pending or Suggested. Pending indicates transactions that are ready to be allocated. Suggested indicates transactions that have been detailed and are ready to be transacted.
Location Tabbed Region
-
Org Code: Code for the organization referenced by the line item.
-
Material Classification Code: Code for the material classification type referenced by the line item.
-
Revision: Revision of the inventory item referenced by the line item.
-
Locator: Location referenced by the line item.
-
Lot Expiration Date: Date controlling the availability of the lot for transaction and planning purposes.
-
Lot Number: Identifies the specific batch of the line item.
-
Serial Number: Serialized unit of the line item.
-
Subinventory: Subinventory referenced by the line item.
-
Transfer Org Code: Code for the destination organization.
-
Transfer Subinventory: Destination subinventory.
-
Transfer Location: Destination location.
Source Tabbed Region
-
Distribution Account: Distribution account for the line item.
-
Reason Name: Transaction reason for the line item.
-
Transaction Action: Transaction action for the line item.
-
Transaction Cost: Cost of the item for the transactions, such as the purchase order price.
-
Transaction Reference: Up to 240 characters of free text describing the transaction.
-
Transaction Source Type: Source type of the transaction, such as WIP Job or Schedule
Intransit Tabbed Region
-
Containers: Number of containers in which the material is stored for the transfer.
-
Expected Arrival Date: Date you expect to receive the material at the destination organization.
-
Freight Code: Freight carrier for the transaction.
-
Shipment Number: Shipment number for the line item.
-
Transfer Cost: Cost to process the transfer.
-
Transportation Cost: Cost to physically transfer the material, such as freight carrier charges.
-
Transportation Account: General ledger distribution account that collects the costs associated with using the freight carrier for the transfer.
-
Waybill Airbill: The waybill or airbill number for the transfer.
Others Tabbed Region
-
Expenditure Organization: The expenditure organization.
-
Expenditure Type: The expenditure type.
-
Department Code: Oracle Work in Process department code for the line item.
-
Employee Code: Employee who entered the transaction.
-
Encumbrance Account: Account used by Oracle Purchasing to receive the item.
-
Encumbrance Amount: Amount encumbered, reserved against funds, when the purchase order or requisition was approved.
-
Line Code: Request ID assigned by the concurrent manager to the line item.
-
Location Code: Ship-to location.
-
New Average Cost: Recalculated average unit cost for the item.
-
Operation Seq Number: Number associated with the job or schedule referenced by the line item
-
Percentage Change: Percentage used to update the item cost.
-
Project Number: The project number.
-
Source Project Number: The source project number.
-
Source Task Number: The source task number.
-
Task Number: The task number.
-
To Project Number: The to project number.
-
To Task Number: The to task number.
-
Transaction Source Delivery ID: Line item detail identifier of the demand source.
-
Transaction Source line ID: Oracle Work in Process line description for the item.
-
Value Change: Amount used to increment the current inventory value
Related Topics
Customizing the Presentation of Data, Oracle E-Business Suite User's Guide
Viewing and Updating Transaction Open Interface Activity
You can view, edit, and correct transactions for the current organization, or for multiple organizations in a given organization hierarchy, received through the transaction open interface. Using the folder or single row windows, you can choose how to view the information appropriate for a particular transaction. You can also resubmit transactions for processing.
To view pending open interface transactions
-
Navigate to the Transaction Interface folder window. The Find Transactions window appears.
-
Enter search criteria for the transactions you want to view. You can search for transactions based on processing information or transaction details.
Note: You can choose any organization hierarchy in which the current inventory organization is a member. You can see the organization that a particular transaction belongs to in the Transaction Interface form.
-
Choose Find to start the search. The results display in the Transaction Interface window.
-
Select a tabbed region to display a type of information:
Error: Interface transaction error information.
Location: Interface transaction location information.
Source: Interlace source information
Intransit: Interface intransit shipping information.
Others: Miscellaneous header and costing information.
Note: For a list of the fields you can view see: Transaction Interface Folder Window Available Fields.
To view lot/serial number information for a transaction:
-
Select a transaction and choose the Lot/Serial button.
-
View information on lot/serial numbers, quantities, and locations.
To resubmit transactions for processing:
-
Check the Submit option next to the transactions you want to resubmit or choose Resubmit All.
To resubmit multiple transactions, use the Resubmit All button to select all transactions for processing and then selectively deselect individual transactions that you do not want to resubmit.
-
Save your work to submit the transactions for processing.
Related Topics
Customizing the Presentation of Data, Oracle E-Business Suite User's Guide
Creating Organization Hierarchies, Oracle HRMS Enterprise and Workforce Management Guide
Transaction Interface Folder Window Available Fields
The Transaction Interface folder window allows you to view pending interface transactions. Using folder options, you can display certain fields for each tabbed region. See: Viewing and Updating Transaction Open Interface Activity.
Common Fields
-
Item: Inventory item referenced by the line item.
-
Transaction Source: Source of the transaction, such as account number
-
Transaction Source Type: Source type of the transaction, such as WIP Job or Schedule
Error Tabbed Region
-
Error Code: Code describing the error on the last attempt to process the line item.
-
Error Explanation: Full explanation of the error that occurred when attempting to process the line item.
-
Header ID: Line item's transaction header ID.
-
Interface ID: Interface ID that is assigned by the external system to track a set of transactions through the Oracle Inventory transaction interface processor.
-
Lock Flag: Indicates if the row and its child rows are locked to update from other processes.
-
Process Flag: Indicates whether the row has been successfully processed by the concurrent manager, is available for processing, or processed with an error.
-
Request ID: Line item's request ID.
-
Transaction Mode: Method used to process the line item, such as concurrent processing.
Location Tabbed Region
-
Locator: Locator referenced by the line item.
-
Organization: Organization code of the organization referenced by the line item.
-
Revision: Revision of the inventory item referenced by the line item.
-
Material Classification Code: Code for the material classification type referenced by the line item.
-
Subinventory: Subinventory referenced by the line item.
-
Transaction Date: Date the transaction was entered for processing.
-
Transaction Quantity: Quantity of the transaction.
-
Transaction UOM: Unit of measure used in the transaction.
-
Transfer Locator: Destination location.
-
Transfer Organization: Organization code of the destination organization.
-
Transfer Subinventory: Destination subinventory
-
Secondary Quantity: Transaction quantity in secondary unit of measure if the item is under dual of unit of measure control.
-
Secondary UOM. Secondary unit of measure if the item is under dual unit of measure control.
Source Tabbed Region
-
Distribution Account: Distribution account for the line item.
-
Reason: The transaction reason.
-
Source Code: Source of the transaction, such as account number.
-
Source Line ID: User-entered line ID of the source code for the line item.
-
Transaction Action: The transaction action
-
Transaction Cost: Cost to process the transaction.
-
Transaction Reference: Reference text describing the transaction.
-
Transaction Type: The transaction type.
Intransit Tabbed Region
-
Containers: Number of containers in which the material is stored.
-
Expected Arrival Date: Date you expected to receive the material at the destination organization.
-
Freight Code: The freight carrier for the transfer.
-
Shipment Number: Number uniquely identifying the item or items transferred.
-
Transfer Cost: Cost to process the transfer.
-
Transportation Account: General ledger account charged with the value entered in the Transportation Cost field.
-
Transportation Cost: Cost to physically transfer the material, such as freight carrier charges.
-
Waybill Airbill: The waybill or airbill number for the transfer.
Others Tabbed Region
-
Department: Oracle Work in Process department code for the line item.
-
Employee Code: Employee who entered the transaction.
-
Encumbrance Account: Account used by Oracle Purchasing to receive the item.
-
Encumbrance Amount: Amount encumbered, reserved against funds, when the purchase order or requisition was approved.
-
Expenditure Organization: The expenditure organization.
-
Expenditure Type: The expenditure type.
-
Demand Source Header ID: Source of the demand for the line item, such as an account number.
-
Demand Source Delivery: Line item detail identifier of the demand source
-
Demand Source Line: Line number from the demand source, such as Sales Order line number.
-
New Average Cost: Recalculated average unit cost for the item.
-
Operation Seq Number: Number associated with the job or schedule referenced by the line item.
-
Percentage Change: Percentage used to update the item cost.
-
Project Number: The project number.
-
Source Project Number: The source project number.
-
Source Task Number: The source task number.
-
Task Number: The task number.
-
To Project Number: The to project number.
-
To Task Number: The to task number.
-
Transaction Source Delivery ID: Line item detail identifier of the demand source.
-
Transaction Source Line ID: User-entered line ID of the source code for the line item.
-
Value Change: Amount used to increment the current inventory value
Purging Transaction History
You can purge all transaction history and associated accounting information for your current organization, where the transaction date is before and including the purge date you enter and is in a closed period.
Note: You should be extremely cautious when purging transaction information. Once you commit the process, Oracle Inventory removes all related information from the database. You cannot view or report on this information once you purge it. For example, you can no longer report purged information with the Accrual Reconciliation Report, the Transaction Register, and so on.
Since the Job/Lot Composition functionality in Oracle Work in Process depends on the material transaction history, you should not enter a purge date which purges material transactions that are part of a genealogy you want to retain. See: Job Lot Composition Report, Oracle Work in Process User's Guide.
Prerequisites
- At least one closed period for your organization. See: Maintaining Accounting Periods.
To purge transactions
-
Navigate to the Purge Transactions or All Reports window.
-
Enter Transaction Purge in the Name field. The Parameters window appears.
-
Enter a name for your purge.
-
Enter a date. Oracle Inventory purges transaction information if the transaction date is less than or equal to this date. This date must be less than or equal to the most recently closed period date.
-
Choose Submit to launch the process.
This concurrent process may actually spawn several independent requests, based on the number of accounting periods you are purging and the setting of the profile option INV: Max # of Txn Purge Processes.
Related Topics
Implementing Profile Options Summary
Overview of Inventory Transactions
Transactions Reports
Oracle Inventory and Oracle Purchasing provide you with reports to view your transactions. The following table presents these reports:
| Report | Description |
|---|---|
| Transaction Register (INV) | Use this report to report comprehensive material transaction detail (transaction date, item description, item revision, subinventory, transaction type, transaction source, quantity, unit of measure, and transaction value). |
| Lot Transaction Register (INV) | Use this report to report comprehensive lot number material transaction detail within a specific date range. |
| Serial Number Transaction Register (INV) | Use this report to report comprehensive serial number material transaction detail within a specific date range. |
| Transaction Source Type Summary (INV) | Use this report to list transactions by source types. |
| Transaction Historical Summary (INV) | Use this report to review past item quantities or past inventory balances. |
| Expected Receipts (PO) | Use this report to review all or specific expected receipts for a particular date or a range of dates. |
| Overdue Supplier Shipments Report (PO) | Use this report to review all or specific overdue shipments. |
| Receipt Adjustments Report (PO) | Use this report to review all or specific purchase order shipments with returns or corrections. |
| Receipt Traveler (PO) | Use this report to print delivery tickets that you use to facilitate delivery of goods you received within your organization. |
| Receipt/Inspection/ Delivery Register (PO) | Use this report to review detail information about your receiving transactions. |
| Receiving Exceptions Report (PO) | Use this report to review all or specific purchase order shipments you placed on exception hold. |
| Inactive Items Report (INV) | Use this report to review items with no transaction activity since the date you specify. |
| Item Reservations Report (INV) | Use this report to determine how many units of an item are reserved for an account, an account alias, or for user-defined source types. |
| Material Account Distribution Detail (INV) | Use this report to view the accounts charged for inventory quantity transactions, to review inventory quantities distributed to GL batch (one period), and to reconcile or reconcile back to the general ledger interface table. |
| Material Account Distribution Summary (INV) | Use this report to verify that inventory accounts are in balance. You can also use this report to do daily trial balances for inventory or to reconcile an account across several periods. |