32 Creating Blog Content
This chapter provides instructions for creating blog assets and categories, and modifying blog author assets. It also provides instructions for working with the comment fields that are added to your blog pages if the Community application was integrated with the Community Blogs module.
This chapter contains the following sections:
32.1 Creating Blog Assets
Blog assets are the units of content that are displayed on the website. You can create blog assets using the WebCenter Sites Contributor interface.
-
Log in to WebCenter Sites with your assigned credentials, select the site on which the blog start menu items are enabled and then select the icon for the WebCenter Sites Contributor interface.
-
In the menu bar, select Content, then select New, and then select New Blog Asset.
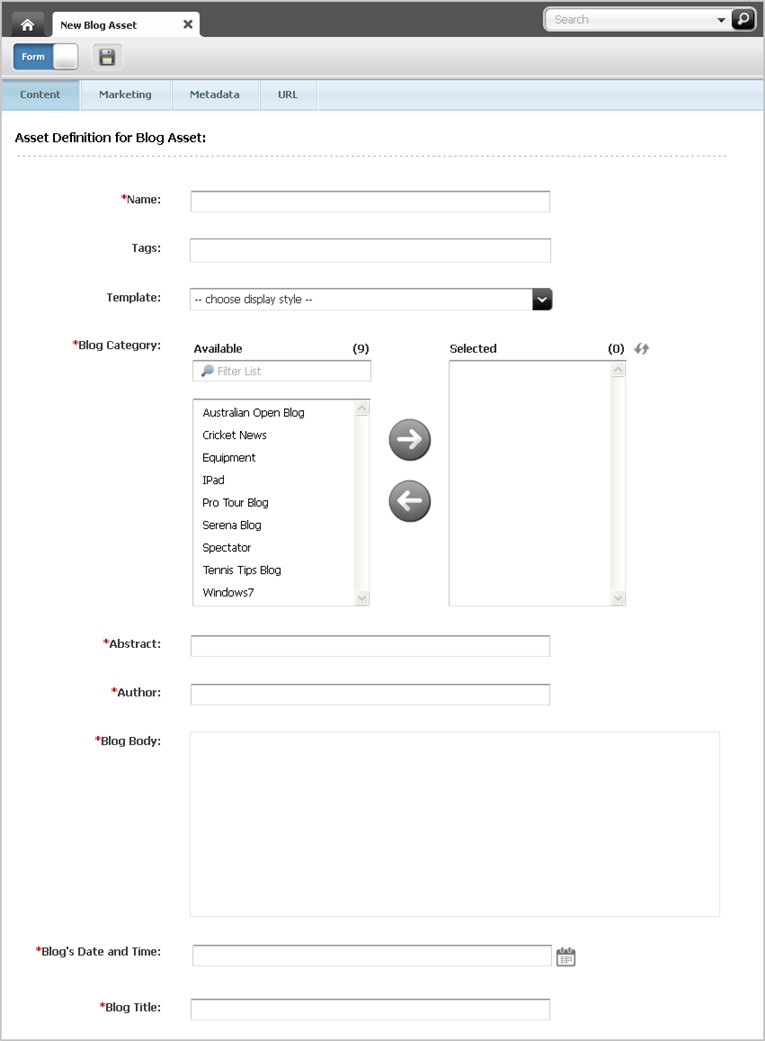
A tab opens displaying the New Blog Asset form, shown in Figure 32-1:
Figure 32-1 Blog Asset Content Entry Form
Description of "Figure 32-1 Blog Asset Content Entry Form"
-
In the Content section of the form, fill in the following fields:
-
Name – Enter a name for the blog asset (up to 64 characters).
-
Tags – Enter a single word or short phrase to attach to the bog asset. You can either enter a new tag into this field or apply a pre-existing tag. For more information about tags, see Section 6.6.2, "Working with Tags."
-
Template – Select the template that will render this blog asset's content.
-
Blog Category – Select the category (or categories) for the blog asset.
-
Abstract – Enter a summary for the blog asset. This summary will be displayed on the website.
-
Author – Do one of the following:
-
If a blog author asset was created for you, enter the name of the asset (to access the asset, follow the steps in Section 32.3, "Editing Your Blog Author Asset"). When your blog asset is published with your blog author asset, your full name and image (both contained in the blog author asset) will be displayed next to your blog post.
-
If a blog author asset was not created for you, enter the name you want to be displayed next to your blog post.
-
-
Blog Body – Enter the content of your blog.
-
Blog's Date and Time – Enter the date and time the blog asset was created. This date and time will be displayed under the blog asset to website visitors.
-
Blog Title – Enter the title of the blog. This title will be displayed on the website to visitors.
-
-
If you want the blog asset to be available on the website for only a certain period of time, switch to the Metadata section of the form and fill in the Start Date and End Date fields. For more information about start and end dates, see Section 7.3.4, "Assigning Start and End Dates."
-
Click the Save icon.
This asset must be approved and published in order for its content to be displayed to website visitors. If a blog author asset exists, make sure that asset, as well, is published. For more information about approval and publishing, see Chapter 14, "Approval for Publishing."
32.2 Creating a Blog Category
When creating blog assets, you may want to create categories that are relevant to the content of the new blogs. You can create new blog categories in the WebCenter Sites Contributor interface. For example, if your site will contain blogs about new products your company is coming out with, you may want to create a "New Products" category. All blogs pertaining to a new product would be associated with this category.
-
Log in to WebCenter Sites with your assigned credentials, select the site on which the blog start menu items are enabled, and then select the icon for the WebCenter Sites Contributor interface.
-
In the menu bar, select Content, then select New, and then select New Blog Category.
-
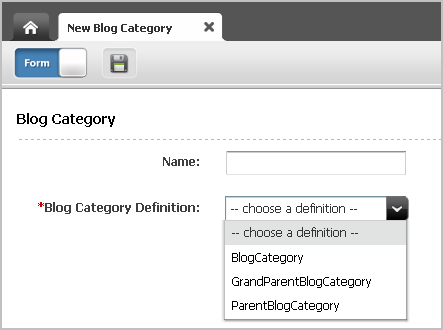
In the "New Blog Category" form, fill in the following fields:
-
Name – Enter a name for the new blog category (for example New Products).
-
Blog Category Definition – Select a definition from the drop-down list,
BlogCategoryin this example (BlogCategoryplaces the New Products category at the third level). For more information about the default options, see "The Community Blogs Data Model" chapter in the Oracle Fusion Middleware WebCenter Sites Developer's Guide.
-
-
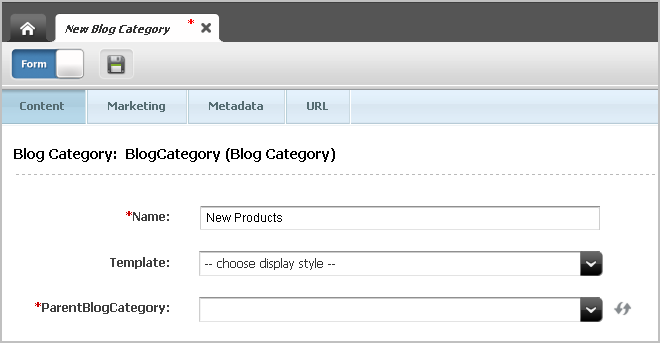
In the Content section of the form (shown in Figure 32-3), fill in the following fields:
Figure 32-3 'New Blog Category' Form: 'Content' Section
Description of "Figure 32-3 'New Blog Category' Form: 'Content' Section"
-
Template – Select the template that will render this category's content.
-
ParentBlogCategory – Select the name of your category's parent (one level above the category you are creating. In our example, the parent you select in this field becomes the grandparent of blog assets that will be associated with the category.)
-
-
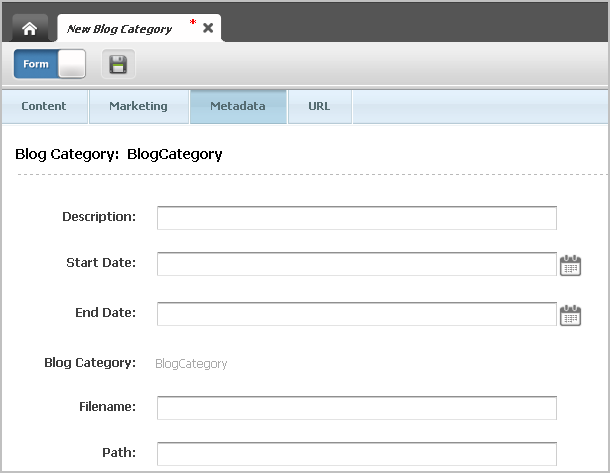
In the Metadata section of the form (shown in Figure 32-4), fill in the following fields:
Figure 32-4 'New Blog Category' Form: 'Metadata' Section
Description of "Figure 32-4 'New Blog Category' Form: 'Metadata' Section"
-
Description – Enter a brief description about the category.
-
Start Date and End Date – If the category must be available for only a certain period of time, set the period by specifying the start and end dates. For more information about start and end dates, see Section 7.3.4, "Assigning Start and End Dates."
-
-
Click Save.
The blog category asset must be approved and published to the website in order for it to be displayed to website visitors. For more information, see Chapter 14, "Approval for Publishing."
32.3 Editing Your Blog Author Asset
An administrator of your system may have created an author asset for you, which is used to render your full name and image next to the blogs you post. This author asset is your blog profile; it contains your full name and profile image. You can modify the information in this author asset from the WebCenter Sites Contributor interface. Any changes you make are automatically generated on the web pages that contain your blogs.
To edit your blog author asset
-
Log in to WebCenter Sites with your assigned credentials, select the site on which the blog start menu items are enabled, and then select the icon for the WebCenter Sites Contributor interface.
-
Access your author asset:
-
In the search field, click the down arrow to open the "Search Type" drop-down list.
-
Click Find Blog Author.
-
Click Search.
-
Select your author asset.
A tab opens displaying the Inspect view for your blog author asset.
-
-
In the blog author asset's toolbar, click the Edit icon.
-
Make the desired changes to the fields, and then click the Save icon.
If you changed the full name or profile image, then the changes will be automatically generated next to your blog posts.
32.4 Moderating Visitors' Comments on Blog Assets
If your system is integrated with the Community application and your blog pages are tagged with the Community application's comment tags, then the pages display comment fields, where visitors can contribute feedback on blog content. Comment links may also be included. If the Community application is configured for manual comment moderation, then all comments on blog assets will await approval from the moderators. If you are a moderator you can approve, delete, or edit comments, or mark them as inappropriate.
To moderate comments that visitors posted to blog assets
-
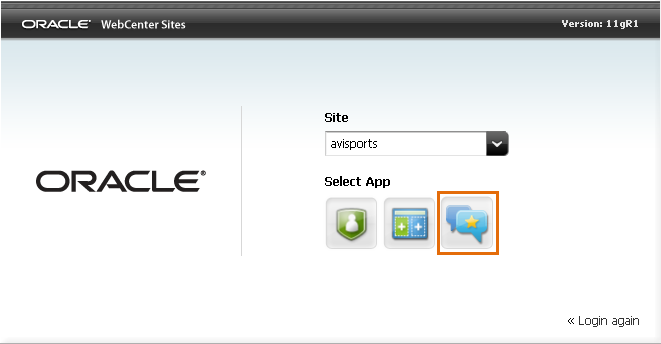
Log in to WebCenter Sites as a moderator, select the site on which the Community application is enabled and then select the Community icon.
Figure 32-5 WebCenter Sites Login Form: Select Site
Description of "Figure 32-5 WebCenter Sites Login Form: Select Site"
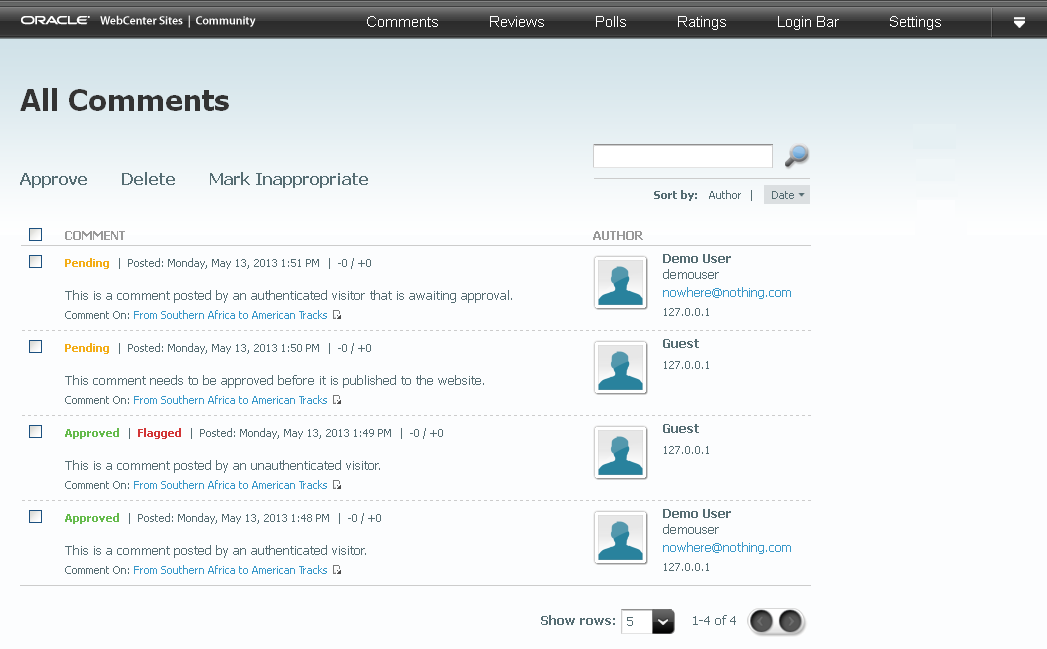
The Community interface's "All Comments" screen opens (shown in Figure 32-6):
-
If you want to review comments posted about a specific blog asset, select Comments, then select Moderate, then select Comments by Topic, and then select the blog title whose comments you wish to review.
To approve a comment
-
Mouse over the comment you wish to approve, and click Approve.
The comment is now displayed in the "All Comments" list with a status of "Approved." The comment is also displayed on the website under the blog to which it was posted.
To modify a comment before approving it
-
Mouse over the comment you wish to edit, and click Edit.
-
In the "Comment" field, modify the content of the comment. Click Save.
The comment is now displayed in the "All Comments" list with the modifications you made.
To delete a comment
-
Mouse over the comment you wish to delete, and click Delete.
-
In the warning box, click OK.
The comment is removed from the "All Comments" list and deleted from the system.
To mark a comment as inappropriate
-
Mouse over the comment that contains the inappropriate content, and click Mark Inappropriate.
The comment is displayed in the "All Comments" list with a status of Inappropriate.
For more information about working with comments in the Community interface, see Chapter 25, "Working with the Comments Widgets."
-
