29 Working with Polls
This chapter is for designers and provides a quick reference for creating and managing polls and the corresponding poll results.
This chapter contains the following sections:
29.1 Overview
Polls allow you to survey the visitors of your website about a certain topic. The Polls menu (shown in Figure 29-1) is used to create Poll widgets and related Results widgets. The Polls menu provides you with options to moderate and reconfigure existing polls, and create new polls widgets which you can then deploy to a web page.
The instructions in this section are written as a quick reference and it is assumed you are already logged in to the Community interface. If you need instructions for logging in, see Section 24.1, "Logging In".
29.2 Working with the 'All Polls' Screen
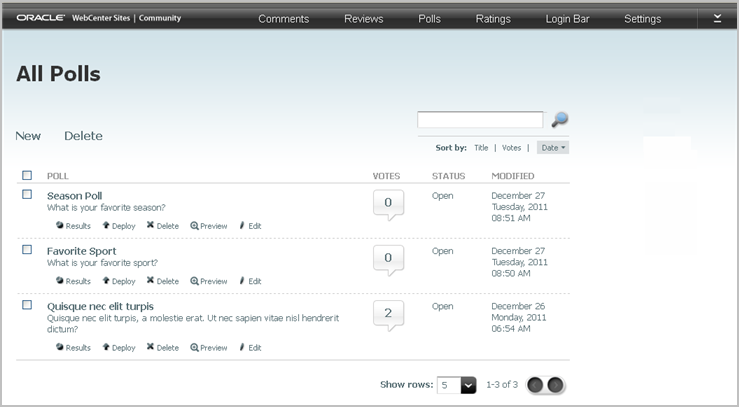
The "All Polls" screen (shown in Figure 29-2) can be accessed by selecting Polls, All Polls in the menu bar. The All Polls screen is used to view existing polls and their results as well as to reconfigure, preview, and deploy poll widgets by using the quick action menu associated with each poll listed in the screen.
Table 29-1 Working with the "All Polls" screen
| Action | Instructions |
|---|---|
|
View the results of a deployed poll |
|
|
Deploy the polls widget tags |
|
|
Delete a poll |
Note: If the poll you deleted is currently deployed on a page, the poll widget will display a message stating that the poll is currently unavailable. To remove the poll widget from the page, you must remove the poll's widget tag from the template used to render that web page's content. |
|
Preview a poll |
A pop-up window opens and displays a preview of the poll. |
|
Modify an existing poll |
|
29.3 Creating a New Poll
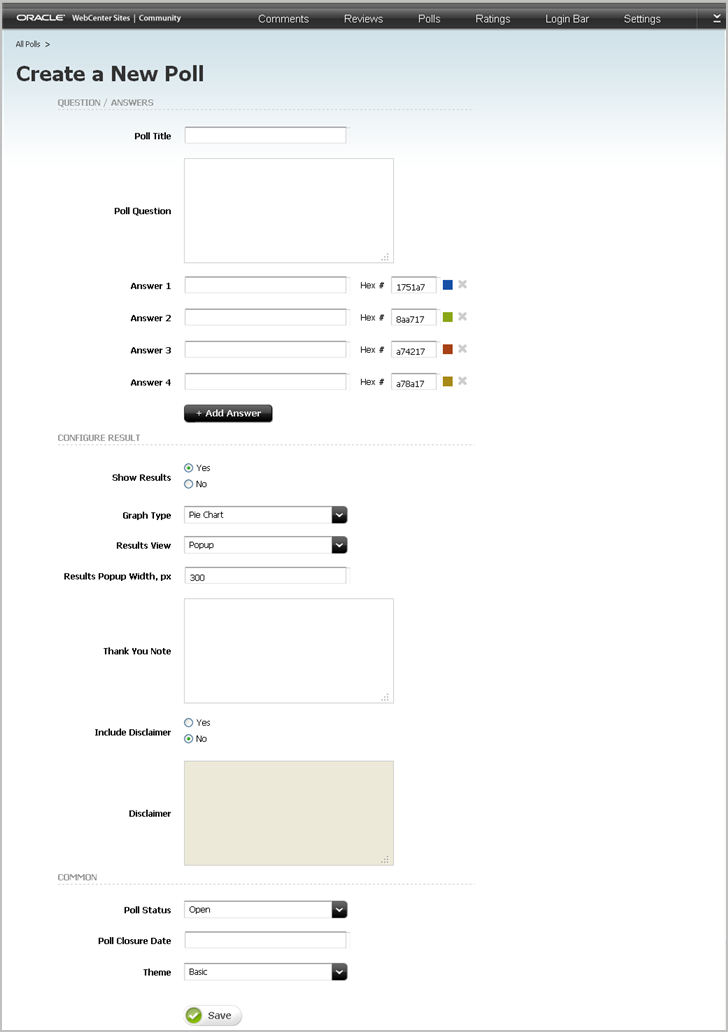
Designers can create a new poll by selecting Polls, and then Create a New Poll from the menu bar, which opens the "Create a New Poll" screen (shown in Figure 29-3). Once you save the poll, it is listed in the "All Polls" screen (select Polls, and then select All Polls).
| Section | Field | Description |
|---|---|---|
|
Questions/Answers |
Poll Title |
Enter a title for the poll. |
|
Questions/Answers |
Poll Question |
Enter the question you want to ask site visitors. |
|
Questions/Answers |
Answer n |
Enter the answer options from which you want visitors to choose.
|
|
Configure Results |
Show Results |
Select Yes to display a summary of the poll's results after a user submits an answer to the main poll. Select No to display only the main poll and its answer options. |
|
Configure Results |
Graph Type |
If you selected Yes in the "Show Results" field, specify the type of graphical representation in which the poll's results summary will be displayed. Select one of the following:
|
|
Configure Results |
Results View |
Specify whether poll results will be displayed in a pop-up window (Popup) or alongside the poll widget (In-Site). Note: This field is available only if you selected Yes in the "Show Results" field. |
|
Configure Results |
Results Popup Width, px |
Specify the width of the results pop-up window. The width must be at least Note: This field is available only if you selected Yes in the Show Results field and Popup in the "Results View" field. |
|
Configure Results |
Thank You Note |
If you selected Yes in the "Show Results" field, enter a thank you note that will be displayed to site visitors when they participate in the poll. |
|
Configure Results |
Include Disclaimer |
Select either Yes or No to specify whether a disclaimer will be displayed to visitors. Note: This field is available only if you selected Yes in the "Show Results" field. |
|
Configure Results |
Disclaimer |
If you selected Yes in the "Include Disclaimer" field, enter the disclaimer text you wish to display to visitors. When the polls widget is deployed, the disclaimer is displayed beneath the poll's question and answers. Note: This field supports plain text and basic HTML tags. You can use HTML tags to control the appearance of your disclaimer |
|
Common |
Poll Status |
This field allows you to manually open and close the poll. Select either:
|
|
Common |
Poll Closure Date |
Click in this field to render the date picker. Specify the date the poll will close (votes can no longer be submitted). If you do not wish to specify a closure date for the poll, leave this field blank. Note: If you do not wish to use the date picker, you can enter a date using the format dd-mm-yyyy (for example, 02-04-2011). |
|
Common |
Theme |
Specify the appearance of the polls widget as it will be displayed on the web page. You can select one of the following:
|


