24 Getting Started
This chapter provides instructions on logging in to the Community interface. The last section of this chapter provides a deployment scenario to help designers become familiar with the process of deploying community widget tags.
This chapter contains the following sections:
24.1 Logging In
The Community application is associated with WebCenter Sites through the WEM Framework. By logging in to a site and accessing the Community application you allow the system to recognize your status as a moderator or designer and enable your permissions to Community interface functions.
To log in to the Community interface
-
Go to the following URL:
<protcol>://<server>:<port>/<context>/login
where
<protocol>is the protocol of the WebCenter Sites application,<server>is the host name or IP address of the server running the WebCenter Sites application,<port>is the port number of the WebCenter Sites application, and<context>is the name of the WebCenter Sites application that was deployed on the server. -
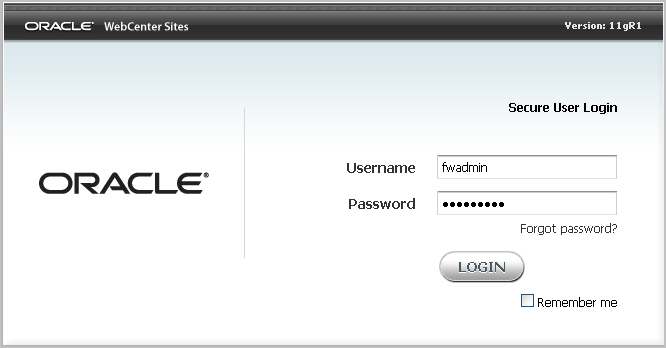
Access the Community application by logging in to WebCenter Sites. Log in credentials are case-sensitive.
In this guide we are using the default login credentials of a general administrator:
-
Username:
fwadmin -
Password:
xceladmin
-
-
Click Login.
-
If you are logging in for the first time, the screen shown in Figure 24-2 is displayed; otherwise, you are logged in to the application you last visited:
Figure 24-2 WebCenter Sites Login Screen: Select Site
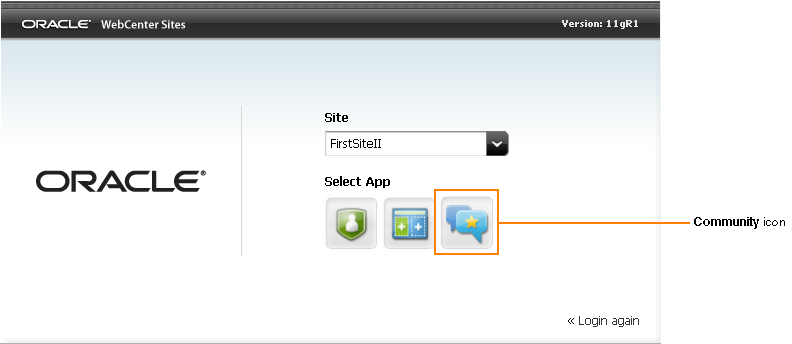
Description of "Figure 24-2 WebCenter Sites Login Screen: Select Site"
Select the site to which the Community application is assigned, and the Community application icon.
-
If you are a moderator, the first screen you see is the "All Comments" screen (shown in Figure 24-3 and Figure 24-4).
-
If this is the first time the Community application is being used, there will be no comments listed in the "All Comments" screen, as shown in Figure 24-3.
Figure 24-3 Unpopulated Community Interface 'All Comments' Screen

Description of "Figure 24-3 Unpopulated Community Interface 'All Comments' Screen "
-
If the Comments widget tag has already been configured and deployed on a web page, and site visitors have posted comments to that page, you will see those comments in the "All Comments" screen, as shown in Figure 24-4.
Figure 24-4 Populated Community Interface 'All Comments' Screen
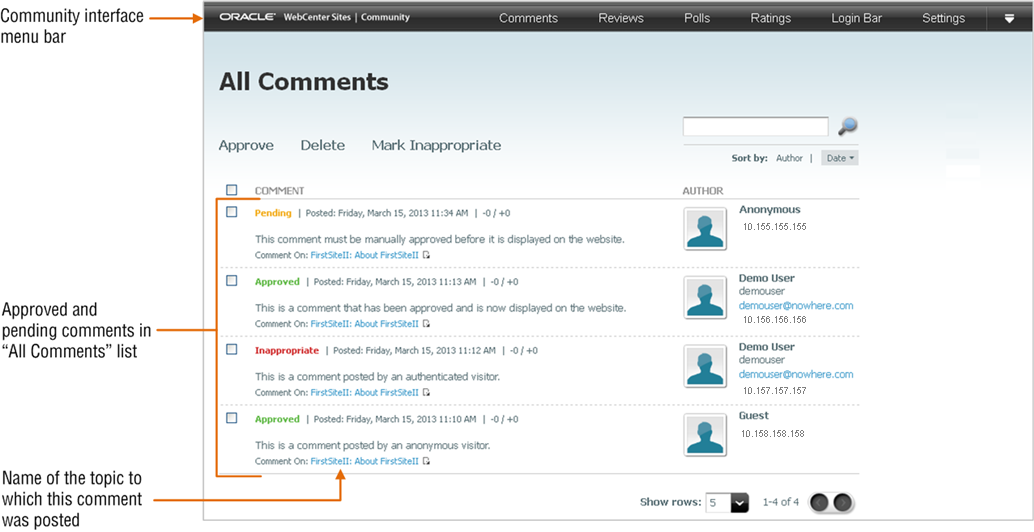
Description of "Figure 24-4 Populated Community Interface 'All Comments' Screen"
Moderators can also view visitors' comments, reviews, and ratings by either the topic to which they were posted or by the name of the site visitor who posted them.
-
-
If you are a designer, the first screen you will see is the "All Polls" screen.
-
If this is the first time the Community application is being used, there will be no polls listed in the "All Polls" screen, as shown in Figure 24-5.
Figure 24-5 Unpoulated 'All Polls' Screen

Description of "Figure 24-5 Unpoulated 'All Polls' Screen"
-
If poll widgets have already been created, you will see those polls listed in the "All Polls" screen, as shown in Figure 24-6.
Designers can also deploy comments, reviews, ratings, and poll widget tags. For more information about deploying community widget tags, see Section 24.2, "How Do I Deploy Community Widget Tags?."
-
-
24.2 How Do I Deploy Community Widget Tags?
This scenario is for designers, and provides instructions for deploying a Comments widget tag. In this scenario, the Community application is assigned to the WebCenter Sites FirstSiteII sample site. You will be inserting the Comments widget tag into the FSIILayout template. Once this template is published, any web pages that display assets rendered by the FSIILayout template (for example, the content of the FSIIAbout asset) will also display a Comments widget.
Note:
Keep in mind the following:
-
To deploy a widget tag, you must have access to the WebCenter Sites Admin interface (Admin). Ensure that the WebCenter Sites Admin application is assigned to the same site as the Community application.
-
If you wish to reconfigure the default settings and visitor permissions for the Comments widget tag before you deploy the tag, see Section 25.3, "Reconfiguring the Comments Widget's Default Settings."
-
If you wish to test the current widget tag settings and visitor permissions without using a WebCenter Sites CM site, insert the tag into an
htmlpage instead to view the configurations you are starting with. -
If Community-Gadgets is integrated with WebCenter Sites, you can deploy community widget tags directly from the WebCenter Sites Contributor interface. For more information, see Chapter 12, "Working with Widgets and Gadgets in the Contributor Interface."
To deploy community widget tags (Comments widget tag)
-
Log in to WebCenter Sites with designer credentials, select the site on which the Community application is enabled (
FirstSiteIIsample site in this example), and then select the icon for the WebCenter Sites Community interface. -
In the menu bar, select Comments, then select Deploy, and then select Comments.
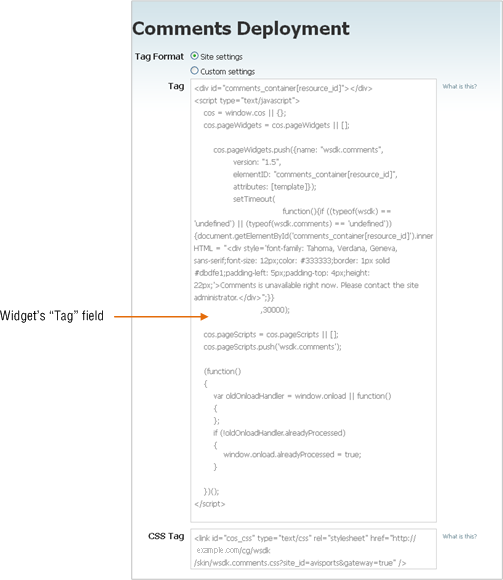
The "Comments Deployment" screen opens, as shown in Figure 24-7:
-
Deploy the widget tag (in this example, we are deploying the Comments widget tag):
-
In the "Tag" field, copy (Ctrl+C) the widget tag.
-
Access the WebCenter Sites Admin interface:
-
In the menu bar, point to the down-arrow icon, located at the extreme right of the screen, to render the applications bar.
-
In the applications bar, click the Admin icon.
The WebCenter Sites Admin interface opens, as shown in Figure 24-8.
Figure 24-8 WebCenter Sites Admin Interface
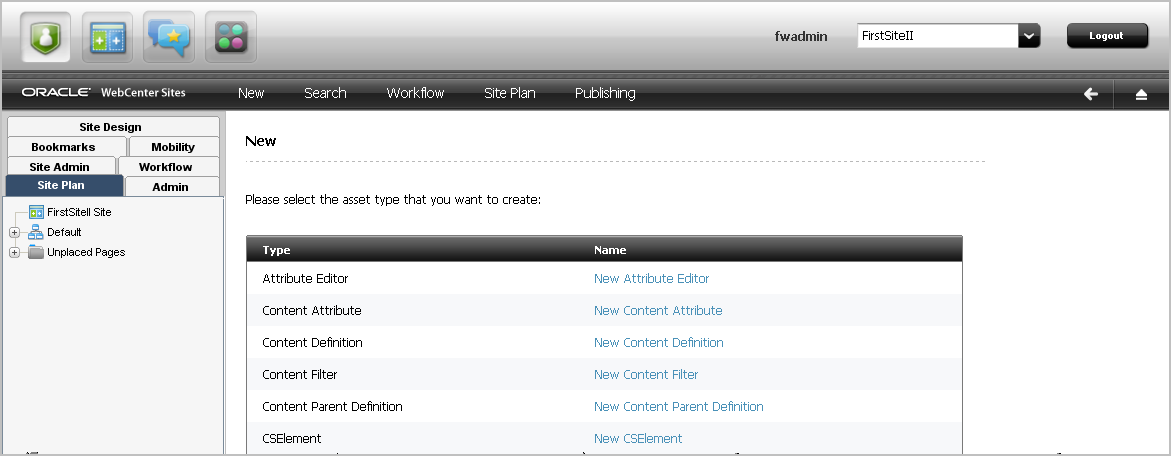
Description of "Figure 24-8 WebCenter Sites Admin Interface"
-
-
In the WebCenter Sites Admin interface, locate the template into which you wish to insert the widget tag (
FSIILayouttemplate in this example):-
From the start menu options, click Search.
-
In the "Search" list, select Find Template.
-
In the "Search for: Templates" form, click Search.
-
In the "List of Templates" screen, select the template into which you wish to insert the widget tag. (
FSIILayouttemplate in this example.)
-
-
In the template's Inspect form, click Edit.
-
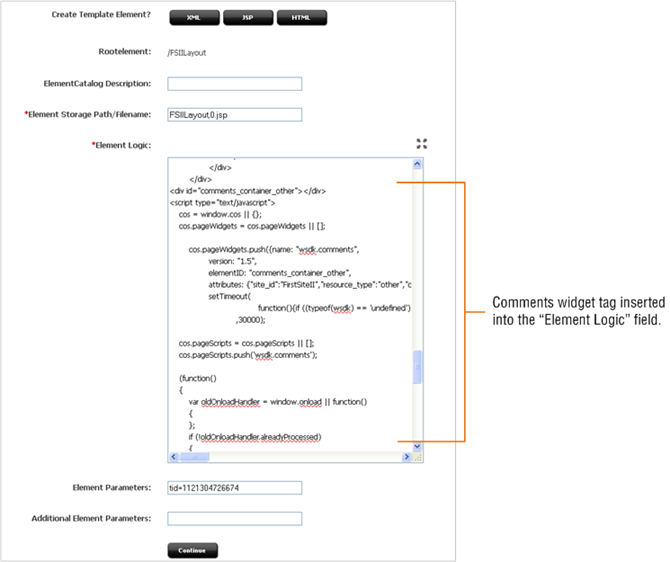
In the template's "Element" screen, insert (Ctrl+V) the widget tag into the Element Logic field in the exact location you want to display the widget.
-
Click Save.
-
-
If you are deploying multiple widgets on the same page, deploy the CSS tag. The CSS tag loads all widget CSS files at the same time, decreasing the load time of a page on which multiple widgets are deployed. For detailed information and instructions about deploying the CSS tag, see the Oracle Fusion Middleware WebCenter Sites Developer's Guide.
-
Preview the widget to ensure it is properly rendered on the website:
-
Switch to the WebCenter Sites Contributor interface. In the menu bar, click the down-arrow to open the applications bar. In the applications bar, select the Contributor icon.
-
Find an asset that is rendered by the template containing the widget tag. In the Search field, enter the desired search criteria and then click the magnifying glass button.
A "Search" tab opens listing the results of your search.
-
In the search results list, right-click the desired asset and select Preview from the context menu.
The asset's preview opens displaying the widget (Comments widget in this example), as shown in Figure 24-10:
Figure 24-10 Preview of an Asset Displaying the Deployed Comments Widget
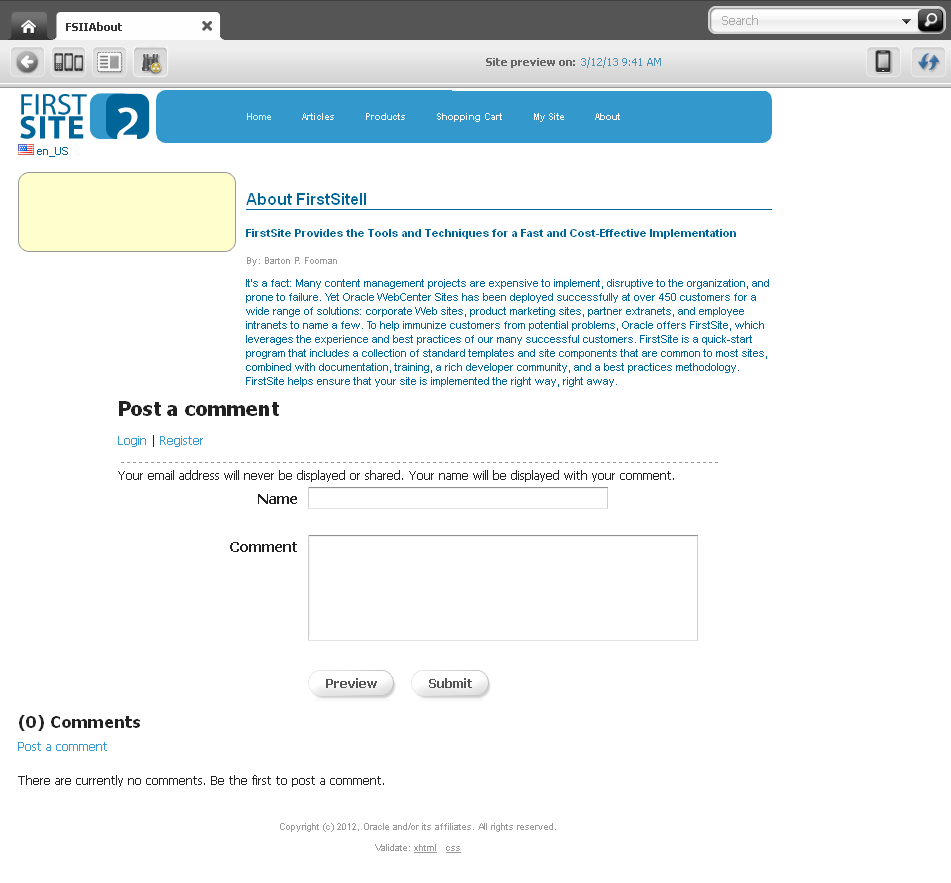
Description of "Figure 24-10 Preview of an Asset Displaying the Deployed Comments Widget"
-
If you want to publish the template to the website, see step 6.
-
If you want to reconfigure default settings for the Comments widget tag, see Section 25.3, "Reconfiguring the Comments Widget's Default Settings."
-
If you want to reconfigure and deploy another type of widget tag, see one of the following chapters:
Chapter 26, "Working with the Reviews Widgets"
Chapter 27, "Working with Ratings Widgets"
-
If you want to configure community widget settings, such as security, language, and moderation settings, see Chapter 30, "Configuring Community Widget Settings."
-
-
-
Publish the template. For instructions, see the publishing chapters in the Oracle Fusion Middleware WebCenter Sites Administrator's Guide.
-
Access the website to view the widget on a web page.
The web page should look similar to Figure 24-11.
Figure 24-11 Web Page Displaying the Comments Widget
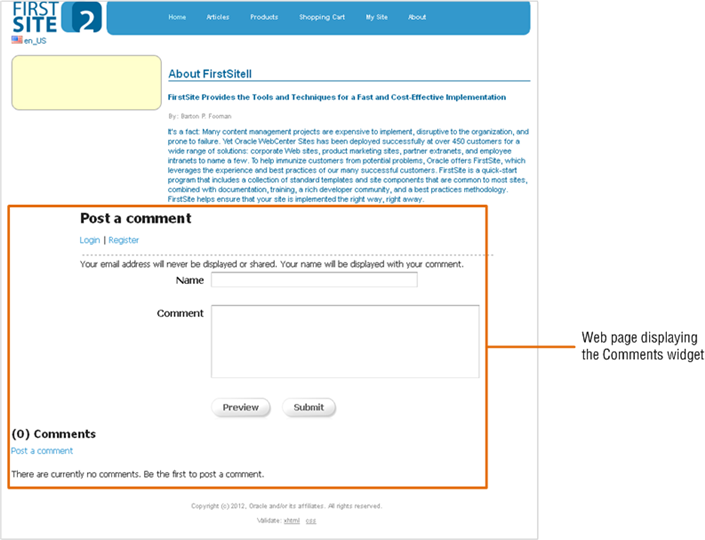
Description of "Figure 24-11 Web Page Displaying the Comments Widget"
24.3 Next Steps
The next chapters provide information and instructions for moderating visitors' comments, reviews, and ratings, as well as viewing poll results. The next chapters also provide information about configuring and deploying the Comments, Reviews, Ratings, Polls, and Login Bar widgets. You will also learn how to configure global community widget settings, such as the language in which community widgets are displayed on the website.
