30 Configuring Community Widget Settings
This chapter provides a quick reference for reconfiguring settings that apply to all community widgets (to which the settings are applicable) of a given site.
This chapter contains the following sections:
30.1 Overview
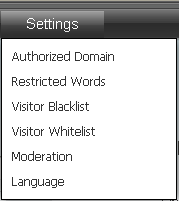
The Settings menu (shown in Figure 30-1) is used to configure moderation and security settings for the entire site and all widget tags. Configuring general community widget settings includes applying automatic moderation filters (Restricted Words, Visitor Blacklist, and Visitor Whitelist) to assist in the moderation process and protecting your widget tags from unauthorized deployment. Once you save these settings, the system dynamically updates all widget tags in the Community interface and on pages where tags are deployed.
The instructions in this section are written as a quick reference and it is assumed you are already logged in to the Community interface. If you need instructions for logging in, see Section 24.1, "Logging In."
30.2 Working with the 'Settings' Menu
This section is for all Community application users. You can reconfigure general settings for community widgets (to which the settings are applicable) in the following ways:
30.2.1 Working with the Authorized Domain Screen
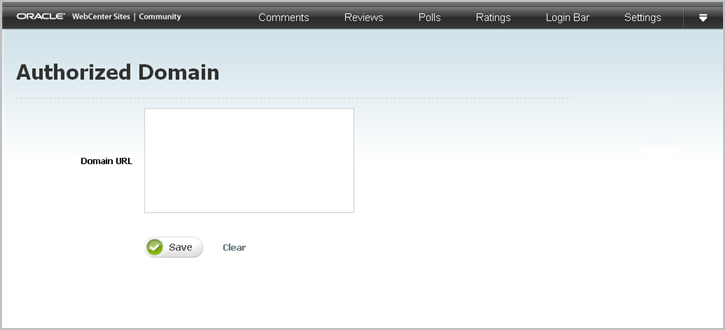
Designers can access the "Authorized Domain" screen (shown in Figure 30-2) by selecting Settings and then Authorized Domain. The "Authorized Domain" screen is used to protect all deployed tags from unauthorized use. Authorizing a domain enables you to specify the domain on which community widget tags can be deployed. This restricts the usage of the tags to only the specified domain.
Table 30-1 Authorizing a Domain
| Field | Description |
|---|---|
|
Domain URL |
Enter the domain name of the site(s) on which you wish to display community widgets. For example: www.mycompany.com or www.mysite.mycompany.com To specify the domain name of multiple sites, separate each domain name with a comma. For example: www.mycompany.com, www.mycompany2.com, www.mycompany3.com, *.mycompany.com Widgets can be rendered only on the specified domain(s) and sub-domain(s). If a visitor views the source code of your company's site, and attempts to copy and deploy the widget tags to his own site, the deployment will fail. Note: This field is optional. If you do not wish to specify a domain on which widget tags can be deployed, leave this field blank. |
30.2.2 Working with the Restricted Words Screen
Moderators can access the "Restricted Words" screen (shown in Figure 30-3) by selecting Settings and then Restricted Words. The "Restricted Words" screen is used to upload a word filter file, which will prevent the publication of comments and reviews containing words that are listed in the file. The comments and reviews will be marked as Inappropriate and will await approval by a moderator in the Community interface.
Note:
The Community application provides a default word filter that searches for partial matches to the words specified in the uploaded word filter file. To enable the word filter to search for these words, you will have to enable auto moderation against restricted words (Section 30.2.5, "Working with the Moderation Screen").
Table 30-2 Configuring the Restricted Words Filter
| Field | Description |
|---|---|
|
Upload filter |
Click Browse to upload a filter file. The size of the file you are uploading can be no more than 100KB, the file must be in Note: When you upload a filter file and save it to the Community interface, the file is renamed |
30.2.3 Working with the Visitor Blacklist Screen
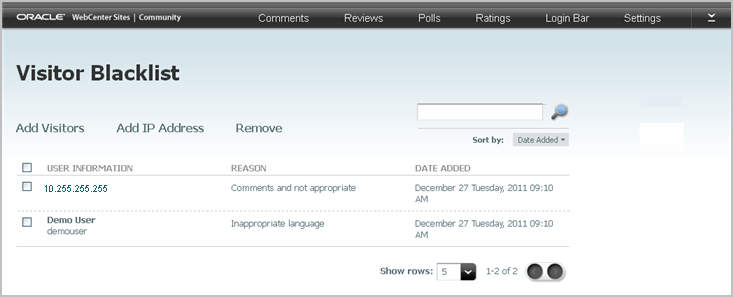
Moderators can access the "Visitor Blacklist" screen (shown in Figure 30-4) by selecting Settings and then Visitor Blacklist. The "Visitor Blacklist" is used to prevent certain visitors' comments, reviews, and ratings from being displayed on the website without going through the moderation process. Moderators must manually moderate all comments, reviews, and ratings posted by blacklisted visitors.
Note:
To automatically mark comments, reviews, and ratings posted by blacklisted visitors as inappropriate, you will have to enable auto-moderation against the visitor blacklist (see Section 30.2.5, "Working with the Moderation Screen").
Note:
If you are blacklisting anonymous visitors, you will need their IP addresses. A visitor's IP address is located next to each of his comments, reviews, and ratings listed in the Community interface.
To obtain a visitor's IP address:
-
Access either the All Comments, All Reviews, or All Ratings screen.
-
Navigate to the comment, review, or ratings posted by the anonymous visitor you wish to add to the blacklist. The visitor's IP address is listed under the Author column, next to his comment or review.
Table 30-3 Configuring the Visitor Blacklist
| Action | Instructions |
|---|---|
|
Adding authenticated visitors to the "Visitor Blacklist" |
|
|
Adding an anonymous visitor to the "Visitor Blacklist" |
|
|
Removing visitors from the "Visitor Blacklist" |
|
30.2.4 Working with the Visitor Whitelist Screen
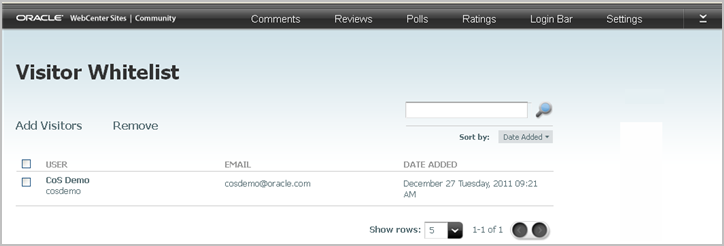
Moderators can access the "Visitor Whitelist" screen (shown in Figure 30-5) by selecting Settings and then Visitor Whitelist. The "Visitor Whitelist" screen is used to allow authenticated visitors to post comments and reviews without requiring approval. This means that once a visitor is added to the whitelist, all of the visitor's posts are automatically approved and displayed on the website (even if manual moderation is enabled).
Note:
To automatically approve all comments and reviews posted by whitelisted visitors, you will have to enable the Pre-publish against Visitor Whitelist before manual approval checkbox in the "Moderation Settings" screen (see Section 30.2.5, "Working with the Moderation Screen").
Note:
Only authenticated visitors can be added to the visitor whitelist.
Table 30-4 Configuring the Visitor Whitelist
| Action | Instructions |
|---|---|
|
Adding authenticated visitors to the "Visitor Whitelist" |
|
|
Removing visitors from the "Visitor Whitelist" |
|
30.2.5 Working with the Moderation Screen
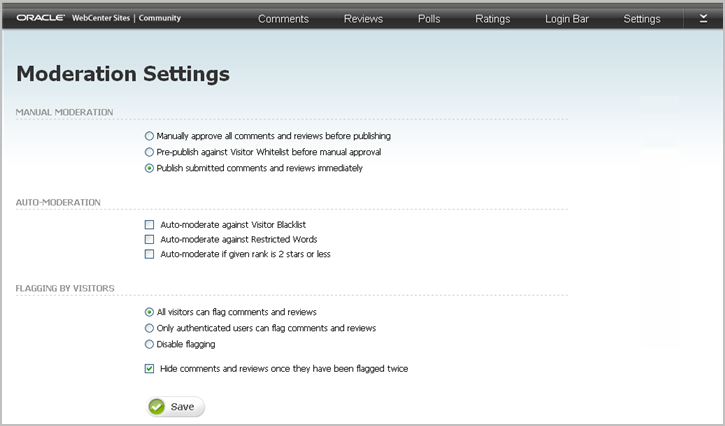
Moderators can access the "Moderation Settings" screen (shown in Figure 30-6) by selecting Settings and then Moderation. The "Moderation Settings" screen is used to specify the following options:
-
Enable manual or automatic moderation. Allow comments, reviews, and ratings to be either passed through the moderation process or automatically approved and displayed on the website.
-
Apply the auto-moderation filters to assist in the moderation process. The filters for auto-moderation are Restricted Words, Visitor Blacklist, and Visitor Whitelist.
For information, see Section 30.2.2, "Working with the Restricted Words Screen," Section 30.2.3, "Working with the Visitor Blacklist Screen," and Section 30.2.4, "Working with the Visitor Whitelist Screen."
-
Choose to auto-moderate reviews and ratings by the rating a site visitor gives to a topic.
-
Specify whether visitors can assist in the moderation process by allowing them to flag comments and reviews posted to the pages of the website. Also, specify which visitors (authenticated or all) can flag comments and reviews.
Table 30-5 Configuring Moderation Settings for Widgets
| Field | Description |
|---|---|
|
Manual Moderation |
Enables you to control whether comments and reviews will be automatically approved or manually moderated before being approved. If manual moderation is enabled, all posted comments and reviews are displayed in the Community interface with a status of Pending until they are manually approved by a moderator. You can also choose to enable the "Visitor Whitelist" filter. When applied, it approves all comments, reviews, and ratings posted by whitelisted visitors. |
|
Auto-Moderation |
Enables you to apply the "Restricted Words" and/or "Visitor Blacklist" filters. When these filters are applied, they mark as Inappropriate all comments and reviews that contain prohibited words (Restricted Words) and all comments, reviews, and ratings posted by blacklisted visitors (Visitor Blacklist). You can also choose to automatically moderate reviews by the rating the site visitor who posted them gives to the topic. When enabled, any review posted with a rating of 2 stars or less is automatically marked as Inappropriate. |
|
Flagging By Visitors |
Enables you to control site visitor flagging capabilities for approved comments and reviews. |
30.2.6 Working with the Language Screen
Designers can access the "Language" screen (shown in Figure 30-7) by selecting Settings and then Language. The "Language" screen enables you to specify the language in which deployed community widgets will be displayed.
Table 30-6 Languages of the Deployed Widgets
| Field | Description |
|---|---|
|
Language |
Click the down-arrow to display the Language drop-down menu. Select the language in which all deployed community widgets will be displayed. The available options are:
Note: If the desired language is not listed, contact your WebCenter Sites administrator or developers. For instructions about adding language options to this list, see the Oracle Fusion Middleware WebCenter Sites Developer's Guide. |
