12 Working with Widgets and Gadgets in the Contributor Interface
If you work with the Community and Gadgets applications, you may want to deploy widgets and gadgets directly from the WebCenter Sites Contributor interface. Now you can! If Community-Gadgets is integrated with your WebCenter Sites installation, the Community and Gadgets applications are assigned to the sites you work with, and the asset types associated with widgets and gadgets are enabled for those sites, then you can deploy widgets and gadgets to web pages while working directly in the WebCenter Sites Contributor interface.
This chapter contains the following sections:
-
Section 12.1, "Overview of the Community-Gadgets Integration with WebCenter Sites"
-
Section 12.4, "Customizing Deployed Community and Login Bar Widgets"
12.1 Overview of the Community-Gadgets Integration with WebCenter Sites
When Community-Gadgets is integrated with WebCenter Sites, the following asset types are created:
-
CGGadget – Asset type for all the gadgets registered to the site's Gadget Catalog. If there are no gadgets registered to the site's Gadget Catalog, then you will not see any assets of type
CGGadgetin the Contributor interface. For instructions on registering gadgets to a site gadget catalog, see the Oracle Fusion Middleware WebCenter Sites Administrator's Guide. -
CGWidget – Asset type for the community widgets, Login Bar widget, and the gadget Dashboard widget available for the site with which you are working.
-
CGPoll – Asset type for the Polls widgets available for the site with which you are working. If there are no polls created for the site with which you are working, you will not see any assets of type
CGPollin the Contributor interface. For instructions on creating polls, see Section 29.3, "Creating a New Poll."
In order to work with assets of these types in the Contributor interface, the following is required:
-
Your administrator must enable these asset types for your site.
-
You must be assigned at least one of the following roles:
GeneralAdmin,SiteAdmin, andDesigner.
The Community-Gadgets integration with WebCenter Sites does not provide the full functionality of the Community and Gadgets applications in the Contributor interface. However, you can do the following:
-
Access widget and gadget assets from the Community-Gadgets tree (located in the navigation pane).
-
Search for assets of type
CGGadget,CGWidget, andCGPollusing the Search field in the Contributor interface. -
Deploy widgets and gadgets on assets that are assigned templates your developers encoded with slots that accept assets of type
CGGadget,CGWidget, andCGPoll. -
Customize a deployed widget instance directly from an asset's Edit view in Web Mode.
Continue with the rest of this chapter for instructions on accessing and deploying widget and gadget assets.
12.2 Accessing Widget and Gadget Assets
Widget and gadget assets can be accessed from either a search results list or the Community-Gadgets tree. This section provides instructions for accessing widget and gadget assets in the WebCenter Sites Contributor interface.
Note:
To work with widgets and gadgets in the Contributor interface, your administrator must enable the following asset types: CGGadget, CGWidget, and CGPoll. If you do not see any widgets or gadgets listed in the Community-Gadgets tree, contact your administrator.
You can access widget and gadget assets in the following ways:
-
Section 12.2.1, "Accessing Widget and Gadget Assets from the 'Community-Gadgets' Tree"
-
Section 12.2.2, "Accessing Widget and Gadget Assets from a Search Results List"
12.2.1 Accessing Widget and Gadget Assets from the 'Community-Gadgets' Tree
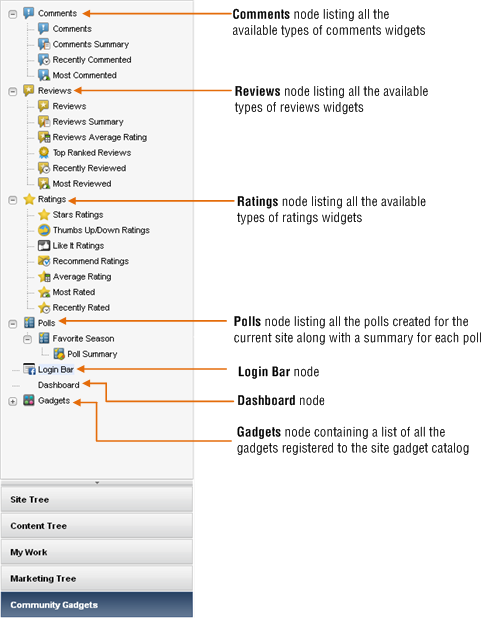
If Community-Gadgets is integrated with WebCenter Sites and the Community and Gadgets applications are assigned to the sites you work with, the navigation pane in the WebCenter Sites Contributor interface displays the Community-Gadgets bar (Figure 12-1). Clicking this bar displays the Community-Gadgets tree (Figure 12-1) which lists the available widgets (community widgets, Login Bar widget, Poll widgets, and the gadgets Dashboard widget) for the site and all of the gadgets that are registered to the site's Gadget Catalog.
To access widget and gadget assets from the 'Community-Gadgets' tree
-
Log in to WebCenter Sites, select the site you want to work with and the icon for the WebCenter Sites Contributor interface.
-
In the navigation pane, click the Community-Gadgets bar.
The navigation pane displays the Community-Gadgets tree (Figure 12-1).
-
Browse the assets in the Community-Gadgets tree by doing the following:
-
Click the plus-sign next to a node to expand the node and display its associated widget or gadget assets.
-
Double-click a node to open a "Browse" tab that lists all of the node's associated widget or gadget assets.
Note:
There is only one Login Bar widget and one Dashboard widget. Therefore, neither of these nodes contain any associated widget or gadget assets.
-
-
(Optional) To refresh the Community-Gadgets tree, right-click anywhere in the tree to open the context menu, and then click Refresh Pane.
12.2.2 Accessing Widget and Gadget Assets from a Search Results List
This section provides instructions for using the Search field in the Contributor interface to search for assets of type CGGadget, CGWidget, and CGPoll.
To access widget and gadget assets from a search results list
-
Log in to WebCenter Sites, select the site you want to work with and the icon for the WebCenter Sites Contributor interface.
-
In the Search field, enter search criteria for the desired widget or gadget, and then click the down-arrow to render the "Search Type" drop-down box:
-
If you are searching for a widget (community widget, gadget Dashboard widget, or Login Bar widget), select Find CGWidget.
-
If you are searching for a gadget, select Find CGGadget.
-
If you are searching for a Polls widget, select Find CGPoll.
Note:
To find assets of type
CGWidget,CGGadget, orCGPoll, you cannot search across all asset types in the Contributor interface. The search results will not include assets of these types. -
-
Click the magnifying glass button.
-
If you are not currently working with any assets, WebCenter Sites displays the search results in a "Search" tab.
-
If you are currently working with an asset, the search results list is automatically docked to the right of the workspace.
For more information about searching for assets, see Chapter 6, "Finding and Organizing Assets."
-
12.3 Deploying Widgets and Gadgets
This section provides instructions for using the Contributor interface to deploy widget and gadget assets to your website.
To deploy widgets and gadgets on web pages
-
Log in to WebCenter Sites, select the site you want to work with and the icon for the WebCenter Sites Contributor interface.
-
Open the asset on which you wish to deploy the widget or gadget. (If you need to create the asset, see Section 3.1, "Creating Assets in Form Mode.")
Note:
The asset you open (or create) must be assigned a template that has been encoded with slots that accept assets of type
CGGadget,CGWidget, and/orCGPoll. If you have any questions, see your template developers. -
Find the widget and/or gadget you wish to deploy:
-
For instructions on accessing assets from the Community-Gadgets tree, see Section 12.2.1, "Accessing Widget and Gadget Assets from the 'Community-Gadgets' Tree."
-
For instructions on searching for widget and gadget assets, see Section 12.2.2, "Accessing Widget and Gadget Assets from a Search Results List."
-
-
Deploy the desired widget or gadget on the asset you opened in step 2:
-
In the search results list or Community-Gadgets tree, click the name of the widget or gadget and drag it to the desired field (Form Mode) or slot (Web Mode).
If the slot supports widgets and gadgets, when you drag the widget or gadget to the slot, a dashed green border is displayed around the slot.
-
Drop the widget or gadget into the field (or slot) by releasing the mouse button.
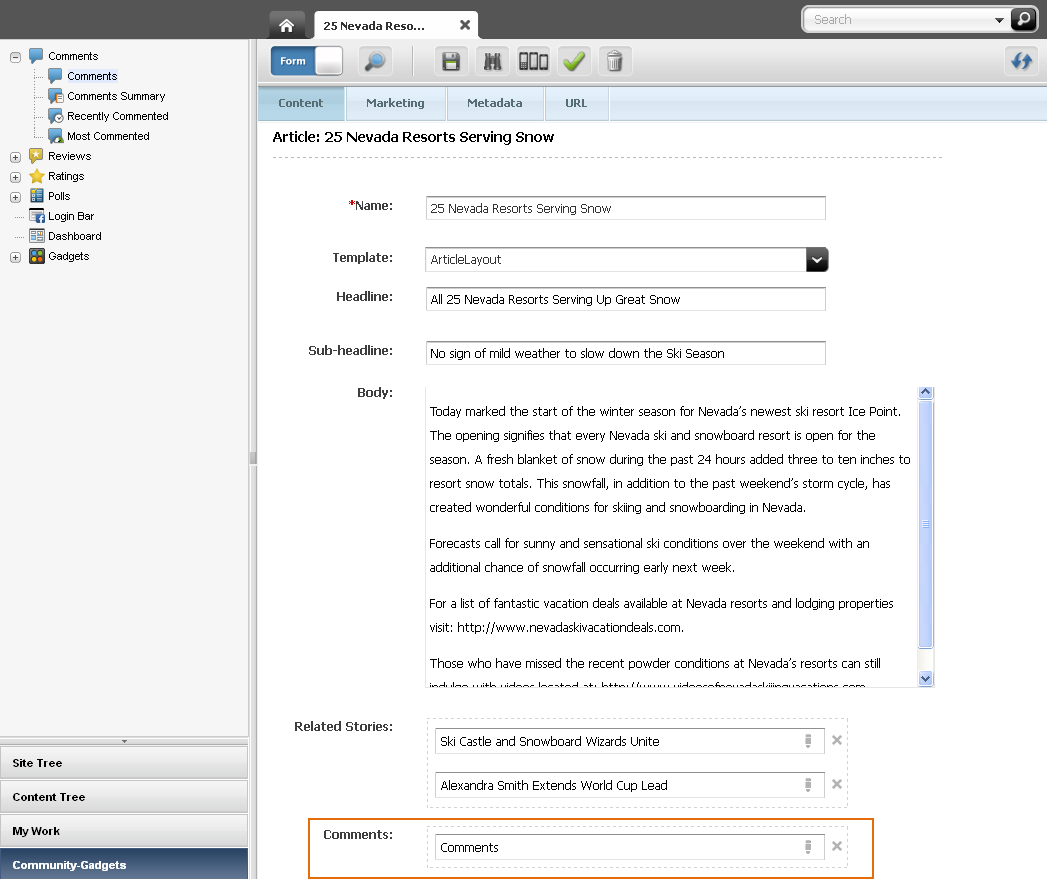
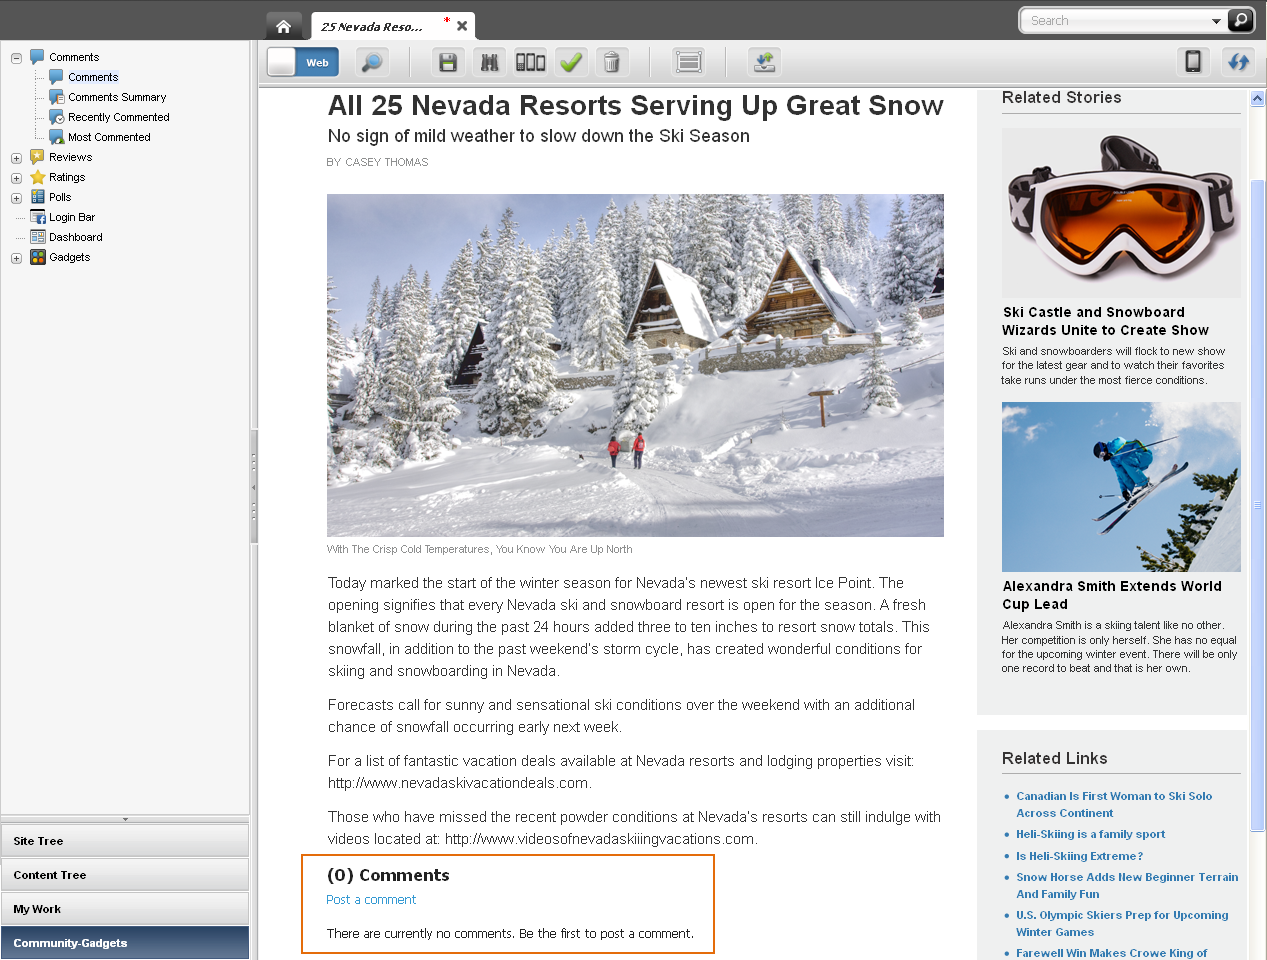
Figure 12-2 shows an asset in Form Mode displaying the Comments widget in a field. Figure 12-3 shows an asset in Web Mode displaying the Comments widget in a slot.
Figure 12-2 Comments Widget Deployed on an Asset Displayed in Form Mode

Description of "Figure 12-2 Comments Widget Deployed on an Asset Displayed in Form Mode"
Figure 12-3 Comments Widget Deployed on an Asset Displayed in Web Mode

Description of "Figure 12-3 Comments Widget Deployed on an Asset Displayed in Web Mode"
-
-
Save your changes by clicking the Save icon in the asset's toolbar.
-
To inspect the asset, click the Inspect icon in the asset's toolbar.
The tab displays the asset in its Inspect view. You cannot modify the asset in its Inspect view.
-
If you wish to customize a deployed widget instance, see Section 12.4, "Customizing Deployed Community and Login Bar Widgets."
-
Publish the asset on which you deployed the widget or gadget. For instructions, see the publishing chapters in the Oracle Fusion Middleware WebCenter Sites Administrator's Guide.
12.4 Customizing Deployed Community and Login Bar Widgets
When working in Web Mode, you can customize deployed community and Login Bar widget settings directly in the Contributor interface. If the widget instance is customizable, the slot toolbar of the slot into which you placed the widget, displays a Settings icon. Clicking the Settings icon opens a pop-up which displays the widget's custom settings screen.
Note:
The custom settings screen for the widget instance you deployed displays custom fields that apply only to that widget instance.
To customize a deployed community or Login Bar widget
-
Log in to WebCenter Sites, select the site you want to work with, and then select the icon for the WebCenter Sites Contributor interface.
-
Find and open the asset on which you deployed the widget you wish to customize.
-
In the Search field, enter search criteria identifying the asset and then click the magnifying glass button.
-
In the search results list, click the name of the asset on which you deployed the widget you wish to customize.
A tab opens displaying the asset in either Form Mode or Web Mode.
-
-
If the asset opens in Form Mode, switch to Web Mode. In the asset's toolbar, click the Mode switch.
The tab re-displays the asset in Web Mode.
-
In the asset's toolbar, click the Edit icon.
The tab displays the Edit view of the asset in Web Mode.
-
Customize the deployed widget's settings:
-
Navigate to the slot containing the widget whose settings you wish to customize.
-
Click in the slot to open the slot's toolbar, and then click the Edit option.
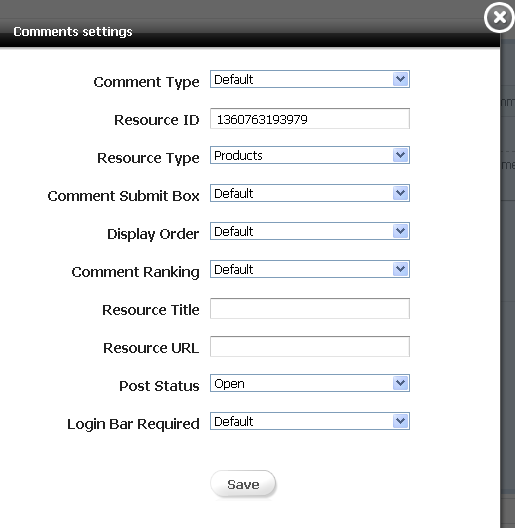
The widget's custom settings window opens (as shown in Figure 12-4).
-
In the widget's custom settings window, enter the desired value for each field. The fields you see are the same fields displayed in the widgets deployment screen in the Community interface. For more information about the fields in a widget's deployment screen, see the following sections:
-
Click Save.
The changes you make are applied only to this instance of the widget. If you wish to modify the site wide settings of a particular type of widget (for example, you wish to modify the site settings for all instances of the Comments widget), you must do so from the Community interface. For instructions, see Part II, "Using the Community Application."
-
-
Save and close the asset. In the menu bar, select Content, and then select Save and Close.

