9 Linking Assets
When creating and updating assets, you have the option to link the assets to each other in several ways, as long as the assets are on the same site.
This chapter includes the following sections:
9.1 Overview
Some assets' Create and Edit views have a CKEditor enabled field. CKEditor supports a wide range of formatting options, such as the option to link assets to each other using the link icons located on the CKEditor toolbar. The table below identifies the icons on the CKEditor toolbar that you will be working with for the following linking procedures:
| Type of Link | Icon(s) | Description | For Linking Procedures, See |
|---|---|---|---|
|
Linking two assets directly: Scenario 1 |
Add asset link |
Used to create a hyperlink to the target asset from the referring asset. |
|
|
Linking two assets directly: Scenario 2 |
Include Asset |
Used to dynamically include the previewable content of one asset in another. |
|
|
Link two assets via an image asset: Scenario 1 |

|
|
Section 9.4.2, "Linking via an Image from the "Bookmarks" Node" |
|
Link two assets via an image asset: Scenario 1 |

|
|
|
|
Linking assets to URLs |
Link |
Used to insert a hypertext link to a URL into the referring asset's CKEditor enabled field. Additional options, such as Email, are also available in the Link icon, but they are not covered in this guide. For more information about the additional options, refer to the CKEditor's documentation at: |
9.2 Linking Two Assets Directly
This section contains prerequisite steps and instructions for linking two assets, as follows:
-
Creating a hypertext link to another asset
You may have two assets—article assets, for example—with related content that you wish to join by a hypertext link. Working in the main article, you would use the Add asset link icon on the CKEditor toolbar to insert a hypertext link to the related article. When site visitors access the main article's content, they can click the inserted hypertext link to render the related article's content.
-
Linking two assets by inclusion
A commonly performed CM operation is to insert previewable content from one asset into another asset, but without manually copying the content. Instead, the content is inserted "by reference," so that it can be dynamically updated at the insertion point when the target asset (the source of content) is modified.
In this scenario, you would use the Include Asset icon in the CKEditor toolbar to insert the asset, whose previewable content is then rendered dynamically at the insertion point.
When using Include Asset, you are actually inserting a link to the target asset, but rendering the link in the form of the target asset's previewable content. The link persists after the target asset is included. As a result, the content is not editable at the insertion point, but it is refreshed when the target asset (the source of content) is modified. To view refreshed content, you must refresh the referring asset by clicking the Refresh icon in the referring asset's toolbar.
The extent to which these capabilities are available to you depends on how your site designers have implemented them as part of the custom asset design. For example, the "Article" asset type that ships with the avisports sample site is configured with a CKEditor in its "Body" field. Therefore the "Body" field supports the types of links described above.
9.2.1 Prerequisites
Before linking assets, you must verify that they can be linked. Use this section as a checklist. (It is assumed that you know how to edit and preview assets, and create them, if necessary. Basic instructions are given in various steps.)
9.2.1.1 Participating Assets
Two assets are involved in this procedure, and both assets are on the same site:
-
The referring asset (in which you will create the link to the target asset)
-
The target asset (which will be rendered when the link is clicked)
9.2.1.2 Referring Asset
-
The referring asset displays the CKEditor in the field where you will place the link. If you need instructions for verifying that CKEditor is displayed, complete the following steps:
Note:
If you are creating a new referring asset, you can start this procedure in the asset's Create view. However, it is best to save the asset and then open its Edit view (to ensure against possible loss of any existing content, as you move from step to step).
-
Open the referring asset in its Edit view. If you need to find the referring asset, do the following:
-
In the Search field, enter the desired search criteria (if any) and then click the magnifying glass button.
-
In the search results list, navigate to and right-click the name of the desired asset. In the right-click menu, select Edit.
-
-
Navigate to the field in which you want to place the link. Click in the field to make sure it displays the CKEditor.
Note:
By default, CKEditor is not displayed automatically when the asset's Edit view opens. To display the CKEditor, click in the field. If the CKEditor does not appear, then the field is not CKEditor enabled and the assets cannot be linked. Contact your system administrator to have the field enabled.
-
-
If you intend to publish the referring asset, the asset must be previewable, including the field where you will place the link. (Ensure that the referring asset can be rendered by one of the templates listed in the asset's "Template" field. For instructions on previewing assets, see Chapter 7, "Previewing Assets.")
9.2.1.3 Target Asset
-
The target asset is previewable (ensure that the target asset can be rendered by one of the templates that is listed in the asset's "Template" field.
-
(Optional) The target asset is readily available for linking (ensure that the target asset is placed in the "Bookmarks" node, located in the My Work tree in the navigation pane).
Note:
Placing target assets in the "Bookmarks" node is most efficient when linking large numbers of target assets to a source asset. When you are linking only one target asset to a source asset, you can conduct a search for the target asset while working in the source asset's Edit view. (If you are trying to link a large number of assets to a source asset, you will have to conduct a separate search for each target asset.) When you conduct a search for a target asset, the search results are displayed (docked) to the right of the source asset's Edit view. For information about searching for assets, see Section 6.1, "Overview of Finding Assets".
-
Find the target asset and place it in the "Bookmarks" node:
-
In the Search field, enter the desired search criteria (if any) and click the magnifying glass button.
-
In the search results list, navigate to and right-click the desired asset. In the right-click menu, select Bookmark.
-
-
Make sure the target asset is displayed in the Bookmarks node:
-
In the navigation pane, click the My Work bar.
-
In the My Work tree, navigate to and expand the Bookmarks node.
-
Make sure the target asset is displayed in the list of assets underneath the "Bookmarks" node.
-
-
9.3 To Create a Hypertext Link to Another Asset
-
Ensure that all prerequisites in Section 9.2.1, "Prerequisites" are met.
-
Open the referring asset in its Edit view.
-
Insert the link to the target asset:
-
In the navigation pane, click the My Work bar.
-
In the My Work tree, navigate to and expand the Bookmarks node.
A list of bookmarked assets is displayed underneath the Bookmarks node.
-
In the desired field of the referring asset, select the text that you want to be hyperlinked. Alternatively, you can type new text anywhere in the field and select it.
To work more comfortably, you can maximize the CKEditor to fill your workspace. Click the Maximize icon (as shown in Figure 9-1).
-
On the CKEditor's toolbar, click the Add asset link icon (as shown in Figure 9-2).
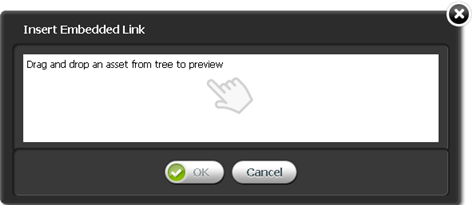
The "Insert Embedded Link" dialog box opens:
Figure 9-3 'Insert Embedded Link' Dialog Box
Description of "Figure 9-3 'Insert Embedded Link' Dialog Box"
-
Navigate to the expanded Bookmarks node in the My Work tree. Select the desired asset and drag it to the drag and drop field in the "Insert Embedded Link" dialog box. Then drop the asset into the field.
The dialog box displays the layouts (templates) available to be assigned to the target the asset.
-
Select a layout (template) to assign to the target asset. The layout (template) you select will render the target asset when the hyperlink is clicked.
-
In the "Wrappers" field, select the wrapper with which you want to render the target asset.
-
(Optional) In the "Link Anchor" field, provide a secondary link. If the primary link to the target asset is broken in some way, the secondary link is used instead.
-
In the "Link Text" field, verify the text you selected to be the hyperlink (step 3c). If necessary, edit the text.
-
If the "Template Arguments" section displays the "Name" and "Value" menus, you can use them to set properties for the target asset. Select the parameters that you need (one at a time), enter a value, and click Add.
Note:
The "Extra Parameters" section is enabled only if developers have configured parameters for the template that is assigned to the target asset. Otherwise, the "Template Arguments" section displays the message "No arguments defined for template Name."
-
Click Apply.
-
Click OK to save the link.
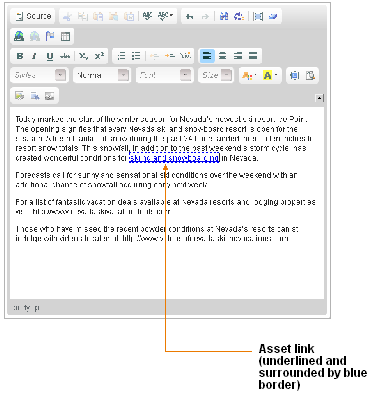
The dialog box closes, and the linked text is displayed in the field, underlined and surrounded by a blue border, as shown in Figure 9-4:
Figure 9-4 Linked Text in the CKEditor Field
Description of "Figure 9-4 Linked Text in the CKEditor Field"
-
-
-
Right-click the linked text to open its context menu. From the context menu you can:
-
Cut Linked Asset
-
Copy Linked Asset
-
Edit Properties
-
Remove Linked Asset
Note:
The Remove Linked Asset option removes the link function, but not the text of the link. To restore the link function, press Ctrl+Z until the underline and blue border re-appear.
-
-
Save the referring asset:
-
If you expanded the CKEditor, click the Maximize icon to collapse the CKEditor and view the entire asset.
-
In the referring asset's toolbar, click the Save icon.
-
-
Test the link by previewing the referring asset:
-
In the referring asset's toolbar, click the Preview icon.
-
Click the hypertext link to display the target asset.
-
9.3.1 To Link Two Assets by Inclusion
-
Ensure that all prerequisites in Section 9.2.1, "Prerequisites" are met.
-
Open the referring asset in its Edit view.
-
Include the target asset:
-
In the navigation pane, click the My Work bar.
-
In the My Work tree, navigate to and expand the Bookmarks node.
A list of bookmarked assets is displayed underneath the Bookmarks node.
-
In the desired field of the referring asset, place your cursor at the point where you want to include the previewable content of the target asset.
To work more comfortably, you can maximize the CKEditor to fill your workspace. Click the Maximize icon (as shown in Figure 9-5).
-
On the CKEditor's toolbar, click the Include Asset icon (as shown in Figure 9-6).
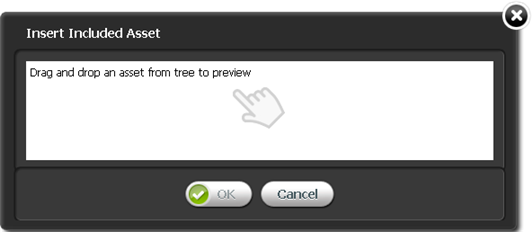
The "Insert Included Asset" dialog box opens, as shown in Figure 9-7:
Figure 9-7 'Insert Included Asset' Dialog Box
Description of "Figure 9-7 'Insert Included Asset' Dialog Box"
-
Navigate to the expanded Bookmarks node in the My Work tree. Select the desired asset and drag it to the drag and drop field in the "Insert Included Asset" dialog box. Then drop the asset into the field.
The dialog box displays the layouts (templates) available to be assigned to the target asset.
-
Select a layout (template) to assign to the target asset. The layout (template) you select will render the target asset at its insertion point in the referring asset.
-
If the "Template Arguments" section displays the "Name" and "Value" menus, you can use them to set properties for the included asset. Select the parameters that you need (one at a time), enter a value, and click Add.
Note:
The "Template Arguments" section is enabled only if developers have configured parameters for the template that is assigned to the included asset. Otherwise, the "Template Arguments" section displays the message "No arguments defined for template Name."
-
Click OK.
The dialog box closes, and the target asset's previewable content is rendered within the referring asset by the layout (template) you selected.
Note:
If you click on the included asset, you will find that all of its content is selected. You cannot select its individual pieces of content. The content is editable only in the target asset (the source of content).
When the target asset is edited, the included content in the referring asset is automatically updated, but not in real time. To view an update, you must refresh the referring asset.
-
-
-
You can now work with the included asset as follows:
-
Right-click the included asset to open its context menu. From the context menu you can:
-
Cut Included Asset
-
Copy Included Asset
-
Edit Properties
-
Remove Included Asset
-
-
If you want to resize the included asset or view its properties, double-click the included asset. When you double-click the asset, a properties window opens. You can adjust the size and alignment of the asset from the properties window.
-
-
Save the referring asset:
-
If you expanded the CKEditor, click the Maximize icon to collapse the CKEditor and view the entire asset.
-
In the referring asset's toolbar, click the Save icon.
-
-
Verify that the included asset is properly rendered by clicking the Preview icon, in the referring asset's toolbar.
9.4 Linking Two Assets via an Image Asset
Company logos (and other images) are often used as links to various types of content: news about the company, products and services offered by the company, and so on. WebCenter Sites enables you to include an image asset in a given asset, and then hyperlink the image to another (target) asset. Clicking the image renders the target asset's previewable content.
Note:
If an image will be used to link two assets, the image must be part of an image asset.
This section contains prerequisite steps and instructions for linking two assets via an image asset. Before continuing with the rest of this section, determine whether you will be including the image from the Bookmarks node (located in the navigation pane, in the My Work tree), or from the "Image Picker":
-
Linking via an image from the "Bookmarks" node using CKEditor
In the CKEditor enabled field of the asset you are working with, you may want to include an image asset that you have bookmarked. From the CKEditor toolbar use the Include asset icon to include the image in the field. Use the Add asset link icon to hyperlink the included image to another asset.
-
Linking via an image from the Image Picker using CKEditor
You might work with an asset that is not enabled with an "Image Picker." If you prefer to choose your image assets from the "Image Picker," CKEditor is capable of invoking an "Image Picker." From the CKEditor toolbar, use the Pick an image to include icon to access the "Image Picker," and select an image to include in the field. Use the Add asset link icon to hyperlink the included image to the target asset.
Note:
The Pick an image to include icon is enabled by the developers of your site. If the icon has not been enabled, then it will appear in grey on the CKEditor toolbar. If this is the case, you can contact your administrator or, see Section 9.4.2, "Linking via an Image from the "Bookmarks" Node" for an alternate method of linking two assets via an image asset.
9.4.1 Prerequisites
Before linking assets, you must verify that they can be linked. Use this section as a checklist. (It is assumed that you know how to edit and preview assets, and create them, if necessary. Basic instructions are given in various steps.)
9.4.1.1 Participating Assets
Three assets are involved in this procedure, and all three assets are on the same site:
-
The referring asset (in which you will include and hyperlink the image asset)
-
The image asset (which you will include in the referring asset)
-
The target asset (to which you will link the image asset)
9.4.1.2 Referring Asset
-
The referring asset displays the CKEditor in the field where you will place the link. If you need instructions for verifying that CKEditor is displayed, complete the following steps:
Note:
If you are creating a new referring asset, you can start this procedure in the asset's Create view. However, it is best to save the asset and then open its Edit view (to ensure against possible loss of any existing content, as you move from step to step).
-
Open the referring asset in its Edit view. If you need to find the referring asset, do the following:
-
In the Search field, enter the desired search criteria (if any) and then click the magnifying glass button.
-
In the search results list, navigate to and right-click the desired asset. In the context menu, select Edit.
-
-
Navigate to the field in which you would like to place the image asset. Click in the field to make sure it displays the CKEditor.
Note:
By default, CKEditor is not displayed automatically when the asset's Edit view opens. Click in the field to display the CKEditor. If the CKEditor does not appear, then linking is not supported in the field. Contact your system administrator to have the field enabled with CKEditor.
-
-
If you intend to publish the referring asset, the asset must be previewable, including the field where you will include the image. (Ensure that the referring asset can be rendered by one of the templates listed in the asset's "Template" field). For instructions on previewing assets, see Chapter 7, "Previewing Assets."
9.4.1.3 Image Asset
-
The image asset is previewable. Ensure that only the image is rendered by one of the templates that is listed in the asset's "Template" field.
Note:
Rendering additional content (such as text) can interfere with and corrupt the linking process
-
Determine whether you will be including an image from the "Image Picker" or from the Bookmarks node (located in the My Work tree):
-
If you are including an image from the "Bookmarks" node. The image asset is readily available for inclusion. Place the image asset into the Bookmarks node, located in the My Work tree of the navigation pane, for easy retrieval during the linking process.
-
Find the image asset and place it in the Bookmarks node:
In the Search field, enter the desired search criteria (if any) and then click the magnifying glass button.
In the search results list, navigate to and right-click the desired asset. In the context menu, select Bookmark.
-
Make sure the image asset is displayed in the Bookmarks node
In the navigation pane, click the My Work bar.
In the My Work tree, navigate to and expand the Bookmarks node.
The image asset should be displayed in the list of assets underneath the Bookmarks node.
-
-
-
If you are including an image from the Image Picker. The image you wish to include is available from the "Image Picker." (Developers enable the "Image Picker" for the Pick an image to include icon. If more than one "Image Picker" exists, developers will also determine which "Image Picker" is rendered when the Pick an image to include icon is selected.)
9.4.1.4 Target Asset
The target asset is also previewable and readily available for linking.
-
The target asset can be rendered by one of the templates listed in the asset's "Template" field.
-
(Optional) The target asset is placed in the Bookmarks node (in the My Work tree) for easy retrieval during the linking process. (For instructions about placing assets in the "Bookmarks" node, see step 0)
Note:
Placing target assets in the Bookmarks node is most efficient when linking large numbers of target assets to a source asset. When you are linking only one target asset to a source asset, you can conduct a search for the target asset while working in the source asset's Edit view. (If you are trying to link a large number of assets to a source asset, you may have to conduct a separate search for each target asset.) When you conduct a search for a target asset, the search results are displayed (docked) to the right of the source asset's Edit view. For information about searching for assets, see Section 6.1, "Overview of Finding Assets."
9.4.2 Linking via an Image from the "Bookmarks" Node
Assuming that all prerequisites inSection 9.4.1, "Prerequisites" are met, continue as follows:
Include the image asset in the referring asset:
-
Open the referring asset in its Edit view.
-
Include the image asset:
-
In the navigation pane, click the My Work bar.
-
In the My Work tree, navigate to and expand the Bookmarks node.
A list of bookmarked assets is displayed underneath the Bookmarks node.
-
In the desired field of the referring asset, place your cursor at the point where you want the image asset to be rendered.
To work more comfortably, you can maximize the CKEditor to fill your workspace. Click the Maximize icon (as shown in Figure 9-8).
-
On the CKEditor toolbar, click the Include Asset icon (as shown in Figure 9-9).
The "Insert Included Asset" dialog box opens, as shown in Figure 9-10:
Figure 9-10 'Insert Included Asset' dialog box

Description of "Figure 9-10 'Insert Included Asset' dialog box"
-
Navigate to the expanded Bookmarks node in the My Work tree. Select the desired asset and drag it to the drag and drop field in the "Insert Included Asset" dialog box. Then drop the asset into the field.
The dialog box displays the layouts (templates) available to be assigned to the target asset.
-
Select a layout (template) to assign to the included asset. The layout (template) you select will render the included asset at its insertion point in the referring asset.
-
If the "Template Arguments" section displays the "Name" and "Value" menus, you can use them to set properties for the included asset. Select the parameters that you need (one at a time), enter a value, and click Add.
Note:
The "Template Arguments" section is enabled only if developers have configured parameters for the template that is assigned to the included asset. Otherwise, the "Template Arguments" section displays the message "No arguments defined for template Name."
-
Click OK to save the included asset.
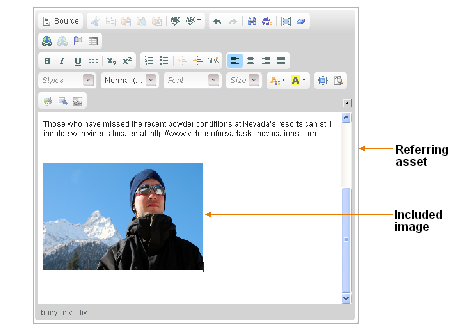
The dialog box closes, and the image is rendered in the field with the layout (template) you selected (as shown in Figure 9-11):
Figure 9-11 Included Image in the CKEditor Field
Description of "Figure 9-11 Included Image in the CKEditor Field"
-
-
-
If you change your mind about the image or wish to make other adjustments, right-click the linked image to open its context menu. From the context menu you can:
-
Cut Included Asset
-
Copy Included Asset
-
Edit Properties
-
Remove Included Asset
-
-
If you want to resize the included image or view its properties, double-click the included image. When you double-click the image, a properties window opens. You can adjust the size and alignment of the asset from the properties window.
Link the image to the target asset:
-
Now that the image is rendered in the referring asset's field, create a hyperlink from the image to the target asset:
-
In the navigation pane, click the My Work bar.
-
In the My Work tree, navigate to and expand the Bookmarks node.
A list of bookmarked assets is displayed underneath the Bookmarks node.
-
In the referring asset's field, select the image you have just inserted.
-
On the CKEditor toolbar, click the Add asset link icon (shown in Figure 9-12).
The "Insert Embedded Link" dialog box opens, as shown in Figure 9-13:
Figure 9-13 'Insert Embedded Link' Dialog Box

Description of "Figure 9-13 'Insert Embedded Link' Dialog Box"
-
Navigate to the expanded Bookmarks node in the My Work tree. Select the desired asset and drag it to the drag and drop field in the "Insert Embedded Link" dialog box. Then drop the asset into the field.
The dialog box displays the layouts (templates) available to be assigned to the target asset.
-
Select the layout (template) to assign to the target asset. The layout (template) you select will render the target asset when the hyperlink is clicked.
-
In the "Wrappers" drop-down field, select the wrapper with which you want to render the target asset.
-
(Optional) In the "Link Anchor" field, provide a secondary link. If the primary link to the target asset is broken in some way, the secondary link is used instead.
-
If you do not want to link the included image to the target asset, you can choose to replace the included image with text. In the "Link Text" field, enter the text you wish to hyperlink. The image is replaced with the text you enter into this field.
-
If the "Template Arguments" section displays the "Name" and "Value" menus, you can use them to set properties for the target asset. Select the parameters that you need (one at a time), enter a value, and click Add.
Note:
The "Template Arguments" section is enabled only if developers have configured parameters for the template that is associated with the target asset. Otherwise, the "Template Arguments" section displays the message (No arguments defined for template Name."
-
Click Apply.
-
Click OK to save the link.
The dialog box closes, and the image you included in the field now appears as a hyperlink, surrounded by a blue border.
-
-
-
At this point, you can work with the linked image by right-clicking it to open its context menu. From the context menu you can:
-
Cut Linked Asset
-
Copy Linked Asset
-
Edit Properties
-
Remove Linked Asset
Note:
The Remove Linked Asset option removes the link function, but not the included image. To restore the link function, press Ctrl+Z until the blue border re-appears.
-
Enter text before or after the linked image.
-
-
Save the referring asset:
-
If you expanded the CKEditor, click the Maximize icon to collapse the CKEditor and view the entire asset.
-
Click the Save icon.
-
If the referring asset is previewable, click the Preview icon, in the asset's toolbar, to preview and test the linked image. Click the image to render the target asset.
9.4.3 Linking via an Image from the Image Picker
Assuming that all prerequisites in Section 9.4.1, "Prerequisites" are met, continue as follows:
Include the image asset in the referring asset:
-
Open the referring asset in its Edit view.
-
Include the image:
-
In the desired field of the referring asset, place your cursor at the point where you wish to include the image.
To work more comfortably, you can maximize the CKEditor to fill your workspace. Click the Maximize icon (shown in Figure 9-14).
-
In the CKEditor toolbar, click the Pick an Image to Include icon (shown in Figure 9-15).
Figure 9-15 'Pick an Image to Include' Icon

Description of "Figure 9-15 'Pick an Image to Include' Icon"
The Image Picker and the "Insert Included Asset" window open, as follows:
-
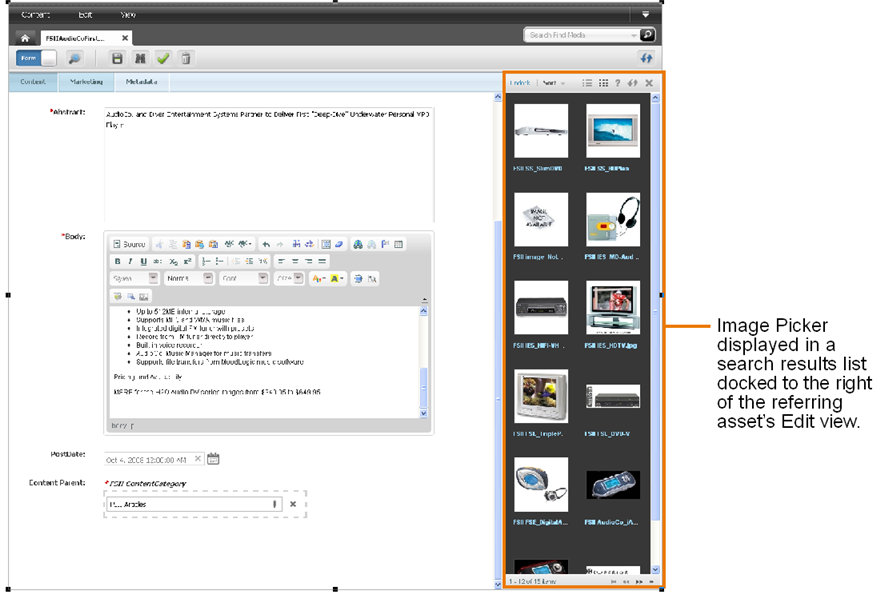
The "Image Picker" opens to the right of the referring asset's Edit view, as shown in Figure 9-16.
Figure 9-16 Image Picker Docked to the Right of the Asset
Description of "Figure 9-16 Image Picker Docked to the Right of the Asset"
-
The "Insert Included Asset" pop-up window opens, as shown in Figure 9-17:
Figure 9-17 'Insert Included Asset' Pop-Up Window

Description of "Figure 9-17 'Insert Included Asset' Pop-Up Window"
-
Navigate to the "Image Picker" (docked to the right of the referring asset's Edit view). Select the desired image asset and drag it to the drag and drop field in the "Insert Included Asset" pop-up window. Then drop the image asset into the field.
The window displays the layouts (templates) available to be assigned to the image asset.
-
Select a layout (template) to assign to the image asset. The layout (template) you select will render the image asset at its insertion point in the referring asset.
-
If the "Template Arguments" section displays the "Name" and "Value" menus, you can use them to set the properties of the included image asset. Select the parameters that you need (one at a time), enter a value, and click Add.
Note:
The "Template Arguments" section is enabled only if developers have configured the parameters for the template that is associated with the image asset. Otherwise, the "Template Arguments" section displays the message "No arguments defined for template Name."
-
Click OK to save the included image asset.
The pop-up window closes, and the image is rendered within the referring asset by the template that you selected.
-
-
-
You can now work with the included image as follows:
Right-click the included image to open its context menu. From the context menu you can:
-
Cut Included Asset
-
Copy Included Asset
-
Edit Properties
-
Remove Included Asset
-
-
If you want to resize the included image or view its properties, double-click the included image. When you double-click the image, a properties window opens. You can adjust the size and alignment of the asset from the properties window.
Link the image asset to the target asset:
-
Now that the image is rendered in the field, create a hyperlink from the image to the target asset:
-
In the navigation pane, click the My Work bar.
-
In the My Work tree, navigate to and expand the Bookmarks node.
A list of bookmarked assets is displayed underneath the Bookmarks node.
-
In the referring asset's field, select the image you just included.
-
In the CKEditor toolbar, click the Add asset link icon (shown in Figure 9-18).
The "Insert Embedded Link" pop-up window opens, as shown in Figure 9-19:
Figure 9-19 'Insert Embedded Link' Pop-Up Window

Description of "Figure 9-19 'Insert Embedded Link' Pop-Up Window"
-
Navigate to the expanded Bookmarks node in the My Work tree. Select the desired asset and drag it to the drag and drop field in the "Insert Embedded Link" window. Then drop the asset into the field.
The window displays the layouts (templates) available to be assigned to the target asset.
-
Select a layout (template) to assign to the target asset. The layout (template) you select will render the target asset when the hyperlinked image is clicked.
-
In the "Wrappers" drop-down menu, select the wrapper with which you want to render the target asset.
-
(Optional) In the Link Anchor field, provide a secondary link. If the primary link to the target asset is broken in some way, the secondary link is used instead.
-
If the "Template Arguments" section displays the "Name" and "Value" menus, you can use them to set the properties of the target asset. Select the parameters that you need (one at a time), enter a value, and click Add.
Note:
The "Template Arguments" section is enabled only if developers have configured the parameters for the template that is assigned to the target asset. Otherwise, the "Template Arguments" section displays the message "No arguments defined for template Name."
-
Click OK to save the link.
-
-
-
At this point, you can work with the linked image as follows:
-
Right-click the linked image to open its context menu. From the context menu you can:
-
Cut Linked Asset
-
Copy Linked Asset
-
Edit Properties
-
Remove Linked Asset
Note:
The Remove Linked Asset option removes the link function, but not the included image. To restore the link function, press Ctrl+Z until the blue border re-appears.
-
-
Enter text before or after the linked image.
-
-
Save the referring asset:
-
If you expanded the CKEditor, click the Maximize icon to collapse the CKEditor and view the entire asset.
-
In the referring asset's toolbar, click the Save icon.
-
If the referring asset is previewable, click the Preview icon, in the asset's toolbar, to preview and test the linked image. Click the image to render the target asset.
9.5 Linking Assets to URLs
Using CKEditor, you can link WebCenter Sites assets to URLs by creating a hypertext link to the desired website's URL. A link to a URL is not stored in its own field in the WebCenter Sites database. The link can be created directly within any CKEditor-enabled field of a WebCenter Sites asset, but it cannot be managed as an asset. As a result, the user who creates a link to a URL must manually validate the URL.
The extent to which this capability is available to you depends on whether CKEditor is configured for your custom asset types. For example, the "Article" asset type that ships with the avisports sample site is configured with a CKEditor in its "Body" field. Therefore the "Body" field supports the creation of a link to a URL as described above. The rest of this section describes how to link assets to URLs.
-
Find the referring asset (in which you will specify a URL) and open its Edit view. If you need to find the referring asset, do the following:
-
In the Search field, enter the desired search criteria (if any) and then click the magnifying glass button.
-
In the search results list, navigate to and right-click the desired asset. In the context menu, select Edit.
Note:
If you are creating a new referring asset, you can start this procedure in the asset's Create view. However, it is best to save the asset and then open its Edit view (to ensure against possible loss of any existing content, as you move from step to step)
-
-
Navigate to the field in which you would like to place the link. Click in the field to make sure it displays the CKEditor.
Note:
By default, CKEditor is not displayed automatically when the asset's Edit view opens. Click in the field to display the CKEditor. If the CKEditor does not appear, then linking is not supported in the field. Contact your system administrator to have the field enabled with CKEditor.
-
In the desired field, select the text that you want to be the hyperlink. Alternatively, you can type new text anywhere in the field and select it.
To work more comfortably, you can maximize the CKEditor to fill your workspace. Click the Maximize icon (shown in Figure 9-20).
-
On the CKEditor toolbar, click the Link icon (shown in Figure 9-21).
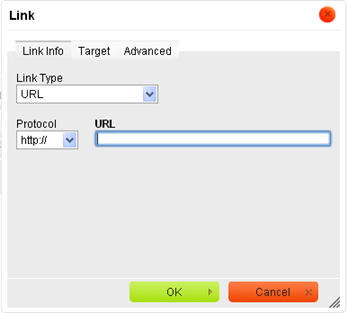
The "Link" pop-up window opens, as shown in Figure 9-22:
-
In the "Link Type" field, select URL.
-
In the "URL" field, type the URL of the website you wish to link to.
-
Click OK to convert the selected text to a link.
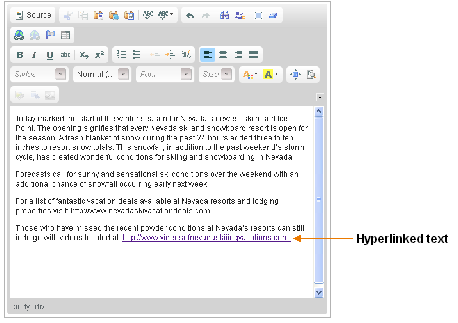
The pop-up window closes, and the hyperlinked text appears underlined in the field, as shown in Figure 9-23:
Figure 9-23 Hyperlinked Text in CKEditor Field
Description of "Figure 9-23 Hyperlinked Text in CKEditor Field"
-
-
If you wish to make adjustments to the link, right-click the link to open its context menu. From the context menu you can:
-
Cut
-
Copy
-
Edit Link
-
Unlink
Note:
The Unlink option removes the link function, but not the text of the link. To restore the link function, press Ctrl+Z until the underscore re-appears.
-
-
Save the referring asset:
-
If you expanded the CKEditor, click the Maximize icon to collapse the CKEditor and view the entire asset.
-
In the referring asset's toolbar, click the Save icon.
-
-
View and test the link.


