7 WebCenter Sites Post-Installation Steps
When the WebCenter Sites installation process completes successfully, perform the following steps as necessary for your environment:
-
Section 7.5, "Integrating Oracle Access Manager (OAM) with WebCenter Sites (Optional)"
-
Section 7.7, "Setting Up WebCenter Sites for Its Business Purpose"
7.1 Loading the XML Parser
WebCenter Sites contains a modified version of the Microsoft XML Parser (MSXML.jar in the WEB-INF/lib directory). If a different version of the Parser is referenced in the CLASSPATH environment variable, you must change the path to refer to the version used by WebCenter Sites; otherwise, WebCenter Sites will fail when parsing XML.
7.2 Specifying Trusted URLs for CAS
On successful login, CAS redirects the user to the requested service. For security, a requested service can be validated prior to CAS redirecting the user to the service. To validate requested services, specify the list of trusted (permitted) URLs in the
cs_install/bin/customBeans.xml
-
Exact URL: For example,
http://<hostname>:<port>/cs/wem/fatwire/wem/Welcome
-
Matching URLs: For example,
http://<hostname>:<port>/SitesWebapp/*
where
/*indicates that all URLs beginning withhttp://<hostname>:<port>/SitesWebappare permitted.
If the user needs to access trusted resources using IP addresses, specify their URLs, as well.
7.3 Verifying the WebCenter Sites Installation
Verify the installation by logging in to Oracle WebCenter Sites as a general administrator and accessing the WebCenter Sites Admin, Contributor, and WEM Admin interfaces. In the process, you will verify that single sign-on functions (by accessing a different application without logging out and back in to WebCenter Sites).
To access the WebCenter Sites interfaces
-
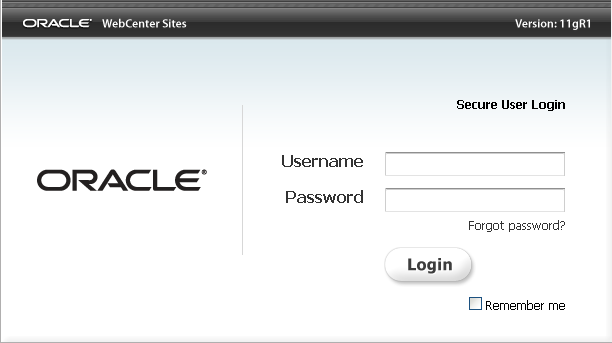
Point your browser to the following URL:
http://<server>:<port>/<context>/login
where
<server>is the host name or IP address of the server running WebCenter Sites,<port>is the port number of the WebCenter Sites application, and<context>is the name of the WebCenter Sites application that was deployed on the server.The WebCenter Sites login form is displayed (Figure 7-1).
-
Enter the following credentials:
-
User name:
fwadmin -
Password:
xceladmin
-
-
Click Login.
-
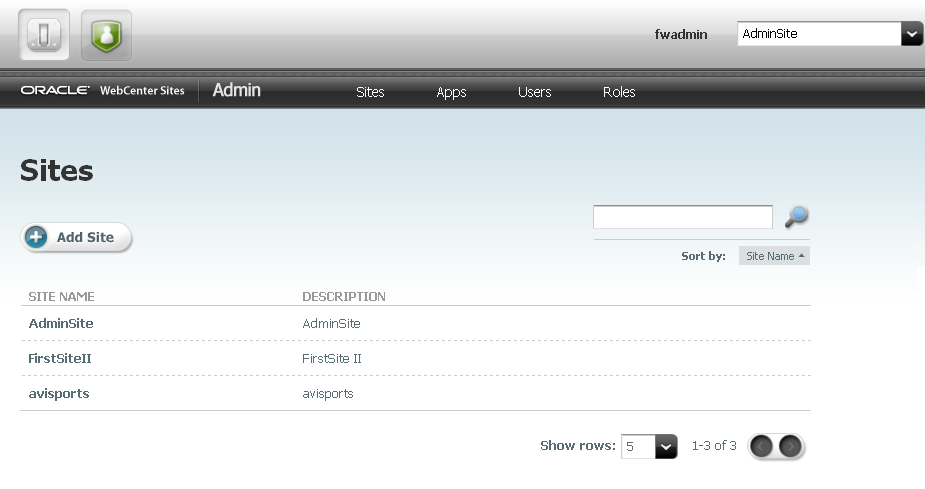
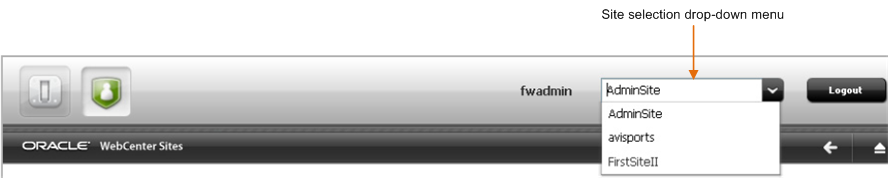
Access the WEM Admin interface. In the Site drop-down list, select AdminSite and the icon for the WEM Admin interface (Figure 7-2).
Figure 7-2 AdminSite Option and WEM Admin Icon

Description of ''Figure 7-2 AdminSite Option and WEM Admin Icon''
The WEM Admin interface (on AdminSite) is displayed (Figure 7-3)
-
Access the WebCenter Sites Admin interface by navigating to the applications bar (at the top of the interface) and selecting the icon for the WebCenter Sites Admin interface (Figure 7-4).
Figure 7-4 WEM Admin Icon in the Application Bar
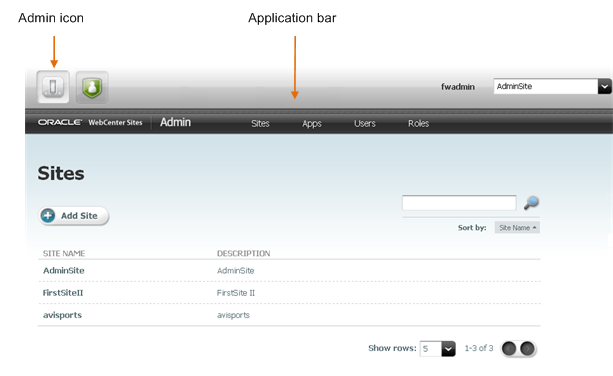
Description of ''Figure 7-4 WEM Admin Icon in the Application Bar''
The WebCenter Sites Admin interface (on AdminSite) is displayed (Figure 7-5). Only system administration functionality is available.
Figure 7-5 Administration Functionality on AdminSite
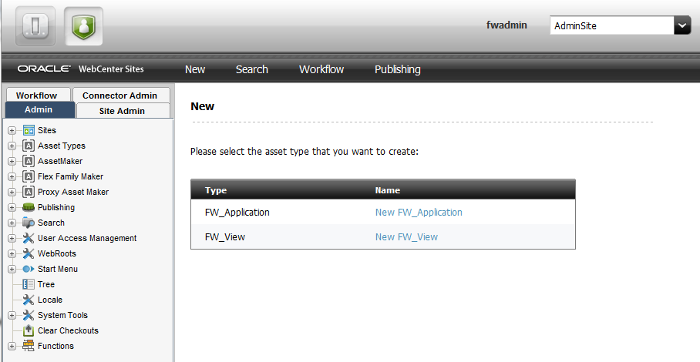
Description of ''Figure 7-5 Administration Functionality on AdminSite''
-
Access the WebCenter Sites Contributor interface:
Note:
The WebCenter Sites Contributor interface is not associated with AdminSite. Start with one of the following steps:-
If the avisports or FirstSite II sample site is installed, the Contributor interface is assigned to each site. Continue to step 6a and select either one of these sample sites to access the Contributor interface.
-
If no sample sites are installed, you will have to open the WEM Admin interface (see step 4), create a site, create users, and then assign the users to the site. The Contributor interface is automatically assigned to the same site. For instructions on assigning users to a site from the WEM Admin interface, see the Oracle Fusion Middleware WebCenter Sites Administrator's Guide and then continue with this step.
-
Navigate to the applications bar. In the site selection drop-down list (Figure 7-6), select a site other than AdminSite.
-
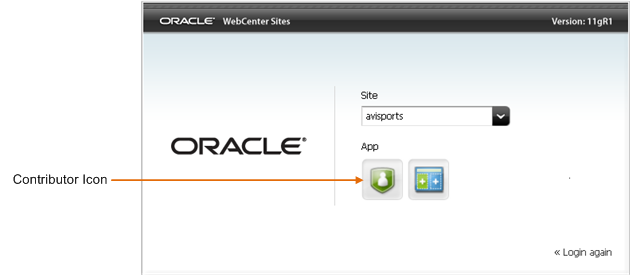
Since this is the first time you are accessing the selected site, the screen shown in Figure 7-7 is displayed. Select the icon for the Contributor interface.
(On subsequent access, WebCenter Sites opens the application you last accessed for the site you selected.)
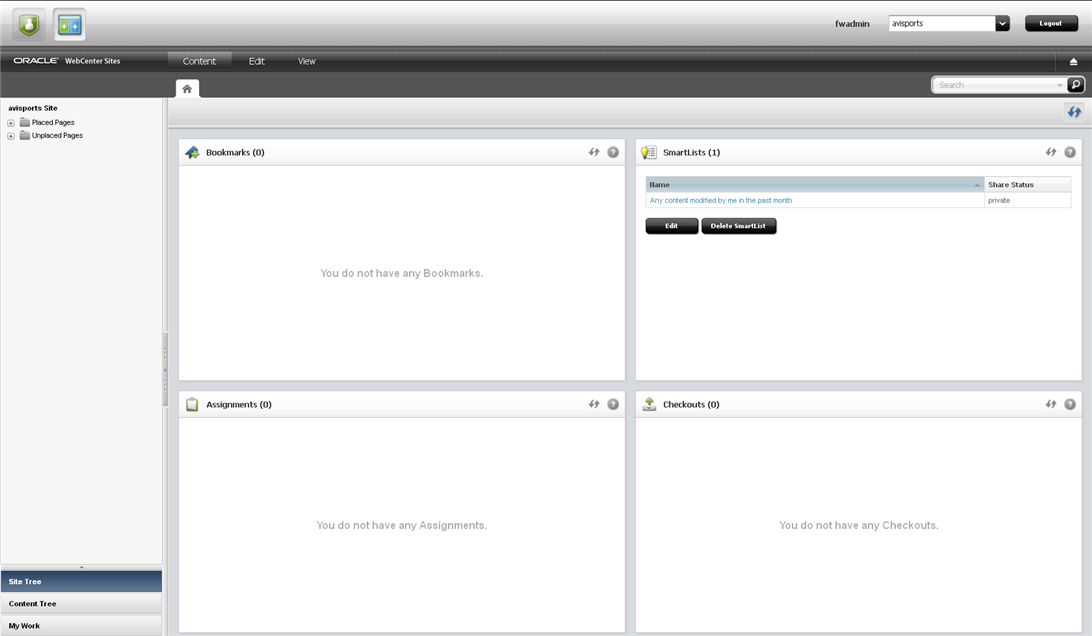
The Contributor interface on your selected site is displayed (Figure 7-8).
WebCenter Sites is now ready to be configured. Follow the steps in the rest of this chapter.
-
7.4 Integrating with LDAP (Optional)
LDAP integration is optional for web installations.
If you need to perform LDAP integration, do the following:
-
Set up a supported LDAP server of your choice. For instructions, see Oracle Fusion Middleware WebCenter Sites: Installing and Configuring Supporting Software.
-
Run the LDAP integration program included on the WebCenter Sites CD.
For more information, see Oracle Fusion Middleware WebCenter Sites: Installing and Configuring Supporting Software.
Note:
If you have configured LDAP for the primary cluster member, make sure to run theconfiguredLDAP.shfor all secondary cluster members. -
Test the integration:
http://<servername>:<port>/servlet/CatalogManager?ftcmd=login&username=<username>&password=<password>
where:
<servername>is the name of the machine that is hosting WebCenter Sites<port>is the port number of that server<username>is user-defined (ContentServer, for example)<password>is user-defined (password, for example)
7.5 Integrating Oracle Access Manager (OAM) with WebCenter Sites (Optional)
If you wish to replace CAS with Oracle Access Manager (OAM), refer to instructions in Oracle Fusion Middleware WebCenter Sites: Installing and Configuring Supporting Software.
7.6 Installing Satellite Servers
For information, see Chapter 9, "Procedures for Installing Remote Satellite Servers."
7.7 Setting Up WebCenter Sites for Its Business Purpose
Once you have completed your WebCenter Sites installation, you are ready to configure it for business use. For instructions, see the Oracle Fusion Middleware WebCenter Sites Administrator's Guide and the Oracle Fusion Middleware WebCenter Sites Developer's Guide. The guides explain how to create and enable a content management environment including the data model, content management sites, site users, publishing functions, and client interfaces.