36 Creating and Authorizing Users
This chapter provides information and instructions about creating a user in the WEM Admin interface, and authorizing that user to manage a site and the application(s) available on that site.
This chapter includes the following sections:
36.1 Creating Users
The types of users you can create are general administrators, site administrators, and regular users.
Note:
Only general administrators can create users. For information about predefined users, see Section 36.3, "Authorizing a Predefined User."-
Log in to the WEM Admin interface as the general administrator that was used during the WebCenter Sites installation process.
-
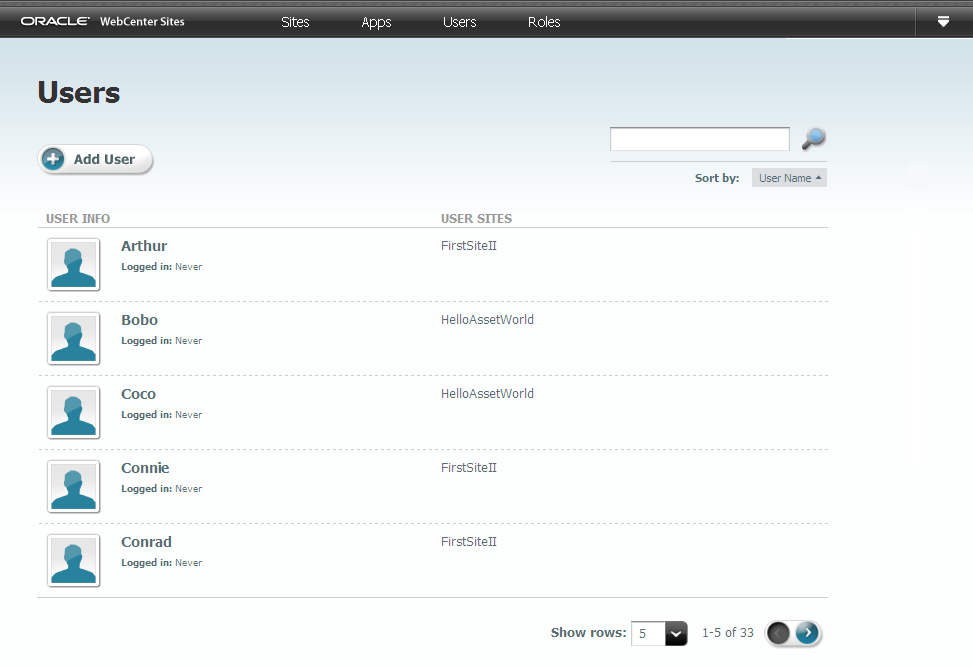
In the Admin menu bar, click Users. The Users form is displayed.
-
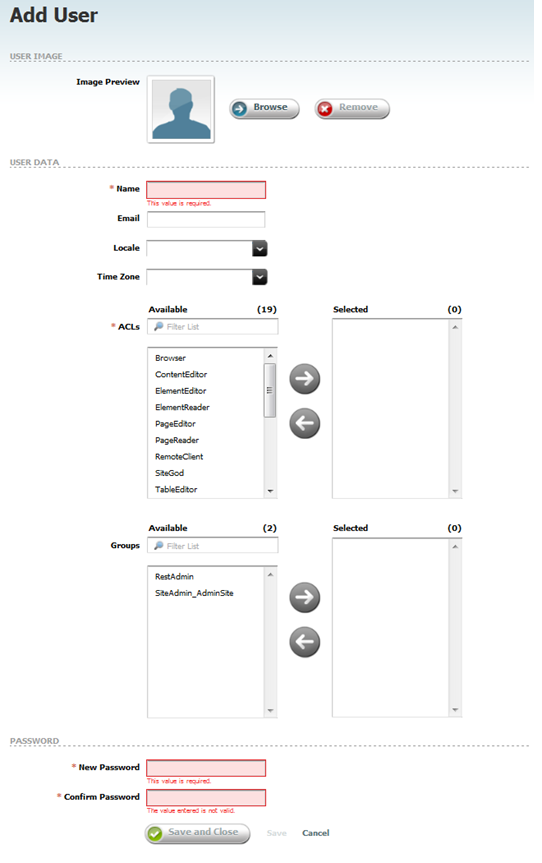
In the Users form, click the Add User button to open the Add User form.
Fill in the following fields:
-
Image Preview – (Optional) Use the Browse button to associate a picture with the new user.
-
Name – Enter a name that the user will use to log in.
-
Email – (Optional) Enter a valid, unique email address.
-
Locale – (Optional) Select the user's language preference. If you do not specify a preference, the WEM Framework uses the default locale that is set for the user's browser.
-
Time Zone – (Optional) Select the user's time zone preference from the dropdown menu. If you do not specify a time zone preference, the system will automatically detect the time zone of the user from the user's browser.
-
ACLs – ACLs regulate the user's access to the database tables. All users require Browser, ElementReader, PageReader, UserReader, and xceleditor. General and site administrators also require xceladmin. General administrators further require TableEditor and UserEditor (and VisitorAdmin, if they use WebCenter Sites: Engage).
-
Groups – Groups provide access to REST. They are used to control access to applications' resources.
-
If you are creating a general administrator, assign the user to the RestAdmin group (a default group, configured in the WebCenter Sites Admin interface). This group has unrestricted permissions to REST resources.
-
If you are creating a site administrator, assign the user to the SiteAdmin_AdminSite group (a default group, configured in the WebCenter Sites Admin interface).
Note:
Security configurations for groups are available in the WebCenter Sites Admin interface. See Section 37.2.1, "Viewing REST Security Configurations." -
If you are creating a regular user, skip this step, for now. You will assign the user to a group (or groups) in step 4, as part of the authorization process (Section 36.2, "Authorizing Users to Work with Applications").
-
-
New Password – Enter a password that is at least 6 characters long.
-
Confirm Password – Re-type the password you just entered.
-
-
Click Save and Close.
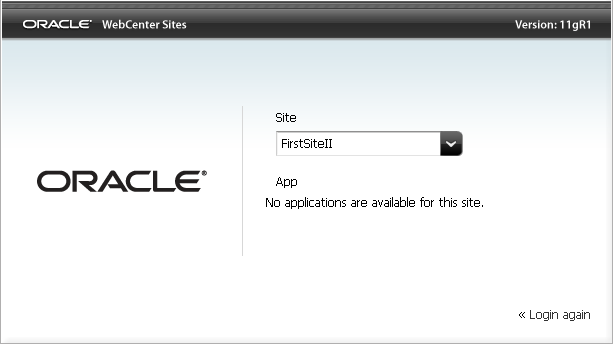
At this point the user can log in, but a message will be displayed indicating that the user does not have access to any sites.
Figure 36-3 WebCenter Sites Login - Access Denied
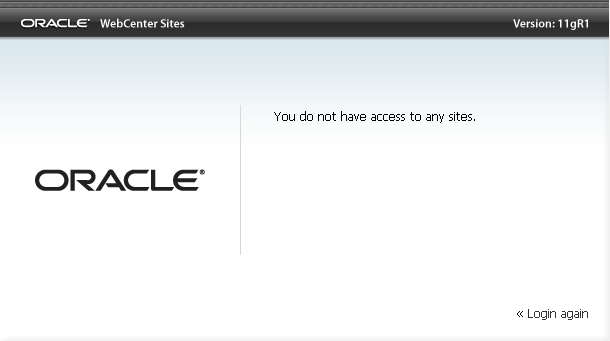
Description of ''Figure 36-3 WebCenter Sites Login - Access Denied''
To enable the user as an administrator or regular user
-
Assign the user to a site:
-
From the Users form, mouse over the user, select Manage User, and click Assign to Sites.
-
If you are creating a general administrator, assign the user to AdminSite.
-
If you are creating a site administrator or regular user, assign the user to a site other than AdminSite.
-
-
Assign roles to the user on the site:
-
If you are creating a general administrator, assign the GeneralAdmin role, which grants the user access to the system.
The WEM Admin application is now available to the user on AdminSite:
Figure 36-4 WebCenter Sites Login Showing WEM Admin App Icon
Description of ''Figure 36-4 WebCenter Sites Login Showing WEM Admin App Icon''
-
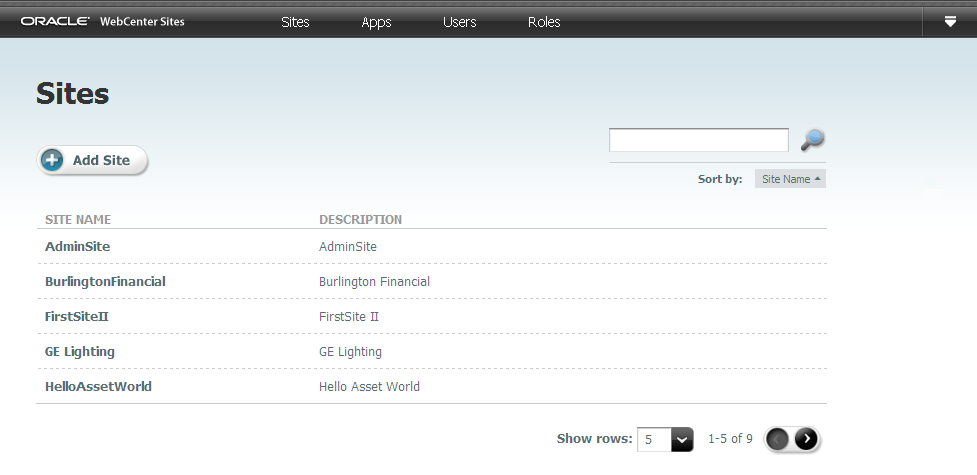
If you are creating a site administrator, assign the SiteAdmin role.
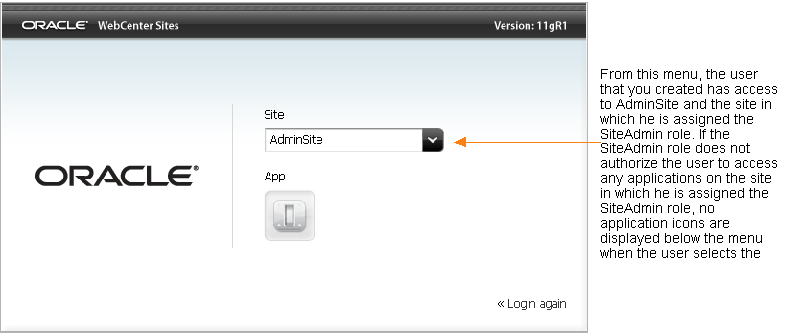
A user who is assigned the SiteAdmin role on a site other than AdminSite is implicitly assigned to AdminSite and gains access to the WEM Admin application on AdminSite. In the WEM Admin application, the user can access only the Sites form, which lists only the site(s) in which he is assigned the SiteAdmin role.
Figure 36-5 WebCenter Sites Login Showing WEM Admin App Icon
Description of ''Figure 36-5 WebCenter Sites Login Showing WEM Admin App Icon''
-
If you are creating a regular user, assign the user roles that are not GeneralAdmin or SiteAdmin.
The user now has access to the site (listed in the menu), but if the user's roles do not authorize access to any applications on that site, no application icons are displayed below the menu.
-
-
-
To authorize a user to work with applications, continue to the next Section 36.2, "Authorizing Users to Work with Applications."
36.2 Authorizing Users to Work with Applications
Users require authorization to work with applications, such as the WebCenter Sites Contributor interface.
This procedure shows you how to authorize a user, which involves:
-
Selecting or creating a site
-
Assigning an application to the site
-
Assigning a user to the same site and coupling the user to the application
-
Assigning the user to a group to enable the user's permissions to REST (applications' resources).
Note:
- Both general and site administrators can authorize users.
-
If you need access to an application on a given site, authorize yourself to access the application on the site.
-
In the steps below, you can select multiple applications and multiple users. For simplicity, instructions specify a single application and user.
-
In this procedure, we assume the user you are authorizing will be working with applications that do not specify a predefined user. For information about predefined users, see Section 36.3, "Authorizing a Predefined User."
-
Select or create the site:
From the WEM Admin interface, click Sites on the Admin menu bar.
If you are a general administrator you can select a site or add a site (click Add Site). If you are a site administrator you can select a site. Your Sites form lists only the sites you are allowed to manage.
-
Assign an application to the site:
-
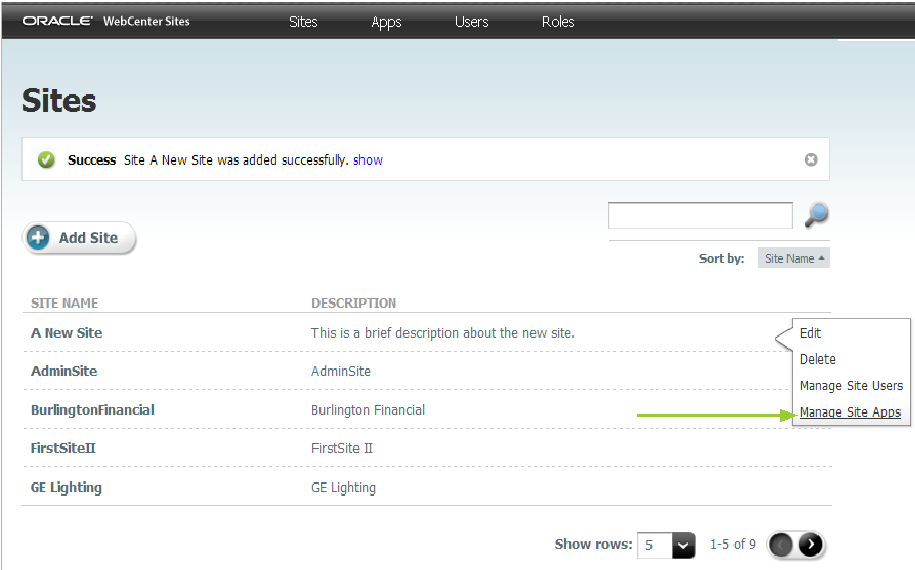
In the Sites form, mouse over the site's name and click Manage Site Apps.
-
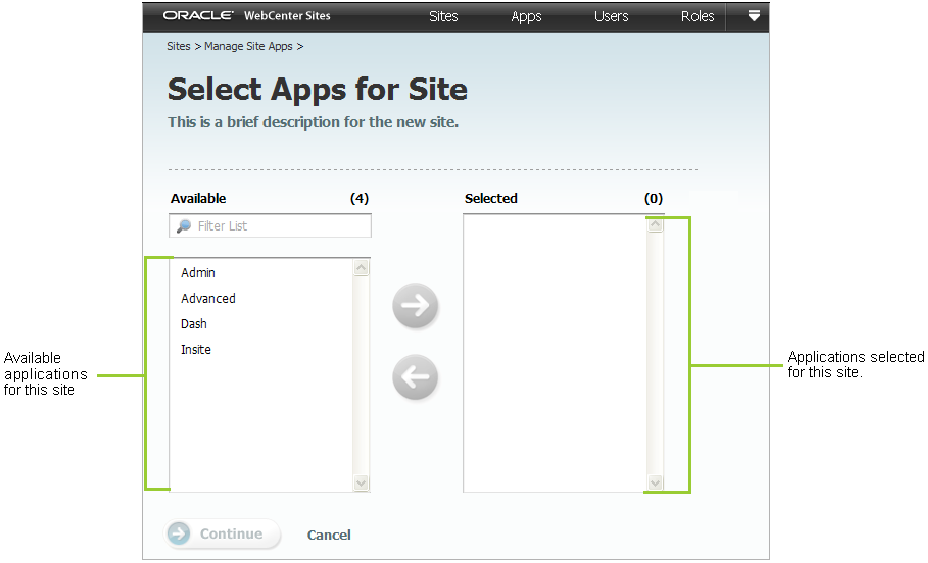
Click Assign Apps.
Note:
The Assign Apps button is dimmed if no applications are registered with the WEM Framework. -
Select the application you wish to assign to the site and move it to the Selected list box. (To search for an application, type its name in the Filter List field. The results appear in the Available list box).
-
Click Continue to assign roles to the application.
-
In the Assign Roles to Apps form, select roles for the application and move them to the Selected list box.
Note:
if the application is the WebCenter Sites Admin interface, assign it the AdvancedUser role. If the application is the WebCenter Sites Contributor interface, assign it the SitesUser role.Take note of the roles you are assigning. You will assign at least one of those roles to the user on the site to grant the user access to the application.
-
Click Save and Close.
-
-
Assign a user to the site:
-
In the Admin menu bar, click Sites.
-
Mouse over the new site's name and click Manage Site Users.
Figure 36-10 Manage User Sites Link on Sites Form
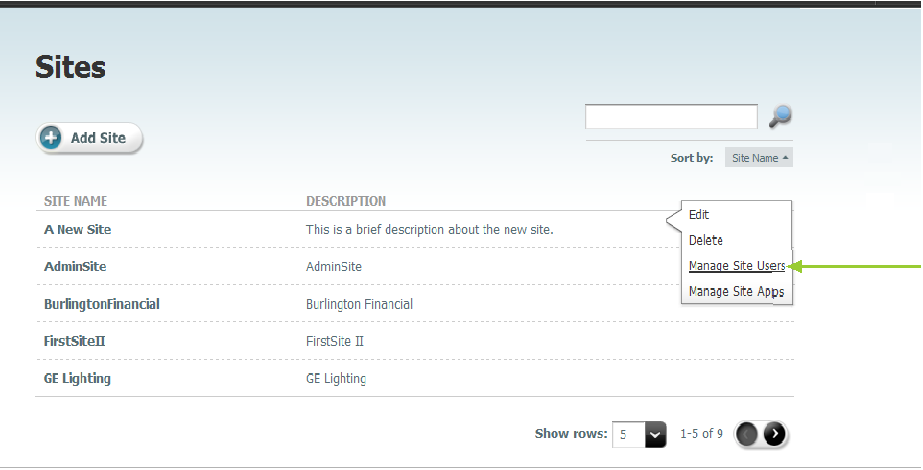
Description of ''Figure 36-10 Manage User Sites Link on Sites Form''
-
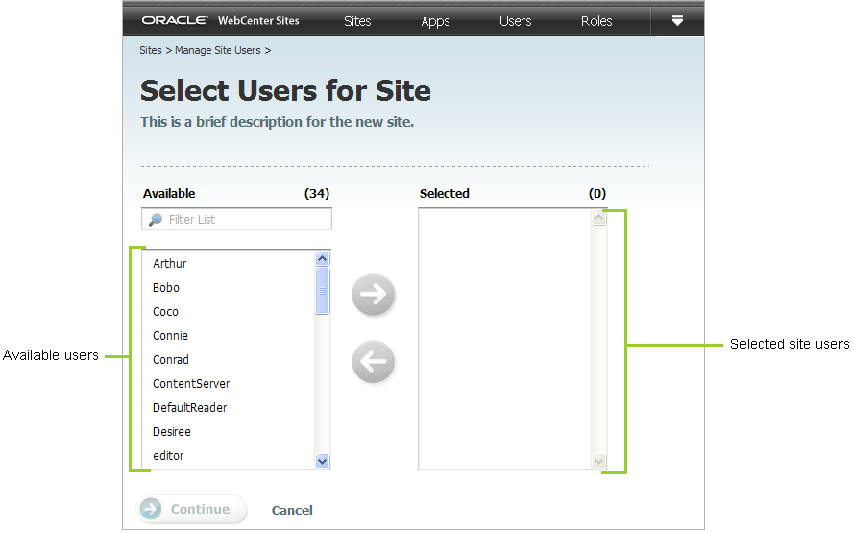
Click Assign Users.
-
In the Select Users for Site form, select the user you wish to assign to the site and move the user to the Selected list box.
-
Click Continue to assign roles to the user.
-
Couple the user to the application (application-level authorization):
In the Assign Roles to Users form, assign the user at least one of the roles that you assigned to the application in step e.
Note:
- For all applications. Sharing a role to a user and an application on a site grants the user access to the application on that site. If the application is the WebCenter Sites Admin interface, you must assign the user the AdvancedUser role. If the application is the WebCenter Sites Contributor interface, you must assign the user the SitesUser role.
-
For applications other than WebCenter Sites. If the application has role-protected interface functions (such as Edit), configure access to each function by assigning the user at least one of the function's roles (specifications are available from application developers). The user is then fully authorized at the application level. However, the user will not be able to work with the application's resources until you authorize the user at the REST level. Click Save and Close and continue to step 5.
-
For WebCenter Sites applications and users. WebCenter Sites has role-protected interface functions. The roles of users configured directly in WebCenter Sites are preserved in the WEM Framework. They are listed in the WEM Admin interface, site by site. Also, the
applicationREST service authorizes WebCenter Sites users at the REST level (eliminating step 4 for administrators). Click Save and Close and skip to step 5.
-
-
Authorize the user at the REST level:
This step grants the user permissions to operate on resources that are used by the application (selected in step 2).
Note:
As noted above, skip this step if you are authorizing dedicated WebCenter Sites users to access the WebCenter Sites applications from the WEM Framework. Continue to step 5.-
In the Admin menu bar, click Users.
-
In the Users form, mouse over the user you wish to authorize and click Edit.
-
In the Edit User form, select group(s) for the user. Each group is configured with specific permissions to operate on specific objects (such as asset types and assets), which map to REST resources used by the application. To determine the permissions of the listed REST groups, or to create groups and configure their privileges, see Section 37.2, "Authorizing Users to Access Application Resources."
-
Click Save and Close.
-
-
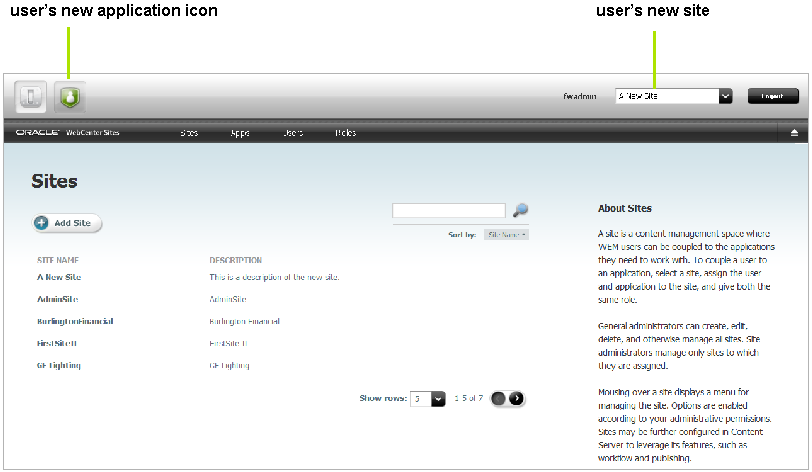
Verify the user's ability to access the new application.
The login dialog lists the user's new site (in the Site drop-down menu) and displays the application icon below the menu.
Figure 36-12 WebCenter Sites Login Dialog
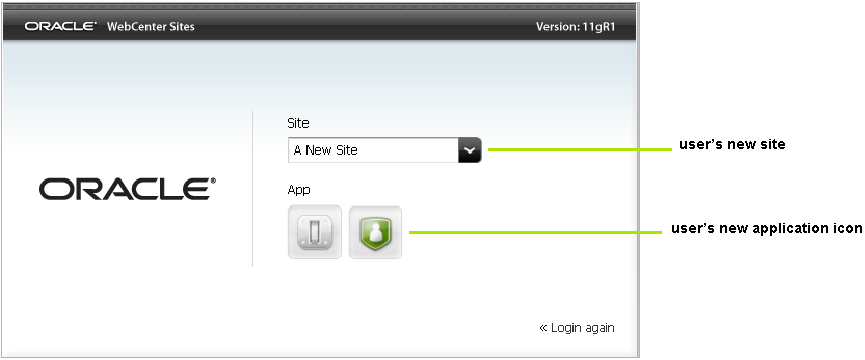
Description of ''Figure 36-12 WebCenter Sites Login Dialog''
The new site is also listed in the drop-down menu next to the name of the logged-in user, and the application icon is displayed in the upper left-hand corner.
-
As a reminder, if you have not yet authorized the user with permissions to REST, complete the steps in Chapter 37, "Configuring REST Security."
36.3 Authorizing a Predefined User
Developers specify predefined users in their applications to simplify administrators' authorization processes. Instead of authorizing each user individually at the REST level, you will authorize the predefined user. Logged-in users with access to the application will gain access to the application's resources through the predefined user's membership in REST groups.
If an application is configured with a predefined user, complete the following steps in the WEM Admin application.
-
Create the predefined user. Have the following information ready:
-
Login name. This name must exactly match the predefined user's name, as specified in the application.
-
Password. The password must exactly match the predefined user's password, as specified in the application.
-
ACLs, which regulate the user's access to the database tables. The predefined user must be assigned the ACLs of the logged-in users who will access the application. All users require Browser, ElementReader, PageReader, UserReader, and xceleditor. General and site admins also require xceladmin. General admins further require TableEditor and UserEditor (and VisitorAdmin, if they use WebCenter Sites: Engage).
-
Group assignment, which authorizes the user at the REST level (to manage application resources). The predefined user must be assigned to a group with the security privileges that you would otherwise grant to the application users. For information about configuring REST security, see Chapter 37, "Configuring REST Security."
For instructions on creating the user, see Section 36.1, "Creating Users."
-
-
Assign the predefined user to the application. For instructions, see Section 36.2, "Authorizing Users to Work with Applications."
-
Assign users to the application (using the procedure in Section 36.2, "Authorizing Users to Work with Applications"), but skip their assignment to groups (step 4).
36.4 Authorizing Developers to Register Applications
For applications to be exposed in the WEM Framework, they must be registered – that is, created as assets – so they can be displayed through REST services on the Apps page in the WEM Admin interface. Administrators can then authorize users to work with the applications.

Typically, it is developers who register the applications they create. The preferred method is programmatic. If developers choose to register applications manually they must use the WebCenter Sites Admin interface to create assets of type FW_Application and FW_View. The asset types are enabled on AdminSite. (For more information about registering applications, see the Oracle Fusion Middleware WebCenter Sites Developer's Guide.)
To authorize a developer, ensure the developer is a general administrator (i.e., has complete permissions to the system, including REST services). For instructions on creating a general administrator, see Section 36.1, "Creating Users."
36.5 Ask Your Developers
To ensure your effectiveness in managing applications and users, you will need information from your developers about the applications they have created for the WEM Framework.
This section contains the following topics:
36.5.1 Resources and Applications
Ask your developers about the resources that are used by custom-built applications.
Once you know which asset types, assets, and other resources users will be working with, you can determine which privileges (such as create, update) the users must be given to those resources and assign the users to groups that have those privileges. Information about configuring groups and assigning users is available in Chapter 37, "Configuring REST Security."
36.5.2 Roles and Applications
Ask your developers whether applications' interface functions are role-protected.
In WEM, roles are used to manage access to applications. Sharing a role to a user and an application on the same site grants the user access to the application on that site. Roles can also be used in application code to protect interface functions, such as Edit. When an application specifies role-protected functions, application users must share at least one role with each interface function.To ensure proper authorization, see Section 36.2, "Authorizing Users to Work with Applications."
36.5.3 Predefined Users
Ask your developers whether predefined users are configured in the applications.
If an application specifies a predefined user, you must authorize the predefined user at the REST level, instead of authorizing all application users individually. Security privileges granted to the predefined user by membership in groups will be passed to logged-in users when they access the application. For instructions on authorizing a predefined user, see Section 36.3, "Authorizing a Predefined User."