 Understanding Planning and Budgeting Integrations
This chapter provides overviews of PeopleSoft Planning and Budgeting integrations and data import, lists prerequisites, and discusses how to:
Integrate with PeopleSoft General Ledger.
Use data from PeopleSoft Asset Management.
Use data from PeopleSoft Project Costing.
Use PeopleSoft Commitment Control.
Integrate with third-party financial applications.
Integrate with PeopleSoft HRMS.
Integrate with PeopleSoft Workforce Rewards.
Integrate with third-party human resource applications.
Understanding Planning and Budgeting Integrations
Planning and Budgeting can integrate with:
PeopleSoft General Ledger 8.8 or later.
PeopleSoft Asset Management 8.8 or later.
PeopleSoft Project Costing 8.8 or later.
PeopleSoft HRMS 8.8 or later.
Other PeopleSoft Enterprise Performance Management applications.
Third-party applications.
This product is delivered with integration capabilities for PeopleSoft Financial Management applications and PeopleSoft HRMS products. When integrating with a PeopleSoft database, verify that your environment is up-do-date.
These integrations involve importing data from the transaction systems into the PeopleSoft EPM database for use by Planning and Budgeting. In many cases, you can also export this data back to the transaction databases when the planning and budgeting process is complete.
Understanding Data Import Using ETL
In PeopleSoft Planning and Budgeting, use the extract, transform, and load (ETL) tool to import data from the PeopleSoft Financial Management and HRMS databases. The ETL process establishes a matching table structure between the PeopleSoft Enterprise Performance Management (EPM) database and other PeopleSoft product line databases. The PeopleSoft system delivers the ETL jobs (maps) that you need to load budget-specific data into the Operational Warehouse Staging (OWS) tables and the Operational Warehouse Enriched (OWE) tables in the PeopleSoft EPM database.
In summary, you use ETL jobs to copy data from the source database into the EPM OWS tables and then to move data from OWS tables to the OWE tables, where Planning and Budgeting uses the data.
Note. To transfer trees into PeopleSoft EPM warehouses, use the PeopleTools TreeMover utility.
Consider reviewing the delivered ETL jobs and maps that you use to load data for PeopleSoft Planning and Budgeting (by product), compared to the source, OWS, and OWE tables that you require, which are listed in Appendix A of this PeopleBook.
See Also
Getting Started with Enterprise Performance Management
PrerequisitesBefore integrating the Financial Management data and the HRMS data, verify that your Financial Management and HRMS application environments are up-to-date with any objects related to Planning and Budgeting integration. Updates can be found on My Oracle Support.
Search My Oracle Support and apply to your PeopleSoft source system any updates that relate to integration with Planning and Budgeting.
To review a table of delivered updates, additional posted documentation, or red papers, visit My Oracle Support.
See Also
PeopleSoft Enterprise Performance Management Installation Guide
Integrating with PeopleSoft General Ledger
This section provides overviews of using data from PeopleSoft General Ledger, reporting itemization and notes data from the planning model, and exporting general ledger budget data from the planning model and discusses how to:
Export budget data from the planning model.
Move budget data back to PeopleSoft General Ledger.
Import data into PeopleSoft General Ledger.
 Understanding Using Data from PeopleSoft General Ledger
In Planning and Budgeting, you can use data from the following ledgers in PeopleSoft General Ledger to seed a budget or to use as a reference during the planning and budgeting process:
General ledger - Actuals (PS_LEDGER)
Standard budget ledger (PS_LEDGER_BUDG)
Project budget ledger (PS_LEDGER_PROJ)
Control budget ledger (PS_LEDGER_KK)
Before importing data from General Ledger using the delivered ETL tool, identify the ledger data that you want to import.
After the data is imported into the PeopleSoft EPM Warehouses, it is the input source during the planning model stage process.
Data staging recognizes these sources identified within the planning model by the Planning and Budgeting scenario group, which contains a collection of scenarios that are available for use. These scenarios are associated with the line item activity type, and they are also used on the Data Source page in the model to define a source/seed and comparison for the line-item activity scenario in the planning model.
After you complete a budget, you can export the budget data from Planning and Budgeting to the EPM database or directly into a staging table to move it into the Financial Management database using ETL.
Note. If you are using PeopleSoft Commitment Control data, Planning and Budgeting does not validate a child budget to verify that it does not exceed the parent budget. To validate this data and identify errors, use the journal posting process in the Financial Management database.
Understanding Reporting Itemization and Notes Data from the Planning
Model
When end users work with line item activities, they can enter public or private notes that apply to line item details, or they can use the itemization method (ITM) to provide underlying details to a line item amount. This information is not exported back to PeopleSoft Financial Management. The notes and itemization data are stored in the EPM database, which is accessible through custom reporting. These line item notes and itemization data are stored in PS_BP_LI_NOTES and PS_BP_LI_ITEMIZE, respectively.
Note. The notes and itemization data are not used as an input source for staging line item activities.
Understanding Exporting General Ledger Budget Data from the Planning
Model
After you complete the budget, you can export the data from the planning model into a stage table for transfer to PeopleSoft Financial Management or to the source budget ledger table in the PeopleSoft EPM database. To export the financial line-item budget data from the planning model, run the Export to General Ledger process (BP_EXP).
Export to General Ledger Budgeting Data Process (BP_EXP)
The Export to General Ledger process (BP_EXP) is a PeopleSoft Application Engine process that extracts line item data from the planning model into PeopleSoft EPM database tables, such as the staging table PS_BP_LEDGER_BDEXP or the budget F00 ledger used by Planning and Budgeting. Based on the request parameters that you define, the system exports planning model data that is located in the master version of the line-item activity scenario at the time of the export. For data being exported back to the general ledger source system, only activities that have the Export to GL option selected on the Activity page are exported to the staging table (PS_BP_LEDGER_BDEXP), and then to the general ledger.
If you export to PeopleSoft Planning and Budgeting, these are the results in the PeopleSoft EPM database:
The system extracts planning model data from the master version and places it in the corresponding budget F00 ledger used by PeopleSoft Planning and Budgeting.
Depending on the budgeting type defined by the scenario group that is associated with the planning model, PeopleSoft Planning and Budgeting updates the relevant budget ledger F00 table located in the PeopleSoft EPM database—PS_BP_LED_BUDG_F00 (standard budget ledger), PS_BP_LED_KK_F00 (control budget ledger), or PS_BP_LED_PROJ_F00 (project budget ledger).
For data that is associated with a balance sheet planning activity, when you export a multiyear budget back to the F00 ledger (and optionally to PeopleSoft General Ledger), the system generates the missing intermediate starting balance (the first chronological period). For example, when exporting a proposed 2008–2009 budget, the system generates the missing starting balance for 2009.
A history table, PS_BP_EXPORT_HIST, tracks each individual activity scenario that is exported to the Planning and Budgeting database.
This allows for incremental loading of activity data by scenario.
If you export to PeopleSoft General Ledger, the scenario in the planning model data is extracted from the master version and placed into the PS_BP_LEDGER_BDEXP staging table in the EPM database in preparation for transfer to the PeopleSoft Financial Management database.
Note. The export process does not move data directly to the PeopleSoft Financial Management database. After data is placed in the staging table, you need to use the ETL tool to transfer the data to the financial database.
During the export process, the system uses the following logic:
The system rounds amount values to the nearest decimal level based on the currency code defined in the Currency Code table.
The rounding equates the total line amount to the sum of the line period detail amounts. Any decimal-rounding difference found is moved to the last budget period line.
If you select the Flip Sign setting defined for account types on the Account Type Options page in Planning and Budgeting, the system reverses the sign associated with data for the account type so that it is consistent with the ledger.
For any activity in the scenario marked as Export to GL, the BP_EXPORT_TO_GL field will contain a Y (yes) so that the ETL map to export the data back to the general ledger source system moves only the data rows to be included during export to general ledger.
Note. Running a process to export notes and itemizations created using PeopleSoft Planning and Budgeting is unnecessary because the system automatically stores the data in the PeopleSoft EPM Warehouses.
Page Used to Integrate with PeopleSoft General Ledger|
Page Name |
Definition Name |
Navigation |
Usage |
|
BP_EXPORT |
Planning and Budgeting, Data Integration, General Ledger Integration, Export to General Ledger |
Export budget ledger data from a planning model to the Planning and Budgeting ledger or the general ledger staging table in the PeopleSoft EPM database. |
Exporting Budget Data from the Planning ModelAccess the Export to General Ledger page (Planning and Budgeting, Data Integration, General Ledger Integration, Export to General Ledger).
|
PeopleSoft Budgeting |
Select to export data to the Planning and Budgeting ledger table in the EPM database. If you select this check box, the Activity field is enabled, and the data can be exported by activity to the EPM Warehouse budget ledger. In this case, the Override GL Scenario field is enabled—that is, you can store the data in the EPM Warehouse budget ledger under a new scenario ID. |
|
PeopleSoft General Ledger |
Select to export data to the staging table in the EPM database in preparation for transference to the financial database. If you select this check box, the Activity field is hidden and PeopleSoft Budgeting is selected automatically and made unavailable for entry. Then the entire scenario (only for those activities that have the Export to GL option selected on the Activity page) is exported to the General Ledger and EPM Warehouse budget ledger. In this case, the Override GL Scenario field is disabled—that is, you cannot choose to store the data in the EPM Warehouse budget ledger under a new GL scenario ID. The Override GL Scenario is never allowed for the activity scenarios that are exported to PeopleSoft General Ledger. |
|
Business Unit, Planning Model ID, Scenario, and Activity |
Enter values to define the model, scenario, and line item activity that you want to export. Activity ID is allowed only when exporting to the EPM database when selecting the PeopleSoft Budgeting option. |
|
Export Line Item Zero Amounts |
Select to export line item rows that contain zero amount values. Clear this check box to drop any rows containing a zero amount during the export process to the ledger or staging table. |
|
Override GL Scenario |
Select to export plan or budget data to the destination budget ledger table (*_F00 tables) using the scenario that you define on this page. Overriding the scenario lets you export planning and budgeting data to a different scenario (such as for reporting purposes). Clear this check box to export data using the GL scenario that was originally associated with the proposed plan or budget, as part of the planning and budgeting scenario definition. This check box appears only if you select PeopleSoft Budgeting as the export destination while the PeopleSoft General Ledger option is disabled. |
Moving Budget Data Back to PeopleSoft General Ledger
Use the ETL tool to move the budget data back to the General Ledger. The ETL job moves data from the PS_BP_LEDGER_BDEXP staging table in EPM Warehouse to the table with the same name in General Ledger. A second ETL job is also required to move planning model information to the PS_BP_LEDG_DTL_EXP table in General Ledger. This table does not exist in the EPM Warehouse, but a view (BP_LEDG_DTL_VW) in EPM is leveraged by the ETL job to provide the criteria required in the source general ledger system to process the budget ledger data.
The criteria for running ETL back to General Ledger is destructive and based on the business unit and Planning and Budgeting scenario.
Note. The Ledger Name field (BP_LEDGER_NAME) of the staging table is equivalent to the Planning and Budgeting scenario field (BP_SCENARIO).
Importing Data into PeopleSoft General Ledger
If you exported data from the planning model into the staging table in the EPM database and ran the ETL job to transfer data to the PeopleSoft Financial Management database, you will now import this data back into the appropriate budget ledger table in PeopleSoft General Ledger by running the Import Budgeting Data (BPLEDGUPDATE) application engine process in the financial management database.
Note. The Planning and Budgeting scenario from the EPM database is the counterpart for ledger name on the run control in the PeopleSoft Financial Management database.
To run the Import Budgeting Data process in the Financial Management database, select the name of the ledger (Planning and Budgeting scenario) that you want to update.
To replace all ledger data associated with the selected business unit and ledger with the data in PS_BP_LEDGER_BDEXP, select the Replace All Ledger Data check box. If this check box is clear, the system updates only the budget ledger table rows that have been updated since the last import process.
The Import Budgeting Data (BPLEDGUPDATE) application engine process moves a copy of the financial budget data from the ledger staging table (PS_BP_LEDGER_BDEXP) to the appropriate budget ledger (PS_LEDGER_BUDG, PS_LEDGER_BUDG_KK, or PS_LEDGER_PROJ) in the Financial Management database based on the budgeting type.
The criteria stored in the PS_BP_LEDG_DTL_EXP table is necessary to process the Import Budgeting Data application engine.
Note. For control budget types, the import process inserts data into the PS_LEDGER_BUDG_KK table. Then you must run the General Ledger Allocation process to create, edit, and post journal entries to PS_LEDGER_KK.
See PeopleSoft Commitment Control PeopleBook
Using Data from PeopleSoft Asset Management
Using existing in-service asset and depreciation information from your source database is optional. This section lists prerequisites and discusses how to:
Set up asset data sources.
Stage asset data.
PrerequisitesIn addition to the prerequisites listed at the beginning of this chapter, you can activate the PeopleSoft Application Messaging Enterprise Integration Point (EIP), process asset depreciation calculations, and use asset catalog items in Asset Management by completing these steps:
To synchronize capital acquisition plan (CAP) data between Asset Management and Planning and Budgeting, activate the PeopleSoft Application Messaging EIP for BUDGET_CAP_SYNC using PeopleSoft Application Designer.
Note. Using the transformation program is an optional step
in the EIP setup. Because Planning and Budgeting does not support transformations,
Version 1 should be set as a default in both the EPM and Financial Management
databases. The purpose is to subscribe and publish CAP information, when required,
between the two databases because no asset or depreciation detail data is
exported back to PeopleSoft Asset Management.
If you decide to use the CAP information in Planning and Budgeting,
the CAP status values (Approval 1, Approval 2, Approval 3, Closed, Entered,
On Hold, and Open) have no effect when used in an asset activity during budgeting.
Run the Depreciation Calculation process (AMDPCALC, but AM_DEPR_CAL application engine in later PeopleSoft releases) to populate the PS_DEPRECIATION record with annual depreciation amounts.
This process moves stored depreciation amounts from department to department or category to category depending on the transaction that you are performing and the dimensions that you specify.
Run the Asset Period Allocation Setup process (AMALLOC application engine) in the Financial Management database to populate the PS_DEPR_ALLOC_TBL with calendar information used to divide annual depreciation amounts into period amounts.
Run the Asset Period Allocation Setup process only once after you create a new calendar or modify an existing calendar. When you perform subsequent runs of the Depreciation Calculation process, you do not need to run the Period Allocation process again.
To import asset profiles into the Planning and Budgeting Asset Catalog asset profiles that you create using PeopleSoft Asset Management, run the Load Asset Catalog (AEBDASSTITEM) application engine process that populates the asset catalog record (PS_BD_ASSET_ITEMS) with data from the profile tables (PS_PROFILE_DET_TBL and PS_PROFILE_TBL) in PeopleSoft Asset Management.
Run the Budgets Interface (AMBD1000) SQR process to load in-service assets and their associated depreciation from PeopleSoft Asset Management into the assets (PS_BD_ASSET) and depreciation (PS_BD_ASSET_DEPR) records for mapping to Planning and Budgeting in EPM database.
Note. Asset depreciation calculations that you run in your
financial database for import into Planning and Budgeting should use the same
number of periods as that defined for your proposed asset budget.
The asset activity in Planning and Budgeting cannot support the distribution
of amounts across multiple dimensions (ChartFields) for a single asset ID.
This rule applies to all in-service asset data from other data sources and
newly added assets by preparers during the planning and budgeting process.
Asset information from any data source should have the same business
unit as those used by your planning model.
After you have finished preparing the in-service asset and depreciation data for use by Planning and Budgeting, complete the following steps:
Load the asset-related data into the PeopleSoft EPM Warehouses using the delivered ETL tool.
In Planning and Budgeting, define asset and account defaults to be used by the asset activities in a planning model on the Asset Budgeting Defaults, Asset Accounts, and Depreciation Accounts pages. To access these pages, from the Planning and Budgeting menu, select Planning and Budgeting Setup, Asset Budgeting Defaults, Asset Budgeting Defaults.
If you loaded the asset catalog table from PeopleSoft Asset Management, use the Asset Catalog maintenance page in Planning and Budgeting to update any required asset budget defaults or create new catalog items. To access this page, from the Planning and Budgeting menu, select Planning and Budgeting Setup, Asset Budgeting Defaults, Asset Catalog.
Finally, when creating an asset activity in a planning model that will use the in-service asset and depreciation data, be sure to use a dimension for planning center that corresponds to what is available in the source data loaded from the asset management database.
For example, if department is the only dimension associated with the asset ID, you will need to use it as your planning center for the asset activity because no process is delivered to map the department ID to a different dimension.
See Also
PeopleSoft Asset Management PeopleBook, "Processing Depreciation"
Setting Up Asset Data Sources
In preparation for staging asset data, you must define the data sources for the asset activity scenario in the planning model. Select Planning and Budgeting, Planning and Budgeting Setup, Setup Model, Planning Models, Activity Scenario, and then click the Data Source link for an asset activity scenario.
|
Use Source Data |
Select to have the staging process pick up any in-service asset and depreciation data for inclusion in the asset activity. If you are not using source data from an asset management database, you do not need to select the check box. |
|
Asset Book Name |
Enter the asset book information for this business unit model and activity. Only a single asset book is supported for the asset activity scenario. |
|
Default Depreciation Account |
Enter the depreciation account for assets that do not have matching depreciation rows. The valid depreciation accounts are taken from those defined using the Depreciation Accounts page. |
See Defining Data Sources for Asset Activities.
Note. The imported, in-service asset data in the Planning
and Budgeting interface tables is the source data during the model staging
process.
You cannot edit in-service assets that you import from PeopleSoft Asset
Management in PeopleSoft Planning and Budgeting.
Staging Asset Data
The data staging process for an asset activity moves data in the following way:
|
From |
To |
|
PS_BD_ASSET |
PS_BP_ASSET |
|
PS_BD_ASSET_DEPR |
PS_BP_ASSET_DEPR |
Note. The asset catalog table does not require staging. When you select an asset catalog item for a new asset, the asset catalog defaults are retrieved from the PS_BP_ASSET_ITEMS table.
The staging process assigns an account for a depreciation row for in-service assets when missing an account value for depreciation. The system populates the depreciation account according to the following hierarchy:
If the field is blank, the system uses the BP_DEPR_ACCOUNT from PS_BP_ASSET.
If the field is blank and the catalog item can be found, the system uses the BP_DEPR_ACCOUNT from the asset catalog for the profile ID assigned to the asset.
The system uses the depreciation account that you specify on the Data Source page.
These rules also apply to in-service asset data when you are running the staging process:
Only in-service assets that have a related depreciation impact are supported and processed during data staging.
When the dimension member for planning center is missing from the source data, the asset and depreciation rows are dropped and not processed.
Only in-service assets that have a depreciation impact to the proposed budget year are processed. This means that the assets must have a budget impact in the time-frame defined by the bottom-up scenario to be staged for an asset activity.
Any single asset ID shared by more than one planning center (or any other dimension) cannot be supported and, therefore, will not be processed into the budgeting tables.
These assets, and any other type of asset in an error condition, are stored in the error table PS_BP_CF_ASSET_ERR, if you want to review them.
Using Data from PeopleSoft Project Costing
This section lists prerequisites and discusses how to:
Process project costing data.
Export and import project budgets.
PrerequisitesIn addition to the prerequisites listed at the beginning of this chapter, you can use your Project Costing budget data as a source for Planning and Budgeting. Before you can load the data into the EPM Warehouses using the delivered ETL tool, run the application engine process (PC_PC_BD_B) in the Project Costing database from the Send to Budgeting page to move data from the PS_PROJ_RESOURCE table to PS_LEDGER_PROJ.
After the data is moved to the project budget ledger, run the ETL jobs to move the data from the financial database source to the PS_LEDGER_PROJ (OWS) table and then the PS_BP_LED_PROJ_F00 (OWE) table in the EPM database.
Processing Project Costing DataWhen processing data from Project Costing, consider the following guidelines:
Due to index size constraints on some database platforms, the number of index fields (such as PS_LEDGER_PROJ) may be limited.
Consequently, LEDGER_PROJ and PS_BP_LED_PROJ_F00 are delivered with the following fields marked as non-key: CHARTFIELD1, CHARTFIELD2, CHARTFIELD3, AFFILIATE_INTRA1, AFFILIATE_INTRA2, DIMENSION1, DIMENSION2, and DIMENSION3. The LEDGER_PROJ table is the staging table for PS_BP_LED_PROJ_F00. The LEDGER_PROJ table does not contain the DIMENSION1, DIMENSION2, and DIMENSION3 fields.
Consider evaluating your key requirements based on your data and reset these keys as appropriate to ensure that indexes are built correctly.
Note. Changing key requirements will affect the entire EPM database.
After you enable the required keys, access the Dimension Configuration page in Planning and Budgeting to set the status as Active for the dimensions that you plan to use with your project budgets.
When implementing Planning and Budgeting using project budget types, implement with a one-to-one relationship between your warehouse business unit and your project business unit.
Because of the logic related to the project business unit and the project, do not consolidate the project business units or IDs.
To define the planning center for your line item project budget, you can use any available dimension in Planning and Budgeting.
When you use the project dimension (ChartField) as the planning center, the same rules apply for defining trees when you must use a node-oriented tree.
On the Budgeting Installation Options page, select your project costing interface as PeopleSoft when your source is PeopleSoft Project Costing.
When you define this as your interface, the project dimension will use the information about the project ID on the project integration template assigned to the project. The information about which project integration template is used is needed to determine which general ledger business unit the project ID will be mapped to. Planning models created in Planning and Budgeting are defined by a general ledger business unit, and not the project business unit.
When adding a new project in the EPM Warehouses using the project maintenance page, the integration template value is required only if you are using project budget types.
Use the ETL tool to copy the project integration template table (PC_INT_TMPL_TBL) into Planning and Budgeting.
When integrating with Project Costing, no online validation exists between the project and activity ID.
To optionally accommodate this requirement, consider using combination edits in conjunction with the enforce budget flag enabled for the activity scenario in the planning model.
When using the online analysis for line item activities, no descriptions or validations exist to filter—only the activity IDs associated and allowed with a project.
For the Activity ID table, use the PS_PROJ_ACTIVITY table for Planning and Budgeting.
When moving data back to Project Costing, the Activity ID is required with the Project ID.
Note. When integrating with Project Costing, you should not use the PS_FS_ACTIVITY_TBL table.
Note. When using the project budget ledger (PS_BP_LED_PROJ_F00) as the integration source for Planning and Budgeting, you can use only line item activity type in the planning model. Asset and position activities are not available when you are using budgeting type of project budget ledger, as defined on the Scenario Group page that is associated with the planning model.
See Also
PeopleSoft Project Costing 9.1 PeopleBook, "Budgeting Project Costs and Revenue," Integrating Budget Data with Planning and Budgeting.
Exporting and Importing Project Budgets
After you complete the planning and budgeting process for a project budget, you can export the project data back to PeopleSoft Financial Management database. To send the data back into the PeopleSoft Project Costing application:
Access the Export to General Ledger page and run the process with an Export Destination of PeopleSoft General Ledger for the defined planning model and scenario.
Use the ETL tool to move the project budget data back to the Financial Management database.
The ETL jobs move data from the PS_BP_LEDGER_BDEXP staging table in the EPM database to the table with the same name in PeopleSoft General Ledger, and from PS_BP_LEDG_DTL_VW in EPM to PS_BP_LEDG_DTL_EXP in General Ledger.
In PeopleSoft General Ledger, run the Import Budgeting Data (BPLEDGUPDATE) application engine process to transfer project budget data from the staging table to the project ledger (LEDGER_PROJ).
Finally, to load the project budget data into the PeopleSoft Project Costing table (PS_PROJ_RESOURCE) in the Financial Management database, access and run the Retrieve from Budgeting page in Project Costing and run the application engine (PC_BD_TO_PC) to move data from PS_LEDGER_PROJ to the PS_PROJ_RESOURCE table.
See Understanding Exporting General Ledger Budget Data from the Planning Model.
See Importing Data into PeopleSoft General Ledger.
Using PeopleSoft Commitment Control
PeopleSoft Commitment Control is an optional feature of the PeopleSoft Financial Management Solutions, Enterprise Services Automation, and Supply Chain Management product lines that enables you to actively control expenditures against predefined, authorized budgets. In PeopleSoft Planning and Budgeting, you can develop budget data for a control budget type while leveraging the rules from Commitment Control definitions that are set up in the PeopleSoft Financial Management database. This feature enables you to validate budget data according to rules that you are also using in PeopleSoft General Ledger. After you complete the development of a control budget, export the budget data to the Commitment Control ledger in PeopleSoft General Ledger.
This section discusses how to:
Set up and use PeopleSoft Commitment Control.
Use control budget rules.
Use control budget options.
Use the ruleset ChartField.
Use keys and translations.
Use the control ChartField.
Use excluded account types.
Export control budget data.
See the Commitment Control documentation delivered as part of your PeopleSoft Financial Management Solutions PeopleBooks library.
Setting Up and Using PeopleSoft Commitment ControlComplete the following steps to set up and use the PeopleSoft Commitment Control rules and features in PeopleSoft Planning and Budgeting:
Use the delivered ETL tool to import ledger data from PS_LEDGER_KK into the OWS and OWE tables in the PeopleSoft EPM database.
Use the delivered ETL tool also to load other related information, such as control budget rules, into the warehouse.
Note. The ETL process loads the data from the Financial Management database into the OWS tables. After they are loaded to the OWS (PS_LEDGER_KK) table, run a second ETL job to load the data from the OWS tables into the OWE table (PS_BP_LED_KK_F00) for use by Planning and Budgeting.
Use the Scenario and Scenario Group pages in Planning and Budgeting to set up budget parameters for a Commitment Control budget type:
For a historical planning scenario, select History as the scenario type on the Scenario page that can be used as a seed/source for base budget and historical comparison scenarios. For a historical scenario type that uses a control budget ledger ID, you will need to select a transaction type (Trans Type).
PeopleSoft Planning and Budgeting uses the transaction type on the Scenario page to filter the data rows from the source commitment control ledger tables. Available transaction type options include original and final budget data. During the staging process, only those data rows associated with the selected transaction type are populated in the staging tables as you prepare for the model staging process.
Note. The transaction type applies only to ledgers associated
with the Commitment Control budget ledger when integrated with PeopleSoft
Financial Management General Ledger.
The calendar selected for each ledger in a scenario for which you want
the system to enforce commitment control definitions determines the ruleset
definitions used in PeopleSoft Planning and Budgeting. Planning and Budgeting
supports a single calendar per defined scenario. Rulesets that do not use
the selected calendar are not used in Planning and Budgeting. The rulesets
and their related calendars apply only to PeopleSoft General Ledger.
For the proposed planning type (a nonhistory scenario type), select the From and To budget period that represents the date range of your budgeting cycle on the Scenario page.
On the Scenario Group page, select Controlled Budget Ledger as the budgeting type.
Use the Activity and Activity Group pages in Planning and Budgeting to set up dimensions (ChartFields), trees, and members that are to be used in the Commitment Control budget type.
The setIDs used for dimensions should be the same as those used by your commitment control rules from PeopleSoft General Ledger.
Note. Using the same trees used by your commitment control rules is not necessary, but the dimension summarization defined for the activity scenario in the planning model should be consistent with the rules.
Define a planning model.
Using the Planning Model page, select the scenario group that you defined with the controlled budget ledger as the budgeting type.
Using the Activity Scenario Line Item Defaults page, select the Enforce Budget check box next to each line item activity scenario for which you want the system to enforce the control budget rules.
Note. The Enforce Budget check box is available only for line item activity types, because ledger ID is a required field when recognizing the control budget rules for validation.
When the data staging process for the line item activity runs, the process will validate all ChartField (dimension) combinations against the control budget definitions that you mapped over from PeopleSoft General Ledger.
Any rows that do not pass the validation against the control budget ruleset will still be staged but will be marked in error when they are inserted into the proposed control budget.
After the budgeting process begins, a preparer who submits a line item budget to the next planning center level must correct any rows marked in error or delete them before submission; to do this, access the Dimension Error Corrections or Dimension Errors page.
Note. When the row marked in error is from a child activity (such as that in an asset or position type), you will need to make the dimension corrections in the child activity.
See Also
Using Control Budget Rules
When developing data for a controlled budget ledger for PeopleSoft General Ledger, PeopleSoft Planning and Budgeting uses rulesets to determine:
Valid ChartField values for each dimension.
Valid combinations of ChartFields and ChartField values.
Valid rulesets for calendars used for a ledger.
Account types and values excluded by the ruleset.
In the PeopleSoft Financial Management database using the Budget Definitions component, set up commitment control definitions—including the control ChartField, key ChartFields, and translation rules—for each commitment control ledger group. From this source, PeopleSoft Planning and Budgeting uses the relevant records to enforce the control budget definitions. The following table lists the specific records that Planning and Budgeting uses and the data entry point within PeopleSoft Financial Management:
|
Record in FMS |
Data Entry Page |
|
PS_KK_BUDGET_TYPE |
Control Budget Options |
|
PS_KK_SUBTYPE |
Ruleset ChartField |
|
PS_KK_FILTER |
Ruleset ChartField |
|
PS_KK_KEY_CF |
Keys and Translations |
|
PS_KK_CF_VALUE |
Control ChartField |
|
PS_KK_EX_ACCT_TYPE |
Excluded Account Types |
|
PS_KK_EX_ACCT_VAL |
Excluded Account Types |
Using Control Budget Options
For the PeopleSoft Financial Management database, the following field in the Control Budget Rules page applies for control budget types created in PeopleSoft Planning and Budgeting:
|
Enable Statistical Budgeting |
If you select this field, you can enter statistical budgets using the statistical code dimension in the line item activity. To make statistical codes available during budgeting, define the dimension details for statistics. You enable the use of the statistical code dimension on the Activity page, while the members are included in the activity group. |
Using the Ruleset ChartField
When you create control budgets in PeopleSoft Planning and Budgeting, the following rules from the RuleSet ChartField page in General Ledger apply:
The ruleset ChartField and the associated ruleset definition, or group of ruleset definitions for a ledger group, are defined.
A ruleset ChartField can have multiple ruleset definitions; however, they must be mutually exclusive and cannot overlap. Rulesets can also be defined using different tree levels.
When you select the tree used for the planning center ChartField (dimension) definition, PeopleSoft Planning and Budgeting requires that all planning centers requiring a detailed budget are on the same level of the tree.
In addition, a detail tree used for the planning center definition cannot have missing levels. The control budget definitions in PeopleSoft General Ledger must use a tree with the detail budget level on the same level as that used in Planning and Budgeting for the planning center tree. To meet this requirement, you may need to modify a new tree in Planning and Budgeting (such as create additional levels of approval).
Note. When using the Control Budget definitions from PeopleSoft General Ledger, you must also move into the PeopleSoft EPM database any trees used by the ChartField rulesets.
Using Keys and Translations
When you create control budgets in PeopleSoft Planning and Budgeting, the following attributes from the Keys and Translations page in General Ledger apply:
|
Calendar ID |
Represents the level on which the ruleset is defined. Each ruleset can contain a different calendar; however, PeopleSoft Planning and Budgeting supports only a single calendar per scenario definition. You can define more than one proposed scenario within a scenario group that is associated with a planning model.
Note. You can specify multiple scenarios in the scenario
group definition with each scenario using a different calendar. |
If you selected the Enforce Budget check box on the Line Item Default page in the planning model, the system will refer to the PS_KK_KEY_CF record to determine some of the validation rules for the control budget.
See Understanding the Combination Data Validation Process.
When you run validations for control budgets in Planning and Budgeting, the following fields apply from the Keys and Translation page in Financial Management:
|
ChartField |
The ChartFields listed in the Keys and Translations grid are required ChartFields during budget preparation. If any of these listed ChartFields (dimensions) are blank, the system generates an error message when performing validations. Also, you cannot budget (or enter budget data) on a ChartField that is not included in the Keys and Translations grid. |
|
Tree Name and Level Name |
Defines the valid values—all those located on the specified tree level and above—for the ChartField based on the tree and tree level. |
Single Calendar for Ledger for PeopleSoft Financial Management
The calendar defined for the scenario (within the scenario group definition) determines the rulesets used for validation that is associated with that scenario. Only those rulesets that use the same calendar as that defined for the scenario are valid.
For example, suppose that you define this scenario group:
Scenario Group: 2006 Controlled Budget
Scenario: 2006 Dept Control Budget, where Calendar is MN (month)
2006 Dept Control budget has these three rulesets associated with it:
|
Ruleset |
Ruleset ChartField |
Calendar ID |
Default Ruleset |
|
Group1 |
50000–56000 |
MN |
Y |
|
Group2 |
60000–69999 |
MN |
N |
|
Group3 |
70000–79999 |
QT |
N |
PeopleSoft Planning and Budgeting considers as valid only those rulesets with a monthly calendar (MN). The ruleset Group3 is excluded from the control definition, and ChartField values of 70000–79999 are considered invalid. Optionally, you could define a second scenario that uses the quarterly (QT) calendar if planning and budgeting is required for Group3.
Using the Control ChartField
In PeopleSoft General Ledger, the Control ChartField page lets you specify tolerance exceptions entered on the Control Budget Options page.
If the budget data entered does not fall within the Range From and Range To values, it is considered invalid. PeopleSoft Planning and Budgeting does not use any other options on this page.
To use all the control ChartField values, select the All Control Values check box.
Using Excluded Account TypesIn PeopleSoft General Ledger, the Excluded Account Types page enables you to specify account types and account values that you want to be excluded from the budget.
The budget data entered in Planning and Budgeting should not include Account Type and Account values that are a part of the excluded rule, and would be considered invalid when used.
Exporting Control Budget Data
After you complete the planning and budgeting process, you can export the control budget data to PeopleSoft General Ledger. You do this by running the Export to General Ledger process, selecting the PeopleSoft General Ledger option to populate the staging table. Then, use the ETL tool to transfer the staged data to the corresponding staging table of the same name in PeopleSoft General Ledger.
When the data is exported to the General Ledger database, access this database and run the BPLEDGUPDATE process from the Import Budgeting Data page in the PeopleSoft General Ledger application to update the PS_LEDGER_BUDG_KK table located in the PeopleSoft General Ledger application.
Note. In PeopleSoft General Ledger, use the Allocation process
to create budget journals and allocate the budget data in PS_LEDGER_BUDG_KK
to the Commitment Control budget header and line tables (PS_KK_BUDGET_HDR
and PS_KK_BUDGET_LN) and the Commitment Control ledger (PS_LEDGER_KK). You
can also run the Commitment Control Posting process to edit and post the budget
journals to PS_LEDGER_KK if you do not do so as part of the Allocation process.
The release of PeopleSoft Financial Management that you are using will
determine the name of the allocation process (for example, GL_ALLOC in PeopleSoft
General Ledger 8.4 and FS_ALLC in PeopleSoft General Ledger 8.8).
See your PeopleSoft Commitment Control PeopleBook for more information about using allocations and integration with Planning and Budgeting.
See Understanding Exporting General Ledger Budget Data from the Planning Model.
Integrating with Third-Party Financial Applications
If you are using financial data from non-PeopleSoft applications, populate the Operational Warehouse Staging (OWS) and the Operational Warehouse Enriched (OWE) tables in the PeopleSoft EPM database, and then implement the other steps described in this chapter for integrating with PeopleSoft Financial Management applications.
Note. Be sure to store general ledger data for Planning
and Budgeting in the PeopleSoft EPM database in the following OWE tables:
PS_LEDGER_F00, PS_BP_LED_BUDG_F00, PS_BP_LED_KK_F00, and PS_BP_LED_PROJ_F00.
If you require your general ledger source data to be stored in the OWS
tables, use the following tables: PS_LEDGER, PS_LEDGER_BUDG, PS_LEDGER_KK,
and PS_LEDGER_PROJ.
See Source, Staging, and Target Tables for Planning and Budgeting.
Integrating with PeopleSoft HRMS
This section provides overviews of:
Preparation of HRMS job and position data for import to Planning and Budgeting.
Loading of data from HRMS to Planning and Budgeting.
Data source setup.
Stage processing details.
This section also lists prerequisites and discusses how to:
Map human resource (HR) business units to planning model.
Map HR departments to planning centers.
Set up earning codes.
Include benefit plan types during stage.
Correct dimension errors.
Update position activity data after staging.
Export position data from the planning model.
Move position data back to HRMS.
Import position data into HRMS.
Understanding Preparation of PeopleSoft HRMS Job and Position Data
for Import
You can use existing position and human resource setup data from PeopleSoft HRMS for position budgeting. Prepare the position and job data within the PeopleSoft HRMS database before importing the data into PeopleSoft Planning and Budgeting.
Note. As indicated in this chapter's prerequisites, you should verify that your PeopleSoft HRMS environment is up-to-date with any objects related to the Planning and Budgeting integration.
See Also
Setting up Earning Codes and General Position Budgeting Defaults
Understanding Loading of Data from HRMS into Planning and Budgeting
When transferring data from your PeopleSoft HRMS database to Planning and Budgeting, you extract, transform, and load (ETL) data into the EPM database. The ETL map that you use to process and transfer the employee job data into the OWE (Operational Warehouse Enriched) table uses a runtime parameter that you may need to enter. When running the map for employee job data for Planning and Budgeting, if you are using the Step Increment process in PeopleSoft HRMS to generate future-dated job rows based on step rules, you can use that Step Increment data (by setting the parameter to Y), or not use the Step Increment option (by setting the parameter to N).
When you use the Step Increment process in PeopleSoft HRMS, the system extracts data from the PS_S_BP_JOB table to PS_BP_JOB_F00, the target OWE table.
If you are not using the optional Step Increment process in PeopleSoft HRMS, then the system extracts data from the PS_JOB table to PS_BP_JOB_F00, the target OWE table. The default setting for the runtime parameter is N.
The following two sample pages illustrate using the Step Increment process when running the map for employee job data for Planning and Budgeting:

Step Increment Condition page
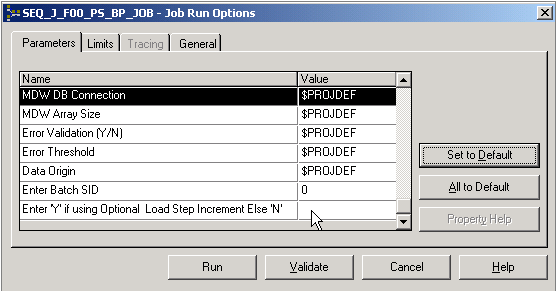
Runtime Parameter page
Understanding Data Source Setup
Before you begin setting up your planning model and running data stage for a position activity, define your position budgeting defaults in PeopleSoft Planning and Budgeting.
The location of the source data that was mapped from your PeopleSoft HRMS system by the ETL tool is stored in the following PeopleSoft Planning and Budgeting tables:
PS_BP_JOB_F00
PS_BP_POSITION_D00
PS_BP_COMP_F00
The planning model can stage data for a specific activity scenario from multiple sources—HRMS, Workforce Rewards (WFR), or another activity scenario prepared and exported earlier. You can prioritize the list of sources that is used to provide the budget data. For each budget component (positions, jobs, salaries, earnings, benefits, and taxes), the staging process queries each source in the order specified by the priority. If a higher priority data source exists for the position component, then the current row will be skipped. Priority is determined by the uniqueness of a given position or job record, based on position number of the position, and position number, employee, and employee record for job and related compensation sources. For example, if data from HRMS has an earning code of B04 for a specific job or employee, and data from WFR has an earning code of B32 for a specific job or employee, then the data from the higher priority source will be written to the budgeting tables.
In preparation for staging job and position data, you must define the data source in the planning model. Select Planning and Budgeting, Planning and Budgeting Setup, Setup Model, Planning Models, Activity Scenario and click the Data Source link (associated with a position activity) on the Activity Scenario page.
Define these options:
|
Use Source Data |
Select when you integrate employee job and position data from your human resource system, Workforce Rewards, or another planning scenario that you want to include during data staging. The flag indicates that data is located in the source human resource tables and corresponding data will be retrieved. You do not need to select the check box when you do not bring data from your human resource system for integration. Do not select Use Source Data when you want to start over for the position activity scenario. |
|
Select Spreads |
Click to access the Spread Definition page and define the spread of amount options across periods, and to set the default spread for the activity scenario. |
|
Priority and Data Source |
Select from the data source drop-down list box by order of priority. Available options are HRMS, WFA, and POSBUD (Planning and Budgeting). |
|
Budgeting/WFA Scenario |
Select from the available scenarios for each of the data sources. An HRMS data source is always blank. |
|
Position Source Scenario |
For each of the budgeting or WFA scenarios, select from one of the available scenarios (at the next level of granularity). This field is blank for an HRMS data source because data brought from that source system does not have or use scenarios. Note. Typically, the Scenario ID field is populated if you previously exported the data from another position activity scenario within the application. For example, you are preparing a second scenario for the same activity and want to modify the data stored in the first scenario to create and generate a second optional scenario. Basically, you will use this as your base budget or seed data for the second scenario. |
|
Include Tax Calculation |
Select to perform employer paid tax calculations while loading the job and position data. The process uses the Employer Tax Group default from the Positions Data Defaults page if the information is not first associated with a corresponding job code assigned on the Job Code Defaults page. |
|
Use Defaults for Employee Data |
Select to assign the same compensation defaults to populate data at the employee level. If you do not want employee data rows populated with position defaults, clear this check box.
Note. If you select this check box, the system uses job
code and position data defaults to populate missing employee compensation
components—benefit, earning, and tax types—when no other rows
are associated with the employee for that compensation type. For example,
if the employee has existing benefit data but no earnings data, the system
picks up only earnings data, but no benefit data because it already exists. |
|
Create New Positions |
Select to create positions (and automatically generate position numbers) within PeopleSoft Planning and Budgeting for employees who do not have assigned positions. If you clear the check box, the system will locate only job records that also contain a corresponding position number from your human resource system—that is, only employee jobs that also have a position number will be staged. |
|
Exclude Temporary Employees |
Select to exclude employees designated as temporary in the source job table (PS_BP_JOB_F00) when creating positions. This check box is available when you select the Create Position check box. |
|
Include Employee Contribution |
Select to include the employer-paid portion of the employee's benefit retirement contribution. |
Note. PeopleSoft Planning and Budgeting does not use any existing employer-paid tax data from PeopleSoft Human Resources. All employer-paid tax information is defined as tax defaults in PeopleSoft Planning and Budgeting. Alternatively, if you have existing tax data that you want to use, populate the tax-related source table for compensation (PS_BP_COMP_F00), and the system will use this data instead of the defaults during the data staging process. This compensation table is the same table that would store existing earnings or benefits data from your human resource system.
See Defining Data Sources for Position Activities.
Understanding Stage Processing Details
The staging process populates the following position-related activity tables in PeopleSoft Planning and Budgeting:
PS_BP_JOB_TBL
PS_BP_POSITION_TBL
PS_BP_SAL_DIS_TBL
PS_BP_BNFT_DIS_TBL
PS_BP_EARN_DIS_TBL
PS_BP_TAX_DIS_TBL
Note. The preceding compensation category tables store data using annual amounts. Other tables that are populated during data staging include the annual amounts broken down by budget period for employee data (PS_BP_PBD_CALC_TBL) and the position defaults (PS_BP_PBD_CLCD_TBL).
When data staging occurs for a position activity, it will define the first effective date for all employee and position records staged. This date will be the start date of your proposed budget year, as defined by the planning and budgeting scenario. When your proposed budget uses a calendar year, this will be a January 1 effective date. However, if your planning and budgeting scenario does not have a begin date of January 1 (such as a fiscal year beginning July 1), a January 1 effective date that occurs just before the proposed budget scenario will be created instead. Creating the first effective date as January 1 provides the necessary information when you are using maximum gross rules for tax calculations. For example, suppose that you are preparing position data for the proposed budget year starting July 1, 2006, to June 30, 2007. In this case, the first effective date created for all employee and position data would be January 1, 2006.
This table describes the staging process:
|
Staging Process |
Type of Distribution |
Table Search Order |
Funding Distribution Hierarchy |
|
For salary distributions, the stage process selects all current and future-dated job rows from PS_BP_JOB_F00 based on the start date of the planning and budgeting scenario. Current job rows are selected for employees with a status of Active, Leave With Pay, Retired with Pay, or Terminated with Pay. For benefits distributions, the stage process selects all current and future-dated rows from the total compensation table (PS_BP_COMP_F00) based on the start date of the planning and budgeting scenario. For retirement distributions, the stage process selects all current and future-dated rows from benefit participation and retirement plan records based on the start date of the planning and budgeting scenario. |
Salary, benefits, and retirement |
For salary distributions:
For benefits distributions:
For retirement distributions:
Tables updated: PS_BP_JOB_TBL PS_BP_SAL_DIS_TBL PS_BP_BNFT_DIS_TBL |
|
|
For earnings distributions, the stage process selects all current and future-dated rows from the total compensation table (PS_BP_COMP_F00) based on the start date of the planning and budgeting scenario. Current rows are selected for employees with the status of Active, Leave With Pay, Retired with Pay, or Terminated with Pay. |
Earnings |
Tables updated: PS_BP_EARN_DIS_TBL PS_BP_JOB_TBL PS_BP_BNFT_DIS_TBL PS_BP_SAL_DIS_TBL |
|
|
If partial or full position management is in effect, the stage process selects all current and future-dated rows from PS_BP_POSITION_D00; otherwise, the process will automatically assign a Planning and Budgeting position number when one is not available. |
Positions |
Tables updated: PS_BP_SAL_DIS_TBL PS_BP_POSITION_TBL |
|
If your position-related data does not use or contain account code information in records such as PS_BP_JOB_F00, PS_DEPT_BUDERN_D00, and PS_DEPT_BUDGET_DED, or your organization does not use the account codes in the PeopleSoft HRMS system, you are not required to create one.
Alternatively, use the Distribution Profile option to assign a default distribution by job code on the Job Code Defaults page, or a global distribution on the Position Data Default page by business unit. The account values are not defined in these distribution profiles.
As a last step, when the account value for an appointment is unavailable for salary, earnings, or benefits from your job and position data, a default account can be assigned on the Position Data Default page by business unit when you are setting up your position budgeting defaults in Planning and Budgeting. On the Position Data Default page, assign a default account that is used by your position activity when one is not found. Complete the default account for each of the following fields on the Position Data Default page: Salary Account, Benefit Account, and Earning Account.
When you run the stage process to format and load employee and position data into the PeopleSoft Planning and Budgeting activity tables in the PeopleSoft EPM database, the system validates the dimension (ChartField) distributions imported from your source to ensure that the dimension members associated with each position exist and are available within the activity scenario in the planning model. After staging the position activity data for the planning model, you can correct any rows that you want to include in the activity before releasing to your end users.
Note. The stage process automatically creates and assigns
a position number to an employee when the existing human resources data does
not have a position number. System-generated and existing position numbers
are used in position budgeting and can coexist within the PeopleSoft Planning
and Budgeting application. To support position or job sharing, or to support
vacant positions not currently filled with an employee, use a position number
such as the position feature in the PeopleSoft HRMS application. Otherwise,
when the format process generates the position number, a single employee ID
that has multiple effective-dated rows is grouped into a single position number.
Position numbers are a requirement in the position activity for Planning
and Budgeting, and are therefore automatically assigned by the data staging
process.
See Also
Understanding Position Budgeting Setup
PrerequisitesIn addition to the prerequisites listed at the beginning of this chapter, complete the following steps to prepare position and job data in PeopleSoft HRMS:
Run the optional Copy Job Data process (BPJBCOPY) to move a copy of the existing data in the PS_JOB, PS_COMPENSATION, and PS_JOB_EARNS_DIST tables to the PS_BP_JOB, PS_BP_COMPENSATION, and PS_BP_JOB_ERN_DIST tables. PeopleSoft Planning and Budgeting uses copies of these tables instead of HRMS tables to ensure that the step increment additions to the data occur in the Planning and Budgeting tables and do not affect any current HRMS job data when you are running the step increment process. You need to run this process only if you plan to perform the following step—Run the optional Load Step Increment process.
Run the optional Load Step Increment (BPCMP107) process for budgets to generate any future-dated job data to the PS_BP_JOB and PS_BP_JOB_ERN_DIST tables.
Run the optional Total Compensation process to extract deductions (HR_TCBENEF) and additional pay (HR_TCPYERN) to calculate benefits and earnings compensation that generates estimated annualized benefit and earning costs and adds job data rows to the TC_EE_DETAIL table in HRMS.
Use the delivered ETL tool to copy data into the Operational Warehouse Staging (OWS) tables, and the additional map to populate the Operational Warehouse Enriched (OWE) tables for Planning and Budgeting.
Note. Steps 1 through 3 are optional. If you do not require or use the PeopleSoft HRMS processes mentioned in steps 2 and 3 (Step Increment process for salary projections or Total Compensation to determine annual earning or benefit data), you can alternatively use the ETL jobs that map the PS_JOB record to the PS_BP_JOB_F00 record for Planning and Budgeting.
This table describes the various prerequisite options to leverage PeopleSoft HRMS salary, earnings, and benefit data:
|
Salary Data |
Benefit and Earnings Data |
||
|
Salary Only |
Salary with Step Increment |
Uses Total Compensation |
Use Defaults |
|
Run ETL jobs that map PS_JOB to PS_BP_JOB_F00. |
|
|
This is defined in Planning and Budgeting. Defaults are defined at the job code level on the Job Code Defaults page, the business unit level on the Position Data Default page, or both. |
After you have prepared the human resource data for use by PeopleSoft Planning and Budgeting and have run the ETL jobs, perform the following steps in preparation for running the data staging process:
Define your position budgeting defaults—including salary, benefits, earnings compensation, employer-paid taxes, distributions, and job codes—in PeopleSoft Planning and Budgeting.
Assign these position budgeting defaults to the Position Data Default and the Job Code Default pages.
Add an employee record called DEFAULT (PERSONAL_DOO)—for the setID that you are using. (Select EPM Foundation, Business Metadata, OW-E Dimension Maintenance, HRMS, Employee and Job, Personal Data).
Define a planning model to include a position activity, and define the Data Source defaults.
Map your HR business units to your Planning and Budgeting business unit.
Map your HR departments to the Planning and Budgeting planning center that corresponds to your position activity in the model.
Select the benefit plan types and the earnings codes to be retrieved from the human resource data during stage process.
The following steps apply before you release the position activity to the preparer but after you have run the data staging process for a position activity scenario:
Access and correct dimension member errors.
Update the staged employee and position activity data before releasing the scenario to end users.
Pages Used to Integrate with PeopleSoft HRMS|
Page Name |
Definition Name |
Navigation |
Usage |
|
BP_HR_TO_BU_MAP |
Planning and Budgeting, Data Integration, Human Resource Information, Map HR Units and Departments, HR Business Units tab |
Define HR business units to map to the business unit in the planning model that uses position activity. This is used during the staging process. |
|
|
BP_HR_SECURITY |
Planning and Budgeting, Data Integration, Human Resource Information, Map HR Units and Departments, HR Departments tab |
Define HR departments to map to the planning centers in a business unit model. This is used during the staging process. |
|
|
BP_VALID_EARNCODES |
Planning and Budgeting, Data Integration, Human Resource Information, Earning Codes and Plan Types, Earning Codes tab |
Set up earning codes. The earning codes are extracted during the stage process from the source compensation data for budgeting purposes. |
|
|
BP_VALID_PLANTYPES |
Planning and Budgeting, Data Integration, Human Resource Information, Earning Codes and Plan Types, Benefit Plan Types tab |
Define the plan types that will be extracted during the stage process from the source compensation data for budgeting purposes. |
|
|
BP_INTRFC_FIND |
Planning and Budgeting, Data Integration, Human Resource Information, Dimension Error Corrections |
Correct dimension member errors resulting from the position data staging process. |
|
|
BP_INTRFC_FIND2 |
Click the Position link on the Dimension Error Corrections page. |
Correct Dimension errors in compensation distributions. |
|
|
BP_SAL_STG_ADJ |
Planning and Budgeting, Data Integration, Human Resource Information, Edit Employee Data |
Adjust or update employee position data. |
|
|
Edit Employee Data - Audit Trail |
BP_EDT_AUDIT_TRAIL |
Click the Audit Trail link on the Edit Employee Data page. |
Review adjustments made to position data using the Edit Employee Data page. |
|
BP_EXPORT |
Planning and Budgeting, Data Integration, Human Resource Information, Export to HR |
Transfer position budget data from planning model activity tables to the warehouse in preparation for moving it to a human resource application or using it as a data source for a new position activity scenario. |
Mapping HR Business Units to Planning ModelAccess the Map HR Business Units page (Planning and Budgeting, Data Integration, Human Resource Information, Map HR Units and Departments, HR Business Units tab).
Select one or multiple HR business units that map to a single business unit in Planning and Budgeting. The HR business units listed on this page apply to any planning model associated with the business unit shown in the header of the Map HR Business Units page. Any employee and position data from HR associated with the HR business unit data can be retrieved during the data staging process for a planning model.
Mapping HR Departments to Planning CentersAccess the Map HR Departments to Planning Centers page (Planning and Budgeting, Data Integration, Human Resource Information, Map HR Units and Departments, HR Departments tab).
|
Planning Center Dimension |
Select the dimension (ChartField) that is defined as the planning center in any planning model associated with a specific business unit. Note. You can define only one dimension per business unit that is used as a planning center for position activities. For example, if you define Department as your planning center for Business Unit A, any position activities associated with planning models that are for Business Unit A should use Department as the planning center when human resource data is available. |
|
Auto Fill |
When your HRMS departments and planning centers have a one-to-one relationship (when Department is also your planning center), click Auto Fill to automatically populate all planning center values. Even when your PeopleSoft HRMS department and planning center are the same, this setup is still required. |
|
Show Blank Rows |
Click to display only the rows that do not contain a planning center. Any data associated with an HR department that is not mapped to a corresponding planning center cannot be mapped during the stage process. |
|
Department |
Select a planning center (for example, Department) value for each department from PeopleSoft HRMS. The planning center description depends on the planning center definition. The stage process uses Map HR Department to Planning Center to map positions to planning centers. After you stage a position activity in a planning model and associate it with a planning center, you cannot change its relationship to the HR department. |
|
HR Department |
The HR department identifies the department that is associated with positions located in the source tables. The planning center description depends on the planning center definition. The stage process uses Map HR Department to Planning Center to map positions to planning centers. After you stage a position activity in a planning model and associate it with a planning center, you cannot change its relationship to the HR department. Note. You can also think of this relationship as establishing ownership of position data from HR. Only one planning center has visibility to a single position number. |
See Also
Understanding Position Budgeting Setup
Setting up Earning Codes
Access the Earning Codes and Plan Types - Earning Codes page (Planning and Budgeting, Data Integration, Human Resource Information, Earning Codes and Plan Types, Earning Codes tab).
|
Include |
Select to include the earning code for an effective date for human resource data that is to be processed by data staging. Your earning codes would have been copied from your HR system by means of the ETL tool. The earning codes that you select here apply only to the staging of the existing compensation data from the HR system, and do not restrict its use during data entry by end users. |
|
Calculate by Hours or Shifts |
Select to identify that the earning code is used for calculating costs by number of hours or number of shifts. When this option is selected, the earnings code will be available to use when creating earnings adjustments for overtime and shift pay. If you select this option, the Include in OT Calculations check box is unavailable for entry. |
|
Include in OT Calculation (Include in overtime calculation) |
Select to identify that amounts associated with the earning code are included with the employee base salary when calculating overtime. If you select this option, the Calculate by Hours or Shifts check box is unavailable for entry. |
See Also
Setting up Earning Codes for Overtime and Shift Pay
Adjusting Overtime/Shift Pay Position Data
Including Benefit Plan Types
During StageAccess the Benefit Plan Types page (Planning and Budgeting, Data Integration, Human Resource Information, Earning Codes and Plan Types, Benefit Plan Types tab).
Check the benefit plan types for an effective date for human resource data that is to be processed by the staging process, or click Select All to check all benefit plan types listed in the system. The plan types that you select here apply only to the staging of the existing compensation data, and do not restrict its use during data entry by end users.
Correcting Dimension ErrorsAccess the Dimension Error Correction page (Planning and Budgeting, Data Integration, Human Resource Information, Dimension Error Corrections).
|
Dimension Filters |
To select an invalid dimension (ChartField) member, click the prompt table button for the dimension (for example, Department). After selecting an invalid dimension member, click Find to display the positions that contain that invalid dimension and member based on your search criteria. The system displays only invalid dimensions that are found within the Dimension Filter section. |
|
Position |
Click the position number link to access the Dimension Errors page, where you can correct the dimension errors. |
Note. If many rows of data require dimension corrections, consider correcting the source position data or changing your defaults before running the data staging process. Otherwise, you must access the Dimension Error Correction page to correct invalid dimensions and members for each position row.
Correcting Position Activity Dimension Errors
Access the Dimension Errors page (click the Position link on the Dimension Error Corrections page).
|
Salary Distribution, Benefits Distribution, Earnings/Allowance Distribution, and Tax Distribution |
The system displays only invalid data. When the data of a position appears in the Job Details grid, the information contains some incorrect dimension member information. For the dimension member in error for any salary, benefit, earning, or tax data, correct the data if you want it to be included within the position activity associated with a planning model. |
After you correct and save the data entered on this page, the data is inserted into the position activity tables that were populated during the data stage process.
Note. Because the changes that you make are directly inserted
into the staged tables, you do not need to run any additional processes.
You are allowed to perform these changes only before a position activity
scenario is released to end users. After the activity scenario status leaves
the staged state, you can no longer perform this operation, and any position
data that contained errors is not included in your position budgeting activity.
Updating Position Activity DataAccess the Edit Employee Data page (Planning and Budgeting, Data Integration, Human Resource Information, Edit Employee Data).
Note. Only coordinators can access this page.
Note. If the Edit Employee Data page fails to load, then you must ensure that an employee record called DEFAULT exists in the employee/personal data record (PERSONAL_D00 table) for whatever setID you are using.
This page enables you to make adjustments to position data for activity scenarios which are either in Staged or On Hold status for planning centers that have a status of Open or Rejected. You can make changes to existing rows of position data, add new effective-dated rows, or delete rows that were previously added to undo those changes.
You enter criteria in the Search and Filter Options to specify the position data to be adjusted, then click Review to retrieve the rows of data that match the criteria. Select the rows to apply the adjustments to, modifying amounts for individual rows if needed. Click Execute Request to apply the adjustments to the selected rows.
Search and Filter Options
Use the fields within this section to indicate the type of adjustment to make and specify the criteria that the system uses to retrieve the subset of records to adjust. The records that meet this criteria appear in the adjustment grid at the bottom of the page when you click the Review button.
|
Activity |
Select the activity to update. |
|
Adj Action (Adjustment Action) |
Specify the type of adjustment. Values are:
|
|
Adjustment Type |
Select Salary, Earnings, or Benefits to indicate the type of adjustment that you want to make. The Salary Adjustment, Earning Adjustment or Benefit Adjustment grid appears at the bottom of the page, depending on the adjustment type selected. This field is unavailable when the value for Adj Action is Delete Rows. Note. Taxes are not available for adjustments; they are calculated based on any adjustments you make. |
|
Version |
For staged models, this field is unavailable for entry, and the value is automatically set to Master. Only budget version 1 and the master version are updated. Base versions are not updated. For models that are on-hold, select the version of the model to make adjustments to. |
|
Currency Code |
Specify the currency code. |
|
Job Code, Union Code, PC From, PC To, (planning center from and to) Empl ID From, Empl ID To, (employee ID from and to) Position From, and Position To |
(Optional) Use these fields to specify additional search parameters to limit the number of rows retrieved. |
|
Plan Type |
Select the type of benefit plan to make adjustments to. This field appears only when the adjustment type is Benefits. |
|
Earn Code (earnings code) |
Select the type of earnings to make adjustments to. This field appears only when the adjustment type is Earnings. |
|
Include Employee Data |
Select to include employee data rows when retrieving the records that match the search and filter options. |
|
Include Position Default Data |
Select to include position default rows when retrieving the records that match the search and filter options. . |
|
Apply to New Data Rows |
Select to apply adjustments only to rows that you or other coordinators have added (in other words, do not make changes to any data that originated from a human resources system). To include all rows for the current effective date, select both this check box and the Apply to HR Data check box. |
|
Apply to HR Data |
Select to apply adjustments only to rows that originated from human resources data (in other words, do not make changes to any data that has been manually added). Typically you would select this option to make mass adjustments to the position data prior to releasing the model. This option is unavailable when the value for the Adj. Action field is Delete Rows. To include all rows for the current effective date, select both this check box and the Apply to New Data Rows check box. |
|
Percentage or Amount |
Enter the global adjustment to apply as a percentage or fixed amount. Use a negative sign to indicate a decrease. This value serves as an incremental adjustment for salary adjustment types. For the other adjustment types (earnings and benefits), this value replace the original number. For example, entering 5% for a benefit adjustment means that the amount calculated represents 5% of gross pay. The system applies the value to the Before Adjustment value for selected rows in the Adjustment grid. |
|
Execute Request |
Click to execute the adjustments. Typically you would click this button after you have clicked Review and selected and confirmed the adjustments. However, you can execute adjustments without reviewing the data by clicking this button first. This enables you to make adjustments to large amounts of data without impacting performance. If you prefer to review the adjustments first, and are concerned about the impact to system performance, consider modifying the search criteria so that fewer records are retrieved at one time, and work with the data in smaller groups. |
|
Review |
Click to review the adjustments and modify them manually, if needed, prior to executing the adjustments. Using this button is not recommended if the search and filter options specified will retrieve a large number of active employee/position data rows, as it can negatively impact system performance. |
|
Clear/Hide Grid |
Click to show or hide the adjustment rows grid. Hiding the grid improves performance during calculations; use this option when you don't need to see the calculated values. |
Adjustment Grid Actions
|
Select All or Clear All |
Click to select the check boxes associated with each row displayed in the adjustment grid. When you click Adjust Selected, the system adjusts each selected row. The system toggles between Select All and Clear All. |
|
Refresh |
Click to view the position rows that meet the criteria and their associated adjustment amounts. The Adjustment Total for Selected Entries section shows the overall adjustment amounts. Refresh does not apply adjustments; it just shows you what the net change will be. The Execute Request button applies the changes. |
Adjustment Grid (Salary Adjustment, Earning Adjustment, or Benefit Adjustment)
This grid contains the rows that match the criteria you specified in the Search and Filter Options section.
|
Selection Flag |
Select a row to include it in any adjustments that are made. |
|
Percent and Manual Amt (manual amount) |
Enter values to apply adjustments to the individual rows and override the amount calculated based on the global percentage or amount. |
Note. No adjustment option exists for employer-paid taxes because they are calculated by the system.
Audit Trail
|
Audit Trail |
Click to access the Audit Trail page and review adjustments that were made to the data specified in the search and filter options fields. This enables you to find adjustments that were made, so you can make modifications to them or delete them, depending on the selected adjustment type. |
Exporting Position Data from the Planning ModelAccess the Export to HR page (Planning and Budgeting, Data Integration, Human Resource Information, Export to HR).
|
Business Unit, Planning Model ID, Scenario, and Activity |
Specify the parameters for the planning model containing the job and position budget data that you want to export. |
|
Export All Positions |
Select to export all job and position costs saved in the planning model, including positions defined as Exclude from Budget Calc on the Position Data page. If you clear this check box, the system does not export positions specified as excluded from budget calculations. |
|
Override Position Scenario and Scenario |
Select to export the employee job and position budget data to the destination tables using the new scenario (GL) that you define on this page. Overriding the scenario enables you to export planning and budgeting position data to a different scenario (such as for reporting purposes) or reuse by a new position activity scenario. Clear this check box to export data using the original GL scenario associated with the proposed plan or budget, as part of the planning and budgeting scenario definition. |
If a position transfer transaction exists for a position/employee, only the latest effective-dated position/employee information is exported. If a position/employee has no transfer transactions, then all rows (history and future rows) are exported.
The Export to HR process (BP_EXP) exports position planning data from the master version in the planning model into the following tables located in the PeopleSoft EPM environment as its export destination:
PS_BP_JOB_F00
PS_BP_POSITION_D00
PS_BP_COMP_F00
PS_BP_POSITION_EXP
This record holds values for the Budget Factor field (defined on the Position Data Defaults page) and Exclude from Budget Calcfield (defined on the Position Data page) for exported positions. This data is used only when recycling data within Planning and Budgeting; it is not moved to the PeopleSoft HRMS database.
Note. The export process does not directly move data to the PeopleSoft HRMS database. After data is placed in the preceding tables, you will need to use the ETL tool to transfer data to the human resource database.
See Also
Moving Position Data Back to HRMS
Run the ETL process to move position data back to PeopleSoft HRMS. ETL moves the data from EPM Planning and Budgeting tables to the HRMS staging tables in the following way:
|
From PeopleSoft EPM Warehouse Tables |
To PeopleSoft HRMS Staging Tables |
|
PS_BP_JOB_F00 |
PS_BP_JOB_EXP |
|
PS_BP_POSITION_D00 |
PS_BP_POSITION_EXP |
|
PS_BP_COMP_F00 |
PS_BP_SAL_DIS_EXP PS_BP_BNFT_DIS_EXP PS_BP_EARN_DIS_EXP PS_BP_TAX_DIS_EXP |
Note. The PS_BP_COMP_F00 contains all the compensation information of salary, benefits, earnings, and tax; however, four separate staging tables in PeopleSoft HRMS have their own corresponding ETL job (map).
Importing Position Data into PeopleSoft HRMS
After you export data from the planning model and run the ETL tool to map stage data back to the PeopleSoft HRMS database, you import this data into the appropriate PeopleSoft HRMS budget tables.
When the data is staged to PeopleSoft HRMS, you populate human resource budget tables by running the Import Budgeting Data (BPIMPORTHR) application engine process in the PeopleSoft HRMS database.
The process moves copied position budget data from the staging tables to the following budget tables in the PeopleSoft HRMS database:
PS_BD_DISTR_TBL
PS_BD_JOB_TBL
PS_BD_POSITION_TBL
Note. This Import Budgeting Data process does not transfer the compensation components for earning and employer-paid tax data for human resource budget tables.
Note. The Ledger Name field (BP_LEDGER_NAME) of the staging table in PeopleSoft HRMS is equivalent to the planning and budgeting scenario field (BP_SCENARIO) used by EPM Planning and Budgeting.
Integrating with PeopleSoft Workforce Rewards
In view of the trend in recent years for compensation to exceed 50 percent of overall expenses for large corporations, compensation planning has become a more complex and critical component of the budgeting process. With Planning and Budgeting, you can now integrate job and position data from HRMS as well as headcount and salary data from Workforce Rewards Compensation Planning and Simulation (CPS) Scenario, to enable more sophisticated budgeting of compensation costs.
This is the integration process flow between HRMS, Workforce Rewards, and Planning and Budgeting:
The ETL tool populates the HRMS Warehouse tables in EPM, such as PS_JOB_F00 and PS_POSITION_DATA.
WFR Compensation Strategy uses this data to project future compensation plan expenses.
The CPS module provides tools to plan, review, and analyze the total compensation costs and strategies for your workforce. With Compensation Strategy, you can automate and streamline the performance of these compensation strategy tasks:
Use data extracted from multiple sources.
Define compensation rules for any type of compensation, such as base pay, variable compensation, or benefits compensation.
Use Workforce Simulation (WFS) to create scenarios of your organization's job growth and reduction, or headcount plans, and simulate new employees/positions.
Create and analyze multiple compensation scenarios involving combinations of compensation types, such as base pay, variable compensation, and benefits compensation.
Evaluate the impacts of these scenarios on compensation distribution, costs, and value.
When the CPS scenario is final, the CPS_APPRV engine populates the position budgeting tables in the EPM database (PS_BP_JOB_F00, PS_BP_COMP_F00, PS_BP_POSITION_D00) for Planning and Budgeting with the compensation scenarios data from Workforce Rewards CPS tables (WA_CALC_F00, WA_JOB_S00, and WA_CALC_TGT).
The data from Workforce Rewards includes future (not current) projections of employee, salary, and benefits information.
The data from the EPM database tables is used during data staging to seed planning centers for a position activity scenario in Planning and Budgeting for budget preparation.
As defined on the Data Source page for the position activity scenario, you can use HRMS, WFR, or another activity scenario as your data source.
The EPM database tables used to store the position activity data in Planning and Budgeting are updated while users complete, submit, and approve position budget information.
When the position budget is considered final, it is exported back to the Planning and Budgeting source tables either to be used by another activity scenario or to be exported to HRMS. The master version data is exported into these tables: PS_BP_JOB_F00, PS_BP_POSITION_D00, and PS_BP_COMP_F00.
The final budget information from the position budgeting tables in the EPM database can be exported back to the source HRMS system. You use the ETL tool and maps to transfer the position and employee budget data back to the HRMS source system.
The planning model can stage data from multiple sources for a specific position activity scenario. You can select source data from HRMS, Workforce Rewards, or another activity scenario that was prepared and exported earlier. In preparation for staging job and position data from Workforce Rewards for an activity scenario, you must first define Workforce Rewards as a data source in the planning model.
See Understanding Data Source Setup.
Integrating with Third-Party Human Resource Applications
If you are not using PeopleSoft applications as a data source for position and job data, you can use data from non-PeopleSoft applications by populating the Operational Warehouse Enriched (OWE) tables in the PeopleSoft EPM database (PS_BP_JOB_F00, PS_BP_POSITION_D00, and PS_BP_COMP_F00), and then completing the other integration steps described under the integrating with PeopleSoft HRMS applications section of this chapter.
If you require your human resource source data to be stored in the OWS tables, use the following tables: PS_S_BP_JOB, PS_S_POSITION_DATA, and PS_TC_EE_DETAIL.
See Source, Staging, and Target Tables for Planning and Budgeting.