An ATG application allows you to assign roles to users. A role corresponds to specific functions that a person can perform within an organization, such as “vice president” or “administrator.” You can use the Community Administration interface to assign access based on roles, as well as based on organizations. This lets you have gears or pages that are accessible to people in different organizations who have the same roles in their organizations. For example, you might have a gear that can be accessed by users who have a budget making role in their organization.
For more information about how roles work in ATG applications, see the Setting Up Visitor Profiles chapter in the ATG Personalization Guide for Business Users or the Working with the Dynamo User Directory chapter in the ATG Personalization Programming Guide.
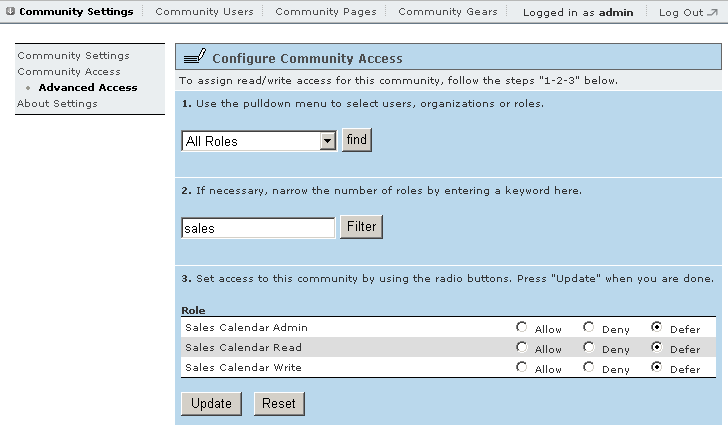
Use the Community Administration interface to assign access based on roles:
From the Community Settings page for a community, click Community Access > Advanced Access.
In the Configure Community Access page, select All Roles from the pulldown menu in the page’s step 1, then click the find button.
In the step 3 section of the Configure Community Access page, use the radio buttons to allow or deny access to the community for any applicable roles. Click the Update button when you are done.
If you allow access for a particular role, then users with that role are allowed access unless another access rule specifically denies access for them. If you deny access for a particular role, then users with that role are denied access, even if another access rule would allow them access. If you do not specifically set allow or deny access for a particular role, then that role is ignored for the purpose of determining access. In that case, access is determined by a user’s organization or username.
