The procedure shown here describes how to set access rights for a new user segment folder. The steps are similar for any of the asset types listed in the previous section.
Important: Keep the following points in mind before you change access rights:
To be able to change access rights, your own user profile must have Write, View Access Rights, and Set Access Rights privileges for the asset you are changing. Otherwise, the Security tab does not appear for the asset (see the procedure below).
Some parts of the Asset Manager framework use JavaServer Page (JSP) technology and others, including Merchandising, are built in Flex. The information in this section applies only to the JSP-based framework. The user interface for Flex-based applications does not include a Security tab. Change access rights for Merchandising assets, including Promotions and Coupons, with ACLs, as described earlier in this chapter. To learn which access rights users must have to view and work with assets in Merchandising, see Configuring Access Rights for Assets in the ATG Merchandising Administration Guide.
To set access rights for a user segment folder:
On the Home page, select Personalization > Targeting and Segmentation.
Create a project that you will use to deploy the folder after you have set its access rights. (You can add the folder to an existing project if you prefer.) For detailed information on creating projects, see the ATG Business Control Center User's Guide.
Select User Segments from the Show list. Any user segments and folders that already exist in your system appear in the left pane.
If you want to edit access rights for an existing folder, proceed to step 5. If you want to create a folder:
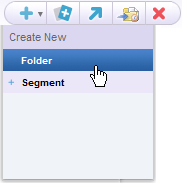
Click the Create New button, as shown in the image, and select Folder.
Specify any required properties for the folder (by default, the Folder Name property).
Click Create.
The folder is created, and a Security tab appears next to the General tab. (Note that the Security tab does not appear for any asset until the asset has been created.)
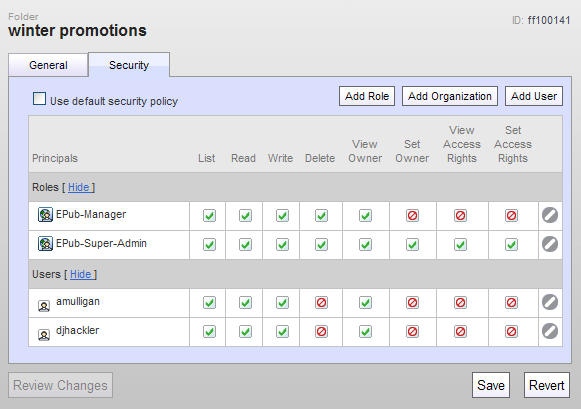
Display the Security tab. The default access rights for this folder appear.
Clear the Use Default Security Policy checkbox. As described earlier, the Default Security Policy is the set of rights specified in the repository definition file for all items of this type. When you choose to define individual access rights for this folder, you are replacing the default rights.
When you clear the checkbox, three buttons appear that you can use to specify access rights for this folder:
Add Role: Allows you to define access rights to this folder for one or more roles. The roles can be global or organizational. The rights will apply to any user who has the specified role.
Add Organization: Allows you to define access rights to this folder for one or more organizations. The rights will apply to any user or role that is assigned to the specified organization.
Add User: Allows you to define access rights to this folder for one or more individual user profiles.
The image below shows the Security tab with these button enabled:
Click the appropriate button and use the asset picker that appears to select the roles, organizations, or users for which you want to define access rights. Note that you can select a combination of all three if required.
Important: You must specify access rights for all principals that need access to this item, including your own profile if necessary.
For each access right, click the corresponding check box and select Allow, Deny, or Unspecified, as applicable. Unspecified means that the default security policy setting is used for this principal.
To remove a role, organization, or user from this tab, click the Remove icon for that item.
When you have finished setting access rights for this folder, click Save. If an error appears informing you that you cannot remove List and Read access for yourself, make sure that you have specified access rights for your own profile or a role that is assigned to you.
Complete the project so that the folder is deployed. For detailed information, see the see the ATG Business Control Center User's Guide.
