| Skip Navigation Links | |
| Exit Print View | |

|
Sun Blade X4-2B Installation Guide |
1. Review Product Documentation
Sun Blade 6000 Modular System Documentation Library
Sun Blade X4-2B Documentation Library
2. Receive and Unpack the Server Module
3. Insert the Server Module Into a Chassis
Insert the Sun Blade X4-2B Server Module Into a Chassis
4. Access Server Module Management Tools
Set Up Server Module Remote Using Ethernet Network Connection
Set Up Server Module Using Local Serial Connection
Set Up Server Module Using Local KVM Connection
Determining Server Module Oracle ILOM SP IP Address
Display Server Module Oracle ILOM SP IP Address (Web Interface)
Display Server Module Oracle ILOM SP IP Address (CLI)
Access Server Module SP Oracle ILOM
Log In to Oracle ILOM SP (Web Interface)
Log In to Oracle ILOM SP (CLI)
5. Set up Server Module Software and Firmware (Oracle System Assistant)
Accessing Oracle System Assistant
Launch Oracle System Assistant (Oracle ILOM)
Launch Oracle System Assistant (Locally)
Set Up Software and Firmware (Oracle System Assistant)
6. Configure Server Module Drives for OS Installation
Identifying REM Host Bus Adapters
SG-SAS6-R-REM-Z Host Bus Adapter
Configuring Storage Drives: SG-SAS6-R-REM-Z (Oracle System Assistant)
SG-SAS6-REM-Z Host Bus Adapter
Configure Storage Drives SG-SAS6-REM-Z (Oracle System Assistant)
Configure Storage Drives (LSI Configuration Utilities)
Configure Storage Drives (LSI WebBIOS Configuration Utility)
Create a RAID Volume using LSI SAS 2 BIOS Configuration Utility
7. Set Up an Operating System and Drivers
Configuring Preinstalled Oracle Solaris OS
Configuring Preinstalled Oracle VM Software
Configuring Preinstalled Oracle Linux OS
Getting Server Firmware and Software Updates
Perform this procedure to make a RAID volume (virtual drive) bootable only when you have created more than one RAID volume (virtual drive) with an SG-SAS6-R-REM-Z HBA using the LSI BIOS Configuration Utility, as described in Configure Storage Drives (LSI WebBIOS Configuration Utility).
Do not perform this procedure if you have:
An SG-SAS6-REM-Z HBA installed.
Used Oracle System Assistant to create a RAID volume (virtual drive) and made that volume bootable.
Created only one RAID volume (virtual drive) using the LSI BIOS Configuration Utility.
Before You Begin
Create at least one RAID volume (virtual drive) on the SG-SAS6-R-REM-Z HBA using the LSI BIOS Configuration Utility. See Configure Storage Drives (LSI WebBIOS Configuration Utility).
Choose one of the following methods.
Refer to the Oracle X4 Series Server Administration Guide for more information.
The Adapter Selection screen appears.

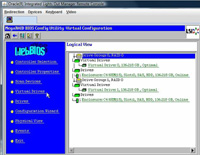
The MegaRAID BIOS Config Utility Virtual Configuration screen appears.

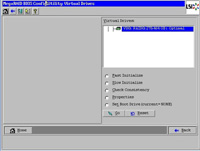
The Virtual Drives screen appears.

When the operation is successfully completed, the Set Boot Drive value for this virtual drive shows (current=selected VD).
Next Steps