About Creating a Database Application
By using the Create Application Wizard, you can create a complete application containing multiple pages including reports, interactive reports, forms, tabular forms, and master detail forms. The Create Application Wizard is designed to easily and quickly create basic Oracle Application Express applications. After you create an application using this wizard, you can modify pages and add additional pages using the Create Page Wizard. See "About Creating Pages in a Database Application".
You can use the Create Application Wizard to create blank pages, or pages based on SQL queries or existing database tables. Applications based on tables can consist of a simple report, a form and report, or a tabular form. To learn more, see and "Creating Forms". You can create SQL queries by manually typing SQL, or by using the graphical user interface of Query Builder.
At the workspace level, you have the option of setting defaults that are used for applications built in that workspace. Setting these defaults enables you to exit the wizard without paging through each step. When you exit the wizard, the application you create uses the values you specified as defaults.
"Building Queries with Query Builder" in Oracle Application Express SQL Workshop Guide and "Leveraging Application Builder Defaults" in Oracle Application Express Administration Guide
Topics:
Creating Mobile Applications
Because mobile applications are designed to run specifically on smartphone devices, they should be built with minimal, semantic HTML that is optimized for mobile connections. This section describes how to create mobile applications in Oracle Application Express.
Topics:
What's the Difference Between a Mobile Design and Responsive Design?
Oracle Application Express includes two approaches to developing applications for mobile devices:
-
Option 1: Create jQuery Mobile-based web pages.
-
Option 2: Use Theme 25 to create a responsive design in which the page layout fits the space regardless of the target device (for example, a desktop computer, laptop computer, tablet, or smartphone).
The main difference between these two approaches is that responsive design enables a single web page to display on any device. In contrast, developers building mobile applications with jQuery Mobile must create two sets of pages: one for desktop display and another for mobile devices. On the surface, creating a responsive design and having only a single page to maintain sounds more appealing than maintaining two separate pages. In practice, however, the up front cost of designing a truly responsive page are much higher and requires a much higher level of understanding of grid layout, HTML and CSS.
You should base your decision on whether to build separate mobile pages or create a responsive design based on the type of site or application you are developing. For example, applications that will accessed by the general public, such as marketing sites, are well suited for responsive design. Productivity applications, such as customer tracker applications, are good candidates for building mobile pages where the native functionality of the smartphone can be utilized.
About jQuery Mobile Support
To support mobile application development, Oracle Application Express incorporates jQuery Mobile. jQuery Mobile-based web pages use a lightweight framework that enables you to create compact and minimalistic web sites that include only a few images and CSS files. jQuery Mobile supports mobile device-specific events, such as orientation change and touch events. You easily change the look and feel of jQuery Mobile-based applications by modifying the CSS using tools such as ThemeRoller. See:
http://jqueryui.com/themeroller/
About Creating Mobile Applications
Oracle Application Express mobile applications run inside the browser on a mobile device. These mobile applications must have a connection in order to communicate with the Oracle database and cannot operate in a disconnected environment. Using jQuery Mobile, these applications can run on the following mobile operating systems: iOS, Android, Blackberry, and Windows Mobile.
Mobile devices that support HTML5 capabilities can utilize all built-in capabilities including HTML5 date-pickers, sub-types that display different keypads based on field definition, and so on. Older devices can still render the application but with less advanced features. The major advantage of developing browser-based applications is that you only need to develop them once for the majority of mobile devices. However, one major limitation is accessing on-device features such as contact lists. You can alleviate this limitation by integrating solutions such as PhoneGap. PhoneGap supports the creation of hybrid solutions which use a native application wrapper to display the web application.
About Selecting the jQuery Mobile Smartphone User Interface
When you create a database application using a wizard, you select a User Interface (for example, Desktop or jQuery Mobile Smartphone). The User Interface you select determines what options display later in the wizard. You can view or alter the User Interface on the Application Attributes page. Note that jQuery Mobile Smartphone does not supports all page types. Supported page types are described in detail later in this document.
Creating a Database Application Based on a Table, Query, or Drill-down Query
You can create a database application based on a table, query, or drill-down query by selecting Database in the Create Application Wizard. A key decision point when running the Create Application Wizard is choosing a target user interface. Based on the user interface you select, the wizard is optimized to display the appropriate page types, attributes, and themes.
To create a database application based on a table, query, or drill-down query:
-
On the Workspace home page, click the Application Builder icon.
-
Click the Create button.
-
For Method, select Database and click Next.
-
For Name:
-
Application - Enter a unique integer value to identify the application. Note that Application IDs between 3000 to 9000 are reserved for internal use by Oracle Application Express.
-
Name - Enter a name to identify the application.
-
Schema - Each application obtains its privileges by parsing all SQL as a specific database schema. Identify the database schema owner.
-
Create Options:
-
Start from scratch - Enables you to manually add all pages.
-
Include Home page - Includes a blank page, which automatically acts as the parent of any new pages added. A list region is also created on the home page, providing navigation to the additional pages.
-
Use previously created application model - Reuses an existing application definition. Using an existing application definition enables you to run this wizard without reentering application property values.
Note that you still have to define all other application attributes, or you can choose to copy some attributes by choosing to copy shared components from another application (See "About Application Models and User Interface Defaults").
-
-
User Interface - Select a user interface for the application. For application primarily designed for desktop use, select Desktop.
-
Click Next.
To create an instant application consisting of just a login page and blank page, click Create Application.
Next, add pages to your application.
-
-
For Pages, select the type of page you want to add.
-
Select the type of page you want to add.
Table 7-1 lists available page types by target user interface (that is, Desktop and jQuery Mobile Smartphone).
Table 7-1 Available Create Application Wizard Page Types
Page Type Description Desktop jQuery Mobile Smartphone Blank
Creates a page with no built-in functionality.
Available
Available
List View
Creates a page that contains the formatted result of a SQL query. You can choose a table to build the List view on, and select a column to be used for the List view display information.
Not applicable
Available
Report
Creates a page that contains the formatted result of a SQL query. You can choose to build a report based on a table you select, or based on a custom SQL SELECT statement or a PL/SQL function returning a SQL SELECT statement that you provide.
Note: jQuery Mobile Smartphone only supports classic reports.
Available
Available
List View and Form
Builds a two page List view and form combination. On the first page, users select a row to update from the List View. On the second page, users can update the selected table or view.
Not applicable
Available
Report and Form
Builds a two page report and form combination. On the first page, users select a row to update. On the second page, users can add a record or update or delete an existing record.
Available
Available
Form
Creates a form to update a single row in a database table.
Available
Available
Tabular Form
Creates a form to perform update, insert, and delete operations on multiple rows in a database table.
Available
Not applicable
Master Detail
Builds a two page report and form combination. On the first page, users select a row to update. On the second page, users can update the selected table or view and its associated detail.
Available
Not applicable
Chart
Creates a page with a chart to represent the result of a SQL query.
Available
Available
Action displays the currently selected page type. For each selection, the wizard prompts you for different types of information, such as selecting a table name or report implementation. To learn more, see item Help.
-
Click Add Page.
The page (or pages) appear at the top of the page. To delete a page, click the Delete icon.
-
Repeat the previous steps until all pages have been added.
-
Click Next.
To exit this wizard early and use Application Builder Defaults, click the Create Application button. To configure Application Builder Defaults, see "Leveraging Application Builder Defaults" in Oracle Application Express Administration Guide.
-
-
For Shared Components, indicate whether to copy shared components from another application. Select Yes or No. If you select Yes, select where to copy them from and which components to import.
Shared components are common application elements that can be displayed or applied across multiple pages in an application. To save time or maintain consistency between applications, copy the shared components from an existing application. The types of shared components you can copy include: user interface themes, lists of values, navigation bar entries, authorization schemes and authentication schemes.
-
For Attributes:
-
Authentication Scheme - Determine how establish user identity before accessing an application. Options include:
-
Application Express - Uses the user account credentials created and maintained with the Application Express Service Administration application. These are the accounts you use to log in to the Application Express development environment. You can also create accounts in this user account repository for end users of your applications.
-
Database Account - Requires users logging into your application to enter a database schema name (or user name) and a password in order to authenticate. This account information is managed entirely within the Oracle database.
-
No Authentication - Also known as Database Account Credentials. This option enables users to access your application using the account credentials stored in the
mod_plsqlDAD definition. In most cases this results in users not having to login when accessing your application. This is the quickest way to create a “public" application.
To learn more, see "Establishing User Identity Through Authentication"
-
-
Tabs - Select whether to include tabs in your application. You can create one level tabs, two level tabs, or no tabs at all. To learn more, see "Creating Tabs"
This attribute identifies the language in which an application is developed. This language is the base language from which all translations are made.
-
Language - Select the primary language for this application.
This attribute identifies the language in which an application is developed. This language is the base language from which all translations are made.
-
User Language Preference Derived From - Specifies how the engine determines the application language. The application primary language can be static (that is, derived from the web browser language) or determined from a user preference or item. The database language setting determines date display and sorting characteristics. To learn more, see item Help.
You can alter the Language and User Language Preference Derived From attributes later on the Edit Globalization attributes page. See "Configuring Globalization Attributes".
-
Date Format - Specifies the date format to be used in the application.
Use this date format to alter the
NLS_DATE_FORMATdatabase session setting before showing or submitting any page within the application. This value can be a literal string containing a valid Oracle date format mask or an item reference through substitution syntax. If no value is specified, the default date format is derived from the database session at runtime. If supplied, this is also used as the date format for any items resulting from columns of typeDATE. -
Date Time Format - Specifies the date time format to be used in the application.
This date time format can be referenced in an application using the substitution reference
&APP_DATE_TIME_FORMAT., or in PL/SQL using the functionv('APP_DATE_TIME_FORMAT'). This attribute does not alter any NLS settings. This value can be a literal string containing a valid Oracle date format mask or an item reference using substitution syntax. If this attribute value is not specified, then a reference toAPP_DATE_TIME_FORMATreturns the NLS database session date format and the NLS time format. -
Timestamp Format - Specifies the timestamp format to be used in your application.
Use this timestamp format to alter the
NLS_TIMESTAMP_FORMATdatabase session setting before showing or submitting any page within the application. This value can be a literal string containing a valid Oracle timestamp format mask or an item reference through substitution syntax. If no value is specified, the default timestamp format is derived from the database session at runtime. -
Timestamp Time Zone Format - Specifies the timestamp with time zone format to be used in your application.
Use this timestamp with time zone format to alter the
NLS_TIMESTAMP_TZ_FORMATdatabase session setting before showing or submitting any page within the application. This value can be a literal string containing a valid Oracle timestamp with time zone format mask or an item reference through substitution syntax. If no value is specified, the default timestamp with time zone format is derived from the database session at runtime. -
Click Next.
-
-
For User Interface Theme, select a theme and click Next.
Themes are collections of templates used to define the layout and style of an entire application. See "Managing Themes".
-
Confirm your selections and click Create Application.
Creating an Application from a Spreadsheet
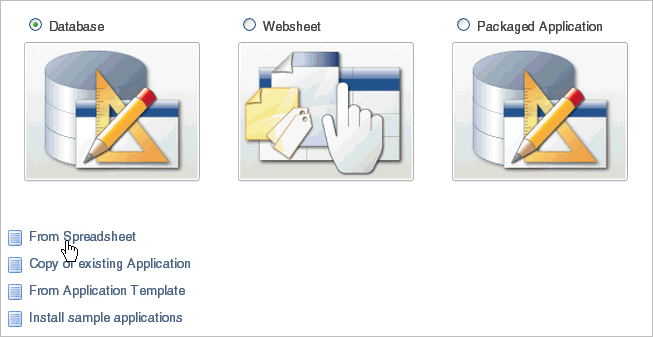
You can create an application based on spreadsheet data by selecting From Spreadsheet in the Create Application Wizard.
To create an application from spreadsheet data:
-
On the Workspace home page, click the Application Builder icon.
-
Click the Create button.
-
For Method, select From Spreadsheet.
-
For Load Method, specify how spreadsheet data is imported. Select one of the following and click Next:
-
Upload file, comma separated (*.csv) or tab delimited. Specify the following and click Next:
-
Text File - Click Choose File to locate the file to be uploaded.
-
Separator - Specify the column separator character. Use \t for tab separators.
-
Optionally Enclosed By - Enter a delimiter character. You can use this character to deliminate the starting and ending boundary of a data value. If you specify a delimiter character, the wizard ignores white space occurring before the starting and ending boundary of a data value. You can also use this option to enclose a data value with the specified delimiter character. If applicable, select First row contains column names.
-
File Character Set - Choose the character set in which the text file is encoded.
-
-
Copy and paste. Copy and paste the tab delimited data you want to import.
-
-
For Table Properties:
-
Schema - Identify the database schema owner.
-
Table - Enter a name for the table being created.
-
Set Table Properties - Review the table properties. Modify the data types or enter format masks.Specify whether to include a column by selecting Yes or No from the Upload list.
-
Click Next.
-
-
For User Interface Defaults:
-
Review the displayed Singular Name and Plural Name.
-
(Optional) Under Column User Interface Defaults, review the displayed column labels.
-
Click Next.
-
-
For Application Options, specify the following:
-
Application Name - Enter an alphanumeric name for this application.
-
Create Mode - Options include:
-
Read Only does not include insert and update pages.
-
Read and Write includes insert and update pages.
-
-
Report Implementation:
-
Classic creates a SQL report.
-
Interactive creates an interactive report.
-
-
Click Next.
-
-
For User Interface Theme, select a theme and click Next.
Themes are collections of templates used to define the layout and style of an entire application. See "Managing Themes".
-
Confirm your selections and click Create Application.
Copying a Database Application
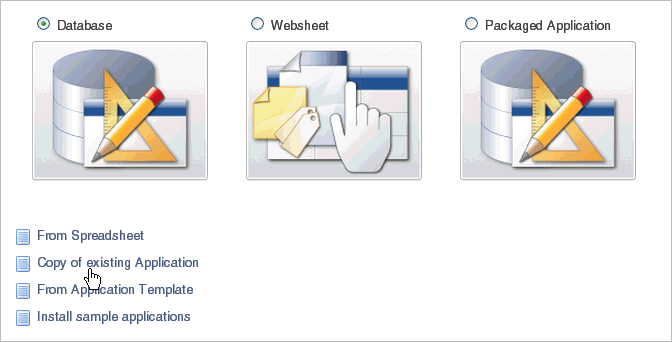
You can create a copy of an existing application by running the Create Application Wizard or by selecting the application and then Copy this Application on the Application home page.
Topics:
Copying a Database Application Using the Create Application Wizard
To copy application by running the Create Application Wizard:
-
On the Workspace home page, click the Application Builder icon.
-
Click the Create button.
-
Select Copy of an existing Application.
-
For Method, click the As a copy of an existing application link.
-
For Identify Copy Target:
-
Copy From - Select the name of the application to copy.
-
Copy To - Enter a short descriptive name for the application to distinguish the new application in select lists and reports.
-
New Application ID - Enter a unique integer value to identify the application. Note that Application IDs between 3000 to 9000 are reserved for internal use.
-
Copy Supporting Object Definitions - Specify whether to include supporting object definitions. Options include:
-
Yes - Include database object definitions, image definitions, and seed data SQL statements encapsulated in a single file.
-
No - Do not include supporting object definitions.
-
-
Click Next.
-
-
Click Create Application.
Copying an Application from the Application Home Page
To copy a database application from the Application home page:
-
On the Workspace home page, click the Application Builder icon.
-
Select an application.
The Application home page appears.
-
From the Tasks list, click Copy this Application.
-
For Identify Copy Target:
-
New Application ID - Enter a unique integer value to identify the application. Note that Application IDs between 3000 to 9000 are reserved for internal use.
-
New Application Name - Enter a short descriptive name for the application to distinguish the new application in select lists and reports.
-
Copy Supporting Object Definitions - Specify whether to include supporting object definitions. Options include:
-
Yes - Include database object definitions, image definitions, and seed data SQL statements encapsulated in a single file.
-
No - Do not include supporting object definitions.
-
-
Click Next.
-
-
Click Copy Application.
Creating a Database Application from a Template
Instance administrators manage the template application repository for an entire Oracle Application Express instance. Developers can create robust applications based on template applications stored in the template application repository.
Only an instance administrator can add or remove an application template from the repository. To create a template application, an instance administrator must first export the application and then add it to the template application repository.
"Managing Template Applications" in Oracle Application Express Administration Guide
To create an application based on a template application:
-
On the Workspace home page, click the Application Builder icon.
-
Click the Create button.
-
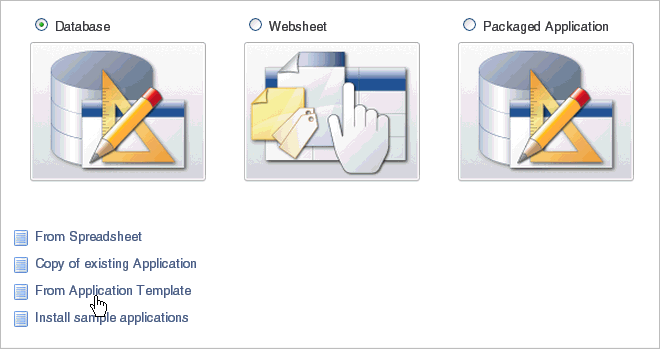
For Method, select From Application Template.
-
For Select Application:
-
Application Type - Select the type of template application on which to base your new application. Select either Database or Websheet.
-
Template Application - Select the name of the template application on which to base your new application.
-
Name - Enter a short descriptive name for the application, helping to distinguish the new application in select lists and reports.
-
Application - Specify an integer value that identifies the application. The application ID must be unique within your Application Express instance.
Application IDs in the range of 3000 to 9000 are reserved for internal use by Application Express.
-
Schema - Your application obtains its privileges by parsing all SQL as a specific database schema. Identify the database schema owner. This option only displays if you select Database for Application Type.
-
Click Next.
-
-
Confirm your selections and click Create Application.
Installing Sample Applications
Oracle Application Express includes many sample applications. You can install, run, and use sample applications as is, or analyze them to better understand how to use Application Builder to build specific types of functionality.
To install sample applications:
-
On the Workspace home page, click the Application Builder icon.
-
Click the Create button.
-
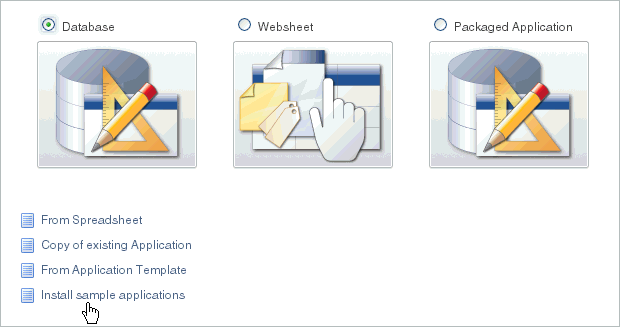
For Method, select Install Sample applications.
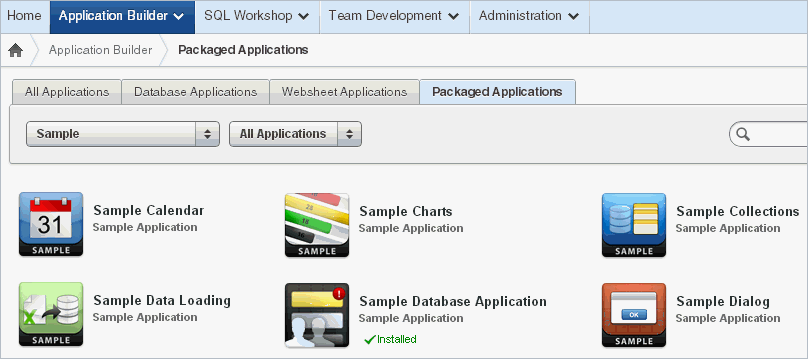
The Packaged Applications page appears.
Note that the application category (for example, Sample Application) displays beneath the application title. You can identify installed applications by the green Installed tag that displays beneath the product category.
-
Locate the application to be installed.
-
Click the application image.
A summary page appears.
-
Click Install Application.
-
Select an Authentication scheme and click Next.
-
Click Install Application again.
A success message appears.
-
To run the application, click the Run Application icon.
-
Enter the appropriate login credentials:
-
Username - Enter your workspace username.
-
Password - Enter your workspace password.
-
Click Login.
-
Deleting a Database Application
You can delete an application from within Application Builder, or while editing application attributes. If you delete an application you also delete all defined components (reports, charts, or forms), page controls (buttons, items, list of values), and shared components (breadcrumbs, lists, and tabs, but not user interface defaults).
Topics:
-
Deleting an Application from the Application Builder Home Page
-
Deleting an Application from the Edit Application Definition Page
Deleting an Application from the Application Builder Home Page
To delete an application from Application Builder:
-
On the Workspace home page, click the Application Builder icon.
-
Select an application.
-
When Application Builder appears, verify the application ID and name at the top of the page.
-
On the Tasks list, click Delete this Application.
-
When prompted, click Permanently Delete Now.
Deleting an Application from the Edit Application Definition Page
To delete an application from the Edit Application Definition page:
-
On the Workspace home page, click the Application Builder icon.
-
Select an application.
-
Click the Edit Application Properties button to the right of the application name.
The Edit Application Definition page appears.
-
Verify the application ID and name.
-
Click Delete at the top of the page.
-
When prompted, click Permanently Delete Now.
About Application Models and User Interface Defaults
The Create Application Wizard is designed with the assumption that the developer may run it multiple times. To facilitate this iterative approach to application development, every time you run the wizard it saves the page definitions to an application model.
Consider the following example. You create an application by running the Create Application Wizard. After viewing the application, you realize it is not quite what you wanted. Instead of altering it, you can run the wizard again and select an application model. By selecting an existing application model when you rerun the wizard, you can quickly improve your application with minimal time and effort.
"Managing Application Models" in Oracle Application Express Administration Guide
Another way to increase your productivity when creating an application is to specify user interface defaults. User interface defaults are metadata that enable you to assign default user interface properties to a table, column, or view within a specified schema.
"Managing User Interface Defaults" in Oracle Application Express SQL Workshop Guide
Leveraging Application Models and User Interface Defaults
You can increase your productivity when creating applications by leveraging application models and user interface defaults. Consider the following scenario:
-
Create an application based on tables or views by running the Create Application Wizard.
-
Run the generated application. Note any functional deficiencies.
-
Evaluate whether to create or edit user interface defaults.
For example, you can use user interface defaults to control how form field or report labels display. You can also use user interface defaults to display specific columns or have columns display in an alternate order.
-
Navigate to the Application Builder home page and create an application by clicking Create.
-
For Method, select Database.
-
For Name:
-
Application - Enter a unique integer value to identify the application. Note that Application IDs between 3000 to 9000 are reserved for internal use by Oracle Application Express.
-
Name - Enter a name to identify the application.
-
Schema - Each application obtains its privileges by parsing all SQL as a specific database schema. Identify the database schema owner.
-
For Create Options - Select Use previously created application model. This option reuses an existing application definition. Using an existing application definition enables you to run the wizard without reentering application property values.
Note that you still have to define all other application attributes, or you can choose to copy some attributes by choosing to copy shared components from another application (See "About Application Models and User Interface Defaults").
-
User Interface - Select user interface for the application.
-
Click Next.
-
-
Select a design model and developer.
Note the pages you previously created already appear.
-
Add pages, edit pages, or remove pages.
-
Complete the wizard.
-
Repeat steps 2 through 9 until the application meets your functional requirements.
