Setting Up Datamaps
This topic provides an overview of datamaps and discusses how to:
Define datamaps.
View datamap fields.
View or add constraints for a datamap.
Use the DataMap Wizard to create datamaps.
Pages Used to Set Up Datamaps
|
Page Name |
Definition Name |
Navigation |
Usage |
|---|---|---|---|
|
General Properties |
PF_DATAMAP_DEFN |
|
Define datamaps. |
|
DataMap Fields |
PF_DATAMAP_DEFN2 |
Click DataMap Fields on the General Properties page. |
View DataMap fields. |
|
Constraints |
PF_DMAP_CONSTRNTS |
EPM Foundation, Foundation Metadata, Metadata Creation and Editing, DataMap, Constraints |
View or add constraints for a specific datamap. |
|
Datamap Wizard |
PF_DATAMAP_WIZ, PF_DATAMAP_SUM |
EPM Foundation, Foundation Metadata, Metadata Wizards, Datamap Wizard |
Simplify datamap setup using the Datamap Wizard. |
Understanding Datamaps
A datamap is the third level of metadata that builds upon the information that you captured in the tablemap and enables you to define a logical view of the physical EPM tables. Datamaps bring together information from the different tables that can be specified in a tablemap and defines it as if it were one entity or table. Not every column of every table that is defined in a tablemap is necessary; datamaps enable you to select only those columns that you want to use
You can group fields that are related to common processes so that processing can be done on one data set. In addition, datamaps enable you to give columns more intuitive, meaningful names, making data retrieval and review easier for business users.
Warning! If you plan at the leaf level instead of the node level for a dimension, you must remove the row that contains this dimension. When you set up your data set that uses this dimension, you must select to group by dimension ID and not dimension node.
Understanding Datamap Setup
PeopleSoft provides you with the option of setting up datamaps using the DataMap Wizard, which is intended to simplify the datamap creation process. You can still use the Record Metadata, TableMap, and DataMap components to manually set up datamaps.
General Properties Page
Use the General Properties page (PF_DATAMAP_DEFN) to define datamaps.
Image: DataMap - General Properties page
This example illustrates the fields and controls on the DataMap - General Properties page. You can find definitions for the fields and controls later on this page.
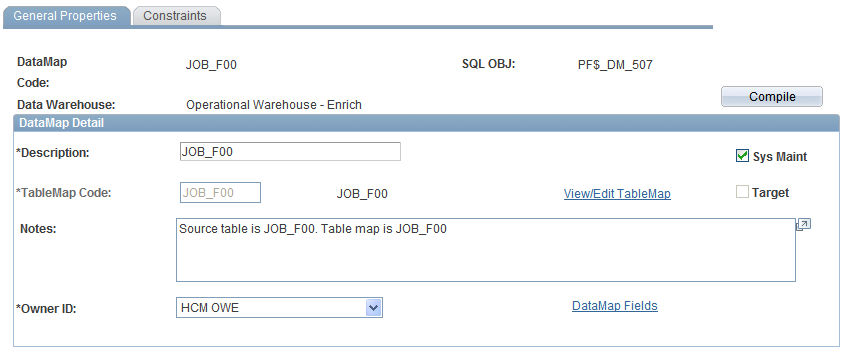
When you have completed your datamap setup, click the Compile button to generate the SQL objects. You must also build your SQL anytime you make changes to the datamap, such as when you delete or add a key field.
Note: If you need to recompile a datamap, you must also recompile any tablemaps or other metadata objects that are associated with the datamap.
DataMap Fields Page
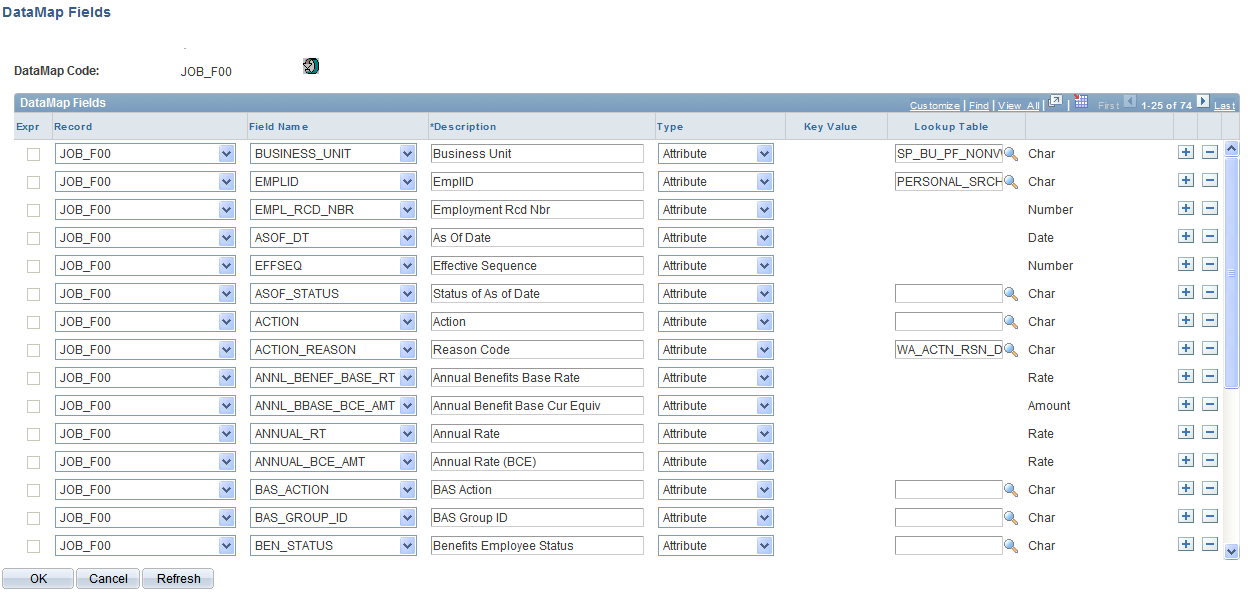
Use the DataMap Fields page (PF_DATAMAP_DEFN2) to view DataMap fields.
Image: DataMap Fields page
This example illustrates the fields and controls on the DataMap Fields page. You can find definitions for the fields and controls later on this page.
Constraints Page
Use the Constraints page (PF_DMAP_CONSTRNTS) to view or add constraints for a specific datamap.
Image: DataMap - Constraints page
This example illustrates the fields and controls on the DataMap - Constraints page.
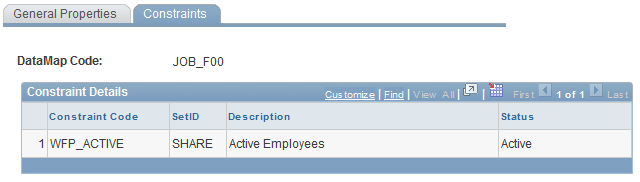
You can use this page to view constraints associated with a datamap. You can also add new constraints to the datamap.
Datamap Wizard Page
Use the Datamap Wizard page (PF_DATAMAP_WIZ, PF_DATAMAP_SUM) to simplify datamap setup using the Datamap Wizard.
DataMap Wizard - Record Metadata (Step 1 of 6)
The first view of the DataMap Wizard enables you to define Record metadata for your DataMap.
Image: Datamap Wizard - Record Metadata input
This example illustrates the fields and controls on the Datamap Wizard - Record Metadata input. You can find definitions for the fields and controls later on this page.
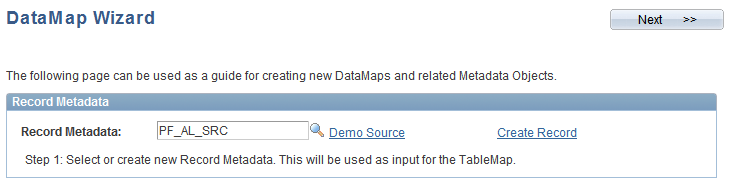
Note: Once you select record metadata for the wizard, a new link appears that can access the Record Metadata page for that specific record. The link name is determined by the description provided on the Record Metadata page.
In the example above the link is named Demo Source because that is the description given for the PF_AL_SRC record on the Record Metadata page.
DataMap Wizard - TableMap Metadata (Step 2 of 6)
The second view of the DataMap Wizard enables you to define TableMap metadata for your DataMap.
Image: Datamap Wizard - TableMap Metadata input
This example illustrates the fields and controls on the Datamap Wizard - TableMap Metadata input. You can find definitions for the fields and controls later on this page.
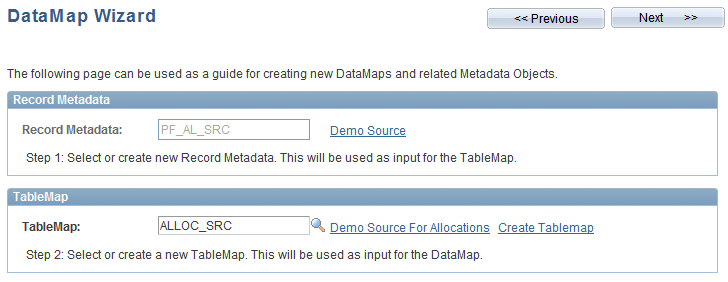
Once you select a tablemap for the wizard, a new link appears that can access the TableMap page for that specific tablemap. The link name is determined by the description provided on the TableMap page.
Note that as you progress through the DataMap Wizard steps, the previous section becomes unavailable for input. You can click Previous at any time to return to the previous step.
DataMap Wizard - DataMap Metadata (Step 3 of 6)
The third view of the DataMap Wizard enables you to define your DataMap.
Image: Datamap Wizard - DataMap Metadata input
This example illustrates the fields and controls on the Datamap Wizard - DataMap Metadata input. You can find definitions for the fields and controls later on this page.
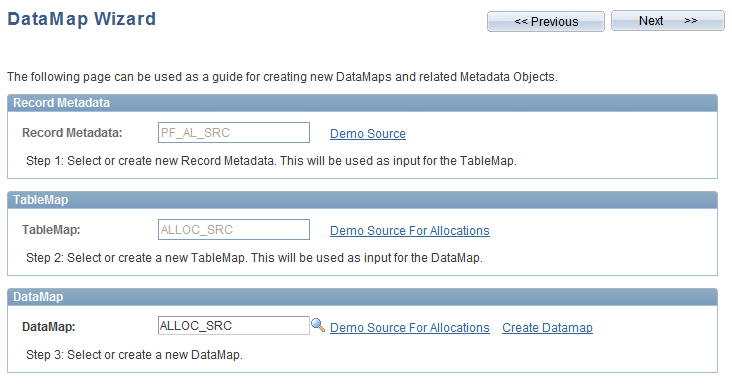
Once you select a datamap for the wizard, a new link appears that can access the DataMap page for that specific datamap. The link name is determined by the description provided on the DataMap page.
Note that as you progress through the DataMap Wizard steps, the previous section becomes unavailable for input. You can click Previous at any time to return to the previous step.
DataMap Wizard - Filter Metadata (Step 4 of 6)
The fourth view of the DataMap Wizard enables you to define filter metadata for your DataMap.
Image: Datamap Wizard - Filter Metadata input
This example illustrates the fields and controls on the Datamap Wizard - Filter Metadata input. You can find definitions for the fields and controls later on this page.

Once you select a filter for the wizard, a new link appears that can access the Filter page for that specific filter. The link name is determined by the description provided on the Filter page.
Note that as you progress through the DataMap Wizard steps, the previous section becomes unavailable for input. You can click Previous at any time to return to the previous step.
DataMap Wizard - Constraint Metadata (Step 5 of 6)
The fifth view of the DataMap Wizard enables you to define constraint metadata for your DataMap.
Image: Datamap Wizard - Constraint Metadata input
This example illustrates the fields and controls on the Datamap Wizard - Constraint Metadata input. You can find definitions for the fields and controls later on this page.
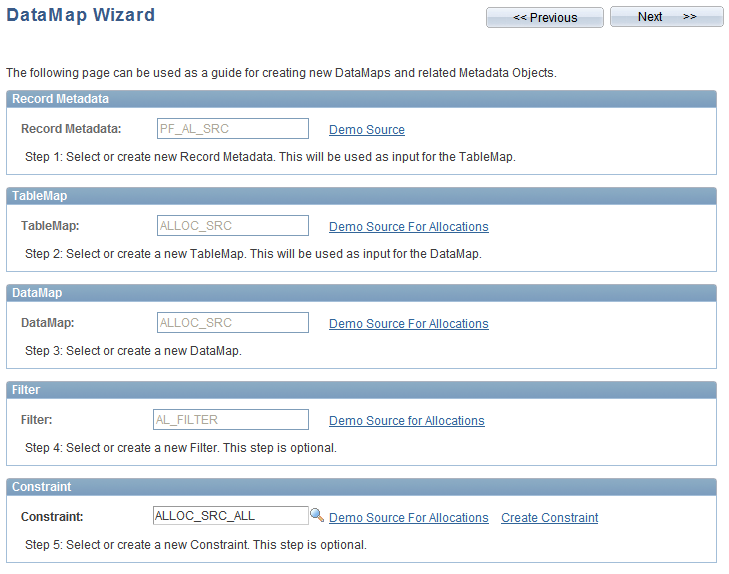
Once you select a constraint for the wizard, a new link appears that can access the Constraint page for that specific constraint. The link name is determined by the description provided on the Constraint page.
Note that as you progress through the DataMap Wizard steps, the previous section becomes unavailable for input. You can click Previous at any time to return to the previous step.
DataMap Wizard - DataMap Summary (Step 6 of 6)
The sixth and final view of the DataMap Wizard provides you with a summary of all the metadata defined for your DataMap.
Image: Datamap Wizard - DataMap summary
This example illustrates the fields and controls on the Datamap Wizard - DataMap summary.
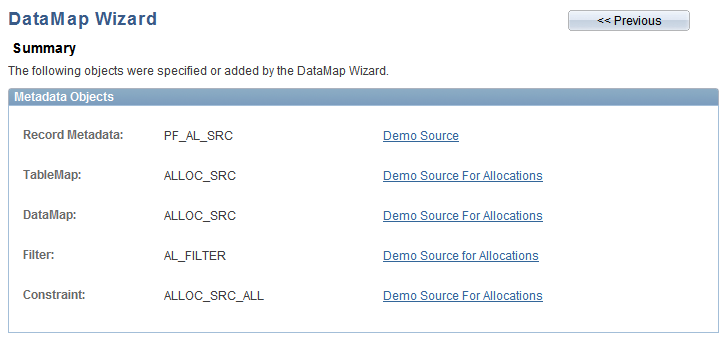
You can click on the links to the right of each metadata object to return to their main criteria pages and make adjustments to the rules.
You can also click Previous to return to the previous DataMap Wizard steps.