| Oracle® Enterprise Manager Ops Center Managing and Using Your vServers 12c Release 1 (12.1.1.0.0) Part Number E27358-01 |
|
| PDF · Mobi · ePub |
| Oracle® Enterprise Manager Ops Center Managing and Using Your vServers 12c Release 1 (12.1.1.0.0) Part Number E27358-01 |
|
| PDF · Mobi · ePub |
Managing and Using Your vServers
12c Release 1 (12.1.1.0.0)
E27358-01
June 2012
This guide provides an end-to-end example for how to use Oracle Enterprise Manager Ops Center.
In Oracle Enterprise Manager Ops Center, the resources allocated to a Virtual Datacenter (vDC) are entitled to accounts. Accounts are containers for virtual resources and provide the required capabilities to manage the allocated resources.
An account entitles designated cloud users the right to use computing, network, and storage resources of a vDC to create virtual servers, known as vServers, and host or access applications.
Oracle Enterprise Manager Ops Center also provides a set of actions to manage and use your vServers. As a cloud user, you can execute these actions on vServers created in any vDC account you can access.
This example describes the options available to cloud users to manage vServers created in an account for a vDC using Oracle VM Server for x86 as the virtualization technology. Some of these actions might not be available for a vServer created in an account that is using a different virtualization technology.
In this example, the following actions are covered:
See Related Articles and Resources for links to related information and articles.
You will need the following to manage and use vServers:
A user in Oracle Enterprise Manager Ops Center with the cloud user role assigned.
Access to an account in a vDC using Oracle VM Server for x86 as virtualization technology and with at least 2GB of storage.
A vServer created in the account.
A volume is additional storage that you can attach to vServers. You can attach volumes during vServer creation or when an existing vServer is stopped or running.
You can create empty volumes or import external volumes. A volume attached to a vServer appears as a normal disk attached in the next available slot of the vServer, for example /dev/xvdb or /dev/hdb.
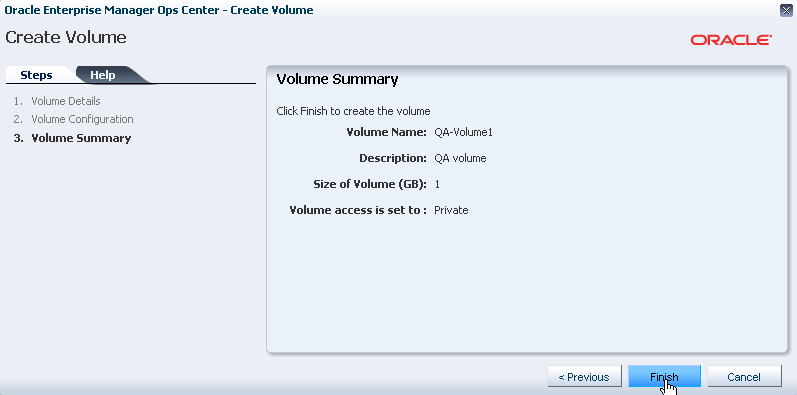
In this example, a 1 GB empty volume is created and attached to a running vServer.
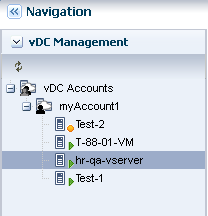
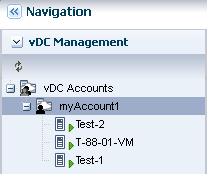
Expand vDC Management in the Navigation pane.
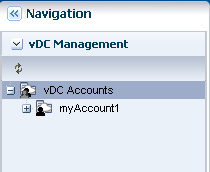
Select the account listed under vDC Accounts.
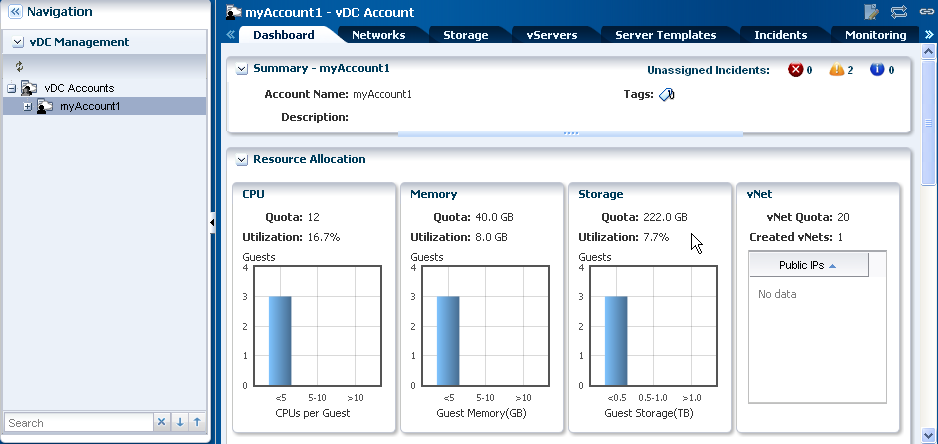
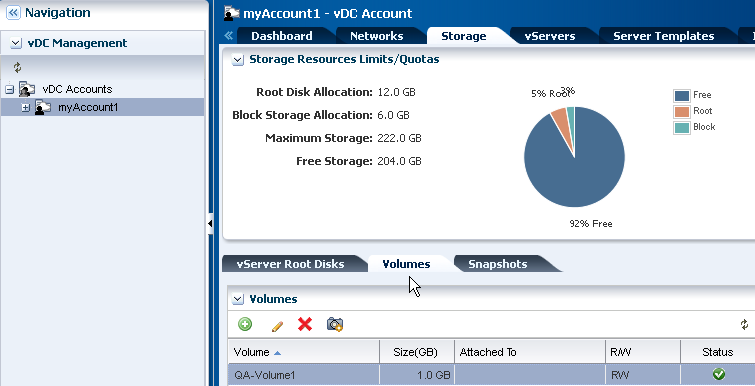
The account must have more than 1 GB of free storage to continue. You can verify the storage utilization in the Dashboard or Storage tab of the account.
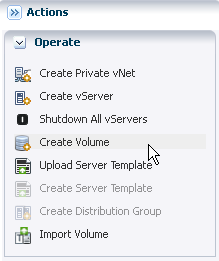
Click Create Volume in the Actions pane.
Enter a name and description for the volume, then click Next.

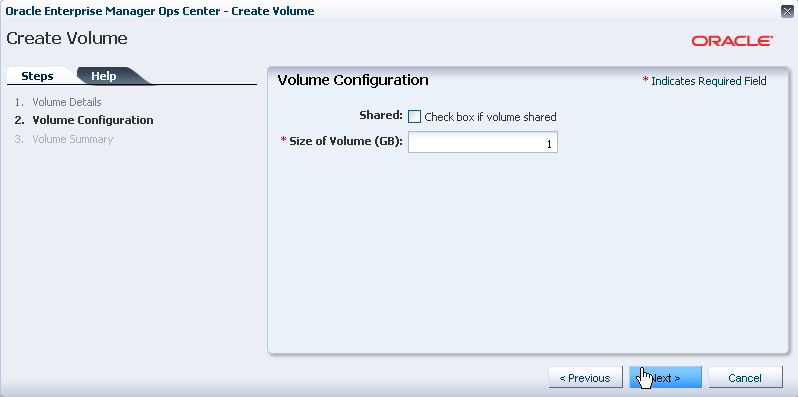
Enter the size of the volume, then click Next.
You can select the shared option to share the volume with other accounts in the vDC. In this example, leave the shared option unchecked.
Review the volume information and click Finish to create the volume.
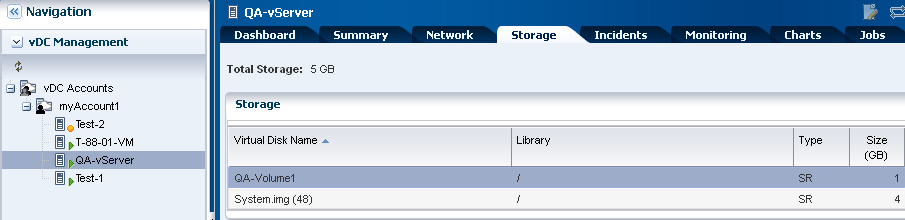
After the job completes, the volume is listed in the Volumes sub tab of the Storage tab of the account.
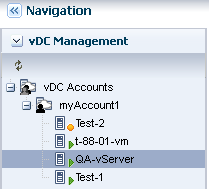
Expand the account in the Navigation pane and select the vServer.
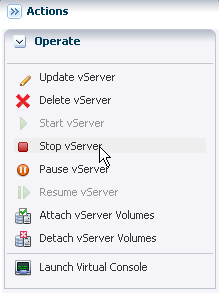
Click Attach vServer Volumes in the Actions pane.

Select the volume to attach from the Available Volumes list and click the right arrow to move the volume to the Attached Volumes list. Click Next.
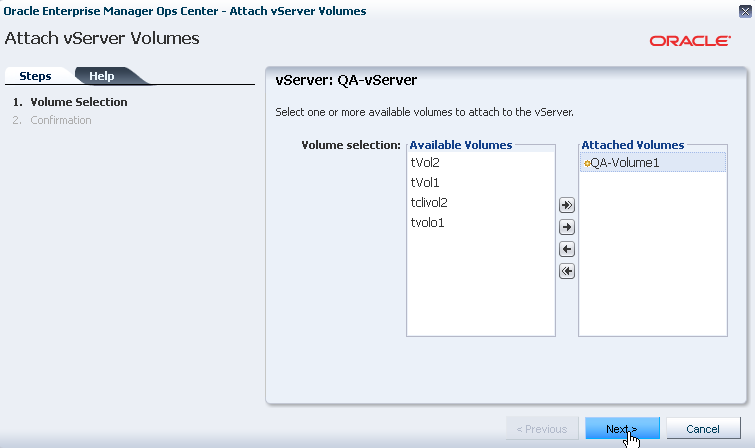
Verify the volume information and click Finish to attach the volume.
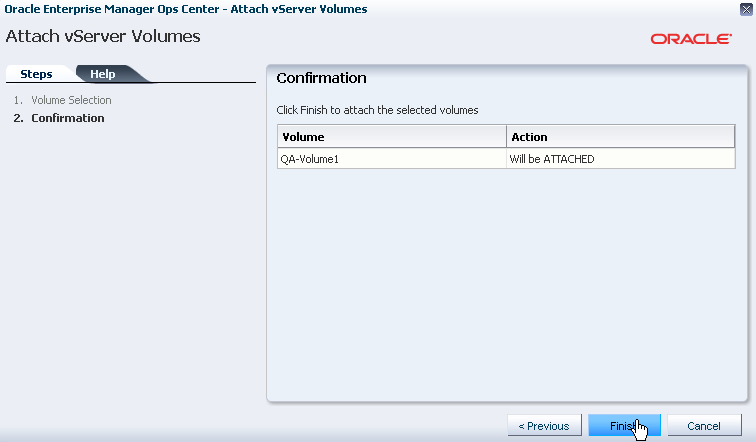
After the job completes, the volume is attached to the vServer as a disk. To use the disk, you can format a file system and mount the entire volume, or you can create partitions with fdisk and then mount the partitions.
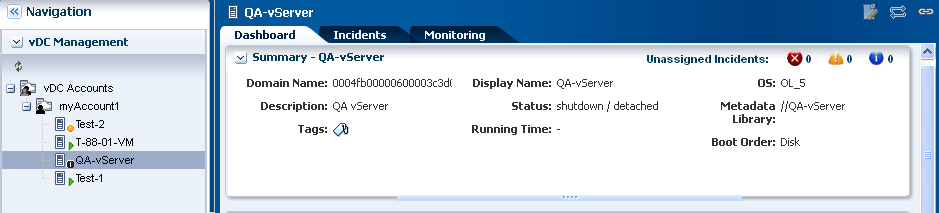
You can stop vServers in running status. You can stop a vServer for maintenance or to realease resources to the account.
When stopping a vServer, the status of the vServer is changed from running to shutdown/detached. Then you can start the stopped vServer and the status is changed back to running.
This example walks you through the process of stopping and starting a vServer.
Select the vServer in the Navigation pane.
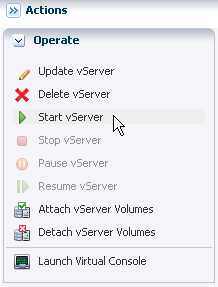
Click Stop vServer in the Actions pane.
Verify the selected vServer and click Stop.
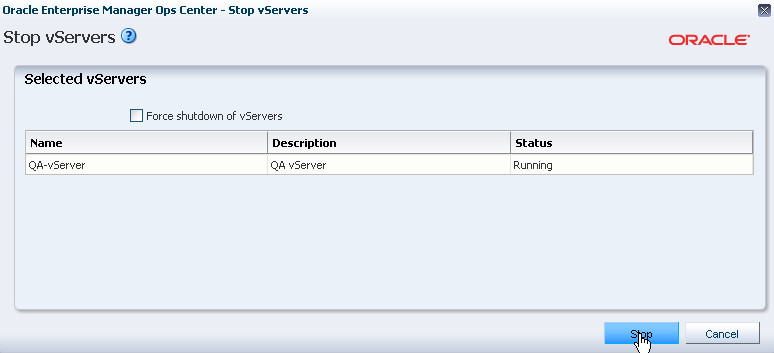
Verify the status of the vServer is changed to shutdown/detached after the job completes.
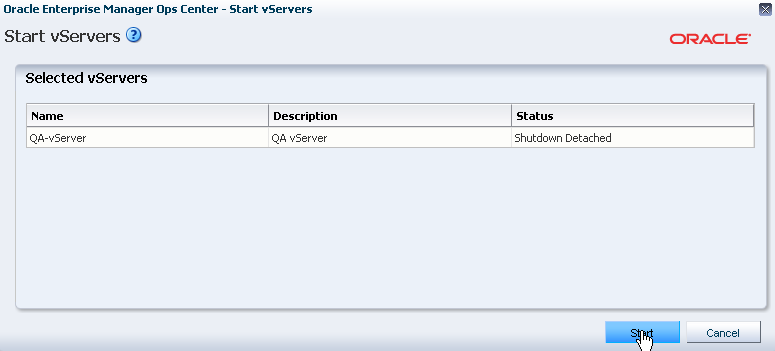
Click Start vServer to move the vServer to a running status.
Verify the selected vServer and click Start.
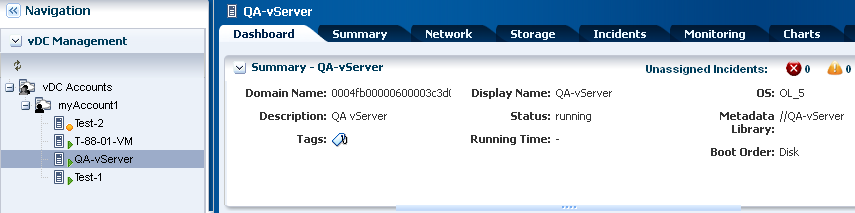
Verify the status of the vServer is changed back to running after the job completes.
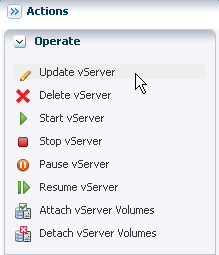
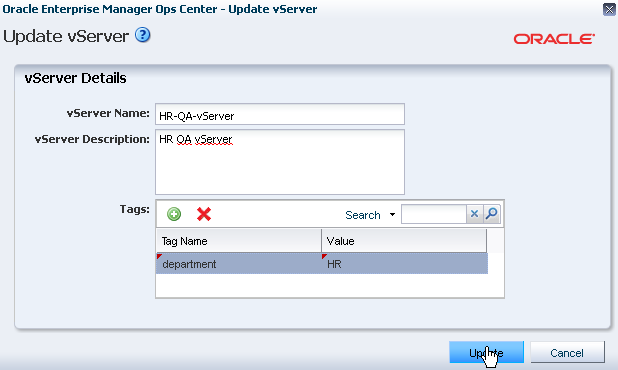
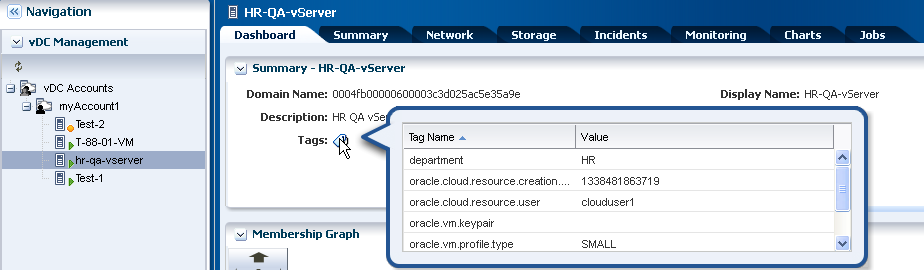
When updating a vServer, you can change the name and description of the vServer. You can also add, delete, or update tags for the vServer.
In this example, the name and description of a running vServer is changed. A tag is also added to associate the department using this vServer. This tag is used for identification and classification of the vServer.
Select the vServer in the Navigation pane.
Click Update vServer in the Actions pane.
Enter the new name and description of the vServer.
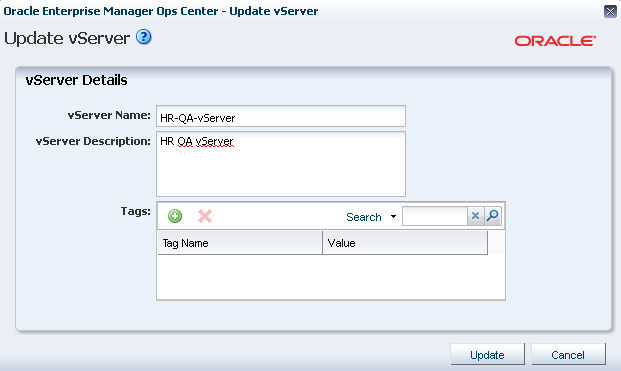
Click the Add icon in the Tags section to add a tag to the vServer.
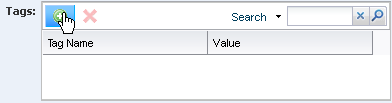
Enter the name and value of the tag. Click Update.
After the job completes, the new information is visible in the Dashboard tab of the vServer in the center pane.
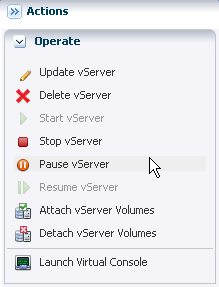
You can pause a vServer in running status. When a vServer is paused, its resources are not released, but the vServer is placed in a suspended status.
You can resume a suspended vServer to continue using the vServer.
This examples pauses a running vServer and then resumes the suspended vServer.
Select the vServer in the Navigation pane.
Click Pause vServer in the Actions pane.
Verify the selected vServer and click Suspend.
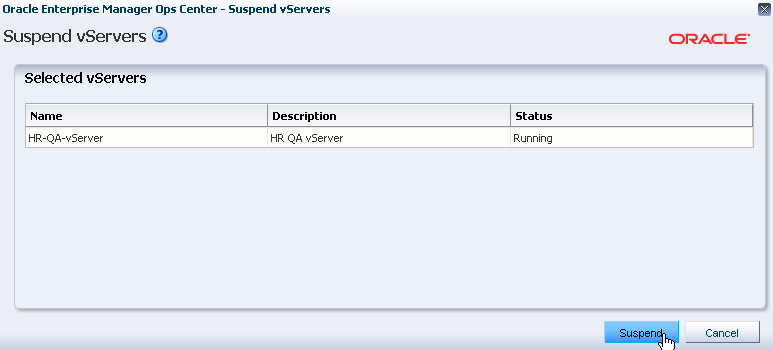
Verify the status of the vServer is changed to suspended after the job completes.
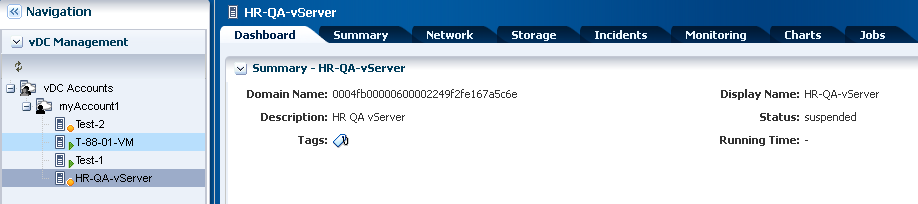
Click Resume vServer to move the vServer to a running status.
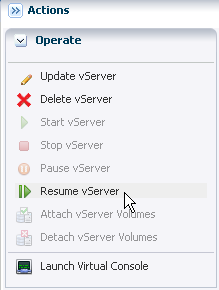
Verify the vServer selected is correct. Click Resume.
Verify the status of the vServer is changed to running after the job completes.
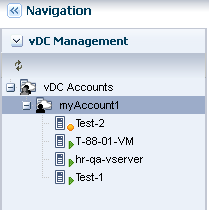
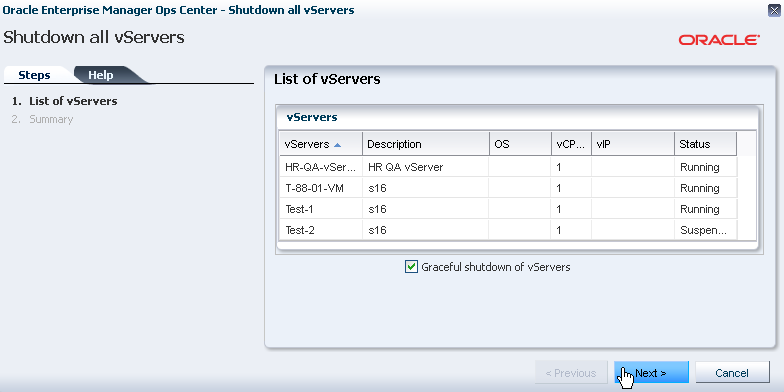
You can shut down all the vServers of an account. The Shutdown All vServer action enables you to shut down all running and suspended vServers.
In this example, all vServers of the account are shut down. This account has three vServers in running status and another vServer in suspended status.
Select an account listed under vDC Accounts in the Navigation pane.
Click Shutdown All vServers in the Actions pane.
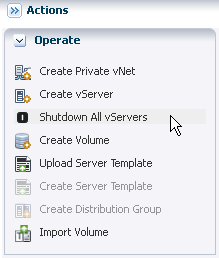
Verify the list of vServers, then click Next.
An option to shut down all vServers gracefully is checked by default, leave this option checked for this example.
Confirm the action and click Finish to shut down all vServers.
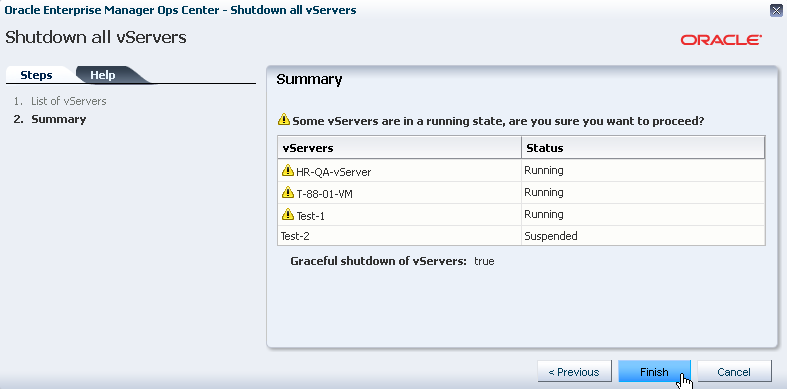
Verify the status of all vServer is changed to shutdown in the Navigation pane.
Select the vServers tab of the account.

Select all the vServers listed in the vServers section.
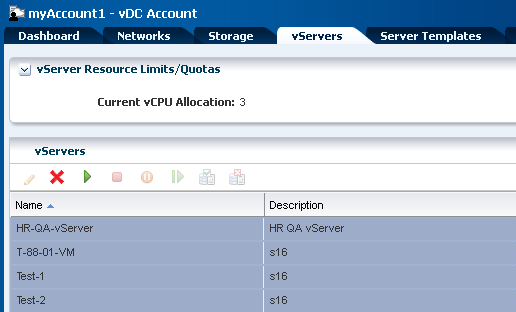
Click Start vServer.
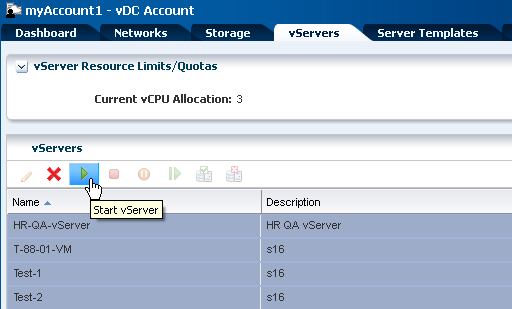
Verify the selected vServers. Click Start to confirm.
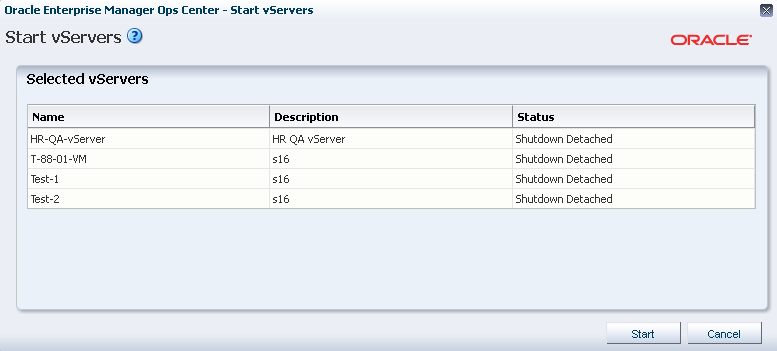
After the job completes, all vServers are moved to a running status.

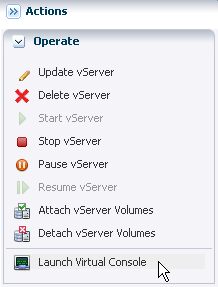
You can use the Launch Virtual Console to connect to a vServer when the vServer is in running state.
In this example, you open the console to access a running vServer that was created from a virtual machine template using an Oracle Linux operating system.
Select the vServer in the Navigation pane.
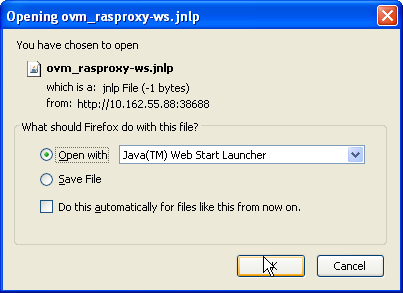
Click Launch Virtual Console in the Actions pane.
Click OK in the window requesting to open a Java proxy file.
Depending on the internet browser you are using, you might be requested to save the file instead of just open it.
Enter the operating system credentials in the console to access and interact with the vServer.
In this example, you can use the default username and password that comes with the operating system image of the template used to create the vServer.

When you delete a vServer, all storage, vcpu, memory, and network resources used by the vServer are released into the account. A vServer can be deleted at any moment regardless of its status.
In this example, you delete a running vServer from an account.
Select the vServer in the Navigation pane.
Click Delete vServer in the Actions pane.

Verify the selected vServer is correct. Click Delete.
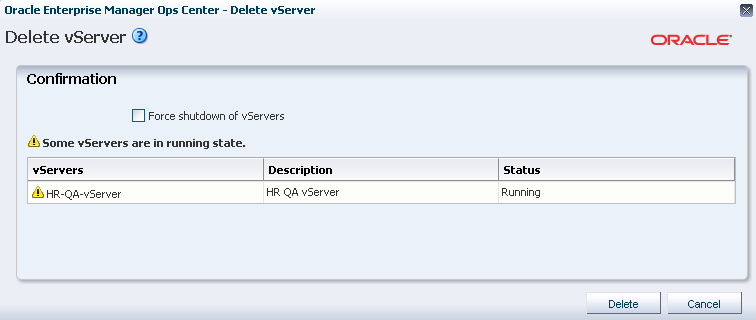
After the job completes, the vServer is deleted. The vServer is no longer visible in the Navigation pane.
Learn more about the Cloud API and CLI that is available for a cloud user to manage the resources efficiently in an account. Refer to Oracle Enterprise Manager Ops Center Cloud Infrastructure API and CLI Reference Guide for more information.
Refer to the following documentation resources for more information:
Virtual Datacenters chapter of the Oracle Enterprise Manager Ops Center Features Guide
Oracle Enterprise Manager Ops Center Cloud Infrastructure API and CLI Reference Guide
For information about Oracle's commitment to accessibility, visit the Oracle Accessibility Program website at http://www.oracle.com/pls/topic/lookup?ctx=acc&id=docacc.
Oracle customers have access to electronic support through My Oracle Support. For information, visit http://www.oracle.com/pls/topic/lookup?ctx=acc&id=info or visit http://www.oracle.com/pls/topic/lookup?ctx=acc&id=trs if you are hearing impaired.
Oracle Enterprise Manager Ops Center Managing and Using Your vServers, 12c Release 1 (12.1.1.0.0)
E27358-01
Copyright © 2007, 2012, Oracle and/or its affiliates. All rights reserved.
This software and related documentation are provided under a license agreement containing restrictions on use and disclosure and are protected by intellectual property laws. Except as expressly permitted in your license agreement or allowed by law, you may not use, copy, reproduce, translate, broadcast, modify, license, transmit, distribute, exhibit, perform, publish, or display any part, in any form, or by any means. Reverse engineering, disassembly, or decompilation of this software, unless required by law for interoperability, is prohibited.
The information contained herein is subject to change without notice and is not warranted to be error-free. If you find any errors, please report them to us in writing.
If this is software or related documentation that is delivered to the U.S. Government or anyone licensing it on behalf of the U.S. Government, the following notice is applicable:
U.S. GOVERNMENT END USERS: Oracle programs, including any operating system, integrated software, any programs installed on the hardware, and/or documentation, delivered to U.S. Government end users are "commercial computer software" pursuant to the applicable Federal Acquisition Regulation and agency-specific supplemental regulations. As such, use, duplication, disclosure, modification, and adaptation of the programs, including any operating system, integrated software, any programs installed on the hardware, and/or documentation, shall be subject to license terms and license restrictions applicable to the programs. No other rights are granted to the U.S. Government.
This software or hardware is developed for general use in a variety of information management applications. It is not developed or intended for use in any inherently dangerous applications, including applications that may create a risk of personal injury. If you use this software or hardware in dangerous applications, then you shall be responsible to take all appropriate fail-safe, backup, redundancy, and other measures to ensure its safe use. Oracle Corporation and its affiliates disclaim any liability for any damages caused by use of this software or hardware in dangerous applications.
Oracle and Java are registered trademarks of Oracle and/or its affiliates. Other names may be trademarks of their respective owners.
Intel and Intel Xeon are trademarks or registered trademarks of Intel Corporation. All SPARC trademarks are used under license and are trademarks or registered trademarks of SPARC International, Inc. AMD, Opteron, the AMD logo, and the AMD Opteron logo are trademarks or registered trademarks of Advanced Micro Devices. UNIX is a registered trademark of The Open Group.
This software or hardware and documentation may provide access to or information on content, products, and services from third parties. Oracle Corporation and its affiliates are not responsible for and expressly disclaim all warranties of any kind with respect to third-party content, products, and services. Oracle Corporation and its affiliates will not be responsible for any loss, costs, or damages incurred due to your access to or use of third-party content, products, or services.
Copyright © 2007, 2012, Oracle and/or its affiliates. All rights reserved. Legal Notices |
|