7 Reference
This section contains important supplementary information about configuring and using Oracle Enterprise Single Sign-On Suite components.
7.1 General Suite Information
This section contains information applicable to all products in the Oracle Enterprise Single Sign-On Suite.
Note:
Keep in mind the distinction between registry paths for 32-bit and 64-bit operating systems.The path for a 32-bit OS registry key begins with "HKEY_LOCAL_MACHINE\SOFTWARE\…".
The equivalent registry key path for a 64-bit OS begins with "HKEY_LOCAL_MACHINE\SOFTWARE\Wow6432Node\…".
7.1.1 Installing an AD LDS (ADAM) Instance
To install AD LDS (ADAM):
-
Launch
ADAMSetup.exe. -
Select A unique instance and click Next.
-
Enter your instance name and click Next.
-
Specify port numbers of 10000 and 10001 (10,000 range, for easy recall) and click Next.
-
Specify the root
DN(for example,OU=SSPR, DC=Oracle,DC=Com) and click Next. -
Specify an easy-to-find base location (for example,
%RootDrive%\ADAM\Instance) and click Next. -
Specify the run privileges and click Next.
-
Specify the administrative permissions and click Next.
-
Select Do not import LDIF files for this instance of AD LDS (ADAM) and click Next.
-
Click Next as requested to proceed.
-
Click Finish.
7.1.2 Obtaining a Certificate for SSL Connectivity
Before configuring applications for SSL connectivity, you must obtain an X.509 Certificate from a trusted certificate authority (CA). This trusted CA must be installed in the list of trusted Root CAs. The certificate must be valid for the current date and its subject must exactly match the network name (either its host name or fully-qualified URL containing a host name and domain suffix) that the various application instances will use when connecting to the corresponding server instance.
Refer to the following articles from the Microsoft Web site for information on installing certificates and setting up SSL:
-
"How to: Obtain an X.509 Certificate"
http://msdn2.microsoft.com/en-us/library/ms819929.aspx -
"How to: Set Up SSL on a Web Server"
http://msdn2.microsoft.com/en-us/library/aa302411.aspx
If you use Microsoft Certificate Services to obtain the X.509 certificate, choose a Server Authentication Certificate. Also, enable the Mark keys as exportable and Use local machine store options under the Key Options section.
7.1.2.1 Considerations When Deciding to Use SSL
Logon Manager supports the use of Secure Sockets Layer (SSL) and enables it by default. When deciding whether to use SSL, consider the following:
-
Logon Manager encrypts all credentials locally through the user's configured authentication method, and transmits and stores those credentials in encrypted form.
-
For repositories that use pass-through authentication (for instance, Active Directory or AD LDS (ADAM)), Logon Manager secures all transactions with the central repository (including authentication to the repository); no credentials of any type are transmitted in clear text.
-
When using LDAP repositories or pass-through repositories in conjunction with Kiosk Manager, the repository authentication will be a clear-text LDAP transaction if SSL is not enabled. If this authentication must be secure, enable SSL for transactions between the client and the repository.
For complete instructions on setting up SSL certificates, refer to the following documentation:
-
Microsoft Active Directory Server: Microsoft MSDN
-
Oracle Directory Server Enterprise Edition: Oracle Directory Server Enterprise Edition Administrator's Guide
-
Novell eDirectory: eDirectory 8.5 Administration Guide
SSL is configured with the registry keys UseSSL and SSLFallback.
7.2 Logon Manager
This section contains information applicable specifically to Logon Manager.
7.2.1 Understanding the Application Configuration Files
Logon Manager stores its application logon instructions in a file named aelist.ini that typically resides in the each user's %AppData%\Passlogix directory (C:\Documents and Settings\username\Application Data\Passlogix). The Agent creates aelist.ini by merging two component files:
-
entlist.ini, which you create using the Administrative Console to provide your organization with customized logons for Windows, Web site, and mainframe/host applications. The Agent's synchronizer extension placesentlist.iniin%AppData%\Passlogix. -
applist.ini, which is included in the Agent installation package and contains predefined logons for network and web pop-up logon dialogs and for many online service providers. Theapplist.inifile resides in the Agent's installation directory.Note:
Pre-configured logons for many Windows and Web applications are provided in the Administrative Console templates.All Administrative Console configuration files (including
entlist.iniandftulist.ini) can only be created and edited using the Administrative Console.
7.2.1.1 How the Agent Uses entlist.ini
The Agent merges entlist.ini with applist.ini to create aelist.ini in the %AppData%\Passlogix directory. The Agent overwrites aelist.ini periodically, including at Agent startup. The Agent then uses aelist.ini to detect known applications.
If using a synchronizer extension (for example, Directory Server or File System), a remote object overrides any local entlist.ini file, and is then merged with applist.ini.
If there is no remote object or local entlist.ini file, the Agent will utilize applist.ini without creating the aelist.ini file.
Note:
You can modifyentlist.ini or the SSOentlist object while the Agent is running. To force the Agent to re-merge to create a new aelist.ini, select Refresh in Logon Manager.See the following topics for more information about creating and distributing application logons:
-
Creating logons from templates:
-
Distributing logons:
See Chapter 2, "Global Agent Settings in Depth" for detailed descriptions of Global Agent Setting options.
7.2.1.2 How the Agent Uses aelist.ini
The file that results from the merger of aelist.ini contains all the information necessary to identify and respond to logon and password change events for all configured applications. This information comprises:
-
Application-type settings such as Error Loop settings; for example, how many times the Agent will retry a logon within the specified time period.
-
Application-specific configuration information; for example, application executable name or Web site URL, password change behavior, password policies, error loop settings, and data file extension.
-
Scenario-specific configuration information for the logon and password change scenarios; for example, window dialog title strings, form names, and locations for credentials.
-
Dialog-specific matching settings; for example, that a string or control is or is not present.
-
Other settings; for example, name of a third or fourth field.
-
The merged file,
aelist.ini, has a hierarchical structure, containing all the information necessary for the Agent to uniquely identify and respond to logon and password change events for each application to configure. It organizes logons in sections and subsections as in the following table.
| Structure | Reference |
|---|---|
[*Other Apps]
|
This section exemplifies two administrator-defined Windows applications defined later in the file. See Chapter 2, "Adding Windows Applications" for details. |
[*Mainframe]
|
This section exemplifies two host/mainframe applications defined later in the file. See Chapter 2, "Adding Host/Mainframe Applications" for details |
[*Shared Groups]
|
This section exemplifies two groups used for credential sharing. See Chapter 2, "Working with Credential Sharing Groups" for details. |
[*PasswordPolicies]
|
This section enables Password Policies. See Chapter 2, "Setting Password Policies" for details. |
The application configurations in entlist.ini allow the Agent to automatically recognize and respond to logon and password-change requests from applications specific to your organization.
When present as a local file or downloaded from a remote object, the Agent downloads an entlist object (if available) to an entlist.ini file, and combines your downloaded or local entlist.ini with those Oracle supplies in applist.ini to create aelist.ini, the complete list of predefined applications available to users. (If entlist.ini is not present, the Agent utilizes applist.ini.)
Note:
Because Oracle provides updates toapplist.ini, it is strongly recommended that you make no changes to this file. Future Logon Manager releases may overwrite your changes, and Oracle cannot guarantee that future releases will support changes made to applist.ini.7.2.2 Best Practices for Deploying the Agent in a Citrix Environment
Deploying Logon Manager on Citrix can be performed using several strategies, with dependencies on how the Citrix farm or farms are deployed, and how access is delivered to end-users. These methods do not change between using a Citrix ICA client on the desktop and using the Citrix Web portal to deliver applications, except where otherwise specified.
Fundamentally, three options exist:
-
Deploying Logon Manager Per User. Enables you to deploy Logon Manager to all servers and all applications, yet still limit users who will utilize it on those servers and applications.
-
Deploying Logon Manager Per Application. Enables you to deploy Logon Manager to all servers and users, but only on a per-application basis.
-
Deploying Logon Manager Per Server. Enables you to deploy Logon Manager to individual servers.
This section covers these options in depth.
7.2.2.1 Installation
Regardless of the ultimate configuration, the initial Agent installation process is the same for all deployment options.
Before starting, be certain that you have properly configured your Global Agent Settings, have a solid understanding of Logon Manager, and decided which extensions you need to install with the Agent. Generally these will be the same extensions and very similar GAS settings to the user workstations in your environment. For more detailed instructions on installing Logon Manager on Citrix, see Chapter 2, "Configuring the Agent in a Citrix Environment."
To install Logon Manager on Citrix MetaFrame:
-
Log on to the Terminal server as an administrator and close all applications.
-
Click Start and then click Run. The Run Dialog window appears.
-
Type
cmdand press Enter. The Command Prompt window appears. -
Type
change user/installand press Enter. -
Install Logon Manager with the appropriate installation options for your environment.
-
At the command prompt, type
change user/executewhen installation is complete.
7.2.2.2 Deploying Logon Manager Per User
Deploying Logon Manager per user allows you to control access to those users/groups that should and should not be granted access to use Logon Manager.
The steps to deploy Logon Manager per user are as follows:
-
Create a group on your domain for Logon Manager Users. Include all users in your environment who will use Logon Manager for Citrix published applications.
-
On each Citrix server, edit the Security properties of the
ssoshell.exefile located in theC:\Program Files\Passlogix\v-GO SSOdirectory. -
Add the previously-created SSO Users group to the ACL of the directory. Be sure to give this group the rights "Read" and "Read & Execute" to this file. Remove the Users, Domain Users or any other group that may have read access to this file. To accomplish this, you may have to uncheck inherit permissions from parent.
This method of permission settings will still allow any administrators full access to this file, and thus the ability to use Logon Manager. There are many other possible combinations or ways to set these permissions. The ultimate goal is to give those users needing access to Logon Manager the permissions to read/execute
ssoshell.exeand keep all other users from being able to access/read it at all.Using the per-user deployment option in Citrix means you can leave all applications published to all users and do not have to use
ssolauncher.exeto configure each of your Published Applications. -
If you do not wish to invoke Logon Manager immediately, delete the
ssolauncher.exevalue from theHKEY_LOCAL_MACHINE\SOFTWARE\Microsoft \Windows NT\CurrentVersion\Winlogon\AppSetupkeyin the Windows registry.Without this key, Logon Manager will not respond to any applications. To elicit a response, you would have to either replace this key or modify your published applications commands to include
ssolauncher.exe.
7.2.2.3 Deploying Logon Manager Per Application
Deploying Logon Manager per application allows you to enable Logon Manager on an application by application basis.
The steps to deploy Logon Manager per application are as follows:
-
Install Logon Manager on every server that will host a single sign-on-enabled application.
-
Prevent Logon Manager from launching automatically by deleting the
ssolauncher.exevalue fromHKEY_LOCAL_MACHINE\SOFTWARE \Microsoft\Windows NT\CurrentVersion\Winlogon\AppSetupand deleting thessoshell.exevalue from theHKEY_LOCAL_MACHINE\SOFTWARE \Microsoft\Windows NT\CurrentVersion\Winlogon\UserInitkey. For specific instructions on doing this, use the keyword "Citrix" in the SSO Console help files. -
Modify the published applications that you wish to use Logon Manager with to include a command-line wrapper that calls
SSOLauncher.exe, which subsequently calls the original command line. For specific instructions, see Chapter 2, "Configuring the Agent in a Citrix Environment."
7.2.2.4 Deploying Logon Manager Per Server
Deploying Logon Manager per Citrix server allows you to enable the Agent on a server-by-server basis. This is the easiest of the three methods to fully deploy.
-
Install Logon Manager on Citrix Servers that you wish to enable for single sign-on.
-
Direct Logon Manager users to the single sign-on-enabled servers.
There is no need to modify any published applications, set any permissions, or remove any registry keys. Logon Manager automatically launches for all users on this server. This method works well if users access remote desktops via the Citrix server.
7.2.2.5 Global Agent Settings Specific to Citrix Servers
For the most part and in most cases, the Citrix servers will use Global Agent Settings that are extremely similar to those deployed to all of your other Logon Manager client machines. In a typical deployment, you would fully configure and test a client workstation prior to beginning Citrix. After you configure and validate your Global Agent Settings configuration, import these into the Administrative Console and rename them for use in your Citrix Environment.
You should configure the following Global Agent Settings for Citrix servers:
-
End-User\Experience\Advanced\Store user data on disk in encrypted format: Set to "Do not store data in user disk file."
-
Synchronization\Delete local cache: Set to "Delete."
-
Eliminate drive letter hard-coding in Global Agent Settings: these are in the Synchronizer and Event Log settings. Simply change the "
C:"to match whatever drive letter where you have installed Logon Manager on your Citrix server. If different Citrix servers use different drive letters, you would have to specify different settings for each server. This is crucial because Logon Manager uses this drive letter to locate components.
7.2.2.6 Publishing Applications
After completing the preceding procedures, Logon Manager is ready for use on your Citrix servers. You can begin enabling some or all of your published applications. To enable Logon Manager for an application, you need to modify its command line using ssolauncher.exe. For specific instructions, see Chapter 2, "Configuring the Agent in a Citrix Environment."
7.2.3 Logon Manager Application Compatibility Considerations
While Oracle officially tests and supports only the applications for which we provide templates, we have an exceptionally high success rate enabling the vast majority of business and productivity applications for Windows, the Web, Java applications and mainframe/AS400 emulators. Our support team will assist you in configuring any application template unless or until we determine that the application as it exists is incompatible with Logon Manager.
The following table identifies characteristics of applications for which Logon Manager is known to have support issues:
| High Risk | Medium Risk |
|---|---|
| Application characteristics that generally hinder successful application template configuration | Application characteristics that often result in incomplete SSO functionality or require an action on the part of the end-user to complete the sign-on or password change |
|
|
7.2.4 Configuring Host Emulators
Logon Manager provides single sign-on functionality for the following host/terminal emulators using built-in HLLAPI (high-level language application programming interface) support. The topics listed here outline how to enable HLLAPI support in each emulator.
Note:
For emulators that do not implement HLLAPI support, you can configure a host/mainframe application as a Windows application (to detect the form by its window title) and using SendKeys (to supply user credentials). See Section 2.12.3, "Adding Windows Applications" for more information.7.2.4.1 Attachmate EXTRA!/ myExtra!
Note:
For a complete list of supported versions, see Oracle support.To set up each session of Attachmate EXTRA! to work with Logon Manager:
In the emulator:
-
Open the session.
-
Select Global Preferences from the Options menu.
-
Select Advanced, select the Short name (for example, A), select Browse, select the session document, and click OK.
Note:
This setting needs to be saved with each session configuration file.Background processes sometimes remain running after a mainframe or host session has ended. This may disrupt the Auto-Logon process and prevent the session from restarting.
7.2.4.2 BlueZone Web-to-Host Emulator
Note:
For a complete list of supported versions, see Oracle support.To install and configure BlueZone Web-to-Host emulator:
-
Launch the BlueZone Web-to-Host setup.
-
In the Setup Type section, select Install BlueZone Web-to-Host and click Next.
-
Read the end-user license agreement carefully. If you agree to the terms, select the button next to Yes, I agree with the terms of this software license, and click Next.
-
Select a location to install the software. The installer defaults to your
C:drive's Program Files directory. -
Direct the installer to the location of the Seagull Activation File (SAF), or leave it blank if you do not have an SAF yet.
-
Select whether the installer should create a program group to use, and whether it should create a desktop shortcut for the BlueZone Web-to-Host Wizard, and click Next.
-
In the Sites dialog, select a language for the site from the dropdown menu.
-
Do one of the following:
-
Click Create and enter a path and folder name.
-
Click Import and navigate to the site you want to import.
-
Click Copy and navigate to the site you want to copy.
-
Click Upgrade and navigate to the site you want to upgrade.
-
If you want to delete an existing site, select it and click Delete.
-
-
In the Launch Folders dialog, select an existing launch folder, or click Create to create a new one. Click Next.
-
In the New BlueZone Launch Folder dialog, enter the folder name, and select from the folder options whether to distribute as a standard web-to-host or as a served desktop. Click OK.
-
When you return to the Launch Folders dialog, which now displays your new launch folder, click Next.
-
In the Sessions dialog, click Create.
-
In the New BlueZone Session dialog, select Mainframe Display from the dropdown menu and click OK.
-
Enter a name for the session and specify whether to use an existing profile. Select an existing profile if appropriate. Select whether to allow local saves. Click OK.
-
In the Define New Connection dialog, enter your connection information and click OK.
-
Review the information in the Session Properties window. Edit any information that you want to change. Click OK when you are done.
-
Select Session in the BlueZone Mainframe Display and click Connect.
7.2.4.3 BOSaNOVA
Note:
For a complete list of supported versions, see Oracle support.Logon Manager supports BOSaNOVA emulator. No steps are necessary to set up BOSaNOVA to work with Logon Manager.
Note:
There is an open issue with the BOSaNOVA emulator when used with Logon Manager. When closing the emulation, the following warning message appears: "There are active applications connected to the emulation via the HLLAPI/DDE interface. Closing the emulation now may cause unpredictable results. Are you sure?"If you click Yes, Logon Manager stops responding to the BOSaNOVA emulator and you must restart it. Note that the restart may take a few additional seconds. Another workaround for this issue is to shut down Logon Manager before closing the emulation, close the emulation, and then restart Logon Manager.
7.2.4.4 Ericom PowerTerm
Note:
For a complete list of supported versions, see Oracle support.To set up Ericom PowerTerm to work with Logon Manager:
In the emulator:
-
Select Terminal from the Setup menu.
-
Select the General tab.
-
Under HLLAPI Names, set Short to a unique value.
-
Click OK.
In order to enable Logon Manager support for PowerTerm InterConnect, Plus, and Lite editions, the complete and exact path to the emulator must be specified in the Agent's host/mainframe-configuration file, MfrmList.ini. The default path in the mainframe configuration is C:\Program Files\Ericom Software\PowerTerm.
If one of these editions of the PowerTerm emulator is installed in any other directory or on any other drive, you must modify this default path in MfrmList.ini. This file can only be edited using the Administrative Console.
-
On the Tools menu, point to Modify Configuration, then click MfrmList.
-
In the INI editor, select Ericom PowerTerm Lite/Plus/InterConnect from the Section dropdown list.
-
For ValueName= edit the path to the emulator as needed.
-
Click Save (click OK to restart the Agent if prompted), then Close.
7.2.4.5 G&R Glink
Note:
For a complete list of supported versions, see Oracle support.To set up G&R Glink to work with Logon Manager:
Configure short names in the glHLLAPI.ini file, which is found in the GLWin\WHLLAPI directory within the G&R Glink installation path. This file must be copied to the user's %WinDir% directory to take effect. Oracle recommends that the default values be left as they are, except for those values that refer to the short names, which take the form of:
A]Name=HLLAPI long nameConfig=config file name
where A represents the short name.
7.2.4.6 Hummingbird Host Explorer
Note:
For a complete list of supported versions, see Oracle support.To set up Hummingbird Host Explorer to work with Logon Manager:
In the emulator:
-
Select API Settings from the Options menu.
-
Under HLLAPI Options, select Update screen after PS update.
-
Under EHLLAPI Compatibility, select Attachmate.
-
Click OK.
7.2.4.7 IBM Client Access
Note:
For a complete list of supported versions, see Oracle support.Logon Manager supports IBM Client Access. No steps are necessary to set up IBM Client Access to work with Logon Manager.
7.2.4.8 IBM Client Access Express
Note:
For a complete list of supported versions, see Oracle support.Logon Manager supports IBM Client Access Express. No steps are necessary to set up IBM Client Access Express to work with Logon Manager.
7.2.4.9 IBM Host On-Demand
Note:
For a complete list of supported versions, see Oracle support.Logon Manager support for IBM Host On-Demand is tested with Microsoft Windows, Microsoft Internet Explorer or Mozilla Firefox, and the updated JVM (Java Virtual Machine). If Microsoft Internet Explorer is installed, the JVM should not have to be updated.
One issue with these methods is that clients might not be able to save configured sessions, and entering the auto-start name each time a session is used is quite tedious. Alternatively, administrators can replicate the existing sessions that are available to the client, and HLLAPI-enable these sessions as explained below. Clients can then be offered both standard and HLLAPI-enabled sessions.
To set up IBM Host On-Demand to work with Logon Manager:
In Microsoft Internet Explorer or Mozilla Firefox:
-
Launch the browser.
-
Go to IBM FixCentral and download the Host On-Demand EHLLAPI Bridge Download for the particular version of IBM Host On-Demand.
-
Unzip the downloaded file to the Logon Manager installation directory.
-
Install
Ehllapibridge.exe. -
Select Internet Options from the Tools menu.
-
Select the Advanced tab.
-
Under Microsoft VM, select Java console enabled (requires restart).
-
Click Apply, then OK. If necessary, exit the browser.
-
Restart the computer.
In Host On-Demand:
-
Configure each individual session to run the HLLAPI enabler through the Host On-Demand applet.
-
Select Properties from the menu.
-
Select the Advanced tab.
-
Select Applet from the Auto-Start drop-down list box.
-
Enter
com.ibm.eNetwork.hllbridge.HLLAPIEnablerin the Name text box. -
Enter
ENABLE_PCSAPI=YESin the Parameter (Optional) text box. -
Select Yes in the Auto-start HLLAPI Enabler check-box.
-
Alternatively, run this applet after the session starts by selecting Assist, then Run applet.
7.2.4.10 IBM Personal Communications
Note:
For a complete list of supported versions, see Oracle support.To set up IBM Personal Communications to work with Logon Manager:
-
From the Edit menu in the emulator, point to Preferences and select API Settings.
-
Select the DDE/EHLLAPI checkbox.
-
Click OK.
7.2.4.11 Jolly Giant QWS3270 PLUS
Note:
For a complete list of supported versions, see Oracle support.Logon Manager supports Jolly Giant QWS3270 PLUS emulator. No steps are necessary to set up Jolly Giant QWS3270 PLUS to work with Logon Manager.
7.2.4.12 NetManage Rumba
Note:
For a complete list of supported versions, see Oracle support.Setting Up NetManage Rumba in the Emulator
-
Select API from the Options menu.
-
Select the Identification tab.
-
Set the Session Short Name.
-
Click OK.
Note:
NetManage Rumba appears to have an incomplete implementation of HLLAPI. NetManage Rumba connects and sees the Presentation Space (emulator screen), but it does not appear to support connections for more than one session. Logon Manager can only provide single sign-on support to the last session started.7.2.4.13 Net Soft NS/Elite
Note:
For a complete list of supported versions, see Oracle support.Logon Manager supports Net Soft NS/Elite. No steps are necessary to setup NS/Elite to work with Logon Manager.
7.2.4.14 Newhart Systems BLUES 2000
Note:
For a complete list of supported versions, see Oracle support.Logon Manager supports Newhart Systems BLUES 2000 emulator. No steps are necessary to set up Newhart Systems BLUES 2000 to work with Logon Manager.
7.2.4.15 Novell LAN Workplace
Note:
For a complete list of supported versions, see Oracle support.In order to enable Logon Manager support for Novell LAN Workplace Pro, the complete and exact path to the emulator must be specified in the Agent's host/mainframe-configuration file, MfrmList.ini. The default path in the mainframe configuration is c:\Program Files\Novell\LAN Workplace\Terminals\Bin.
If the Novell LAN Workplace emulator is installed in any other directory or on any other drive, you must modify this default path in MfrmList.ini. This file can only be edited using the Administrative Console.
-
On the Tools menu, point to Modify Configuration, then click MfrmList.
-
In the INI editor, select Novell LAN Workplace Pro 5.2 from the Section dropdown list.
-
For ValueName= edit the path to the emulator as needed.
-
Click Save (click OK to restart the Agent if prompted), then Close.
7.2.4.16 PuTTY
Note:
For a complete list of supported versions, see Oracle support.Due to the way PuTTY and support for PuTTY in Logon Manager have been designed, you must keep the following information in mind when creating templates for applications accessed via PuTTY:
Note:
Use PuTTY's Copy All to Clipboard feature when creating a PuTTY-based template.-
PuTTY Treats Fixed-Screen Applications as Scrolling-Screen
Because PuTTY treats all applications as scrolling-screen, you must create scrolling-screen templates even if the application in question is fixed-screen.
-
PuTTY Does Not Support Detection or Setting of Cursor Position
Because PuTTY cannot detect or set the cursor position, you must do the following when creating templates:
-
Fixed-screen applications. Configure the template to manually position the cursor into the target row and column by sending appropriate keyboard characters such as tabs and spaces.
-
Scrolling-screen applications. Configure the template with the assumption that the cursor is always positioned after the last character on the last line of the screen, plus a separating space.
-
-
Screen Updates in PuTTY Are Not Immediate
Because PuTTY does not update its screen display immediately due to host echo (text entered is first sent to the server then returned back to the terminal and displayed), it is necessary to add delays when switching fields and/or submitting the credentials, depending on the latency of the echo. If you need to delay the "Submit" action, you must disable the "Auto Submit" feature.
7.2.4.17 Scanpak Aviva for Desktops
Note:
For a complete list of supported versions, see Oracle support.Logon Manager supports Scanpak Aviva for Desktops (formerly Eicon Aviva). To set up Scanpak Aviva for Desktops to work with Logon Manager:
In the emulator:
-
Select Settings, then Properties from the menu.
-
Select Automation.
-
Ensure the Choose first available short name checkbox is selected.
Note:
Only the session and destination parameters must be configured.7.2.4.18 Seagull BlueZone
Note:
For a complete list of supported versions, see Oracle support.Logon Manager supports Seagull BlueZone. No setup steps are necessary.
7.2.4.19 WRQ Reflection
Note:
For a complete list of supported versions, see Oracle support.To set up WRQ Reflection to work with Logon Manager:
In the emulator:
-
Select Setup, then Terminal from the menu.
-
Set the HLLAPI names for Short and Long. (Short must be unique, Long can be anything the program permits.)
-
Click OK.
7.2.4.20 Zephyr PC to Host
Note:
For a complete list of supported versions, see Oracle support.To set up Passport to work with Logon Manager:
In the emulator:
-
Select Communication, then Setup from the menu.
-
Select HLLAPI. If Automatically Select is checked there are no additional steps necessary. If Manually Specify is checked, you must select either a Short Name or Long Name.
7.2.4.21 Zephyr Web to Host
Note:
For a complete list of supported versions, see Oracle support.Logon Manager supports Passport Web to Host. No steps are necessary to setup Web to Host to work with Logon Manager.
7.2.5 SAP Configuration
Logon Manager supports SAP applications. In order for Logon Manager to work with SAP applications, scripting must be turned on. (Note that in your environment, scripting may be turned off by default.) The following configuration changes must be made to all SAP desktops that will run Logon Manager. If these configuration changes are not made, end users will receive an SAP error unless Logon Manager is shut down.
To set up SAP to work with Logon Manager:
-
Configure the Client.
-
Open the SAP Client and log on (SAPGUI Front End).
-
On the SAP Easy Access screen, open the Options dialog. (Click Alt F12 or select Customizing of local layout from the Standard Toolbar on any SAP screen).
-
Select the Scripting tab.
-
Under User Settings, make sure that Enable Scripting is checked and that Notify when a script attaches to a running GUI is not checked.
-
Click Apply.
-
-
Configure the Server
-
Open the SAP Application Server.
-
Start transaction RZ11.
-
On the Maintain Profile Parameters screen, in the Param. Name, enter
sapgui/user_scriptingand click Display. -
On the Display Profile Parameter Attributes screen, select Change Value from the Application Toolbar.
-
On the Change Parameter Value screen, enter TRUE in the New Value field.
-
Click Save (lower left hand corner).
-
-
Edit the Registry
-
Open the Registry.
-
Drill down to
HKCU\software\SAP\SAPGUI Front\SAP Frontend Server\Security:WarnOnAttach. -
Set the
WarnOnAttachvalue to zero (0). -
Push out this change to all desktops that will use SAP applications with Logon Manager.
-
Note:
The SAP Helper must be present for this process. Run the Logon Manager Agent Installer, select Advanced Setup, expand the Extensions tree and drill down to Logon Manager. Select SAP Helper and choose This Feature will be installed on the local hard drive. Select Next and follow the onscreen instructions to complete the installation.7.2.5.1 Border Values for Web Logon Credential Fields
Values for Feedback Color follow the standard for the border attribute in cascading style sheets (CSS). The table below lists valid colors and their RGB values. See Section 2.17.3.4, "Web Application Response" for the Feedback Color setting in which these values are used.
| Attribute | Possible Values |
|---|---|
| Width |
|
| Style |
|
| Color | A color keyword or RGB value; common examples are listed in the next table. |
| Keyword | RGB Equivalent | Keyword | RGB equivalent |
|---|---|---|---|
| aqua | #00FFFF | navy | #000080 |
| black | #000000 | olive | #808000 |
| blue | #0000FF | purple | #800080 |
| fuchsia | #FF00FF | red | #FF0000 |
| gray | #808080 | silver | #C0C0C0 |
| green | #008000 | teal | #008080 |
| lime | #00FF00 | white | #FFFFFF |
| maroon | #800000 | yellow | #FFFF00 |
7.2.6 Understanding the Logon Manager Secondary Authentication API
The secondary authentication API allows a third party application to programmatically supply a passphrase to the Windows Authenticator v2 (a.k.a. MSAuth) and LDAP Authenticator v2 (LDAPv2) during an authentication session. This eliminates the need for interaction with the user and automates the authentication process.
The API consists of the following functions:
-
SecondaryAuthKey. Allocates the passphrase answer buffer, fills the buffer with the passphrase answer, and returns a pointer to the answer buffer.
-
Free SecondaryAuthKey. Clears the answer buffer once the answer is no longer needed by third party code.
Note:
The custom secondary authentication library must be validated and digitally signed by Oracle; otherwise, it will not be accepted by Logon Manager. For assistance with this process, please contact Oracle Support.7.2.6.1 The SecondaryAuthKey Method
This method is used to obtain the user's passphrase answer (in our example, the user's directory SID) and store it in memory at a specified address for later retrieval.
BOOL SecondaryAuthKey( LPBYTE* pbAnswer, LPDWORD pdwSize ) {
BOOL fRetVal = FALSE;
// check for invalid parametersif ( NULL != pbAnswer ) {
// obtain user's SID - it will be used as passphrase answer CSid sid; CString strSid( sid.Sid() );
// allocate the memory buffer LPBYTE pByte = new BYTE[strSid.GetLength() + 1];
// copy the SID to the buffer ::memcpy( pByte, strSid.GetBuffer(), strSid.GetLength() );
// save the address of the buffer to the passed pointer *pbAnswer = pByte;
// save the size of the buffer to the passed pointerif ( NULL != pdwSize ) {
*pdwSize = strSid.GetLength() + 1;
}
// set successful return code fRetVal = TRUE;
}
return fRetVal;
}
7.2.6.2 The FreeSecondaryAuthKey Method
This method is used to clear the passphrase answer buffer after SecondaryAuthKey has been successfully called.
void FreeSecondaryAuthKey( LPBYTE pbAnswer )
{
// free the memory bufferdelete[] pbAnswer;
}
7.2.6.3 Driver Code for Testing a Custom Secondary Authenticator
Below is example code for a driver code that will allow you to test your custom secondary authenticator.
BOOL CResetDlg::SecondaryAuth( LPCTSTR pszDllPath ) {
BOOL fRetVal = FALSE;
// load SecondaryAuth.dll HMODULE hSecondaryAuth = LoadLibrary( pszDllPath );
If ( NULL != hSecondaryAuth ) {
SECONDARYAUTHKEY pfnSecondaryAuthKey = (SECONDARYAUTHKEY) GetProcAddress( hSecondaryAuth, "SecondaryAuthKey" ); if ( NULL != pfnSecondaryAuthKey ) {
LPBYTE pbByte = NULL; DWORD dwAnswerSize = 0;
// call SecondaryAuthKey to get the passphrase answer BOOL bAnswerResult = pfnSecondaryAuthKey( &pbByte, &dwAnswerSize );
// use the returned answer - pbByte// ...
// call FreeSecondaryAuthKey to let the library free the memory FREESECONDARYAUTHKEY pfnFreeSecondaryAuthKey = (FREESECONDARYAUTHKEY) GetProcAddress( hSecondaryAuth, "FreeSecondaryAuthKey" ); if ( NULL != pfnFreeSecondaryAuthKey ) {
pfnFreeSecondaryAuthKey( pbByte );
}
// set successful return code fRetVal = TRUE;
}
// unload SecondaryAuth.dll FreeLibrary( hSecondaryAuth );
}
return fRetVal;
}
7.2.6.4 Switching Secondary Authentication Methods
You have the ability to change the method used by Windows Authenticator v2 (WinAuth v2) or LDAP Authenticator v2 (LDAPAuth v2) to verify the user's identity to another method if necessary. The following scenarios are supported:
-
WinAuth v2/LDAPAuth v2 built-in secondary authentication to external secondary authentication
-
External secondary authentication to WinAuth v2/LDAPAuth v2 built-in secondary authentication
-
One external secondary authentication library to another
7.2.6.5 Switching from Built-In Secondary Authentication to External Secondary Authentication
To configure WinAuth v2 for recovery via custom secondary authentication library, do the following:
-
Start the Administrative Console.
-
In the tree in the left pane, right-click the Global Agent Settings node and select Import > From Live HKLM from the context menu.
-
Under the Live settings set, navigate to Authentication > Windows v2 or LDAP v2.
If you have previously configured Logon Manager to use either the user's directory SID or a secure random key as a secondary authentication method, revert back to interactive passphrase by deselecting the check box next to the Recovery Method option. (This reverts the option to its default value, User passphrase.)
-
Create a directory named identically to the GUID of your custom library in the following directory:
<oracle_install_dir>\v-GO SSO\AUI\Recovery\Note:
Substitute the full path of the directory in which Oracle Enterprise Single Sign-On products are installed for<oracle_install_dir>.For example, if your library's GUID is
{B623C4E7-A383-4194-A719-7B17D074A70F}, you would create the following directory:<oracle_install_dir>\v-GO SSO\AUI\Recovery\{B623C4E7-A383-4194-A719-7B17D074A70F} -
Place your custom library file in the directory you created in step 4.
-
Add a GUID entry to the Logon Manager secondary authentication methods list for your custom library by creating a key named identically to the GUID of your custom library. Use the following locations:
-
On 32-bit systems:
HKEY_LOCAL_MACHINE\Software\Passlogix\AUI\MsAuth\RecoveryMethods\ -
On 64-bit systems:
HKEY_LOCAL_MACHINE\Software\Wow6432Node\Passlogix\AUI\MsAuth\ RecoveryMethods\For example, if your library's GUID is
{B623C4E7-A383-4194-A719-7B17D074A70F}, you will create the following key on a 32-bit system:HKEY_LOCAL_MACHINE\Software\Passlogix\AUI\MsAuth\RecoveryMethods\ {B623C4E7-A383-4194-A719-7B17D074A70F}
-
-
Set the Logon Manager recovery method to your custom secondary authentication library. If it does not already exist, create a string value named
ResetMethodGUIDunderHKEY_LOCAL_MACHINE\Software\Passlogix\AUI\MsAuth\RecoveryMethods\and set it to the GUID of your custom library. -
Reinitialize the WinAuth v2 settings with the newly selected configuration:
-
Launch Logon Manager, double-click its system tray icon, and select Settings in the left-hand pane of the window that appears.
-
Select the Authentication tab, then click Change. The Setup Wizard appears.
-
Follow the prompts in the wizard. When prompted to select your primary logon method, make sure that Windows Logon v2 or LDAP v2 remains selected.
-
Complete the remaining steps in the wizard.
-
7.2.6.6 Switching from External Secondary Authentication to Built-In Secondary Authentication
To configure WinAuth v2 or LDAPAuth v2 for recovery via one of Logon Manager's built-in secondary authentication methods, do the following:
-
Start the Administrative Console.
-
In the tree in the left pane, right-click the Global Agent Settings node and select Import > From Live HKLM from the context menu.
-
Under the Live settings set, navigate to Authentication > Windows v2 or LDAP v2.
-
Select the check box next to the Recovery Method option and do one of the following:
-
To use the interactive passphrase prompt with a user-supplied passphrase for secondary authentication, select User passphrase from the drop-down list
-
To use silent secondary authentication using the user's directory SID as the passphrase answer, select Passphrase suppression using user's SID from the drop-down list
-
To use silent secondary authentication with a secure random key as the passphrase answer, select Passphrase suppression using secure key from the drop-down list.
-
To use the entryUUID for silent secondary authentication, select Passphrase suppression using entryUUID from the drop-down list
-
-
Save your changes locally or publish them to the repository, as applicable.
-
Reinitialize the WinAuth v2 or LDAP v2 settings with the newly selected configuration:
-
Launch Logon Manager, double-click its system tray icon, and select Settings in the left-hand pane of the window that appears.
-
Select the Authentication tab, then click Change. The Setup Wizard appears.
-
Follow the prompts in the wizard. When prompted to select your primary logon method, make sure that Windows Logon v2 or LDAP v2 remains selected.
-
Complete the remaining steps in the wizard.
-
7.2.6.7 Switching from One External Secondary Authentication Library to Another
If you are currently using one external secondary authentication library and want to switch to a different external library, repeat the steps in Switching from Built-In Secondary Authentication to External Secondary Authentication.
7.2.7 Configuring Windows Authenticator Version 2
This section describes how to install and configure the Windows Authenticator v2 for each of the secondary authentication methods described earlier in this document. It covers the following topics:
-
Configuring WinAuth v2 for Authenticator Key Management via Windows DPAPI
-
Configuring WinAuth v2 for Recovery via Interactive Passphrase Prompt
-
Configuring WinAuth v2 for Recovery via Logon Manager Secondary Authentication API
Note:
The steps in this section illustrate how to manually perform the procedures listed above. If you wish to automate and/or customize any of those processes, see the Oracle Enterprise Single Sign-On Suite Installation Guide and/or request the assistance of Oracle Support to develop a deployment plan tailored specifically to your environment.7.2.7.1 Migrating a WinAuth v1 Installation to WinAuth v2
To manually migrate from an existing WinAuth v1 deployment to WinAuth v2, do the following:
-
Reconfigure the First-Time Use wizard so that WinAuth v2 is the only available logon method:
-
Start the Administrative Console.
-
In the tree in the left pane, right-click the Global Agent Settings node and select Import > From Live HKLM from the context menu.
-
Under the Live settings set, navigate to User Experience > Setup Wizard.
-
Select the check box next to the Selected Authenticator option and select Windows v2 from the drop-down list.
-
Save your changes locally or publish them to the repository, as applicable.
-
-
Using a plain text editor, create a batch (
.cmd) file with the following content:##Install WinAuth v2<esso-lm_installer> /s /v"/qb RUNVGO="YES" ADDLOCAL="MSauth""##Initiate primary logon method change"<oracle_install_dir>\v-GO SSO\ssoShell.exe" /shellLoad Themes /shellLockNote:
Substitute the full path and name of the Logon Manager installer executable in place of<esso-lm_sso_installer>, as well as the full path of the directory in which Oracle Enterprise Single Sign-On products are installed for<oracle_install_dir>. -
Save and close the file.
-
Run the file on the target machine.
-
When the FTU wizard appears, follow the displayed instructions to complete the migration process.
7.2.7.2 Configuring WinAuth v2 for Authenticator Key Management via Windows DPAPI
To configure WinAuth v2 for authenticator key management via Windows DPAPI, complete the steps below.
Note:
This procedure assumes WinAuth v2 has already been installed and configured to work with your Logon Manager deployment.Before you begin, ensure that your environment meets the following minimum software requirements in order for secondary authentication via Windows DPAPI to function:
-
Domain controllers: Windows Server 2008 and above.
-
Client machines running Logon Manager:
-
Windows Server 2008 and above
-
Windows Server 2012
-
Windows 7
-
Windows 8
-
Note:
Windows Server 2008 requires KB907247: Credential Roaming Software Update.The following Microsoft Developer Network and TechNet articles provide detailed information on Windows DPAPI and credential roaming:
-
Windows Data Protection:
http://msdn.microsoft.com/en-us/library/ms995355.aspx -
Credential Roaming:
http://technet.microsoft.com/en-us/library/cc700815.aspx
If your environment meets the listed minimum requirements, configure WinAuth v2 to use Windows DPAPI as the secondary authentication method as follows:
-
Start the Administrative Console.
-
In the tree in the left pane, right-click the Global Agent Settings node and select Import > From Live HKLM from the context menu.
-
Under the Live settings set, navigate to Authentication > Windows v2.
-
If you have previously configured Logon Manager to use either the user's directory SID or a secure random key as a secondary authentication method, revert back to interactive passphrase by deselecting the check box next to the Recovery Method option. (This reverts the option to its default value, User passphrase.)
-
Enable Windows DPAPI for WinAuth v2. Select the check box next to the Use Windows Data Protection (DPAPI) option, then select Yes from the drop-down list.
-
Save your changes by publishing them to the repository.
-
Test your configuration. The tests below ensure proper configuration of Logon Manager and your environment to handle credential roaming, password changes, and keyset rotation:
-
Enroll a new user with Logon Manager by completing the First Time Use (FTU) wizard; during enrollment, Logon Manager will prompt for the user name and password but should not prompt to select a passphrase answer.
-
Enroll an application with Logon Manager and store a set of credentials for the application.
-
Close and re-open the application. Logon Manager should automatically respond and log you on to the application without prompting for a passphrase answer.
-
Log out of the machine and log on to another machine as the same user. Logon Manager should behave exactly as on the original machine, without prompting for a passphrase answer or any other extraneous information.
-
Use the Log on using Logon Manager option (accessed by right-clicking the Logon Manager system tray icon) to confirm that application response functions as desired.
-
Open the properties dialog for the application within the Agent and use the Reveal Password option to reveal the stored password. There should be no prompt for the passphrase answer.
-
Change the user's Windows password before the Agent is launched, and then again while the Agent is running. There should be no prompt for the passphrase answer; stored credential should remain accessible.
-
Log on to a third machine and confirm that stored credentials remain accessible.
-
Test that the 90-day keyset rotation enforced by Windows DPAPI functions correctly. Advance the machine's clock, as well as the domain controller's clock, by 120 days, then log on to at least two different machines and confirm that the stored credentials remain accessible.
-
7.2.7.3 Configuring WinAuth v2 for Recovery via Interactive Passphrase Prompt
To configure WinAuth v2 for authenticator key recovery via interactive passphrase prompt, simply install WinAuth v2 as described in Migrating a WinAuth v1 Installation to WinAuth v2. The Recovery Method option in the Console defaults to User passphrase unless manually changed.
Note:
This procedure assumes WinAuth v2 has already been installed and configured to work with your Logon Manager deployment.-
Start the Administrative Console.
-
In the tree in the left pane, right-click the Global Agent Settings node and select Import > From Live HKLM from the context menu.
-
Under the Live settings set, navigate to Authentication > Windows v2.
-
If you have previously configured Logon Manager to use either the user's directory SID or a secure random key as a secondary authentication method, revert back to interactive passphrase by deselecting the check box next to the Recovery Method option. (This reverts the option to its default value, User passphrase.)
-
Configure the user warning that appears during recovery. This warning should emphasize the importance of remembering the passphrase answer:
-
Under the Live settings, navigate to Authentication > Windows v2 > Passphrase.
-
Select the check box next to the Message option and enter a message explaining the importance of remembering the passphrase answer to the user. (When filling in the fields in the steps below, use the
\ncharacter sequence to indicate a line break.)This message appears during enrollment and requires the user to check a check box and click the OK button in order to continue.
-
Select the check box next to the Message Dialog Title option and enter the desired window title for the dialog.
-
Select the check box next to the Checkbox Label option and enter the desired label for the check box that appears in the dialog.
-
Select the check box next to the Reset with old password option and select Yes from the drop-down list. This option allows the user to recover access to their credential store using the old (most recent) password.
-
Ensure that the check box next to the Force password re-enrollment when using old password to reset option is not selected (i.e., option is at its default value of Yes).
This setting forces Logon Manager to re-enroll the user when the Reset with old password option is in effect, and the user has used the old (most recent) password as the passphrase answer during recovery.
For example, if you configure the warning as follows:
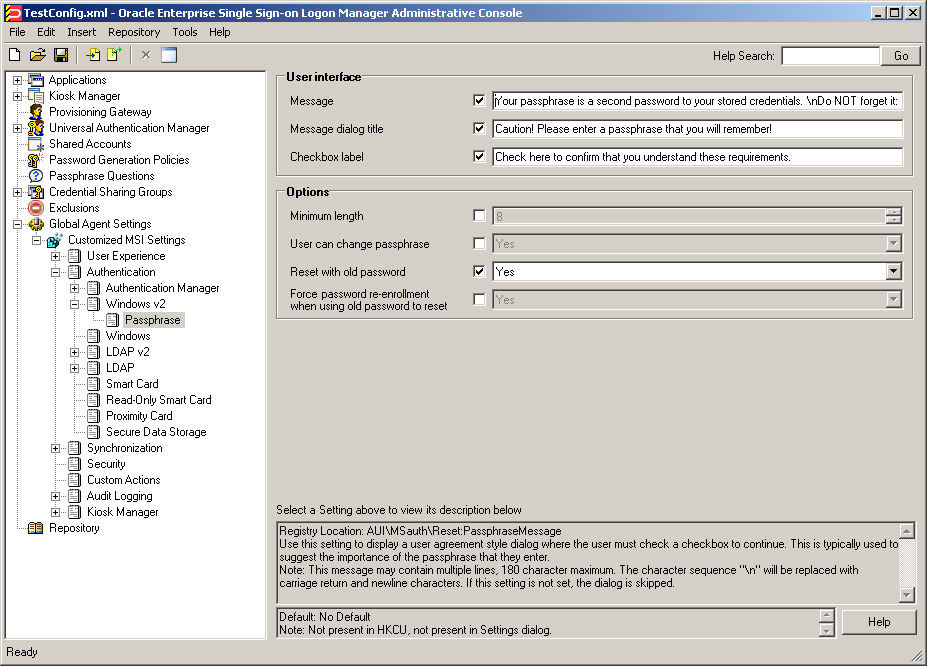
It will appear as follows when the user is prompted for the passphrase answer during recovery:
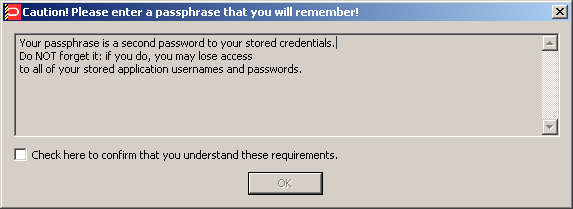
-
-
Save your changes locally or publish them to your repository, as appropriate.
7.2.7.4 Configuring WinAuth v2 for Recovery via Logon Manager Secondary Authentication API
To configure WinAuth v2 for recovery via the Logon Manager secondary authentication API, complete the instructions in one of the following sections.
7.2.7.4.1 Recovery via Custom Secondary Authentication Library
Before starting this procedure, make sure you have done the following:
-
Written your custom secondary authentication library according to the section Understanding the Logon Manager Secondary Authentication API.
-
Ascertained your custom library's GUID and made sure that library returns that GUID to Logon Manager via its
GetIDmethod. -
Submitted your custom library file to Oracle to obtain a digital signature and received a digitally signed copy of the file back from Oracle. Logon Manager will not load the custom file without a valid digital signature.
To configure WinAuth v2 for recovery via custom secondary authentication library, do the following:
-
Start the Administrative Console.
-
In the tree in the left pane, right-click the Global Agent Settings node and select Import > From Live HKLM from the context menu.
-
Under the Live settings set, navigate to Authentication > Windows v2.
If you have previously configured Logon Manager to use either the user's directory SID or a secure random key as a secondary authentication method, revert back to interactive passphrase by deselecting the check box next to the Recovery Method option. (This reverts the option to its default value, User passphrase.)
-
Create a directory named identically to the GUID of your custom library in the following directory:
<oracle_install_dir>\v-GO SSO\AUI\Recovery\Note:
Substitute the full path of the directory in which Oracle Enterprise Single Sign-On products are installed for<oracle_install_dir>.For example, if your library's GUID is
{B623C4E7-A383-4194-A719-7B17D074A70F}, you would create the following directory:<oracle_install_dir>\v-GO SSO\AUI\Recovery\
{B623C4E7-A383-4194-A719-7B17D074A70F} -
Place your custom library file in the directory you created in step 4.
-
Add a GUID entry to the Logon Manager secondary authentication methods list for your custom library by creating a key named identically to the GUID of your custom library. Use the following locations:.
-
On 32-bit systems:
HKEY_LOCAL_MACHINE\Software\Passlogix\AUI\MSAuth\ResetMethods\ -
On 64-bit systems:
HKEY_LOCAL_MACHINE\Software\
Wow6432Node\Passlogix\AUI\MSAuth\ResetMethods\For example, if your library's GUID is
{B623C4E7-A383-4194-A719-7B17D074A70F}, you will create the following key on a 32-bit system:HKEY_LOCAL_MACHINE\Software\Passlogix\
AUI\MSAuth\ResetMethods\{B623C4E7-A383-4194-A719-7B17D074A70F}
-
-
Under the key you created in step 6a, create a string value named Path and set it to the full path and file name of your custom library. In our example, you would set it to:
<oracle_install_dir>\v-GO SSO\AUI\Recovery\

{B623C4E7-A383-4194-A719-7B17D074A70F}\<MyCustomLibrary.dll>Where <oracle_install_dir> is the full path of the directory in which Oracle Enterprise Single Sign-On products are installed and
<MyCustomLibrary.dll>is the file name of your custom library. -
Set Logon Manager's recovery method to your custom secondary authentication library.
If it does not already exist, create a string value named ResetMethodGUID under
HKEY_LOCAL_MACHINE\Software\Passlogix\AUI\MSAuth\ResetMethods\and set it to the GUID of your custom library. -
Reinitialize the WinAuth v2 settings with the newly selected configuration:
-
Launch Logon Manager, double-click its system tray icon, and select Settings in the left-hand pane of the window that appears.
-
Select the Authentication tab, then click Change. The Setup Wizard appears.
-
Follow the prompts in the wizard. When prompted to select your primary logon method, make sure that Windows Logon v2 remains selected.
-
Complete the remaining steps in the wizard.
-
7.2.7.4.2 Recovery via a Built-In Silent Secondary Authentication Method
To configure WinAuth v2 for recovery via one of Logon Manager's built in silent secondary authentication methods, do the following:
-
Start the Administrative Console.
-
In the tree in the left pane, right-click the Global Agent Settings node and select Import > From Live HKLM from the context menu.
-
Under the Live settings set, navigate to Authentication > Windows v2.
-
Select the check box next to the Recovery Method option and do one of the following:
-
To use the user's directory SID for silent secondary authentication, select Passphrase suppression using user's SID from the drop-down list
-
To use a secure random key for silent secondary authentication, select Passphrase suppression using secure key from the drop-down list
-
-
Save your changes locally or publish them to the repository, as applicable.
7.2.7.5 Configuring WinAuth v2 for Kiosk Environments
If you are configuring a Kiosk Manager environment to use WinAuth v2 for authentication, only the secondary authentication methods shipped with WinAuth v2 are supported; custom secondary authentication libraries are not supported.
To configure WinAuth v2 for a Kiosk Manager environment, the following options must be configured in addition to those already described in this section:
-
The Delete Local Cache option (located under Global Agent Settings > [target settings set] > Synchronization must be set to Yes.'
-
For Active Directory deployments, the Credentials to Use option (located under Global Agent Settings > [target settings set] > Synchronization must be set to Use Active Directory Server Account.
-
For AD LDS (ADAM) deployments, the Credentials to Use option (located under Global Agent Settings > [target settings set] > Synchronization must be set to Use AD LDS (ADAM) Server Account.
-
The Prefill Username/ID on FTU option (under Global Agent Settings > Windows Authenticator v2 > User interface) must be set to No. This prevents the username/ID field from being populated with the previous user's name during FTU.
7.2.7.6 Resetting the User-Provided Passphrase Answer
To force a user to provide a new passphrase answer based on new passphrase questions, do the following as a user with administrative privileges:
-
Using the Administrative Console, do the following:
-
Disable existing questions that are no longer desired.
-
Add the new questions.
-
-
For each user, perform the following steps on the target machine as the target user:
-
Delete the following registry key and its contents:
HKEY_CURRENT_USER\Software\Passlogix\AUI\MSauth\Reset -
Execute the following command:
<
oracle_install_dir>\v-GO SSO\ssoshell.exe /forceverify nowNote:
Substitute the full path of the directory in which Oracle Enterprise Single Sign-On products are installed for <oracle_install_dir>.
-
When automating the above steps, Oracle highly recommends that you:
-
Create a script to manage the process
-
Provide end-user instructions that explain what is happening
-
Include a logging capability that centrally records the success or failure of each step, including:
-
Script launch
-
Old registry key deletion
-
New registry key creation
-
Passphrase answer entry by user
-
-
Include reporting capability to audit recorded data for users who have successfully completed passphrase answer change
-
Once all users have completed the change, delete the unwanted passphrase questions.
7.2.7.7 Enabling WinAuth v2 Strong Authentication Device Support
Note:
The following instructions apply to Windows 7 and Windows 8 only.If you are planning to use strong authentication devices, such as Smart Cards, to authenticate to Windows, you must configure Windows to permit the hand-off of strong authentication events to third-party credential providers, such as Logon Manager deployed with WinAuth v2. Otherwise, Logon Manager will not be able to communicate with the device and you will not be able to authenticate to Logon Manager.
To do so, complete the following steps:
-
Launch the Windows registry editor and navigate to the following path:
HKEY_LOCAL_MACHINE\Software\Microsoft\

WindowsNT\CurrentVersion\Winlogon\Notify -
Under the above key, create a
DWORDvalue namedSmartCardLogonNotify. -
Set the above value to
1. -
Restart the machine.
7.2.8 Configuring LDAP Authenticator Version 2
This section describes how to install and configure the LDAP Authenticator v2 for each of the secondary authentication methods described earlier in this document. It covers the following topics:
-
Configuring LDAPAuth v2 for Recovery via Interactive Passphrase Prompt
-
Configuring LDAPAuth v2 for Recovery via Logon Manager Secondary Authentication API
Note:
The steps in this section illustrate how to manually perform the procedures listed above. If you wish to automate and/or customize any of those processes, see the Oracle Enterprise Single Sign-On Suite Installation Guide and/or request the assistance of Oracle Support to develop a deployment plan tailored specifically to your environment.7.2.8.1 Migrating an LDAPAuth v1 Installation to LDAPAuth v2
To manually migrate from an existing LDAPAuth v1 deployment to LDAPAuth v2, do the following:
-
Reconfigure the First-Time Use wizard so that LDAPAuth v2 is the only available logon method:
-
Start the Administrative Console.
-
In the tree in the left pane, right-click the Global Agent Settings node and select Import > From Live HKLM from the context menu.
-
Under the "Live" settings set, navigate to User Experience > Setup Wizard.
-
Select the check box next to the Selected Authenticator option and select LDAP v2 from the drop-down list.
-
Save your changes locally or publish them to the repository, as applicable.
-
-
Using a plain text editor, create a batch (
.cmd) file with the following content:##Install LDAPAuth v2<esso-lm_installer> /s /v"/qb RUNVGO="YES" ADDLOCAL="LDAPAuth""##Initiate primary logon method change"<oracle_install_dir>\v-GO SSO\ssoShell.exe" /shellLoad Themes /shellLockNote:
Substitute the full path and name of the Logon Manager installer executable in place of <esso-lm_sso_installer>, as well as the full path of the directory in which Oracle Enterprise Single Sign-On products are installed for<oracle_install_dir>. -
Save and close the file.
-
Run the file on the target machine.
-
When the FTU wizard appears, follow the displayed instructions to complete the migration process.
7.2.8.2 Configuring LDAPAuth v2 for Recovery via Interactive Passphrase Prompt
To configure LDAPAuth v2 for authenticator key recovery via interactive passphrase prompt, simply install LDAPAuth v2. The "Recovery Method" option in the Console defaults to User passphrase unless manually changed.
Note:
This procedure assumes LDAPAuth v2 has already been installed and configured to work with your Logon Manager deployment.-
Start the Administrative Console.
-
In the tree in the left pane, right-click the Global Agent Settings node and select Import > From Live HKLM from the context menu.
-
Under the Live settings set, navigate to Authentication > LDAP v2.
-
If you have previously configured Logon Manager to use either the user's directory SID, secure key, or entryUUID as a secondary authentication method, revert back to interactive passphrase by deselecting the check box next to the Recovery Method option. (This reverts the option to its default value, User passphrase.)
-
Save your changes locally or publish them to your repository, as appropriate.
7.2.8.3 Configuring LDAPAuth v2 for Recovery via Logon Manager Secondary Authentication API
To configure LDAPAuth v2 for recovery via the Logon Manager secondary authentication API, complete the instructions in one of the following sections.
7.2.8.3.1 Recovery via Custom Secondary Authentication Library
Before starting this procedure, make sure you have done the following:
-
Written your custom secondary authentication library according to the section "Understanding the Logon Manager Secondary Authentication API" in the Oracle Enterprise Single Sign-On Suite Administrator's Guide.
-
Ascertained your custom library's GUID and made sure that library returns that GUID to Logon Manager via its
GetIDmethod. -
Submitted your custom library file to Oracle to obtain a digital signature and received a digitally signed copy of the file back from Oracle. Logon Manager will not load the custom file without a valid digital signature.
To configure LDAPAuth v2 for recovery via custom secondary authentication library, do the following:
-
Start the Administrative Console.
-
In the tree in the left pane, right-click the Global Agent Settings node and select Import > From Live HKLM from the context menu.
-
Under the Live settings set, navigate to Authentication > LDAP v2.
If you have previously configured Logon Manager to use either the user's directory SID, secure key, or entryUUID as a secondary authentication method, revert back to interactive passphrase by deselecting the check box next to the Recovery Method option. (This reverts the option to its default value, User passphrase.)
-
Create a directory named identically to the GUID of your custom library in the following directory:
<oracle_install_dir>\v-GO SSO\AUI\Recovery\Note:
Substitute the full path of the directory in which Oracle Enterprise Single Sign-On products are installed for<oracle_install_dir>.For example, if your library's GUID is
{B623C4E7-A383-4194-A719-7B17D074A70F}, you would create the following directory:<oracle_install_dir>\v-GO SSO\AUI\Recovery\{B623C4E7-A383-4194-A719-7B17D074A70F} -
Place your custom library file in the directory you created in step 4.
-
Add a GUID entry to the Logon Manager secondary authentication methods list for your custom library by creating a key named identically to the GUID of your custom library. Use the following locations:.
-
On 32-bit systems:
HKEY_LOCAL_MACHINE\Software\Passlogix\AUI\LDAPAuth\ResetMethods\ -
On 64-bit systems:
HKEY_LOCAL_MACHINE\

Software\Wow6432Node\Passlogix\AUI\LDAPAuth\ResetMethods\
For example, if your library's GUID is
{B623C4E7-A383-4194-A719-7B17D074A70F}, you will create the following key on a 32-bit system:HKEY_LOCAL_MACHINE\Software\Passlogix\
AUI\LDAPAuth\ResetMethods\{B623C4E7-A383-4194-A719-7B17D074A70F}
-
-
Under the key you created in step 6a, create a string value named
Pathand set it to the full path and file name of your custom library. In our example, you would set it to:<oracle_install_dir>\v-GO SSO\AUI\Recovery\>
{B623C4E7-A383-4194-A719-7B17D074A70F}\<MyCustomLibrary.dllWhere
<oracle_install_dir>is the full path of the directory in which Oracle Enterprise Single Sign-On products are installed and <MyCustomLibrary.dll> is the file name of your custom library. -
Set Logon Manager's recovery method to your custom secondary authentication library.
If it does not already exist, create a string value named
ResetMethodGUIDunderHKEY_LOCAL_MACHINE\Software\Passlogix\AUI\LDAPAuth\ResetMethods\and set it to the GUID of your custom library. -
Reinitialize the LDAP v2 settings with the newly selected configuration:
-
Launch Logon Manager, double-click its system tray icon, and select Settings in the left-hand pane of the window that appears.
-
Select the Authentication tab, then click Change. The Setup Wizard appears.
-
Follow the prompts in the wizard. When prompted to select your primary logon method, make sure that LDAP v2 remains selected.
-
Complete the remaining steps in the wizard.
-
7.2.8.3.2 Recovery via a Built-In Silent Secondary Authentication Method
To configure LDAP v2 for recovery via one of Logon Manager's built in silent secondary authentication methods, do the following:
-
Start the Administrative Console.
-
In the tree in the left pane, right-click the Global Agent Settings node and select Import > From Live HKLM from the context menu.
-
Under the Live settings set, navigate to Authentication > LDAP v2.
-
Select the check box next to the Recovery Method option and do one of the following:
-
To use the user's directory SID for silent secondary authentication, select Passphrase suppression using user's SID from the drop-down list
-
To use a random secure key for silent secondary authentication, select Passphrase suppression using secure key from the drop-down list
-
To use the user's entryUUID for silent secondary authentication, select Passphrase suppression using entryUUID from the drop-down list
-
-
Save your changes locally or publish them to the repository, as applicable.
7.2.8.4 Resetting the User-Provided Passphrase Answer
To force a user to provide a new passphrase answer based on new passphrase questions, do the following as a user with administrative privileges:
-
Using the Administrative Console, do the following:
-
Disable existing questions that are no longer desired.
-
Add the new questions.
-
-
For each user, perform the following steps on the target machine as the target user:
-
Delete the following registry key and its contents:
HKEY_CURRENT_USER\Software\Passlogix\AUI\LDAPauth\Reset -
Execute the following command:
<oracle_install_dir>\v-GO SSO\ssoshell.exe /forceverify nowNote:
Substitute the full path of the directory in which Oracle Enterprise Single Sign-On products are installed for<oracle_install_dir>.
-
When automating the above steps, Oracle highly recommends that you:
-
Create a script to manage the process
-
Provide end-user instructions that explain what is happening
-
Include a logging capability that centrally records the success or failure of each step, including:
-
Script launch
-
Old registry key deletion
-
New registry key creation
-
Passphrase answer entry by user
-
-
Include reporting capability to audit recorded data for users who have successfully completed passphrase answer change
-
Once all users have completed the change, delete the unwanted passphrase questions.
7.2.8.5 Enabling LDAPAuth v2 Strong Authentication Device Support
Note:
The following instructions apply to Windows 7 and Windows 8 only.If you are planning to use strong authentication devices, such as Smart Cards, to authenticate to Windows, you must configure Windows to permit the hand-off of strong authentication events to third-party credential providers, such as Logon Manager deployed with LDAPAuth v2. Otherwise, Logon Manager will not be able to communicate with the device and you will not be able to authenticate to Logon Manager.
To do so, complete the following steps:
-
Launch the Windows registry editor and navigate to the following path:
HKEY_LOCAL_MACHINE\Software\Microsoft\

WindowsNT\CurrentVersion\Winlogon\Notify -
Under the above key, create a
DWORDvalue namedSmartCardLogonNotify. -
Set the above value to
1. -
Restart the machine.
7.2.9 Smart Card Monitor Utility (ssoSCDetect.exe)
The utility program ssoSCDetect monitors a workstation's smart card reader, making it possible to use the workstation as a multiple-user "kiosk" that can access and synchronize the remote SSO credential store of any user authenticated by a smart card.
When a user inserts a card into the reader, the ssoSCDetect utility starts the Agent and prompts for the user's primary logon credentials. It then synchronizes the user's credentials with the remote repository. When the user logs out of the workstation (for example, by removing the card from the reader), ssoSCDetect shuts down the Agent.
To run the utility, copy the executable file ssoSCDetect.exe from the Utilities directory of the Logon Manager CD to the installation directory (%ProgramFiles%/Passlogix/v-GO SSO) then launch the program.
7.2.10 Global Agent Settings
Various functions and behaviors of Logon Manager can be centrally defined by using the Settings dialog, setting Windows registry settings on the local workstation, and specifying administrative overrides via a Synchronizer extension.
Note:
Configure these settings in the Administrative Console. The table is provided only for reference.Registry settings can be set by the Agent, by the Administrative Console, with the RegEdit Windows utility, and via a centrally managed software distribution mechanism. Registry settings are located in the following Windows Registry locations:
-
HKLM\…\for computer-specific settings -
HKCU\…\for user-specific settings
Administrative override objects from Synchronizer extensions specify settings that override HKLM\…\ Windows Registry settings, which in turn overrides the HKCU\…\ Windows Registry settings.
The following table lists examples of settings and their override locations.
| Setting | Sample Location |
|---|---|
| Synchronizer extension object overrides | Extensions\AccessManager:MFEnable=DWORD:0 |
Computer-specific Registry Location (HKLM\…\) overrides |
HKLM\…\Extensions\AccessManager:MFEnable |
User-specific Registry Location (HKCU\…\)
or User setting in Settings dialog in Logon Manager Mainframe Enable |
HKCU\…\Extensions\AccessManager:MFEnable |
7.2.10.1 Recommended Global Agent Settings for SSO Kiosk Operation
For best performance and security, the following Global Agent Settings should be applied to the Logon Manager Agent running on a workstation configured as a kiosk:
| Setting | Function |
|---|---|
| User Paths | (Active Directory only) For best performance, specify one or more fully-qualified paths to begin searching for user accounts. See the Advanced options, under Synchronization>Active Directory. |
7.2.11 Configuring Registry Settings and Administrative Overrides
The Administrative Console can be used to configure HKLM\&\ values and deploy them to synchronizer extensions.
-
In the Administrative Console, create a new set of settings (right click Global Agent Settings and choose New Settings), load a saved set of settings (right click Agent Settings and select Import), or select an existing set of settings (by selecting it in the left pane).
-
In the left pane, select and open the set of settings, and select and open the desired registry key.
Note:
Registry entries beginning withExtensions\are displayed in the Administrative Console without the leadingExtensions\. -
In the right pane, select the desired registry value, select the checkbox, and enter the desired value.
-
Export to the desired format (Admin Override or HKLM Registry format):
-
Select the set of settings in the left pane
-
Choose Export from the File menu and choose an export format.
To deploy an administrative overrides file to a synchronizer extension, see the following topics:
-
Chapter 2, "Configuring the Agent for Directory Server Synchronization"
-
Chapter 2, "Configuring the Agent for Database Synchronization"
-
Chapter 2, "Configuring the Agent for File System Synchronization"
To use an HKLM Registry format file, either launch it (for example, double-click on the file from Explorer), import it (for example, from RegEdit), or deploy it using your deployment tool.
Refer to Chapter 2, "Global Agent Settings in Depth" for a complete description of these settings, including:
-
Screen layouts
-
Setting names
-
Setting descriptions
-
Registry names
-
Setting options and defaults
-
Registry and Data Types
7.2.12 Directory Server Schema Definition
The following are Directory Server Container and Class Objects, their rights, and their attributes.
7.2.12.1 vGOSecret
Stores all user secrets. This includes an object that stores all deleted objects and their logon credentials. This is added to the SSOUserData object as an auxiliary class. All users can read this object, but only the owner can write to this object, and only the owner or administrator can delete this object.
Rights: The rights are inherited from the vGOUserData object.
| Attribute Name | Syntax | Flag |
|---|---|---|
| vGOSecretData | Case Ignore String | Singled Valued, Synchronize |
| vGOSharedSecretDN | Not Used | |
| Other optional attributes | ou, dn, cn, o |
7.2.12.2 vGOUserData Object
A container allowing users to store their individual/personal secured credentials.
Rights: Users have write access to these attributes for their own user objects. The administrator has full rights but will not be able to read the secrets due to encryption.
| Attribute Name | Syntax | Flag |
|---|---|---|
| vGOSecretData | Case Ignore String | Singled Valued, Synchronize |
| vGORoleDN | Not Used | |
| Other optional attributes | ou, dn, cn, o |
7.2.12.3 vGOConfig Object
Used to hold all configuration information that the Agent needs. This includes the application-supported list, mainframe/host application supported list, first-time use setup instructions, Password Policies, and admin overrides. All of these settings control Agent behavior.
Rights: All users have read-only rights to the attributes within this object. The administrator has full rights.
| Attribute Name | Syntax | Flag |
|---|---|---|
| vGOConfigType | Case Ignore String | Singled Valued, Synchronize |
| vGOConfigData | Case Ignore String | Singled Valued, Synchronize |
| vGORoleDN | Not Used | |
| Other optional attributes | ou, dn, cn, o |
7.2.12.4 vGOLocatorClass
This is used to specify where to store user credentials.
Rights: All users have read/compare/search access to these attributes for all of this class of object. The administrator has full rights.
| Attribute Name | Syntax | Flag |
|---|---|---|
| vGOLocatorAttribute | Case Ignore String | Single Valued |
| Other optional attributes | dn, cn, o |
7.2.13 Error Loop Quick Reference
This section serves as a quick-reference to the basic Error Loop settings.
Note:
Configure these settings in the Administrative Console. The table is provided only for reference.The settings are inherited downward from global to application type to application. More specific settings override more general (application overrides application type, which overrides global).
Note:
For security settings (for example, MaskPW), the most secure setting is used, regardless of whether it is set globally, for an application type, or for an application.Place the application-type settings in the entlist.ini[*Root] section.
- Example 1
-
[*Root]
AppsTimeout=8
WebMaxRetry=3
Place the Application settings in the specific application's entlist.ini section.
- Example 2
-
[Payroll]
WindowTitle1=Payroll
MaxRetry=3
Timeout=30
IDCtrl=203
...
| Global (Registry) | Application Type([*Root]) | |||||
|---|---|---|---|---|---|---|
| ParameterPurpose | Extensions\ AccessManager\ Dlg |
Windows | Web | Host/Mainframe | Application | Default |
| Max # of retries (after first try) before Error Loop dialog appears | MaxRetry | AppsMaxRetry | WebMaxRetry | MainframeMaxRetry | MaxRetry | 0 |
| Max time between successive logon attempts before Error Loop dialog appears | Timeout | AppsTimeout | WebTimeout | MainframeTimeout | Timeout | 30 |
| Setting to indicate whether to hide the password confirmation field in the Error Loop dialog | HideConfirmPW | AppsHideConfirmPW | WebHideConfirmPW | MainframeHideConfirmPW | HideConfirmPW | 0 (do not hide) |
7.2.14 Configuring Logon Manager Event Logging for IBM DB2 Database Support
In order to configure Logon Manager to store event log data in a table in an IBM DB2 database, you must complete the following steps:
-
If you have not already done so, install and configure the IBM DB2 database as described in the vendor's documentation. Use the Typical installation scenario when prompted.
-
Set up the event log data table.
-
Install the Database Event Extension component for Logon Manager.
-
Configure Logon Manager to store its event log data in the table you created.
-
Test your event logging configuration.
7.2.14.1 Installing and Configuring the IBM DB2 Database
Before you begin configuring Logon Manager event logging, install and configure an instance of the IBM DB2 database as described in the vendor's documentation, if you have not already done so. Unless your environment dictates otherwise, select the "Typical" installation scenario when prompted by the installer.
7.2.14.2 Setting Up the Event Log Data Table
Before Logon Manager can store event log data in the database, you must set up a table that will store the data. The steps are as follows:
-
Launch the IBM DB2 Control Center application. By default, the application is located in
C:\Program Files\IBM DB2\General Administration Tools.
-
Within the database of your choice, create a table that will store Logon Manager event log data:
-
Under the selected database, right-click Tables and select Create… from the context menu.
-
In the Create Table Wizard, name the table in accordance with the vendor's naming schema, then click Next.
-
Set up the required table columns. For each required column, do the following:
-
In the Change column definitions for the new table dialog, click Add.
The Add Column dialog appears.
-
Name the column. These column names will correspond to event log field names shown below that you will configure later in this document using the Administrative Console.
WARNING:
Each event log field must have a corresponding column with an identical name in the event log data table. Otherwise, event data will not be recorded.
-
Select CHARACTER as the data type.
-
Set the data length to 128.
-
When you have populated the appropriate fields, click Apply, then OK.
When you have finished, the table configuration will look as follows:

-
-
If you need to make any changes, select the desired column in the list and click Change. When the table configuration is complete, click Next.
-
When prompted to configure the table space, make a selection that is most appropriate to the level of Logon Manager event logging required by your environment, then click Next.
-
For the remainder of the wizard, click Next to accept the defaults presented in each screen.
-
In the configuration summary dialog, click Finish.
The table is created. Depending on the speed of your system, this can take a few moments.
-
-
Monitor the table creation process by checking the database log. When the table has been created successfully, the log will show the following:

7.2.14.3 Installing the Database Event Extension Component for Logon Manager
The Database Even Extension component must be installed in order for Logon Manager to store event log data in the database. To install the component, do the following:
-
Click Start > Settings > Control Panel.
-
In the Control Panel, click Programs and Features.
-
In the applet, navigate to the Logon Manager Agent entry and click Change.
-
In the Logon Manager Agent installer, click Next.
-
In the Program Maintenance dialog, select Modify and click Next.
-
In the Advanced Setup dialog, expand the Audit Logging Methods node.
-
Under the Audit Logging Methods node, click the button next to Database Event Extension and select This feature will be installed on local hard drive from the context menu.
-
Click Next; then, in the dialog that follows, click Install and wait for the installation to complete.
-
When the installation completes successfully, click Finish.
7.2.14.4 Configuring Logon Manager Event Logging for Database Support
-
Launch the Administrative Console and load your current configuration set.
-
In the tree, navigate to Global Agent Settings > [Current Configuration Set] > Audit Logging > Database.
-
Select the check box next to Events to log and click the ellipsis ("…") button.
-
In the Events to log dialog, select the types of events you want to log.
WARNING:
You must select the Event Types: Info item; otherwise, no data will be logged.
-
Under the Audit Logging node in the tree, select Database and configure Logon Manager as follows:
Setting Value Servers Provider=<db2_provider_name>;Password=<db2_admin_user_password>;User ID=<db2admin_user_name>;Data Source=<database_name>Default server URL to your database server instance. Default table Name of the event log data table created earlier in this section. (DB2ADMIN."S.EVENTTABLE2in our example)Retry interval Set to the desired retry interval. See Chapter 2, "Global Agent Settings in Depth" for more information. Events to log Configure to exactly match the event types chosen in step 4. -
Under the Database node in the tree, select Event Fields.
-
For each field, enter the name of the corresponding column in the event log data table. The names must match the names you specified for the database table columns.
WARNING:
Do not alter the values of the AppName, Category, TimeStamp, and Type parameters.
-
When finished, push the modified configuration set to your directory or write them to the local registry, whichever option suits your environment.
-
Proceed to the next section to test your event logging configuration.
7.2.14.5 Testing Your Event Logging Configuration
This simple test procedure allows you to check whether Logon Manager is properly logging event data to the database. In our example, you will press the Help button in Logon Manager and check the database to see if the button press is logged.
-
Open Logon Manager and click Help.
-
Start the IBM DB2 Command Center. Typically, the shortcut is located in Start > Program Files > IBM DB2 > Command Line Tools.
-
Under Database Connection, click the ellipsis ("…") button.
-
In the Select a Database dialog, navigate to the target database, select it, and click OK.
-
Under Command, enter the following, then press Enter:
SELECT * FROM <name_of_event_log_data_table>; -
The Command Center displays all Logon Manager events that have been logged in the database so far. The Help button press event should appear near or at the end of the list, as shown below.
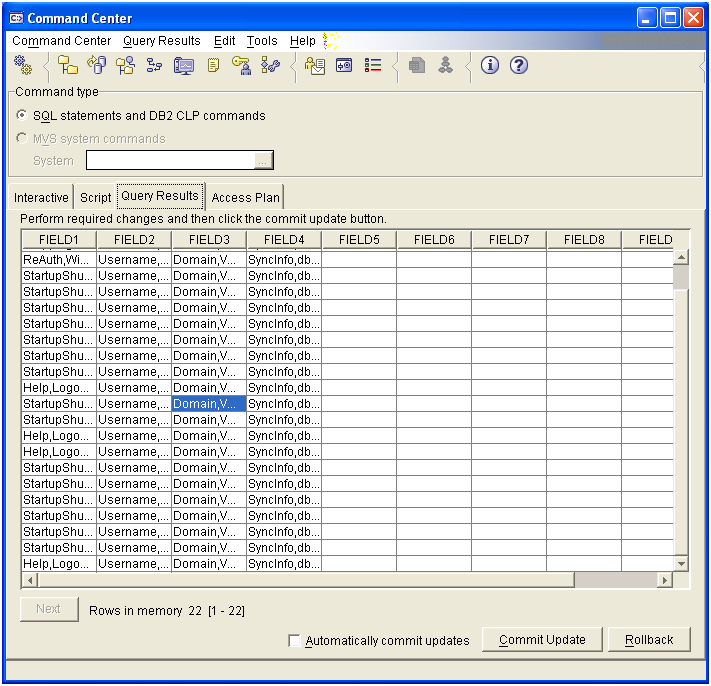
If the Help button press event does not appear, retrace your steps and check your database and Logon Manager configurations.
7.2.15 Configuring Logon Manager Event Logging with MS SQL Server 2005
In order to configure Logon Manager to store event log data in a table in an MS SQL Server 2005 database, you must complete the following steps:
7.2.15.1 Install and Configure MS SQL Server 2005
Before you begin configuring Logon Manager event logging, install and configure an instance of the MS SQL Server 2005 database as described in the vendor's documentation, if you have not already done so. Unless your environment dictates otherwise, select the Typical installation scenario when prompted by the installer.
7.2.15.2 Set Up the Event Log Data Table
Before Logon Manager can store event log data in the database, you must set up a table that will store the data. The steps are as follows:
-
Launch the SQL Server Management Studio application and navigate the left-hand tree to expand the database of your choice.
-
Within the selected database, create a table that will store Logon Manager event log data:
-
Under the selected database, right-click Tables and select New Table… from the context menu. MS SQL Server creates a table with a default name (for example, Table_1).
-
Rename the table as desired using the Name field in the Properties pane on the right-hand side. You will supply this table name to Logon Manager later in this process.
-
Set up the required table columns. For each required column, do the following:
-
Name the column. These column names will correspond to event log field names shown below that you will configure later in this document using the Administrative Console.
WARNING:
Each event log field must have a corresponding column with an identical name in the event log data table. Otherwise, event data will not be recorded.
-
Select char as the data type.
-
Set the data length to 255.
-
Enable the Allow Nulls option.
-
When you have finished, save your changes (File > Save Table).
When complete, the table configuration will appear as follows:
-
7.2.15.3 Install the Database Event Extension Component for Logon Manager
The Database Event Extension component must be installed in order for Logon Manager to store event log data in the database. To install the component, do the following:
-
Click Start > Settings > Control Panel.
-
In the Control Panel, click Programs and Features.
-
In the applet, navigate to the Logon Manager Agent entry and click Change.
-
In the Logon Manager Agent installer, click Next.
-
In the Program Maintenance dialog, select Modify and click Next.
-
In the Advanced Setup dialog, expand the Audit Logging Methods node.
-
Under the Audit Logging Methods node, click the button next to Database and select This feature will be installed on local hard drive from the context menu.
-
Click Next; then, in the dialog that follows, click Install and wait for the installation to complete.
-
When the installation completes successfully, click Finish.
7.2.15.4 Configure Logon Manager Event Logging for Database Support
-
Launch the Administrative Console and load your current configuration set.
-
In the tree, navigate to Global Agent Settings > [Current Configuration Set] > Audit Logging Methods.
-
Select the check box next to the Events to log option and click the ellipsis ("…") button.
-
In the Events to log dialog, select the types of events you want to log.
WARNING:
You must select the Event Types: Info item; otherwise, no data will be logged.
-
Under the Audit Logging node in the tree, select Database and configure Logon Manager as follows:
Setting Correct Value Servers Provider=<SQL_provider_name>;Password=<SQL_admin_user_password>;User ID=<SQLadmin_user_name>;Data Source=<database_name>Default server URL to your database server instance. This will be Server1. Default table Name of the event log data table created earlier in this section. (Table_1 in our example)
Retry interval Set to the desired retry interval. See Chapter 2, "Global Agent Settings in Depth" for more information. Events to log Configure to exactly match the event types chosen in step 4. -
Under the Database node in the tree, select Event Fields.
-
For each field, enter the name of the corresponding column in the event log data table. The names must match the names you specified for the database table columns.
WARNING:
Do not alter the values of the AppName, Category, TimeStamp, and Type parameters.
-
When finished, push the modified configuration set to your directory or write them to the local registry, whichever option suits your environment.
-
Proceed to the next section to test your event logging configuration.
7.2.15.5 Test Your Event Logging Configuration
This simple test procedure allows you to check whether Logon Manager is properly logging event data to the database. In our example, you will press the Help button in Logon Manager and check the database to see if the button press is logged.
-
Open Logon Manager and click Help.
-
Start the Microsoft SQL Server Management Studio application. Typically, the shortcut is located in Start > Program Files > Microsoft SQL Server 2005.
-
In the left-hand tree, navigate to the event log data table.
-
Right-click the event log data table and select Open Table from the context menu.
The Microsoft SQL Server Management Studio will display all Logon Manager events that have been logged in the database so far. The Help button press event should appear near or at the end of the list, as shown below.
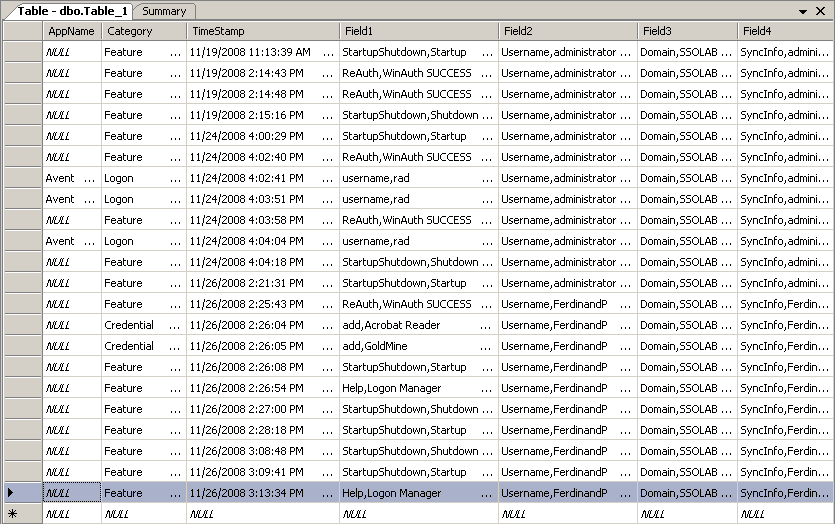
7.2.16 Understanding the Logon Manager Event Notification API
The Logon Manager Notification Service (referred to as "the service" for the remainder of this section) allows the sending and receiving of event data between Oracle Enterprise Single Sign-On applications. The service runs as a Windows system service and acts as a global events repository and an event router.
The service runs as a Windows system service and distinguishes between the following application roles:
-
Producer. An application that sends events to other applications
-
Consumer. An application that receives events from other applications
7.2.16.1 Event Handling Tasks
The service handles events as follows:
-
Stores events received from producers. The service enumerates and retains the latest 1000 events received for each producer and each running session. Once the event buffer is full, the oldest event is discarded for each new event that enters the buffer. Each event can be uniquely identified by producer GUID, session GUID, and its consecutive position in the buffer.
-
Transmits events to consumers. The service uses the following interface to transmit events:
[object,uuid(DD9E48CA-63D2-4106-876D-4DDEAA063B6F),dual,nonextensible,helpstring("Allows Consumers to access to the information about event"),pointer_default(unique) ]interface ISSONotificationEvent: IDispatch{[propget, id(1), helpstring("Gets event order number")] HRESULT Number([out, retval] ULONG* pVal);[propget, id(2), helpstring("Gets notification event code")] HRESULT NotificationCode([out, retval] ULONG* pVal);[propget, id(3), helpstring("Gets progress value")] HRESULT Progress([out, retval] LONG* pVal);[propget, id(4), helpstring("Gets event importance level")] HRESULT Level([out, retval] ULONG* pVal);[propget, id(5), helpstring("Gets additional data")] HRESULT AdditionalData([out, retval] BSTR* pVal);[propget, id(6), helpstring("Gets event time")] HRESULT Time([out, retval] DATE* pVal);};
7.2.16.2 The SSONotificationService Co-Class
The following IDL code describes the service's co-class used by producers and consumers:
[
uuid(FBB13217-02AB-42DF-8867-69B8DD935BA9),helpstring("SSO Notification Service class")
]coclass SSONotificationService {
// Allows Consumers to subscribe for event notifications: [default] interface ISSONotificationService;
// Allows Consumers to access to the information about events:interface ISSONotificationEventReader;
// Allows Producers to obtain ISSONotificationEventWriter pointer for event raising:interface ISSOWriterManager;
};
7.2.16.3 Sending Data (Producer)
Producers should follow these guidelines to interface with the service properly.
7.2.16.3.1 Producer Identification
A producer must implement the ISSOProducerInfo interface to uniquely identify itself to the service:
[
object,uuid(4961B340-D358-4A0E-B8FB-6E2A4BF2DFDD),dual,nonextensible,helpstring("Provides information about Producer"),pointer_default(unique)
]interface ISSOProducerInfo : IDispatch {
[propget, id(1), helpstring("Gets Terminal Services session identifier")] HRESULT SessionId([out, retval] ULONG* pVal);
[propget, id(2), helpstring("Gets Producer GUID")] HRESULT ProducerGuid([out, retval] BSTR* pVal);
[propget, id(3), helpstring("Gets Producer description")] HRESULT ProducerDescription([out, retval] BSTR* pVal);
};
7.2.16.3.2 Event Notification
When an event occurs, the producer passes the event data to the service via the ISSONotificationEventWriter COM interface:
[
object,uuid(72A23F33-927D-4e01-8B50-759262519076),dual,nonextensible,helpstring("Allows Producers to raise new events"),pointer_default(unique)
]interface ISSONotificationEventWriter : IDispatch {
[id(1), helpstring("Raises new event")] HRESULT AddEvent([in] ULONG nNotificationCode, [in] LONG nProgress, [in] ULONG nLevel, [in] BSTR sAdditionalData);
};
To obtain a pointer to this interface, the producer must implement the ISSOProducerInfo interface mentioned earlier and pass its pointer into the GetWriter method of the service's ISSOWriterManager interface shown below:
[
object,uuid(4490B430-81FD-48f5-BCD9-F9F0A82C6832),dual,nonextensible,helpstring("Allows Producers to obtain ISSONotificationEventWriter pointer for event raising"),pointer_default(unique)
]
interface ISSOWriterManager : IDispatch
{
[id(1), helpstring("Returns ISSONotificationEventWriter pointer for specified Producer")]
HRESULT GetWriter([in] IDispatch* pProducerInfo, [out,retval] IDispatch** pEventWriter);
};
7.2.16.3.3 Security Measures
The service only accepts events from producers whose executables have been signed by Oracle.
A producer requesting a pointer to the ISSONotificationEventWriter using the ISSOWriterManager::GetWriter method is validated as follows:
-
The producer's process identifier (PID) is obtained (based on the producer's
ISSOProducerInfodatapassed into the method viatheCoGetServerPIDfunction). -
The signature of the producer executable corresponding to the retrieved PID is checked against the information stored in the Windows registry or through the COM Security Initialization process.
Note:
The service cannot guarantee a valid signature check when the producer executable is remote.
Additionally, Oracle highly recommends that producers and consumers validate the service's signature as follows:
-
Obtain the service's PID using the
CoGetServerPIDfunction from one of theISSONotificationServicesub-interfaces (ISSONotificationEventReader,ISSOWriterManager,ISSONotificationEventWriter, orISSONotificationEvent). -
Check the signature of the executable corresponding to the retrieved PID.
7.2.16.4 Receiving Data (Consumer)
Consumers can receive data using either the "push" or "pull" model.
7.2.16.4.1 Receiving Data in a "Push" Model
In the "push" model, consumers must do the following to receive event data:
-
Implement the
_ISSONotificationServiceEventsinterface to handle events:[uuid(88AD71A0-0A9A-4916-BE26-E82C4F41BF3F),helpstring("Sink interface to handle events")]dispinterface _ISSONotificationServiceEvents {properties:methods: [id(1), helpstring("Handles notification event")]HRESULT HandleEvent([in] IDispatch* pEvent);};The pEvent parameter referenced above stores the pointer to the object implementing the
ISSONotificationEventandISSOProducerInfointerfaces described earlier:[
uuid(C8DCA6F1-2009-4A04-9E4C-BA7CB4CBA86C),helpstring("SSO Event class")]coclass SSONotificationEvent {[default] interface ISSONotificationEvent;interface ISSOProducerInfo;}; -
Subscribe to the service event stream by passing the
_ISSONotificationServiceEventsevent handler interface into the method of theISSONotificationServiceinterface:[object,uuid(079F0093-99CB-4FCF-900E-18DAD87ED316),dual,nonextensible, helpstring("Allows Consumers to subscribe and unsubscribe for events"),pointer_default(unique)]interface ISSONotificationService : IDispatch {[id(1),helpstring("Subscribes event handler to events from specified producer and user and returns subscription cookie")]HRESULT SubscribeToEvents([in] ULONG nSessionId, [in] BSTR sProducerGuid, [in] IUnknown* pEventHandler, [out,retval] ULONG* pCookie);[id(2),helpstring("Unsubscribes event handler from events from specified producer and user using cookie returned bySubscribeToEventsmethod")]HRESULTUnsubscribeFromEvents([in] ULONG nSessionId, [in] BSTR sProducerGuid, [in] ULONG nCookie);};
When a new event arrives, the service transmits the event data to all subscribed consumers.
7.2.16.4.2 Receiving Data in a "Pull" Model
In the "pull" model, a consumer receives the latest events from a producer using the service's ISSONotificationEventReader interface:
[
object,uuid(5C4C57D9-D0B1-46AC-A45C-E41C55A7FEF8),dual,nonextensible,helpstring ("Allows Consumers to get the information about latest events"),pointer_default(unique)
]interface ISSONotificationEventReader : IDispatch {
[id(1), helpstring ("Gets the latest event from specified producer and user")]
HRESULT GetLastEvent([in] ULONG nSessionId, [in] BSTR sProducerGuid, [out, retval] IDispatch** pVal);
[id(2), helpstring("Returns array containing specified number of latest events from specified producer and user")]
HRESULT GetLatestEventsList([in] ULONG nSessionId, [in] BSTR sProducerGuid, [in] ULONG nCount, [out, retval] VARIANT* eventsArray);
};
The service returns event data as pointer (or a safe array of pointers) to the implementations of the ISSONotificationEvent interface described earlier.
7.2.17 Using the Trace Controller Utility
The Trace Controller utility allows you to monitor and log events occurring within an Oracle Enterprise Single Sign-On application. You have the choice to monitor events as they occur in real-time, or log them to a file for later review.
The basic components of trace logging are:
-
Provider. An Oracle Enterprise Single Sign-On application that supports trace logging. Each application represents a separate provider and establishes a separate logging session when trace logging is enabled.
-
Consumer. An application that parses, interprets, and displays the logged events, such as the Trace Controller utility (tracecontroller.exe) or Windows Event Viewer
The Trace Controller utility serves the following purposes:
-
Control and configure the logging of Logon Manager events. This involves creating a session and enabling logging in the desired provider(s)
-
Display the logged events in the desired format, including filtering by a number of criteria.
The utility allows you to select the desired provider, logging method, and event types, as well as configure additional logging options.
After you enable logging for a provider, it remains enabled even when Trace Controller, the provider application, or Windows itself is shut down. When Windows starts back up and/or the provider application is relaunched, event capture continues until you explicitly disable it.
Oracle Enterprise Single Sign-On applications support the following log verbosity levels.
| Level | Level Name | Description |
|---|---|---|
| 1 | Critical | Abnormal exit or termination |
| 2 | Error | Server errors that need logging |
| 3 | Warning | Warnings such as allocation failure |
| 4 | Information | Includes non-error cases (for example, Entry-Exit) |
| 5 | Debug | Detailed traces from intermediate steps |
When capture is complete, the Trace Controller utility allows you to display one or more event logs in a single viewer that organizes the events in chronological order. For example, you can view Logon Manager and Authentication Manager events in a single list, which can then be filtered by a number of custom criteria.
7.2.17.1 Using the Trace Controller Utility in Graphical Mode
This section explains how to use the Trace Controller utility in its graphical (interactive) mode. Using the utility via command line is explained in the section, Using the Trace Controller Utility in Command Line Mode.
Note:
You must have administrative privileges to run the Trace Controller utility. If you are not logged on as a user with administrative privileges, the utility will prompt you for administrative credentials when launched.To enable trace logging:
-
Launch
TraceController.exe. -
If prompted, enter the credentials of an account with administrative privileges.
-
Select Capture Events from the File menu. The Capture window appears.
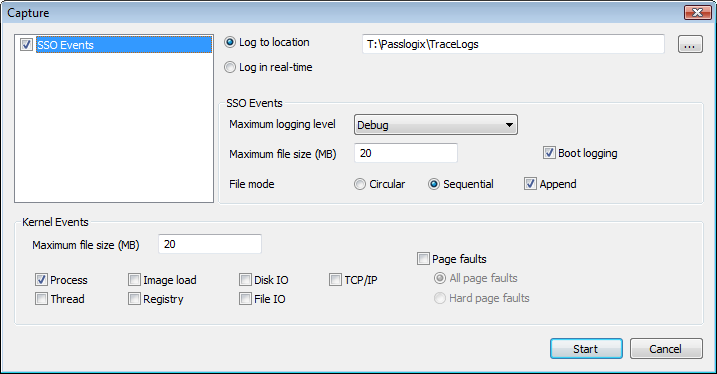
-
In the Capture window, do the following:
-
Select the provider whose events you want to log. By default, SSO Events, the main Logon Manager logging provider, is selected.
-
Select whether you would like to log events to a file or display them in real-time. If logging to a file, click the Browse (…) button and specify the path and file to which you want to log.
-
Specify the Maximum logging level for the SSO Events provider. See Command Line Switch Reference for a list of available logging levels)
-
Specify the Maximum file size for the SSO Events provider. The default value is 20MB.
-
Select the desired log file write mode:
Circular. After the maximum log file size is reached, the utility begins overwriting old data in chronological order. The log is cleared each time logging is started.
Sequential. After the maximum log file size is reached, the utility stops logging. The log is cleared each time logging is started, unless you select the Append check box.
-
If you want logging to begin at boot time, select the Boot logging check box. When this feature is enabled, events will be logged as soon as Windows completes startup and will not require a user logon.
-
For the Kernel Events provider, select the types of events you would like to log, and the maximum log file size (the default value is 20MB). In most cases, only kernel process events should be logged for Logon Manager troubleshooting.
-
-
Click Start to begin logging events. Note the following:
-
Logging will remain enabled until you explicitly disable it.
-
When the Trace Controller utility is running, its system tray icon animates to indicate events are being captured.
Note:
After you have configured your initial capture settings, you can configure the Trace Controller utility to start and stop event capture using hot keys. To set up the hot keys, see Configuring Event Capture Hot Keys.
-
7.2.17.2 Viewing Logged Events
To view events logged to a file, do the following in the Trace Controller utility:
-
Open the desired log file:
-
From the File menu, select Open Events.
-
Browse to the desired provider's log file and click Open. The events stored in the log file are displayed as a list in chronological order.
-
If you want to view events from multiple log files simultaneously, repeat steps 1a and 1b for each additional file you want to open. The events from all open log files are displayed in the list in chronological order.
Note:
To reverse the sort order, click the Time column header. An arrow in the header indicates the currently selected sort direction.
-
-
To view details for a specific event, navigate to it in the list and double-click it. The details are displayed in a pop-up window.
When you are finished viewing the event details, click Close to return to the event list.
Note:
If you are viewing events from multiple log files, you can see which log files are currently open by selecting Show Open Log Files from the File menu.
7.2.17.3 Customizing the Event List View
You can customize the following aspect of the event list:
-
Event list columns
-
Event filter
-
Font style and size
-
Timestamp format
7.2.17.3.1 Customizing Event List Columns
You can select which columns will be displayed in the event list and in what order as follows:
-
Select Choose Details from the Options menu.
The Choose Details window appears.
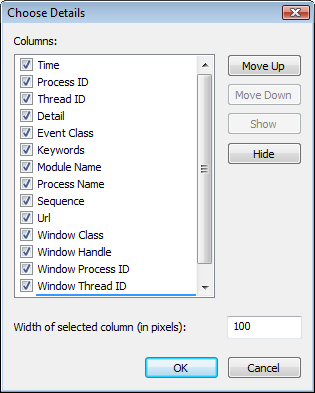
-
In the Columns list, select the check box next to each column you want to be visible; deselect the check box to hide the column.
-
To move a column left in the event list, select it in the Columns list and click Move Up; to move a column right, select it and click Move Down.
-
To set a column's width, select it in the Columns list and enter the desired width (in pixels) into the Width of selected column field.
-
When you have finished, click OK to save your changes.
7.2.17.3.2 Filtering Events
The Trace Controller utility allows you to filter the displayed events by one or more criteria of your choice. To enable filtering, do the following:
-
From the Filter menu, select Filter.
-
In the window that appears, configure your first criterion as follows:
-
Select the parameter to filter against.
-
Select the operator (is, is not, less than, greater than, and so on).
-
Enter the value to match the parameter against. Plain text strings as well as regular expressions are supported.
-
Select whether this criterion should include or exclude matches from the results.
-
Click Add.
-
-
Repeat the previous step to add criteria.
-
When you are finished, click OK. Your results are updated to reflect the filtering criteria you have configured.
Note:
The Advanced Filter option is a special feature reserved for developers. Use the standard filter to filter your event list.
7.2.17.3.3 Customizing the Timestamp Format
You can customize the event timestamp format as follows:
-
From the Options menu, select Date/Time Format.
The Date/Time Format window appears.
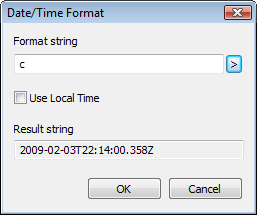
-
Select or enter the desired timestamp format string as follows:
-
If you want to choose one of the preset timestamp formats, click the arrow button to the right of the Format string field and select it from the upper section of the menu.
-
If you want to enter a custom string, click the arrow button to the right of the Format string field and examine the legend in the lower section of the menu, then construct your custom string using the building blocks of your choice.
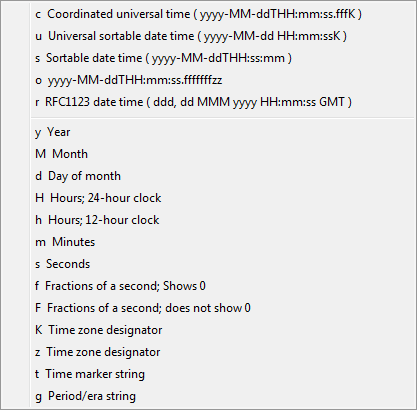
-
-
When you have finished, click OK to save your changes.
7.2.17.4 Configuring Event Capture Hot Keys
You can configure the Trace Controller utility to start and stop event capture using hot keys as follows:
-
From the Options menu, select Hot Keys. The Hot Keys window appears:
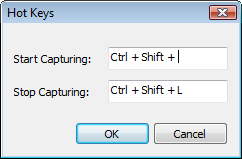
-
Configure the Start Capturing hot key:
-
Click within the Start Capturing field.
-
Press the desired key combination. The combination will appear in the field.
-
-
Configure the Stop Capturing hot key:
-
Click within the Stop Capturing field.
-
Press the desired key combination. The combination will appear in the field.
-
-
Click OK to save your changes.
7.2.17.5 Using the Trace Controller Utility in Command Line Mode
The Trace Controller utility can be launched and configured from the command line without the need to interact with its graphical interface. This section explains the command-line syntax accepted by the utility.
7.2.17.5.1 Command Line Switch Reference
The Trace Controller utility accepts the following command-line switches. Required switches are shown in bold; non-bold switches are optional.
| Switch | Purpose |
|---|---|
/start |
Start logging |
/stop |
Start logging |
/boot |
Start logging on boot |
/noui |
Start in silent mode (suppress graphical interface) |
/path |
Specifies the path in which log files will be stored in the following format:
(This default folder is only accessible to users with administrative privileges.) |
/event |
Specifies the event type(s) to log in the following format:
If omitted, events of all currently supported types (except kernel) will be logged. |
/level |
Specifies the maximum logging verbosity level in the following format:
where 1 - Critical, 2 - Error, 3 - Warning, 4 - Information, 5 - Debug (The default verbosity level is 4.) |
/circular |
Specifies the log file write mode to be circular. In this mode, once the maximum log file size is reached, the utility begins overwriting old data in chronological order.
The log is cleared each time logging is started. This is the default mode. |
/sequential |
Specifies the log file write mode to be sequential. In this mode, once the maximum log file size is reached, the utility stops logging. The log is cleared each time logging is started, unless you also specify the /append switch. |
/append |
If /sequential is used, the utility will continue writing to the log file at the end of the existing data instead of clearing it. |
/fsize |
Specifies the maximum size of the log file in megabytes in the following format:
|
filename |
Specifies the log file name to open for viewing in the following format:
|
7.2.17.5.2 Command-Line Use Examples
The following are examples of operating the Trace Controller utility from the command line.
Starting Logging
To start logging, use the /start switch, plus one of the optional startup switches.
TraceController.exe /start [/noui] [/boot] [/path "<log_file_path>"]
For most troubleshooting scenarios, you will want to log all supported event types at the debug verbosity level and using Oracle-specified defaults for all other configuration options:
TraceController.exe /start /level 5
Specifying Logging Options for Multiple Event Types
When specifying more than one event type, you have the option to specify custom logging options for each individual type, as shown below. You can also specify them globally after specifying the event types, in which case all event types will be logged with the same configuration options.
Custom configuration options for each event type:
TraceController.exe /start /noui /path "T:\Oracle\TraceLogs"
/event "EventType1" /level 2 /circular /fsize:10 /event "EventType2" /level 3 /sequential /append
Global configuration options for all event types:
TraceController.exe /start /noui /path "T:\Oracle\TraceLogs"
/level 2 /circular /fsize 10 /event "EventType1" /event "EventType2"
Stopping Logging
To stop logging, use the /stop switch:
TraceController.exe /stop
Viewing a Log File
You can open one or more log files for viewing as follows:
TraceController.exe "logfile1" "logfile2" … "logfile3"
7.2.18 Authentication Manager Error Messages
This section lists the messages logged in Authentication Manager during smart card authentication.
7.2.18.1 Warning Level Messages
| Event Message | Description |
|---|---|
| Failed to retrieve the random password from the registry | This message can be ignored if the user has just completed the First Time Use (FTU) process, otherwise this indicates that information expected to be in the registry is missing. Check previous logs to ensure the random password was successfully saved and verify that synchronization process has completed successfully. |
| Failed to retrieve the PIN from the registry | This message can be ignored if the user has just completed the FTU process, or the first time after configuration was changed to store the PIN. Otherwise this indicates that information expected to be in the registry is missing. Check previous logs to ensure the PIN was successfully saved and verify that synchronization process has completed successfully. |
| Failed to retrieve the certificate passphrase from the registry | This message can be ignored if the user has just completed the FTU process, otherwise this indicates that information expected to be in the registry is missing. Check previous logs to ensure the passphrase was successfully saved and verify that synchronization process has completed successfully. |
7.2.18.2 Error Level Messages
| Event | Description |
|---|---|
| Smart card selection failed | Either the user canceled out of the smart card selection dialog, or the inserted smart card was not recognized by the system. Check to ensure that the proper middleware for the smart card is installed and configured correctly. |
| Exporting session key failed | Could not export a session key off of the smart card. Verify that the "SmartcardAPI" console setting is configured properly for the middleware. Some middleware may not support exporting session keys. |
| Importing session key failed | Could not import a session key onto the smart card. Verify that the "SmartcardAPI" console setting is configured properly for the middleware and verify that synchronization process has completed successfully. |
| Failed to set application data on the smart card | Application data could not be stored on the smart card. This message can be ignored if Kiosk Manager is not in use. Verify that the middleware includes support for PKCS #11 and the smart card is not "read only." |
| Failed to get application data from the smart card | This error message is usually encountered when application data could not be successfully stored on the smart card. |
| Failed to get the smart card serial number | The middleware does not support retrieving the smart card serial number. This message can be ignored if Kiosk Manager is not in use. |
| Failed to enumerate encryption certificate key containers | The Cryptographic Service Provider (CSP) installed by the middleware does not support enumerating key containers on the smart card. |
| Failed to locate logon certificate | A smart card logon certificate could not be located on the card. Verify that the logon certificate is present on the card and is the default certificate. |
| Failed to locate encryption certificate | If this error is encountered during FTU, no encryption certificates could be located on the card. The smart card logon certificate cannot be used for this purpose. Verify that a separate, non-logon encryption certificate is present on the card.
If this error is encountered after successful FTU, verify that the encryption certificate used during FTU is present on the card and available for use. |
| Failed to obtain exchange key | The exchange key could not be obtained for use. If configured for logon certificates, verify that the certificate is available on the card for use. If SSO keys are configured, verify that the SSO container has been created on the card and contains keys. |
| Failed to create session key | A session key could not be created on the card. Verify that the "SmartcardAPI" console setting is configured properly for the middleware and the smart card is not "read only." |
7.2.19 Regular Expression Syntax
The following operators and meta-characters can be used to specify a text string pattern that the Agent uses to detect specific application windows. See Section 2.13.4.13, "Add or Edit a Title on the Windows Matching Tab" for more information.
The following explanations are adapted for the .NET regular expression reference. The complete description and syntax of regular expressions can be found on the Microsoft Developer Network website (www.msdn.microsoft.com).
| Symbol | Grouping |
|---|---|
[ ] |
Indicates a character class that matches any character inside the brackets.
Example: |
( ) |
Indicates a character grouping operator.
Example: |
{ } |
Indicates a match group.
Example: |
| |
Separates two expressions, exactly one of which matches.
Example, |
| Symbol | Matching |
|---|---|
. |
Matches any single character. |
^ |
If ^ occurs at the start of a character class, it negates the character class. A negated character class matches any character except those inside the brackets. Example, [^abc] matches all characters except "a", "b,",and "c."
If Example, |
$ |
At the end of a regular expression, $ matches the end of the input. Example: [0-9]$ matches a digit at the end of the input. |
- |
In a character class, a hyphen indicates a range of characters.
Example: |
| Symbol | Repeat Operation |
|---|---|
! |
Negates the expression that follows. |
? |
Indicates that the preceding expression is optional: it matches once or not at all.
Example: [0-9][0-9]? matches " |
+ |
Indicates that the preceding expression matches one or more times.
Example: |
* |
Indicates that the preceding expression matches zero or more times. |
??, +?, *? |
"Non-greedy" versions of ?, +, and *. These match as little as possible, unlike the greedy versions which match as much as possible.
Example: given the input " |
| Escape and Abbreviation | |||
|---|---|---|---|
\ |
Escape character that forces the next character to be interpreted literally. Example: [0-9]+ matches one or more digits, but [0-9]\+ matches a digit followed by a plus character).
If Example: The |
||
| Abbreviation | Meaning | Matches | |
\a |
Any alphanumeric character | [a-z A-Z 0-9] |
|
\b |
White space (blank) | [ \\t] |
|
\c |
Any alphabetic character | [a-z A-Z] |
|
\d |
Any decimal digit | [0-9] |
|
\h |
Any hexadecimal digit | [0-9 a-f A-F] |
|
\n |
New line | \r|\r?\n |
|
\q |
A quoted string | \"[^\"]*\"|\'[^\']*\' |
|
\w |
A simple word | [a-z A-Z]+ |
|
\z |
An integer | [0-9]+ |
|
7.2.20 Command-Line Options
You can invoke Logon Manager from the command line to perform certain tasks.
Note:
Items in [brackets] are optional in this section only.| Task | Use/Description | |
|---|---|---|
| Backup | ssoshell.exe/mobility /backup [path] /silent [confirm] |
|
Example: [path] |
The actual path to the directory where the backup file is placed. (Default: the last directory in which a command line backup file was stored, or where Shell:AutoBackupPath points.) |
|
Example: silent |
Do not show the Backup/Restore Wizard when performing the backup. | |
Example: [confirm] |
Show all dialogs. When doing a silent backup where the confirm switch is not present, the user does not see the Yes/No dialog and the Agent defaults to Yes. (Example of a confirm dialog: "Overwrite backup file?") | |
| Logon Manager | ssoshell.exe |
|
| Example | Show Logon Manager | |
| No FTU | ssoshell.exe/background /noftu |
|
| Description | Prevents the Agent from starting twice when logging on to the computer. Enable in the Userinit registry key, which is located in HKLM\Software\Microsoft\ Windows NT\Current Version\Winlogon. |
|
| Description | Prevents the Agent from starting twice when logging on to the computer. Enable in the Userinit registry key, which is located in HKLM\Software\Microsoft\ Windows NT\Current Version\Winlogon. |
|
| Description | Using /noftu ensures that the Agent does not run for users who do not have it in their Windows Startup folder. This allows the administrator to roll out Logon Manager to only specific (not all) users of a particular computer. |
|
| Options | ssoshell.exe/options |
|
| Example | Show the Settings property page. | |
| Restore | ssoshell.exe/mobility /restore [path] /silent [confirm] |
|
Example:[path] |
The actual path to the directory where the backup file exists. (Default: the last directory to which a command line backup file was stored, or where Shell:AutoBackupPath points.) |
|
Example: silent |
Do not show the Backup/Restore Wizard when performing the backup. | |
Example: [confirm] |
Show all dialogs. When doing a silent backup and the confirm switch is not present, the user will not see the Yes/No dialog and the Agent will default to Yes. (Example of a confirm dialog: "Backup file has been restored") | |
Example: Notes |
The restore password submitted by default is the Windows password. The restore command is executed with a startup task (see Section 2.17.9, "Custom Actions Settings"). | |
| Setup | ssoshell.exe/setupmgr |
|
| Example | Show the Setup Wizard. | |
| Shutdown | ssoshell.exe/shutdown |
|
| Startup | ssoshell.exe/background |
|
| Synchronize | ssoshell.exe/syncmgr /sync |
Execute synchronization with the first synchronizer in the Sync Order list (see Section 2.17.7, "Synchronization Settings"; displays a logon to connect to the first-listed synchronizer. |
7.2.21 Character Codes and Keys
This section lists the various codes and keys used to send keystrokes to Logon Manager.
7.2.21.1 Codes for VTabKeyN (Windows)
| Code | Meaning |
|---|---|
`DELAY=N` |
N is the number of milliseconds to delay |
`VKEY=N` |
N is the virtual key code to send |
Example sending a Tab, End, Space, a 1.5 second delay, Logon username , Space, the username/ID, Home, a 0.35 second delay, Tab, and then the password:
VTabKey1=`VKEY=9``VKEY=35` `DELAY=1500`Logon username`VKEY=32`
VTabKey2=`VKEY=36``DELAY=350``VKEY=9`
7.2.21.2 Codes for VirtualKeyCode and VKEY (Windows)
These codes are used in the application configuration file (entlist.ini) to send specific keystrokes to Windows logon or password change form fields. They are listed here for reference only. Use the SendKeys (Windows) dialog to specify keystrokes for a Windows application. See Chapter 2, "Adding Windows Applications" for more information.
| Key | Code | Key | Code | Key | Code | Key | Code |
|---|---|---|---|---|---|---|---|
| Break | 3 | 5 | 53 | V | 86 | F5 | 116 |
| Backspace | 8 | 6 | 54 | W | 87 | F6 | 117 |
| Tab | 9 | 7 | 55 | X | 88 | F7 | 118 |
| Clear | 12 | 8 | 56 | Y | 89 | F8 | 119 |
| Enter | 13 | 9 | 57 | Z | 90 | F9 | 120 |
| Shift | 16 | A | 65 | Left Windows | 91 | F10 | 121 |
| Ctrl | 17 | B | 66 | Right Windows | 92 | F11 | 122 |
| Alt | 18 | C | 67 | NumPad 0 | 96 | F12 | 123 |
| Caps Lock | 20 | D | 68 | NumPad 1 | 97 | F13 | 124 |
| Esc | 27 | E | 69 | NumPad 2 | 98 | F14 | 125 |
| Spacebar | 32 | F | 70 | NumPad 3 | 99 | F15 | 126 |
| Page Up | 33 | G | 71 | NumPad 4 | 100 | F16 | 127 |
| Page Down | 34 | H | 72 | NumPad 5 | 101 | F17 | 128 |
| End | 35 | I | 73 | NumPad 6 | 102 | F18 | 129 |
| Home | 36 | J | 74 | NumPad 7 | 103 | F19 | 130 |
| Left | 37 | K | 75 | NumPad 8 | 104 | F20 | 131 |
| Up | 38 | L | 76 | NumPad 9 | 105 | F21 | 132 |
| Right | 39 | M | 77 | Asterisk (*) | 106 | F22 | 133 |
| Down | 40 | N | 78 | Plus (+) | 107 | F23 | 134 |
| Print Scrn | 44 | O | 79 | Minus (-) | 109 | F24 | 135 |
| Help | 47 | P | 80 | Period (.) | 110 | Num Lock | 144 |
| 0 | 48 | Q | 81 | Slash (/) | 111 | Scroll Lock | 145 |
| 1 | 49 | R | 82 | F1 | 112 | Left Shift | 160 |
| 2 | 50 | S | 83 | F2 | 113 | Right Shift | 161 |
| 3 | 51 | T | 84 | F3 | 114 | Left Ctrl | 162 |
| 4 | 52 | U | 85 | F4 | 115 | Right Ctrl | 163 |
7.2.21.3 Codes for PreKey and TabKey (Host/HLLAPI)
These codes are used in the application configuration file (entlist.ini) to send specific keystrokes to HLLAPI-enabled Mainframe/Host logon or password change form fields. They are listed here for reference only. Use the SendKeys (Host/Mainframe) dialog to specify keystrokes for a host application. See Section 2.12.5, "Adding Host/Mainframe Applications" for more information.
| Char/Cmd | Code | Char/Cmd | Code | Char/Cmd | Code |
|---|---|---|---|---|---|
| Alt Cursor | @$ | Local Print | @P | PF12/F12 | @c |
| Backspace | @< | Reset | @R | PF13/F13 | @d |
| @ | @@ | Shift | @S | PF14/F14 | @e |
| Alt | @A | Dup | @S@x | PF15/F15 | @f |
| Field - | @A@- | Field Mark | @S@y | PF16/F16 | @g |
| Field + | @A@+ | Tab (Right Tab) | @T | PF17/F17 | @h |
| Field Exit | @A@E | Cursor Up | @U | PF18/F18 | @i |
| Alt Cursor | @$ | Cursor Down | @V | PF19/F19 | @j |
| Erase Input | @A@F | Cursor Left | @L | PF20/F20 | @k |
| Sys Request | @A@H | Cursor Right | @Z | PF21/F21 | @l |
| Insert Toggle | @A@I | Page Up | @u | PF22/F22 | @m |
| Cursor Select | @A@J | Page Down | @v | PF23/F23 | @n |
| Attention | @A@Q | End | @q | PF24/F24 | @o |
| Print Screen | @A@T | Home | @0 | PA1 | @x |
| Hexadecimal | @A@X | PF1/F1 | @1 | PA2 | @y |
| Cmd/Func Key | @A@Y | PF2/F2 | @2 | PA3 | @z |
| Print (PC) | @A@t | PF3/F3 | @3 | PA4 | @+ |
| Back/Left Tab | @B | PF4/F4 | @4 | PA5 | @% |
| Clear | @C | PF5/F5 | @5 | PA6 | @& |
| Delete | @D | PF6/F6 | @6 | PA7 | @' |
| Enter | @E | PF7/F7 | @7 | PA8 | @( |
| Erase EOF | @F | PF8/F8 | @8 | PA9 | @) |
| Help | @H | PF9/F9 | @9 | PA10 | @* |
| Insert | @I | PF10/F10 | @a | ||
| New Line | @N | PF11/F11 | @b |
7.2.21.4 ftulist.ini Keys
ftulist.ini determines special actions the Agent will take the first time a user starts it. The file can exist as a local file or as a directory server or database object. If it is deployed using synchronization, ftulist.ini is placed in the %AppData/Passlogix% directory.
Note:
All Logon Manager configuration files (includingentlist.ini and ftulist.ini) can only be created and edited using the Administrative Console. The information in the topics listed below is provided only for reference.The following tables list the keys and acceptable values for each section of ftulist.ini:
-
Root Keys for
ftulist.ini -
Password Windows Section Keys
-
My Logons Section Keys
-
Bulk Add Logon Section Keys
7.2.21.4.1 Root Keys
These settings are used strictly within the [FTU] section and are required.
Example
[FTU]
Ver=20020523
Step1=Password Windows
Step2=My Logons
| First-Time Use Keys | Description | Acceptable values |
|---|---|---|
Ver = %s |
Required. String of the date of the last ftulist.ini file. If the value of this key is higher (newer) than the decimal value in the user's registry (in HKCU\&\Extensions\SetupManager:Completed), then the user will see the bulk add list the next time the user starts up the Agent.
Example: 20020523 |
%s = string representing the decimal equivalent of a date in yyyymmdd (year-month-date) format, as in 20130523 for May 23, 2013. |
Step1 = %s |
Required, do not alter. Calls the section that launches Primary Logon Method. This module forces the user to select an authenticator. | %s = "Password Windows" |
Step2 = %s |
Required, do not alter. Calls the section that launches Access Manager. This module enables bulk adding of credentials. | %s = "My Logons" |
7.2.21.4.2 Password Windows Section Keys
These settings are required and used strictly within the Password Windows section.
Example
[Password Windows]
ExtensionName=<core>
Action1=Password Window
| First-Time Use Keys | Description | Acceptable values |
|---|---|---|
ExtensionName = %s |
Required, do not alter. Internal name of the extension module. | %s = "<core>" |
Action1 = %s |
Required, do not alter. Launches primary logon method. This module forces the user to select an authenticator. | %s = "Password Window" |
7.2.21.4.3 My Logons Section Keys
These settings are required and used strictly within the [My Logons] section.
| First-Time Use Keys | Description | Acceptable values |
|---|---|---|
ExtensionName = %s |
Required, do not alter. Internal name of the extension module. | %s = "AccessManager" |
Section%d = %s |
Required, do not alter. Specifies logons to include in the bulk add wizard. | %d = consecutive integers
|
7.2.21.4.4 Bulk Add Logon Section Keys
These settings are required and used in each bulk-add logon section.
- Example 1
-
[My Logons]
ExtensionName=AccessManager
Section1=Corporate Win App
Section2=Intranet
- Example 2
-
[Intranet]
ConfigKey=*Other Webs
ConfigName=Corporate Intranet
FTU_NeedID=0
FTU_NeedOther=0
FTU_NeedPwd=1
FTU_CONFIRMID=0
FTU_CONFIRMOTHER=0
FTU_CONFIRMPASSWORD=1
URL=Corp Intranet
&
| First-Time Use Keys | Description | Acceptable Values |
|---|---|---|
ConfigKey = %s |
Link to logon configuration in entlist.ini |
%s = application logon section name in entlist.ini or applist.ini. Use [*Mainframe] for host/mainframe logons, [*Other Webs] for Web logons, [*Online Services] for Online service logons, and [*Other Apps] for other Windows application logons. |
ConfigName = %s |
The name to use in the First-Time Use Wizard to describe the logon. | %s = application logon name |
Description = %s |
The name to use in Logon Manager to describe the logon. | %s = application logon name |
FTU_CONFIRMID = %b |
Flag indicating if the First-Time Use Wizard will require the user to confirm username/ID (optional). | %b = 0, user will not have to confirm username/ID (default)
|
FTU_CONFIRMOTHER = %b |
Flag indicating if the First-Time Use Wizard will require the user to confirm a third field, if one exists (optional). | %b = 0, user will not have to confirm third field (default)
|
FTU_CONFIRMPASSWORD = %b |
Flag indicating if the First-Time Use Wizard will require the user to confirm password (optional). | %b = 0, user will not have to confirm password (default)
|
FTU_NeedID = %b |
Flag to indicate whether the application requires a username/ID. | %b = 0, application does not require a username/ID
|
FTU_NeedOther = %b |
Flag to indicate whether the application requires a third field (optional). | %b = 0, application does not require a third field (default)
|
FTU_NeedPwd = %b |
Flag to indicate whether the application requires a password. | %b = 0, application does not require a password
|
URL = %s |
Section name in entlist.ini for a Web or Host application, or URL for a Web site that is not predefined in entlist.ini. |
%s = Web/Host section name or Web URL |
7.2.21.5 entlist.ini Keys
The administrator designates the directory where the entlist.ini file resides. In most instances, this should be a subdirectory under the Logon Manager program directory.
Note:
All Logon Manager configuration files (includingentlist.ini and ftulist.ini) can only be created and edited using the Administrative Console. The information in the topics listed below is provided only for reference.This is also the format for synchronizer objects that override local entlist.ini files.
Note:
A directory-based object causes the Agent to ignore any localentlist.ini file. The remote object (if it exists) overwrites a local entlist.ini file when downloaded.Then, entlist.ini is merged with applist.ini to create a new file (aelist.ini) in the %AppData%\Passlogix directory. The aelist.ini file is overwritten periodically, including when Logon Manager launches, when it re-merges applist.ini and entlist.ini. The Agent then uses aelist.ini to detect known applications.
The tables in the following topics list the keys and acceptable values for each section of entlist.ini.
-
Root Keys for
entlist.ini -
Windows Application Keys
-
Web Application Keys
-
Host/Mainframe Application Keys
-
Password Policy Keys
7.2.21.5.1 Root Keys
These settings are used strictly within the [*Root] section.
- Example 1
-
[*Root]
Section1=*Other Apps
Section2=*Other Webs
Section3=*Mainframe
AppsMaxRetry=1
WebMaxRetry=3
HostMaxRetry=2
WebTimeout=90
&
| Global Application Keys | Description | Acceptable values |
|---|---|---|
[*Root] |
Root section, from which application types (logon classes) are derived. | N/A |
AppsHideConfirmPW = %b |
Indicates whether to hide the password confirmation field in the Logon Error dialog for all Windows applications. | %b = 0; do not hide confirmation field (default)
|
AppsMaxRetry = %d |
Indicates the number of logon retries for all Windows applications the Agent makes before displaying the Logon Error dialog. | %d = the number of retries (default: 0) |
AppsTimeout = %d |
Indicates the maximum time between successive logon attempts that will trigger Error Loop detection for all Windows applications. | %d = amount of time in seconds (default: 30) |
MainframeHideConfirmPW = %b |
Indicates whether to hide the password confirmation field in the Logon Error dialog for all Host applications. | %b = 0; do not hide confirmation field (default)
|
| MainframeMaxRetry = %d | Indicates the number of logon retries for all Host applications the Agent makes before displaying the Logon Error dialog. | %d = the number of retries (default: 0) |
| MainframeTimeout = %d | Indicates the maximum time between successive logon attempts that will trigger Error Loop detection for all Host applications. | %d = amount of time in seconds (default: 30) |
| Section%d = %s | Declaration of supported subsections.
Because *Other Webs, *Online Services, and *Other Apps are defined in |
%d = consecutive integers
|
| WebHideConfirmPW = %b | Indicates whether to hide the password confirmation field in the Logon Error dialog for all Web applications. | %b = 0; do not hide confirmation field (default)
|
| WebMaxRetry = %d | Indicates the number of logon retries for all Web applications the Agent makes before displaying the Logon Error dialog. | %d = the number of retries (default: 0) |
WebTimeout = %d |
Indicates the maximum time between successive logon attempts that will trigger Error Loop detection for all Web applications. | %d = amount of time in seconds (default: 30) |
7.2.21.5.2 Application Type Section Keys
These settings are used for the Windows, Web, and Host application sections that delineate the list of predefined applications.
- Example 1
-
[*Other Apps]
Section1=Corporate WinApp
&
[*Other Webs]
Section1=Corporate Intranet
&
[*Mainframe]
Section1=Corporate Mainframe
| Global Application Keys |
Description | Acceptable Values | |
|---|---|---|---|
[%s] |
Section heading that identifies an application category section. | %s = [*Other Apps]: |
(Windows applications) |
%s = [*Mainframe]: |
(Host/Mainframe applications) | ||
%s = [*Other Webs]: |
(Predefined Web applications) | ||
Section%d = %s |
Declaration of application sections. | %d = consecutive integers
|
|
7.2.21.5.3 Windows Application Keys
These settings are used within applications delineated in the [*Other Apps] section.
| Windows Application Keys | Description | Acceptable Values |
|---|---|---|
AllowReveal = %b |
Flag that enables or disables the Reveal button for password in Wizards and property pages. | %b = 0; disabled
|
AppPathKey%d = %s |
Windows registry key identifying the application associated with a logon to match against running processes. Used in combination with the WindowTitle for exact matching of logon requests. %d is replaced with a number, starting at 1, so that multiple registry keys can be associated with a single logon. |
%d = consecutive integers
|
AutoOK = %b |
Flag instructs the Agent to automatically select OK for this application logon after insertion of logon data. | %b = 0; disabled
|
ChangeTitle%d = %s |
Text matched against password change window titles to identify password change requests. %d is replaced with a number, starting at 1, so that multiple windows can be identified for a single password change request.
There must be a duplicate WindowTitle entry for each ChangeTitle entry. |
%d = consecutive integers
|
ChgCtrl0 = %d |
Control ID used to identify the username/ID field in a password-change request window. | %d = -1; change request does not require a username/ID
|
ChgCtrl1 = %d |
Control ID used to identify the old password field in a password change request window. | %d = -1; change request does not require an old password
|
ChgCtrl2 = %d |
Control ID used to identify the new password field in a password change request window. | %d = -1; change request does not require a new password.
|
ChgCtrl3 = %d |
Control ID used to identify the password confirmation field in a password change request window. | %d = -1; change request does not require a "confirm new password" entry.
|
ConfigName = %d |
Control ID identifying the control that contains the text used to create the initial configuration name when the user adds this logon. | %d = 1 - 99,999; Control ID value |
CPWFlag = %d |
Determines the behavior of the Password Change Wizard, for specific applications, when a user encounters a password-change request. This key is specified in the application's root section, not in a password-change subsection.
Note: This setting can also be set globally, for all applications, via the Registry. |
%d = 1; Prompts user with Password Change Wizard (default).
|
CtrlOrder = %s1, %s2, %s3& |
Determines the order in which fields are sent when UseSendKeys is enabled. For example, specifying CtrlOrder = OtherCtrl1, IDCtrl, PassKeyCtrl tells the Agent that the tab order in the dialog should be OtherCtrl1, then IDCtrl, followed by PassKeyCtrl.
For logons, the default order is For password changes, the default order is Note: This setting applies only when |
%s1 = The first field sent
etc. |
Description = %s |
Text describing this application, also stored in the Description field in Logon Manager. | %s = any string |
ExtMap = %s |
Windows file extension associated with a logon. Allows the Agent to map an icon to the configuration. | %s = three-character string for file extension |
ForceReauth = %b |
Force the user to reauthenticate before providing credentials to this application.
Note: Applies to all subsections; the user would have to reauthenticate multiple times in a multiple-section password change scenario. |
%b = 0; do not require reauthentication (default)
|
Group = %s |
Group section name that this application is a part of. Used when configuring for credential sharing groups. Special values include:
Note: Must set Windows Registry entry |
%s = the section name of the application group that the application belongs to. |
HideConfirmPW = %b |
Determines whether to hide the password confirmation field in the Logon Error dialog. | %b = 0; do not hide confirmation field (default)
|
IDCtrl = %d |
Identifies the username/ID control field and/or the mechanism to provide the username/ID data to the appropriate username/ID control. | %d = 0; the user must use the Agent's "teaching tool" mechanism during application setup (default)
|
IDCtrlType = %d |
Identifies the control type of the username/ID control field. | %d = 0; edit control (default)
|
IgnoreClassName = %s |
Identifies the class name of the logon or password-change window that should be ignored when submitting credentials. Used in cases where an application contains a second, hidden logon or password-change window. | %s = class name string |
InteractionMode = %b |
Prevents the Agent from attaching to the application's window's message queue. | %b = 0; disabled (default)
|
Match%d = %s |
Maps to a matching section for the application. Use this method if the same application has multiple logon and password change screens. This is most useful when one set of user credentials is for multiple screens within an application. By using this method, the matching sections could be set up for logons, password change (pick and manual), and ignores. | %d = consecutive integers
|
MaxRetry = %d |
Determines the number of logon retries the Agent makes before displaying the Logon Error dialog. | %d = the number of retries (default: 0) |
ModuleName%d = %s |
Application module name associated with a logon to match against running processes. Used in conjunction with WindowTitle key to identify a specific application logon or password-change request. %d is replaced with a number, starting at 1, so that multiple application modules can be associated with a single logon. |
%d = consecutive integers
|
OKCtrl = %d |
Identifies the Control ID of the OK button for this application. | %d = 1; use the Agent's internal logic (default)
|
OtherCtrl1 = %d |
Identifies the Control ID of a third logon field and/or the mechanism to provide the additional field data to the appropriate control. | %d = -1; application does not require a third field
|
OtherCtrl1Type = %d |
Identifies the control type of a third logon field. | %d = 0; edit control (default)
|
OtherCtrl2 = %d |
Identifies the Control ID of a fourth logon field and/or the mechanism to provide the additional field data to the appropriate control. | %d = -1; application does not require a fourth field
|
OtherCtrl2Type = %d |
Identifies the control type of a fourth logon field. | %d = 0; edit control (default)
|
OtherLabel1 = %s |
The text label used by the Agent when displaying a third logon field. | %s = the text the Agent will display |
OtherLabel2 = %s |
The text label used by the Agent when displaying a fourth logon field. | %s = the text the Agent will display |
ParentKey1 = %s |
Maps a subsection to its parent section. | %s = parent application/section name |
PassKeyCtrl = %d |
Identifies the password control field and/or the mechanism to provide the password data to the appropriate password control. | %d = 0; the user must use the Agent's "teaching tool" mechanism during application setup
|
PassKeyCtrlType = %d |
Identifies the control type of the password control field. | %d = 0; edit control (default)
|
PassPolicy = %s |
Identifies which password policy section to associate with this application logon configuration. | %s = Policy Section Name |
PresetFocusAll = %b |
Specifies whether to set the focus to a logon field before the Agent actually places data in that field. | %b = 0; disabled (default)
|
QuietGenerator = %b |
When set, this flag instructs the Agent to handle password change requests automatically and not inform the user that a password change request has been handled. | %b = 0; do not use quiet generator, use standard password change process with user intervention (default)
|
Section%d = %s |
Declaration of application subsections. | %d = consecutive integers
|
SystemLogon = %b |
RESERVED. Flag identifying if a logon section is a system logon section. | %b = 0; not a system logon section (default)
|
Timeout = %d |
Determines the maximum time period between successive logon attempts that will trigger Error Loop detection. | %d = amount of time in seconds (default: 30) |
UseSendKeys = %b |
Send fields via keystrokes to the application.
If UseSendKeys is selected, then |
%b = 0; do not use Send Keys; use Control IDs (default)
|
VTabKey%d0 = %d1 |
Specifies the character/delay sequence to send before/after each credential field.
Note: Fields are sent in the order specified by
To send nothing for the specified value, specify a value of |
%d0 = 1; sequence to send before the first credential field
- so on;
|
VTabKeyPWC%d0 = %d1 |
Specifies the character/delay sequence to send before/after each credential field.
Note: Fields are sent in the order specified by
To send nothing for the specified value, specify a value of |
%d0 = 1; sequence to send before the first credential field
- so on;
|
WindowTitle%d = %s |
Text matched against logon window titles to identify logon requests. %d is replaced with a number, starting at 1, so that multiple windows can be identified for a single logon. |
%d = consecutive integers
%s = window title string |
7.2.21.5.4 Windows Application Keys for SectionN Subsection
These settings are used within subsections delineated by SectionN.
- Example 1
-
[Corporate WinApp]
Section1=~Corporate WinApp Logon
Section2=~Corporate WinApp Password Change
&
[~Corporate WinApp Logon]
(the keys below)
7.2.21.5.5 Windows Application Keys for MatchN Subsection
These settings are used within subsections delineated by MatchN.
- Example 1
-
[Corporate WinApp
Section1=~Whatever subsection
Match1=~Corporate WinApp Logon Match
Match2=~Corporate WinApp Ignore Match
&
[~Corporate WinApp Ignore Match]
(the keys below)
| Match Section Keys | Description | Acceptable values |
|---|---|---|
ChangeTitle%d = %s |
(See Windows Application Keys, above) | (See Windows Application Keys, above) |
ChgCtrl0 = %d |
(See Windows Application Keys, above) | (See Windows Application Keys, above) |
ChgCtrl1 = %d |
(See Windows Application Keys, above) | (See Windows Application Keys, above) |
ChgCtrl2 = %d |
(See Windows Application Keys, above) | (See Windows Application Keys, above) |
ChgCtrl3 = %d |
(See Windows Application Keys, above) | (See Windows Application Keys, above) |
Field%d0 = %d1,%s1,%s2,%s3 |
The match criteria for the fields. %d1 is replaced with a number, starting at 1, so that multiple matching criteria could be set up for one screen. %d2 is replaced with the Control ID of the matching criteria. %s1 is replaced with the control type. %s2 is replaced with the comparison operator. %s3 is replaced with the compare value. |
%d0 = consecutive integers
|
IDCtrl = %d |
(See Windows Application Keys, above) | (See Windows Application Keys, above) |
OKCtrl = %d |
(See Windows Application Keys, above) | (See Windows Application Keys, above) |
OtherCtrl1 = %d |
(See Windows Application Keys, above) | (See Windows Application Keys, above) |
OtherCtrl2 = %d |
(See Windows Application Keys, above) | (See Windows Application Keys, above) |
ParentKey1 = %s |
(See Windows Application Keys, above) | (See Windows Application Keys, above) |
PassKeyCtrl = %d |
(See Windows Application Keys, above) | (See Windows Application Keys, above) |
Type = %s |
The type of event. | %s = string for the type:
|
WindowTitle%d = %s |
(See Windows Application Keys, above) | (See Windows Application Keys, above) |
7.2.21.5.6 Host/Mainframe Application Keys
These settings are used within applications delineated in the [*Mainframe] section.
For all keys below that have row/column values, the row/column value starts at 1 (that is, top-left is 1,1).
Note:
For Telnet the value must be 1,1.| Host Application Keys | Description | Acceptable values |
|---|---|---|
AllowReveal = %b |
Flag that enables or disables the Reveal button for password in Wizards and property pages. | %b = 0; disabled
|
AltTabKey = %d |
Flag to indicate how to send credentials to the host emulator. Normally, credentials are sent through a direct HLLAPI call but this setting specifies using another method. If this is set to 1, then Enter is pressed in between two fields. This is usually used for password change screens that separate the new password and confirmation password into two screens.
Note: |
%d = 0; Use HLLAPI to submit credentials directly to the credential fields (default).
|
AutoOK = %b |
Flag instructs the Agent to automatically send Enter for this application logon after insertion of logon data. | %b = 0; disabled
|
CPWFlag = %d |
Determines the behavior of the Password Change Wizard, for specific applications, when a user encounters a password-change request. This key is specified in the application's root section, not in a password-change subsection.
Note: This setting can also be set globally, for all applications, via the Registry. |
%d = 1; Prompts user with Password Change Wizard (default).
|
CtrlOrder = %s1,%s2,%s3,%s4,%s5 |
Determines the order in which fields are sent when AltTabKey=2.
For example, specifying |
%s1 = The first field sent (default: IDField)
|
DelayField = %d |
Numeric value in milliseconds for the Agent to delay between actions (entering value into a field). | %d = integer value in milliseconds |
Description = %s |
Text describing this application, also stored in the Description field in Logon Manager. | %s = any string |
Field%d0 = %d1, %d2, %s |
Strings to match against text fields as displayed on the screen for identifying a host/mainframe logon. %d0 is replaced with a number, starting at 1, so that multiple text strings can be used to uniquely identify a logon. For Telnet applications, the values must be 1,1. |
%d0 = consecutive integers
|
ForceReauth = %b |
Force the user to reauthenticate before providing credentials to this application.
Note: Applies to all subsections; the user would have to reauthenticate multiple times in a multiple-section password change scenario. |
%b = 0; do not require reauthentication (default)
|
Group = %s |
Group section name that this application is a part of. Used when configuring for credential sharing groups. Special values include:
Note: Must set Windows Registry entry |
%s = the section name of the application group that the application belongs to. |
HideConfirmPW = %b |
Determines whether to hide the password confirmation field in the Logon Error dialog. | %b = 0; do not hide confirmation field (default)
|
IDField = %d1, %d2 |
Location of first input character of username/ID field as displayed on a host/mainframe logon screen. For Telnet applications, this value is ignored and is optional. Set to 1,0 if the field is not present. |
%d1 = row of first text string character
|
MaxRetry = %d |
Determines the number of logon retries the Agent makes before displaying the Logon Error dialog. | %d = the number of retries (default: 0) |
NewPWField = %d1,%d2 |
The key-value pair that identifies the location of the new password field. | %d1 = row of first text string character
|
NewPWField2 = %d1,%d2 |
The key-value pair that identifies the location of the new password confirmation field. This is optional. This is not necessary if only one new password field is required. | %d1 = row of first text string character
|
OtherField1 = %d1, %d2 |
Location of first input character of third logon field as displayed on a host/mainframe logon screen. For Telnet applications, this value is ignored and is optional. | %d1 = row of first text string character
|
OtherField2 = %d1, %d2 |
Location of first input character of fourth logon field as displayed on a host/mainframe logon screen. For Telnet applications, this value is ignored and is optional. | %d1 = row of first text string character
|
OtherLabel1 = %s |
The label presented within the Agent for the third logon field. | %s = text string |
OtherLabel2 = %s |
The label presented within the Agent for the fourth logon field. | %s = text string |
Page%d = %s |
Pointer to subsections used for multiple pages for one host/mainframe application. One application logon may have multiple pages. | %d = consecutive integers
|
ParentKey1 = %s |
Maps a subsection to its parent section. | %s = parent application/section name |
PassField = %d1, %d2 |
Location of first input character of password field as displayed on a host/mainframe logon screen. For Telnet applications, the values must be 1,1. Set to 1,0 if the field is not present. | %d1 = row of first text string character
|
PassPolicy = %s |
Identifies which password policy section to associate with this application logon configuration. | %s = Policy Section Name |
PreKey = %d |
A string of characters and mnemonics defining what should be sent prior to any credential submission. | Any combination of characters and/or ASCII mnemonics. Maximum length is 25 characters. |
QuietGenerator = %b |
When set, this flag instructs the Agent to handle password change requests automatically and not inform the user that a password change request has been handled. | %b = 0; do not use quiet generator, use standard password change process with user intervention (default)
|
TabKey1 = %d |
A string of characters and mnemonics defining what should be sent after IDField is submitted. | Any combination of characters and/or ASCII mnemonics. Maximum length is 25 characters. |
TabKey2 = %d |
A string of characters and mnemonics defining what should be sent after PassField is submitted. |
Any combination of characters and/or ASCII mnemonics. Maximum length is 25 characters. |
TabKey3 = %d |
A string of characters and mnemonics defining what should be sent after OtherField1 is submitted. |
Any combination of characters and/or ASCII mnemonics. Maximum length is 25 characters. |
TabKey4 = %d |
A string of characters and mnemonics defining what should be sent after NewPWField is submitted. |
Any combination of characters and/or ASCII mnemonics. Maximum length is 25 characters. |
TabKey5 = %d |
A string of characters and mnemonics defining what should be sent after NewPWField2 is submitted. |
Any combination of characters and/or ASCII mnemonics. Maximum length is 25 characters. |
TabKey6 = %d |
A string of characters and mnemonics defining what should be sent after OtherField2 is submitted. |
Any combination of characters and/or ASCII mnemonics Maximum length is 25 characters. |
Timeout = %d |
Determines the maximum time period between successive logon attempts that will trigger error loop detection. | %d = amount of time in seconds (default: 30) |
7.2.21.5.7 Host Applications: Keys for PageN Subsection
These settings are used within subsections delineated by PageN.
- Example 1
-
[Corporate Mainframe]
Page1=~Corporate Mainframe Logon
Page2=~Corporate Mainframe Password Change
[~Corporate Mainframe Logon]
(the keys below)
7.2.21.5.8 Web Application Keys
These settings are used within applications delineated in the [*Other Webs] section.
| Web Application Keys | Description | Acceptable values |
|---|---|---|
AllowReveal = %b |
Flag that enables or disables the Reveal button for password in Wizards and property pages. | %b = 0; disabled
|
AutoOK = %b |
Flag instructs the Agent to automatically send Enter for this application logon after insertion of logon data. | %b = 0; disabled
|
CPWFlag = %d |
Determines the behavior of the Password Change Wizard, for specific applications, when a user encounters a password-change request. This key is specified in the application's root section, not in a password-change subsection.
Note: This setting can also be set globally, for all applications, using the Registry. |
%d = 1; Prompts user with Password Change Wizard (default).
|
Description = %s |
Text describing this application, also stored in the Description field in Logon Manager. | %s = any string |
ForceReauth = %b |
Force the user to reauthenticate before providing credentials to this application.
Note: Applies to all subsections; the user would have to reauthenticate multiple times in a multiple-section password change scenario. |
%b = 0; do not require reauthentication (default)
|
Group = %s |
Group section name that this application is a part of. Used when configuring for credential sharing groups. Special values include:
Note: Must set Windows Registry entry |
%s = the section name of the application group that the application belongs to. |
HideConfirmPW = %b |
Determines whether to hide the password confirmation field in the Logon Error dialog. | %b = 0; do not hide confirmation field (default)
|
IDField = %s1,%s2,%s3,%s4 |
Identification of the field for entering a username/ID.
Note: If a frame/form/field name consists solely of digits, the enumerated value must be used. |
%s1 = Frame name/number
|
MaxRetry = %d |
Determines the number of logon retries the Agent makes before displaying the Logon Error dialog. | %d = the number of retries (default: 0) |
NewPWField = %s1,%s2,%s3,%s4 |
Identification of the field for entering a new password. | %s1 = Frame name/number
|
NewPWField2 = %s1,%s2,%s3,%s4 |
Identification of the field for confirming a new password. | %s1 = Frame name/number
|
OtherField1 = %s1,%s2,%s3,%s4 |
Identification of the third logon field. | %s1 = Frame name/number
|
OtherField2 = %s1,%s2,%s3,%s4 |
Identification of the fourth logon field. | %s1 = Frame name/number
|
OtherLabel1 = %s |
The label presented within the Agent for a third logon field. | %s = text string |
OtherLabel2 = %s |
The label presented within the Agent for a fourth logon field. | %s = text string |
ParentKey1 = %s |
Maps a subsection to its parent section. | %s = parent application/section name |
PassField = %s1,%s2,%s3,%s4 |
Identification of the field for entering the password. | %s1 = Frame name/number
|
PassPolicy = %s |
Identifies which password policy section to associate with this application logon configuration. | %s = Policy Section Name |
QuietGenerator = %b |
When set, this flag instructs the Agent to handle password change requests automatically and not inform the user that a password change request has been handled. | %b = 0; do not use quiet generator, use standard password change process with user intervention (default)
|
Section%d = %s |
Declaration of application subsections. | %d = consecutive integers
|
StrictURLCheck = %b |
Determines whether to require an exact (case-insensitive) URL match or to use substring matching. | %b = 0; use substring matching (default)
|
SubmitField = %s1,%s2,%s3,%s4 |
Identification of the Submit button (or equivalent).
The value format is frame name/number, form name/number, field name/number/URL, and Field type. If the field type is image, the field name must be the entire/exact URL. Note: This entry is optional. If not specified, the Agent uses its own internal search logic to locate and press this button. |
%s1 = Frame name/number
|
Timeout = %d |
Determines the maximum time period between successive logon attempts that will trigger Error Loop detection. | %d = amount of time in seconds (default: 30) |
URL%d = %s |
The address(es) of a Web site's logon page(s).
Note: If the web address consists of spaces or special characters, use the URL quoting method (RFC 2396) to define the web address. This means substituting |
%d = consecutive integers starting with 1
|
7.2.21.5.9 Web Application Keys for SectionN Subsection
These settings are used within subsections delineated by SectionN.
- Example 1
-
[Corporate WebApp]
Section1=~Corporate Intranet Logon #1
Section2=~Corporate Intranet Logon #2
&
[~Corporate Intranet Logon #1]
(the keys below)
| Web Application Keys | Description | Acceptable values |
|---|---|---|
IDField = %s1,%s2,%s3,%s4 |
(See Windows Application Keys, above) | (See Windows Application Keys, above) |
NewPWField = %s1,%s2,%s3,%s4 |
(See Windows Application Keys, above) | (See Windows Application Keys, above) |
NewPWField2 = %s1,%s2,%s3,%s4 |
(See Windows Application Keys, above) | (See Windows Application Keys, above) |
OtherField1 = %s1,%s2,%s3,%s4 |
(See Windows Application Keys, above) | (See Windows Application Keys, above) |
OtherField2 = %s1,%s2,%s3,%s4 |
(See Windows Application Keys, above) | (See Windows Application Keys, above) |
ParentKey1 = %s |
(See Windows Application Keys, above) | (See Windows Application Keys, above) |
PassField = %s1,%s2,%s3,%s4 |
(See Windows Application Keys, above) | (See Windows Application Keys, above) |
SubmitField = %s1,%s2,%s3,%s4 |
(See Windows Application Keys, above) | (See Windows Application Keys, above) |
URL%d = %s |
(See Windows Application Keys, above) | (See Windows Application Keys, above) |
7.2.21.5.10 Password Policy Keys
These settings are used within subsections delineated by SectionN in the [*PasswordPolicies] section.
- Example 1
-
[*PasswordPolicies
Section1=A policy
Section2=PIN
Section3=Windows
&
[A policy]
(the keys below)
| Password Policy Keys | Description | Acceptable Values |
|---|---|---|
ALPHA = %s |
Flag instructing the Agent to use alphabetic characters when generating a password. | %s = U; use upper case alphabetic characters only
|
NAME = %s |
Descriptive name of this password policy. | %s = any string |
NUMCONSMAX = %d |
Number of times a given character can be repeated consecutively (adjacent to itself). | %d = 0-127 (default: 8) |
NUMERIC = %b |
Flag instructing the Agent to use numeric characters when generating a password. | %b = 0; do not use numeric characters (default)
|
NUMFLAGFIRST = %b |
Flag indicating if a numeric character can start a password. | %b = 0; numeric character cannot start (default)
|
NUMFLAGLAST = %b |
Flag indicating if a numeric character can end a password. | %b = 0; numeric character cannot end (default)
|
NUMRPTMAX = %d |
Number of times a character can be repeated in a password. | %d = 0-127 (default: 8) |
NUMSIZE = %d |
Maximum number of numeric characters. | %d = 0-128 (default: 0) |
NUMSIZEMIN = %d |
Minimum number of numeric characters. | %d = 0-128 (default: 0) |
SBYE = %s |
List of special characters to exclude when generating this password. | %s = any string of special characters, to exclude, such as:
The Windows registry key pair that holds the list of special characters normally used, but which can be excluded, is |
SCHARFLAGFIRST = %b |
Flag specifying if a special character can start a password. | %b = 0; special character cannot start (default)
|
SCHARFLAGLAST = %b |
Flag specifying if a special character can end a password. | %b = 0; special character cannot end (default)
|
SCHARS = %b |
Flag instructing the Agent to use special characters when generating a password. | %b = 0; do not use special characters (default)
|
SCHARSIZE = %d |
Maximum number of special characters. | %d =0-128 (default: 0) |
SCHARSIZEMIN = %d |
Minimum number of special characters. | %d =0-128 (default: 0) |
SIZE = %d |
Maximum total length of a password. | %d = 1-255 (default: 8) |
| SIZEMIN = %d | Minimum total length of a password. | %d = 1-255 (default: 8) |
7.2.22 Kiosk Manager .NET API Sample
- Example 1 .NET API Sample C# code with properties for the "User Change" event
-
using System;using System.Collections.Generic;using System.Text;using System.Windows.Forms;namespace ClassLibraryTest{ public class TestClass { private string m_userName; private string m_domainName; public string UserName { set { m_userName = value; } get { return m_userName; } } public string DomainName { set { m_domainName = value; } get { return m_domainName; } } public void UserChange() { MessageBox.Show("UserChange called with user: " + DomainName + "\\" + UserName); } public void SessionStart() { MessageBox.Show("SessionStart called"); } public void SessionEnd() { MessageBox.Show("SessionEnd called"); } public void SessionLocked() { MessageBox.Show("SessionLocked called"); } public void SessionUnlocked() { MessageBox.Show("SessionUnlocked called"); } public void PreSessionUnlocked() { MessageBox.Show("PreSessionUnlocked called"); } public void AuthLogon() { MessageBox.Show("AuthLogon called"); } public void AuthTimeout() { MessageBox.Show("AuthTimeout called"); } public void DeviceIn() { MessageBox.Show("DeviceIn called"); } public void DeviceOut() { MessageBox.Show("DeviceOut called"); } public void GracePeriod() { MessageBox.Show("GracePeriod called"); } }}
7.3 Password Reset
This section contains information applicable specifically to Password Reset.
7.3.1 Understanding Password Reset Data Structures
When you initialize the database schema, several database tables are created. Password Reset uses these tables to store data during its operation. This section discusses the database tables and how Password Reset uses them.
The schema contain data in the following tables:
Note:
This information is intended as a reference only and does not provide the actual configuration steps whose results are illustrated in the examples shown. For information on how to access the configuration forms and settings described in this guide, see the Oracle Enterprise Single Sign-On Suite Installation Guide.7.3.1.1 Main Configuration Data (SYSTEMPARAMETERS Table)
In the following example, we configure Password Reset and submit the changes to the server.
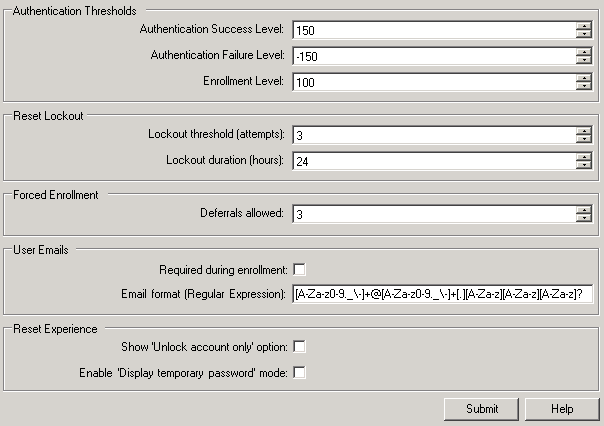
When you click Submit, the following data is written to the SYSTEMPARAMETERS table as an XML string:
- Example 1 System Parameters XML String
-
AuthSuccessLevel="150" AuthFailureLevel="-150" EnrollLevel="200" UserQuestionCorrectResponseWeight="0" UserQuestionWrongResponseWeight="0" MinUserDefinedQuestions="0" MaxUserDefinedQuestions="0" AdminServiceStatus="0" OperationalServiceState="0" UserLockoutCount="3" UserLockoutHours="24" ByPassForceEnrollment="3" ExcludedUsers="" UserEmailRequired="0" UserEmailFormat="[A-Za-z0-9._\-]+@[A-Za-z0-9._\-]+[.][A-Za-z][A-Za-z][A-Za-z]?" ShowUnlockOption="false" EnableTempPasswordMode="false"
Additionally, the following logging configuration data is written to the SYSTEMPARAMETERS table as an XML string:
7.3.1.2 Logging Configuration Data (SYSTEMPARAMETERS Table)
In the following example, we configure Password Reset logging and submit the changes to the server.
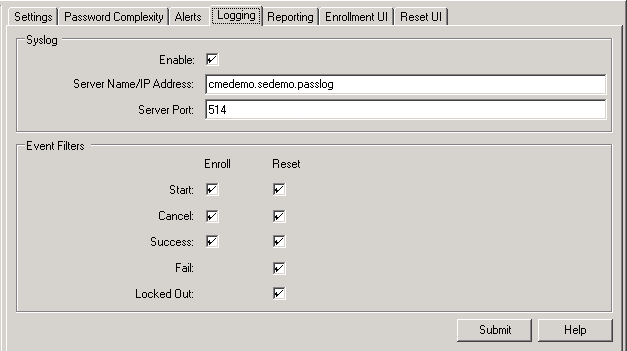
When you click Submit, the following data is written to the SYSTEMPARAMETERS table as an XML string:
7.3.1.3 System Challenge Question Data (SYSTEMPARAMETERS Table)
In the following example, we configure Password Reset system challenge questions and submit the changes to the server.
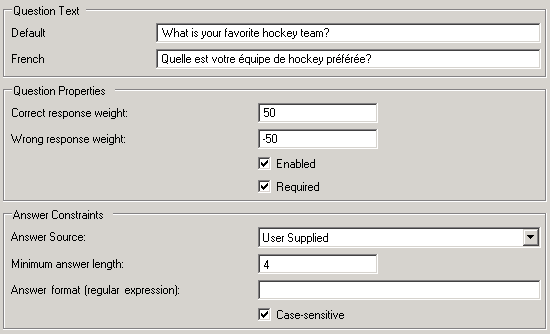
When you click Submit, the following data is written to the SYSTEMPARAMETERS table as XML strings:
| Field | String |
|---|---|
QUID |
99a96ea2-671c-4db6-941c-058a6986123b |
QUESTION |
QuestionText="What is your favorite hockey team?"
|
A new row is added for each system challenge question created.
7.3.1.4 User Enrollment Data (ENROLLMENTINFORMATION, USERQUESTIONS, and USER Tables)
The following example illustrates the data written to the database during user enrollment.
-
User accesses the enrollment page via the following URL:
http://<hostname>:<port>/vgoselfservicereset/enrollmentclient/ enrolluser.aspxThe Password Reset enrollment page is displayed.
-
User clicks Start. A new row with the following data (in XML string format) is written to the USER table:
Field String USER.USERSIDS-1-5-21-1607104245-2398925301-1456127008-1137USER.ENROLLEDFALSEUSER.USERINFORMATIONUserName="SEDEMO\jraymond"strSid="S-1-5-21-1607104245-2398925301-1456127008-1137"bEnrolled="false"LockOutTime="0001-01-01T00:00:00-05:00"LockoutCount="0"Email=""EnrollmentByPassCount="0"<
Language/><
ConnectorUsername/> -
When the user answers the required challenge question, a confirmation screen is displayed and a row with the following data is added to the
ENROLLMENTINFORMATIONtable:Field String USERSIDS-1-5-21-1607104245-2398925301-1456127008-1137ENROLLMENTINFORMATIONStartTime="2008-11-21T15:05:02.8386162-05:00"EndTime="0001-01-01T00:00:00-05:00"Weight="0"Activity="1"State="2"UserNameSelect="SEDEMO\jraymond"GUID="d9d3c610-dd78-4292-924c-f21f9c9b9217"CREATETIME21- NOV-08 -
When the user clicks Next to begin answering the optional challenge questions, the following message is logged:
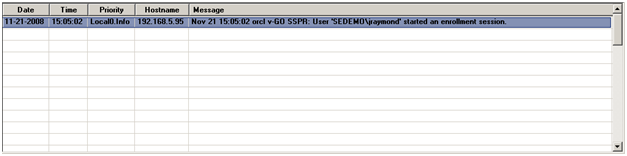
When the user has answered the optional questions (six in our example), the Enrollment Finished screen appears.
-
When the user clicks Close, the following events occur:
-
A message is logged:
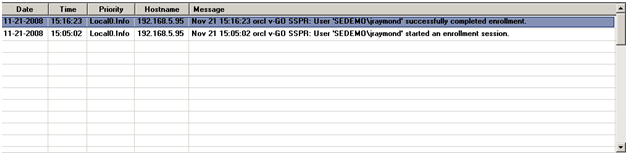
-
A row for each answered question is added to the
USERQUESTIONStable with the following data:Field String USERSIDS-1-5-21-1607104245-2398925301-1456127008-1137QUID53412afd-af16-4a1a-9ddb-ecdf5414ff51USERQUESTIONSQuestionAnswer="BoNGMYmBe5KUp5Zqzu5QtOGylJl6QJtnupKIkQ8Tx SnQGIU0" SystemQuestion="true"SystemQUID="99a96ea2-671c-4db6-941c-058a6986123b"QUID="53412afd-af16-4a1a-9ddb-ecdf5414ff51" -
The following data is written to the
USERtable:Field String USER.USERSIDS-1-5-21-1607104245-2398925301-1456127008-1137USER.ENROLLEDTRUEUSER.USERINFORMATIONUserName="SEDEMO\jraymond"Sid="S-1-5-21-1607104245-2398925301-1456127008-1137" Enrolled="true"LockOutTime="0001-01-01T00:00:00-05:00"LockoutCount="0"Email=""EnrollmentByPassCount="0"Language />ConnectorUsername /> -
The following data is written to the
ENROLLMENTINFORMATIONtable:Field String USERSIDS-1-5-21-1607104245-2398925301-1456127008-1137ENROLLMENTINFORMATIONStartTime="2008-11-21T15:05:02.8386162-05:00"EndTime="2008-11-21T15:16:23.1736578-05:00"Weight="200"Activity="1"State="6"UserNameSelect="SEDEMO\jraymond"GUID="71c2739f-b192-42b3-a326-271bec9323da"
CREATETIME21- NOV-08
-
7.3.1.5 Password Reset Data (RESETINFORMATION Table)
The following example illustrates the data written to the database during password reset.
-
User accesses the password reset page via the following URL:
http://<hostname>:<port>/vgoselfservicereset/resetclient/default.aspxThe Password Reset logon page appears.
-
When the user enters the required information and waits too long before clicking the OK button, the Session is invalid screen appears, providing a link allowing the user to reset the enrollment session. At this point, the following message is logged:
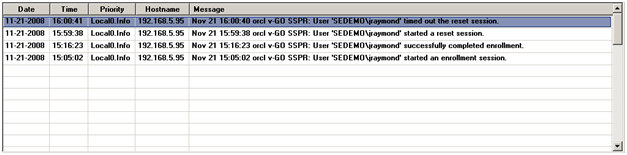
-
When the user retries the reset procedure and arrives at the password reset page, the following data is written to the
RESETINFORMATIONtable:Field String USERSIDS-1-5-21-1607104245-2398925301-1456127008-1137RESETINFORMATIONStartTime="2008-11-21T15:59:38.436503-05:00"EndTime="2008-11-21T16:00:40.5771384-05:00"Weight="0"State="2"HostAddress="192.168.5.101"CREATETIME21-NOV-08At this point, the following message is logged:
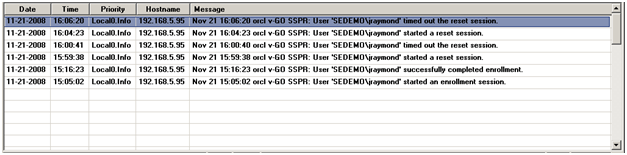
-
When the user has successfully reset the password, Password Reset displays a message confirming the successful password reset and the following data is written to the
RESETINFORMATIONtable:Field String USERSIDS-1-5-21-1607104245-2398925301-1456127008-1137RESETINFORMATIONStartTime="2008-11-21T16:10:43.7618874-05:00"EndTime="0001-01-01T00:00:00-05:00"Weight="100"State="6"HostAddress="192.168.5.101"CREATETIME21-NOV-08At this point, the following message is logged:
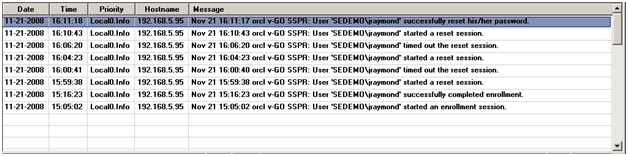
7.3.1.6 Log Message Data (SYSLOG)
When enabled, the logging feature of Password Reset will write the following data to SYSLOG:
-
Date
-
Time
-
Priority
-
Host name
-
Message
The following are examples of typical log messages generated by Password Reset during normal operation.
- Example 1 Logging Configuration Table Entry
-
Nov 21 16:21:46 orcl v-GO SSPR: User 'SEDEMO\lchristine' started an enrollment session.
Nov 21 16:22:42 orcl v-GO SSPR: User 'SEDEMO\lchristine' cancelled the enrollment session.
Nov 21 15:16:23 orcl v-GO SSPR: User 'SEDEMO\jraymond' successfully completed enrollment
- Example 2 Example Password Reset Log Messages
-
Nov 21 16:10:43 orcl v-GO SSPR: User 'SEDEMO\jraymond' started a reset session.
Nov 24 11:21:51 orcl v-GO SSPR: User 'SEDEMO\jraymond' cancelled the reset session.
Nov 21 16:11:17 orcl v-GO SSPR: User 'SEDEMO\jraymond' successfully reset his/her password.
Nov 24 09:43:08 orcl v-GO SSPR: User 'SEDEMO\jraymond' failed the reset quiz.
Nov 24 10:00:15 orcl v-GO SSPR: User 'SEDEMO\jraymond' has been locked out!
Nov 21 16:06:20 orcl v-GO SSPR: User 'SEDEMO\jraymond' timed out the reset session.
Nov 24 10:13:28 orcl v-GO SSPR: User 'SEDEMO\jraymond' successfully unlocked his/her account.
For additional information on logging see Chapter 4, "Using the Administrative Console to Configure Password Reset" in this guide.
7.3.2 Schema Diagram
This diagram shows the object classes that Password Reset adds when extending the schema.
-
Each box represents a class.
-
The class name is displayed in the top of the box.
-
The attributes the class can have are displayed in the bottom of the box.
-
Each link represents the child classes that a class can contain.
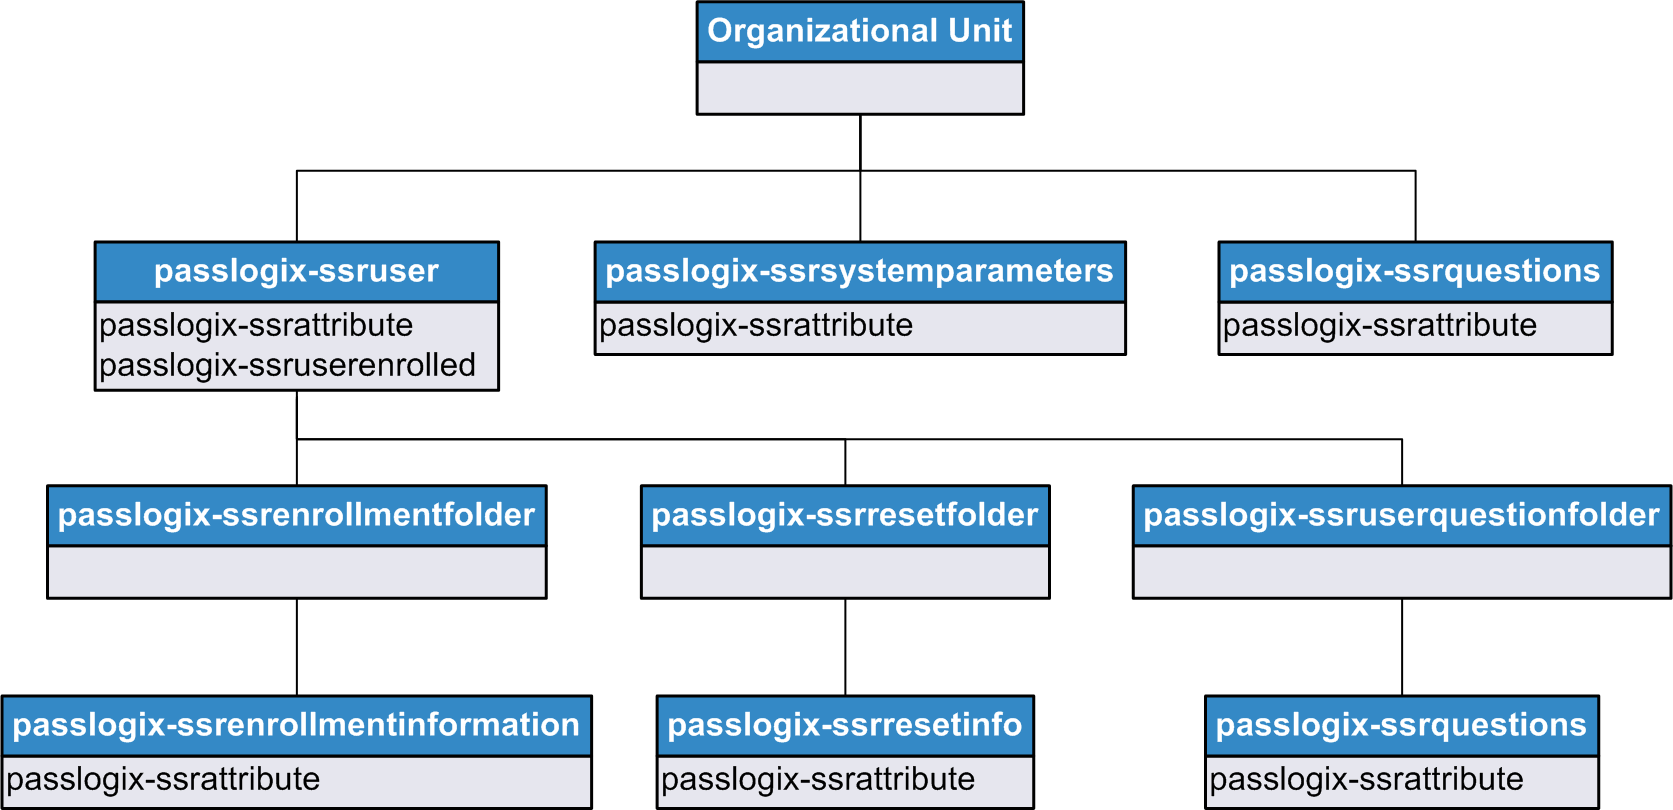
7.3.2.1 Rights and Security
At a minimum, the Password Reset Web Service account requires permission to create, delete, and modify the classes shown in the schema diagram. These permissions should be granted for the OU=SSPR organizational unit and be inherited to all child objects.
7.3.2.2 Object Classes
Following are definitions of the schema's object classes.
7.3.2.2.1 passlogix-ssruser
This class contains enrollment, reset, and question response objects, and serves as a container to hold all the information about an Password Reset user. An instance of this class will be created for each user under OU=SSPR,OU=Users. The instance name will be the user's SID.
| Attribute Name | Syntax | Flag |
|---|---|---|
passlogix-ssrattribute |
Case Ignore String | Single Valued |
passlogix-ssruserenrolled |
Cast Ignore String | Single Valued |
| Other optional attributes | cn, dn |
7.3.2.2.2 passlogix-ssrenrollmentfolder
This class contains passlogix-ssrenrollmentinformation objects, and can only exist as a child of a passlogixssruser object.
| Attribute Name | Syntax | Flag |
|---|---|---|
| Other optional attributes | cn, dn |
7.3.2.2.3 passlogix-ssrenrollmentinformation
This class stores information about an enrollment event, and typically exists as a child of passlogix-ssrenrollmentfolder. The instance name will be a randomly generated GUID.
| Attribute Name | Syntax | Flag |
|---|---|---|
passlogix-ssrattribute |
Case Ignore String | Single Valued |
| Other optional attributes | cn, dn |
7.3.2.2.4 passlogix-ssruserquestionfolder
This class containspasslogix-ssrquestions objects, and can only exist as a child of a passlogix-ssruser object.
| Attribute Name | Syntax | Flag |
|---|---|---|
| Other optional attributes | cn, dn |
7.3.2.2.5 passlogix-ssrquestions
This class stores information about a question or a response, and typically exists as a child of passlogixssruserquestionfolder if it represents the user answer to a question. If it represents a system question, it will exist under OU=SSPR,OU=SystemQuestions. The instance name will be a randomly generated GUID.
| Attribute Name | Syntax | Flag |
|---|---|---|
passlogix-ssrattribute |
Case Ignore String | Single Valued |
| Other optional attributes | cn, dn |
7.3.2.2.6 passlogix-ssrresetfolder
This class containspasslogix-ssrresetinfoobjects, and can only exist as a child of a passlogix-ssruserobject.
| Attribute Name | Syntax | Flag |
|---|---|---|
| Other optional attributes | cn, dn |
7.3.2.2.7 passlogix-ssrresetinfo
This class stores information about a reset event, and typically exists as a child of passlogix-ssrresetfolder. The instance name will be a randomly generated GUID.
| Attribute Name | Syntax | Flag |
|---|---|---|
passlogix-ssrattribute |
Case Ignore String | Single Valued |
| Other optional attributes | cn, dn |
7.3.2.2.8 passlogix-ssrsystemparameters
This class stores Password Reset system settings information. An instance of this class is typically created under OU=SSPR and will be named CN=SystemParameters.
| Attribute Name | Syntax | Flag |
|---|---|---|
passlogix-ssrattribute |
Case Ignore String | Single Valued |
| Other optional attributes | cn, dn |
7.3.3 Configuring Password Reset for Data Storage in an Oracle Database
Follow the guidelines below when preparing your Oracle database instance for Password Reset:
-
Create a dedicated simple tablespace in a simple database instance with initial size of 200MB and auto-extend enabled.
-
Create a dedicated application user whose only role is to allow Password Reset to connect to and store data in the database. Do not use the SYSTEM user for interfacing Password Reset with the database.
Note:
The specifics of configuring your Oracle database are beyond the scope of this document. Oracle highly recommends that you engage your organization's DBA team to determine how to integrate Password Reset into your existing Oracle database infrastructure.7.3.3.1 Configuring the Database Schema for Password Reset Data
Complete the steps below to configure the database schema for Password Reset:
-
Locate the Password Reset DDL script file:
%PROGRAM FILES%\Passlogix\v-GO SSPR\WebServices\OracleTables.txt -
If you have not already done so, replace all instances of the SYSTEM user in the
OracleTables.txtscript with the dedicated Password Reset application user you created when preparing your Oracle database instance. -
Launch the Oracle SQL*Plus client and log on to the Password Reset database instance.
-
Execute theOracleTables.txtscript create the required data structures:
@ "<ESSO-PR_server_install_path>\WebServices\OracleTables.txt"
7.3.3.2 Configuring Password Reset to Store Data in the Database
-
Log in to the Administrative Console by pointing your Web browser at the following URL:
http://<hostname>:<port>/vGoSelfServiceReset/ManagementClient/storage.aspxNote:
If you have configured Password Reset to accept SSL connections, replacehttpwithhttpsin the above URL. -
In the left hand pane, click Storage.
-
On the Storage page, do the following:
-
From the Storage Type drop-down list, select Oracle Database.
-
In the Connection String field, enter the connection string for the target database instance, then click Add. The syntax is as follows (on a single line):
Provider=OraOLEDB.Oracle;Data Source=<datasource>;User Id=<user_id>;Password=<password>Where:
<datasource>is the name of the data source for the target instance,<user_id>is the ID of the dedicated application user account you created in your database instance for Password Reset,<password>is the password for the user chosen above. -
In the Database Timeout field, enter a desired value in seconds. Oracle recommends 60 seconds as a default.
-
Click Submit.
Password Reset is now configured for storing its data in the selected database instance. See Understanding Password Reset Data Structures for more information on, and examples of, the data Password Reset stores in the database, and how this data is organized.
-
7.3.4 Password Reset Client-Side Registry Settings
This section describes registry settings governing the behavior of the Password Reset client.
7.3.4.1 Under HKLM\Software\Passlogix\SSPR
| Key | Value Name | Data Type | Data [URLRoot] : http://[host]/vgoselfservicereset |
|---|---|---|---|
WindowsInterface |
EnrollURL |
string (REG_SZ) | URL of the Enrollment service default page: [URLroot]/enrollmentclient/enrolluser.aspx |
ResetURL |
string (REG_SZ) | URL of the reset service default page: [URLroot]/resetclient/default.aspx |
|
StatusURL |
string (REG_SZ) | URL of the checkstatus page (notifies reset client that reset service is available: [URLroot]/resetclient/checkstatus.aspx |
|
CheckEnrollURL |
string (REG_SZ) | URL of Enrollment check service (checks if user is enrolled in service): [URLroot]/resetclient/checkenrollment.aspx |
|
AutomaticEnroll |
dword (REG_DWORD) | Set to a non-zero value to offer enrollment option to enroll user at next logon. Set to 0 (default) not to offer enrollment upon logon. | |
ForceEnrollment |
dword (REG_DWORD) | Set to a non-zero value to require unenrolled user to enroll at next logon. Set to 0 (default) not to require enrollment upon logon. | |
CheckForceEnrollment |
string (REG_SZ) | URL of force enrollment check service (checks the number of times user can defer Enrollment): [URLroot]/resetclient/checkforceenrollment.aspx |
|
WindowHeight |
dword (REG_DWORD) | Adjusts the Password Reset browser window height. | |
WindowWidth |
dword (REG_DWORD) | Adjusts the Password Reset browser window width. | |
IgnoreCertRevocation Errors |
dword (REG_DWORD) | Set to a non-zero value to ignore certificate revocation errors. Set to 0 (default) or leave empty to recognize those errors. | |
WindowsInterface\xx (where xx is the two-letter language code*) |
LinkText |
string (REG_SZ) | Enter desired text to instruct the user to click to reset password (Windows 7 only). |
WindowTitle |
string (REG_SZ) | Enter desired text for the Enrollment and Reset Interface window titles. | |
WindowsInterface\ |
UseSeparateTile |
string (REG_DWORD) | Set to any non-zero number to eliminate the "Forgot your password?" link under the user's default Windows 7 logon tile, and create a separate password reset tile and text, on the logon screen.
Set to 0 to disable the additional tile. Default is 0. |
WindowsInterface\xx\ |
TileText |
string (REG_SZ) | Text to display under the replacement Password Reset tile, where xx is the language of the text. |
WindowsInterface\xx\ |
TileImage |
string (REG_SZ) | Full path to a bitmap file to use for the replacement Password Reset tile. |
7.3.4.2 Language Codes for WindowsInterface\xx
| Language | Code | Language | Code |
|---|---|---|---|
| English (default) | en-US |
Norwegian | no |
| Brazilian Portuguese | pt-BR |
Polish | pl |
| Czech | cs |
Portuguese | pt |
| Danish | da |
Romanian | ro |
| Dutch | nl |
Russian | ru |
| Finnish | fi |
Simplified Chinese | zh-CN |
| French | fr |
Slovak | sk |
| German | de |
Spanish | es |
| Greek | el |
Swedish | sv |
| Hungarian | hu |
Thai | th |
| Italian | it |
Traditional Chinese zh | zh |
| Japanese | ja |
Turkish | tr |
| Korean ko | ko |
7.3.5 Password Reset Server-Side Registry Settings
This section describes the registry settings governing the behavior of the Password Reset Server application.
7.3.5.1 Under HKLM\Software\Passlogix\SSPR
| Key | Value Name | Data Type | Data |
|---|---|---|---|
SSPRService |
CacheEnabled |
dword REG_DWORD | Set to 1 (default) to allow the server to cache user information. Set to 0 to disable caching user information.
This setting specifically addresses a configuration with more than one Web server. For such configurations, use the 0 value to prevent user information from synchronizing incorrectly. |
SSPRService |
Reset_ShowIntroduction |
dword REG_DWORD | Set to 1 to display the reset prompt. Set to 0 (default) to suppress the reset prompt. |
SSPRService |
Reset_CustomizedErrorMsg |
dword REG_DWORD | Set to 1 to activate customizable reset error messages. Set to 0 (default) to use the built-in reset error messages. |
SSPRService |
SessionTimeoutMessage |
dword REG_DWORD | Set to 1 to activate a message notifying the user that the session will timeout within a specified period of time. Set to 0 (default) if you do not want this message to display. |
7.3.5.2 Under HKLM\Software\Passlogix\SSPR\Storage\Extensions\
| Key | Value Name | Data Type | Data |
|---|---|---|---|
ADAM |
Root |
string (REG_SZ) | AD LDS (ADAM) partition root |
Classname |
string (REG_SZ) | Adam |
7.3.5.3 Under HKLM\Software\Passlogix\SSPR\Storage\Extensions\ADAM\
| Key | Value Name | Data Type | Data |
|---|---|---|---|
Servers |
Server1 |
string (REG_SZ) | server:port (of the AD LDS (ADAM) instance) |
7.4 Reporting
This section contains information applicable specifically to the Reporting tool.
7.4.1 Reporting Event Definition Table
This section describes the reporting event table and the values contained therein. Because field population depends on the product and context in which the event was generated, events will not always have every field populated. All fields are textual in nature, with the exception of time stamps and any fields specific to Oracle use. Some entries have specific enumerated values; these are included under the description when applicable.
Following is the SQL Server Script used to create the event log table.
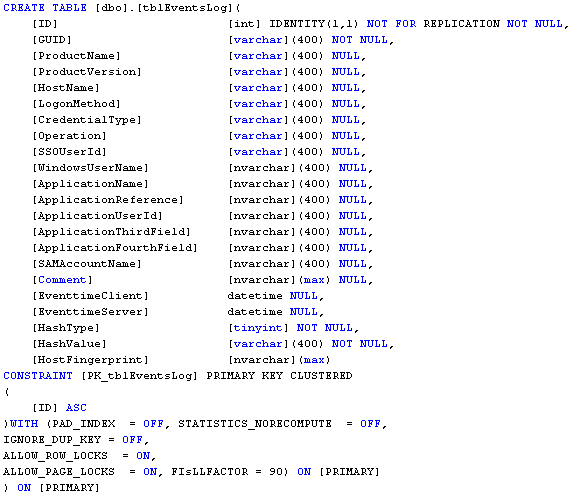
7.4.1.1 Definitions
-
GUID
A Globally Unique Identifier. Every event generated has an identifier that is unique to that specific event.
Note:
This field is generally not needed for reporting purposes but may be useful for accounting purposes. -
ProductName
The name of the Oracle Enterprise Single Sign-On Suite component that generated the event.
Current Values SSO_Server SSO_Client
SAM_Server
SAM_Client
PM_Server
PM_Client
SSPR
AM
SM UAM
ODE
NotificationService
ReportingService
DC_Client
OPAM_Client
-
ProductVersion
The version of the Oracle Enterprise Single Sign-On Suite Plus product that generated the event.
-
HostName
The name of the host or machine that generated the event.
-
LogonMethod
-
The logon method that was used if applicable for the given event.
Current Values:
-
WinAuth
-
MsAuth
-
LDAPv1
-
LDAPv2
-
MultiAuth
-
-
CredentialType
Denotes the type of credential if available.
Current Values:
-
Standard
-
Shared
-
-
Operation
This defines the nature of the event generated by a given Oracle Enterprise Single Sign-On Suite product.
Current Values LoginCredentialChange_UsernameCredentialChange_PasswordCredentialChange_ThirdCredentialChange_FourthPauseShutdown_ManualShutdown_ProgrammaticResumeFirstTimeUseCredentialAddedCredentialDeletedCredentialAddAbortedAuth_FailureAuth_SuccessAuth_EnrollmentAuth_UnenrollmentStartSM_AuthenticatorLogonSM_SessionStartSM_SessionLockSM_SessionUnlockSM_SessionEndSM_SessionExpirationSM_MachineShutdownSM_MachineRestartSM_ManagerExitSM_SpecialActionExecSM_RunListExecNetSM_TerminateListExecSM_TerminateListExecEnrollmentPasswordReset_SuccessPasswordReset_FailRe-enrollmentPM_CredentialAddedPM_CredentialDeletedPM_CredentialModifiedDC_DelegationAcceptedDC_DelegationRevokedDC_DelegationModifiedDC_DelegationDeclinedDC_DelegationEndedTimeExceededDC_DelegationEndedManualOPAM_CheckOutOPAM_CheckIn_UserOPAM_CheckIn_ExternalOPAM_CheckIn_Expire -
SSOUserIdThis is the User ID that Logon Manager uses for synchronization with the corporate repository, such as Active Directory or LDAP. If the generated event is from another Oracle Enterprise Single Sign-On Suite product or a repository not in use, this field will be the user's Windows Logon name, for example
<domain>\<user>. -
WindowsUserNameThis is the Windows logon name for the system that generated the event, for example
<domain>\<user>. This may or may not be the same asSSOUserId. -
ApplicationNameThis is the name of the application that was the target of event generation, such as an Logon Manager logon to Outlook, AIM etc.
-
ApplicationReferenceThe application template reference for the credential used, if available.
-
ApplicationUserIdThe User ID for the application this credential belongs to.
-
ApplicationThirdFieldThis field will be populated with the Third Field if the credential used contains additional information.
Note:
If the template is masked by definition, this field will contain"<masked>"to avoid exposing sensitive information. -
ApplicationFourthFieldThis field will be populated with the Fourth Field if the credential used contains additional information.
Note:
If the template is masked by definition, this field will contain"<masked>"to avoid exposing sensitive information. -
SAMAccountNameIf this event was generated from a Shared Account, this will contain the name of that Shared Account.
-
CommentAdditional (and optional) information regarding this event.
-
EventtimeClientThis is the time (in GMT) format when the event was created on the local system.
Note:
This time is sourced from the local system; while stored in GMT format, if the local system time is incorrect, it will be reflected/stored in this field. -
EventtimeServerThis is the time (in GMT) format that the event was stored in the database.
Note:
This field is sourced from the system that contains the database. The database itself creates this timestamp when the event is stored. -
EventtimeEnrollmentThis field is the time (in GMT format) that the user's cryptographic key was generated or updated. The cryptographic key is used to encrypt credentials when a user enrolls to an authenticator or changes the enrollment. This field is set only for the
Auth_Enrollment and Auth_Unenrollmentevents. -
HashTypeOracle internal use only.
-
HashValueOracle internal use only.
-
HostFingerprintOracle internal use only.
7.5 Universal Authentication Manager Registry Settings
This section describes the registry settings governing the behavior of Universal Authentication Manager. They are:
Note:
Keep in mind the distinction between registry paths for 32-bit and 64-bit operating systems.The path for a 32-bit OS registry key begins with "HKEY_LOCAL_MACHINE\SOFTWARE\…".
The equivalent registry key path for a 64-bit OS begins with "HKEY_LOCAL_MACHINE\SOFTWARE\Wow6432Node\…".
7.5.1 Setting Logon Method Display Order
This feature provides the ability to set the order in which logon methods are displayed in the user interface screens throughout Universal Authentication Manager. These settings are initially configured by the Universal Authentication Manager installer; afterwards, they must be configured directly in the Windows registry.
Note:
If you make changes to these keys, and later uninstall and reinstall or run an installation repair, you will have to manually reconfigure the authenticator preferred display order settings.Open the Windows registry and navigate to HKEY_LOCAL_MACHINE\SOFTWARE\Passlogix\UAM\Authenticators\{authID} : "Order" = DWORD
(where authID refers to the logon method identifier).
Any numeric decimal value can be used. Methods appear in the user interface from left to right and from smaller to larger order.
The following is the default order installed by Universal Authentication Manager:
32-bit OS:
HKEY_LOCAL_MACHINE\Software\Passlogix\UAM\Authenticators\{16627EE1-FAE3-43B5-B884-D3661649B97D}
64-bit OS:
HKEY_LOCAL_MACHINE\Software\Wow6432Node\Passlogix\UAM\Authenticators\{16627EE1-FAE3-43B5-B884-D3661649B97D}
Order REG_DWORD 100
32-bit OS:
HKEY_LOCAL_MACHINE\Software\Passlogix\UAM\Authenticators\{4A8F93E4-2328-44CA-8DBE-FBFA4E5FD334}
64-bit OS:
HKEY_LOCAL_MACHINE\Software\Wow6432Node\Passlogix\UAM\Authenticators\{4A8F93E4-2328-44CA-8DBE-FBFA4E5FD334}
Order REG_DWORD 500
32-bit OS:
HKEY_LOCAL_MACHINE\Software\Passlogix\UAM\Authenticators\{A1B34553-8D40-42A9-8ED5-F70E3497E138}
64-bit OS:
HKEY_LOCAL_MACHINE\Software\Wow6432Node\Passlogix\UAM\Authenticators\{A1B34553-8D40-42A9-8ED5-F70E3497E138}
Order REG_DWORD 600
32-bit OS:
HKEY_LOCAL_MACHINE\Software\Passlogix\UAM\Authenticators\{393D4B53-EC46-4A38-9E9E-3D6B5141DD34}
64-bit OS:
HKEY_LOCAL_MACHINE\Software\Wow6432Node\Passlogix\UAM\Authenticators\{393D4B53-EC46-4A38-9E9E-3D6B5141DD34}
Order REG_DWORD 900
32-bit OS:
HKEY_LOCAL_MACHINE\Software\Passlogix\UAM\Authenticators\{0C29417D-8A20-48B7-8CC4-D948D384E9B2}
64-bit OS:
HKEY_LOCAL_MACHINE\Software\Wow6432Node\Passlogix\UAM\Authenticators\{0C29417D-8A20-48B7-8CC4-D948D384E9B2}
Order REG_DWORD 999
Note:
If the Order key does not exist, the default is 800.7.5.2 Global Universal Authentication Manager Settings
These are general Universal Authentication Manager application configuration settings that control the behavior of various Universal Authentication Manager features. Most settings of this type apply to all users on a particular computer. These settings should not need to be modified in most cases.
| Target | Category | Type | Name | Values | Description | Path |
|---|---|---|---|---|---|---|
| Framework | General | DWORD | ClientMode |
Enterprise Client Mode (1) (default) or Local Client Mode (0) | Client Mode may be set to Local or Enterprise during install. | 32-bit OS:
64-bit OS: |
| Framework | Logging | DWORD | SimpleLoggerOn |
Yes (1) or No (0) (default) | Turn auditing and debug logging on or off. | 32-bit OS:
|
| Framework | Logging | DWORD | SimpleLogger Level |
Audit - Auditing Events (0), Fatal Errors Only (1), Business Logic Errors (2), Warnings - Recoverable Error Conditions (3), Informational - Business Logic Flow (4), Debug - Extra Debugging Information (5) (default), Verbose - Maximum Debugging Information (6) | Maximum logging verbosity. Each level includes all preceding levels of a lesser numeric value. | 32-bit OS:
|
| Framework | Logging | SZ | SimpleLoggerPath |
Default is c:\uamlog.txt | Specify debug log path and filename. | 32-bit OS:
|
| Framework | Logging | SZ | SimpleLoggerAuditPath |
Default is c:\uamadt.txt | Specify audit log path and filename. | 32-bit OS:
|
| Framework | Logging | SZ | SimpleLogger ProcShow |
N/A | Regular expression to only show matching log entries by process name. Default is to show all entries. | 32-bit OS:
|
| Framework | Logging | SZ | SimpleLogger ProcHide |
N/A | Regular expression to hide matching log entries by process name. Default is to show all entries. | 32-bit OS:
|
| Framework | Logging | SZ | SimpleLogger FileShow |
N/A | Regular expression to only show matching log entries by source filename. Default is to show all entries. | 32-bit OS:
|
| Framework | Logging | SZ | SimpleLogger FileHide |
N/A | Regular expression to hide matching log entries by source filename. Default is to show all entries. | 32-bit OS:
|
| Framework | Logging | SZ | SimpleLoggerMsgShow |
N/A | Regular expression to only show matching log entries by log entry contents. Default is to show all entries. | 32-bit OS:
|
| Framework | Logging | SZ | SimpleLoggerMsgHide |
N/A | Regular expression to hide matching log entries by log entry contents. Default is to show all entries. | 32-bit OS:
|
| Framework | Logging | DWORD | SimpleLoggerRemote |
Disabled (0) or Enabled (1) | If enabled, add extra columns for console session ID, remote session state and application vs. service process. | 32-bit OS:
|
| Framework | Logging | DWORD | SimpleLoggerFormat |
TXT (0) or CSV (1) | Controls how the logging file is formatted. Note: Audit log is always in CSV format. | 32-bit OS:
|
| Framework | Communication | DWORD | IpcTimeout |
Default is 5000 ms
Allowed range is 1-60000 ms |
Controls the communication timeouts between Universal Authentication Manager Client Applications and the Universal Authentication Manager auth service. It is unlikely this will ever need to be modified, but it is possible that on extremely slow computers, it may need to be increased in order for Client Applications to function. | 32-bit OS:
|
| Framework | Communication | DWORD | IpcRetries |
Default is 3 retries
Allowed range is 0-10 retries |
Service connect retries. It is unlikely this will ever need to be modified, but it is possible that on extremely slow computers, it may need to be increased in order for Client Applications to function. | 32-bit OS:
|
| Framework | User Resolution | DWORD | UserIDCacheSize |
Default is 5 users
Allowed range is 1-2147483646 users |
Number of user identities to cache in the disconnected MRU. Also used during synchronization. | 32-bit OS:
|
| Framework | User Resolution | DWORD | UserResolve Timeout1 |
Default is 1000 ms
Allowed range is 1-2147483646 ms |
How long to wait for live resolution before falling back to cache. | 32-bit OS:
|
| Framework | User Resolution | DWORD | UserResolve Timeout2 |
Default is 5000 ms
Allowed range is 1-2147483646 ms |
Additional time to wait for live results when cache is empty. | 32-bit OS:
|
| Framework | Enrollment | DWORD | PromptToken Description |
Prompt User for Description (1) (default) or Do Not Prompt User for Description (0) | Ask user to enter a token description during enrollment. If not prompted, the default description is automatically used. | 32-bit OS:
|
| Framework | Enrollment | DWORD | JitEnrolllPromptMode |
Ask - Prompt User with Yes/No Dialog (0) (default), Force - force enrollment with a message (1), Silent - Silently initiate enrollment (2), None - Disable just-in-time enrollment / Fail authentication (3) | Configure if just-in-time enrollment will be permitted during ESSO-LM reauthentication, and whether the user will be prompted or automatically forced to enroll. | 32-bit OS:
|
| Framework | Enrollment | DWORD | JitEnrollForceReauth |
Disabled (0) (default), Enabled (1) | Control whether just-in-time enrollment during ESSO-LM reauthentication will suppress the second authentication prompt. If enabled, the user will have to authenticate twice. | 32-bit OS:
|
| Framework | Reauthentication | DWORD | MaxAuthAttempts |
Default is 3 attempts
Allowed range is 1-2147483646 attempts |
Number of consecutive credential capture attempts allowed during reauthentication. Note: Windows Password always has unlimited attempts. | 32-bit OS:
|
| Framework | Reauthentication | SZ | Default Authenticator |
None (default), Fingerprint, Proximity Card, Smart Card, Challenge Questions, Windows Password | Default authenticator to use in preference to remembering the last used method. | 32-bit OS:
|
| Framework | Reauthentication | DWORD | HideAlways UseMethod |
Hide Checkbox (1) or Show Checkbox (0) (default) | Hide or show the Always Use Method checkbox. | 32-bit OS:
|
| Synchronization | Sync Timeouts | DWORD | SyncData Timeout |
Default is 10000 ms
Allowed range is 1-2147483646 ms |
Time to wait for any foreground data sychronization to complete. | 32-bit OS:
|
| Synchronization | Sync Timeouts | DWORD | SyncPolicy Timeout |
Default is 10000 ms
Allowed range is 1-2147483646 ms |
Time to wait for any foreground policy sychronization to complete. | 32-bit OS:
|
| Synchronization | Per-Logon Sync | DWORD | SyncData AuthInterval |
Default is 0 (sync every time)
Allowed range is 1-2147483646 minutes |
Sync user data at logon only if data sync not performed with past X minutes. | 32-bit OS:
|
| Synchronization | Per-Logon Sync | DWORD | SyncData AuthAsync |
Asynchronous Update (1) (default), or Synchronous Update (0) | Sync user data at logon synchronously or asynchronously. | 32-bit OS:
|
| Synchronization | Per-Logon Sync | DWORD | SyncPolicy AuthInterval |
Default is 0 (sync every time)
Allowed range is 1-2147483646 minutes |
Sync user policy at logon only if policy sync not performed with past X minutes. | 32-bit OS:
|
| Synchronization | Per-Logon Sync | DWORD | SyncPolicy AuthAsync |
Asynchronous Update (1) (default), or Synchronous Update (0) | Sync user policy at logon synchronously or asynchronously. | 32-bit OS:
|
| Synchronization | Background Sync | DWORD | SyncBackground |
Disabled - No background sync (0) (default), Enabled - Sync Policy and Data (1), Sync User Data Only (2), Symc User Policy Only (3) | Enable or disable periodic background service update of cached user policy and data. | 32-bit OS:
|
| Synchronization | Background Sync | DWORD | SyncBackground Interval |
Default is 90 minutes
Allowed range is 1-2147483646 minutes |
Set time interval between periodic background service update of cached user policy and data | 32-bit OS:
|
| Client | Enrollment | DWORD | DisplayEnroll Success |
Default is 5 seconds
Allowed range is 1-2147483646 seconds |
Hide or display enroll success dialog and configure auto-submit timer. | 32-bit OS:
|
| Logon | General | DWORD | RemoteSupportLogon |
Enabled (1) (default), Disabled (0) | Turn Remote Desktop support on or off in the logon application. Framework support must also be enabled. | 32-bit OS:
|
| Logon | General | REG_SZ | DefaultAuthenticator |
None (default), Fingerprint, Proximity Card, Smart Card, Challenge Questions, Windows Password
The actual values are the GUIDs of the respective logon methods (available in the Config Editor). |
Default authenticator to use in preference to remembering the last used method. | 32-bit OS:
|
| Logon | Filters | DWORD | Disable |
Enabled (visible) (0), Disabled (filtered) (1) (default) | Enable or disable the Microsoft Windows Password Credential Provider (Windows 7). | 32-bit OS:
|
| Logon | Filters | DWORD | Disable |
Enabled (visible) (0), Disabled (filtered) (1) (default) | Enable or disable the Microsoft Windows Smart Card Credential Provider (Windows 7). | 32-bit OS:
|
| Logon | Filters | DWORD | Disable |
Enabled (visible) (0), Disabled (filtered) (1) (default) | Enable or disable the Microsoft Windows Biometric Credential Provider (Windows 7). | 32-bit OS:
|
| Logon | Filters | DWORD | Disable |
Enabled (visible) (0), Disabled (filtered) (1) (default) | Enable or disable the Microsoft Windows Password Credential Provider (Windows 8). | 32-bit OS:
|
| Logon | Filters | DWORD | Disable |
Enabled (visible) (0), Disabled (filtered) (1) (default) | Enable or disable the Microsoft Windows Smart Card Credential Provider (Windows 8). | 32-bit OS:
|
| Logon | Filters | DWORD | Disable |
Enabled (visible) (0), Disabled (filtered) (1) (default) | Enable or disable the Microsoft Windows Biometric Credential Provider (Windows 8). | 32-bit OS:
|
| Logon | Filters | DWORD | Disable |
Enabled (visible) (0), Disabled (filtered) (1) (default) | Enable or disable the Microsoft Windows PIN Credential Provider (Windows 8). | 32-bit OS:
|
| Logon | Filters | DWORD | Disable |
Enabled (visible) (0), Disabled (filtered) (1) (default) | Enable or disable the Microsoft Windows Picture Credential Provider (Windows 8). | 32-bit OS:
|
| Logon | Filters | DWORD | Disable |
Enabled (visible) (0), Disabled (filtered) (1) (default) | Enable or disable the Microsoft Windows Microsoft Account (Windows Live ID) Credential Provider (Windows 8). | 32-bit OS:
|
| Proximity Card | General | DWORD | InsertionDelay |
Default is 0 ms
Allowed range is 1-2147483646 ms |
Rest period between accepting consecutive proximity token insertions. | 32-bit OS:
|
| Proximity Card | Omnikey Provider | DWORD | EnableOmnikey |
Enabled (1) (default), or Disabled (0) | Enable or disable the Omnikey proximity card provider. | 32-bit OS:
|
| Proximity Card | Omnikey Provider | DWORD | MinPresence |
Default is 0 ms
Allowed range is 1-2147483646 ms |
Minimum token presence before accepting a proximity token. Note: Use 1500 or greater to resolve Omnikey 5125 driver defect. | 32-bit OS:
|
| Proximity Card | RFIdeas Provider | DWORD | EnableRFIdeas |
Enabled (1) (default), or Disabled (0) | Enable or disable the RFIdeas proximity card provider. | 32-bit OS:
|
| Proximity Card | RFIdeas Provider | DWORD | RFIdeasMinBits |
Default is 8 bits
Allowed range is 0-64 bits |
Minimum number of bits to accept as a serial number. | 32-bit OS:
|
| Proximity Card | RFIdeas Provider | DWORD | RFIdeasSerial |
Enabled (1), or Disabled (0) (default) | Enable or disable RFIdeas serial COM port devices. | 32-bit OS:
|
| Smart Card | General | SZ | DefaultProvider |
N/A | Default CSP provider name to use if smart card is not mapped to any provider. For example, "Microsoft Base Smart Card Crypto Provider."
Any value other than the Base CSP provider name will be routed to the configured PKCS#11 provider. |
32-bit OS:
|
| Smart Card | Microsoft Base CSP Provider | DWORD | Enabled |
Enabled (1), or Disabled (0) (default) | Enable or disable smart card authenticator support for Microsoft Base CSP. | 32-bit OS:
|
| Smart Card | Microsoft Base CSP Provider | DWORD | SessionKeyUseKeyCipherCerts |
Enabled (1) (default), or Disabled (0) | Card PIN mode only. If enabled, use any existing Key Encipher (not Smart Card Usage) certificates and key pairs to wrap session keys. | 32-bit OS:
|
| Smart Card | Microsoft Base CSP Provider | DWORD | SessionKeyUseSmartCardCerts |
Enabled (1) (default), or Disabled (0) | Card PIN mode only. If enabled, use any existing Smart Card Usage (subset of Key Encipher) certificates and key pairs to wrap session keys. | 32-bit OS:
|
| Smart Card | Microsoft Base CSP Provider | DWORD | SessionKeyStrictKeyCipher |
Disabled (0) (default), Enabled (1) | Card PIN type only. If enabled, ignore certificates and key pairs without Key Cipher usage (whether Smart Card Usage or not). | 32-bit OS:
|
| Smart Card | Microsoft Base CSP Provider | DWORD | SessionKeyUseEssoKeyPair |
Enabled (1), or Disabled (0) (default) | Card PIN mode only. If enabled, generate a custom RSA key pair on each smart card to use to wrap session keys. Card must permit key generation. | 32-bit OS:
|
| Smart Card | Microsoft Base CSP Provider | DWORD | SessionKeyRegenerateEssoKeyPair |
Enabled (1), or Disabled (0) (default) | Card PIN type only. If enabled, and using custom ESSO key pairs, delete and replace any existing key pairs during every enrollment. | 32-bit OS:
|
| Smart Card | Microsoft Base CSP Provider | DWORD | SessionKeyEssoKeyPairBits |
1024-4096 bits.
Default is 2048 bits. |
Card PIN mode only. If using custom ESSO key pairs, specify the number of bits to use in the RSA key pair. Card must support bit length. | 32-bit OS:
|
| Smart Card | Microsoft Base CSP Provider | DWORD | SessionKeyPreferSmartCardCert |
Enabled (1), or Disabled (0) (default) | Card PIN type only. If enabled, prioritize Smart Card Usage certificates ahead of other Key Encipher certificates. If disabled, use Smart Card Usage as last resort. | 32-bit OS:
|
| Smart Card | Microsoft Base CSP Provider | DWORD | SessionKeyPreferEssoKeyPair |
Enabled (1), or Disabled (0) (default) | Card PIN mode only. If enabled, prioritize ESSO key pair creation ahead of using existing certificates. If disabled, use custom key pair only if existing certs not found. | 32-bit OS:
|
| Smart Card | Microsoft Base CSP Provider | DWORD | SessionKeyPromptIfMultipleCerts |
Enabled (1) (default), or Disabled (0) | Card PIN mode only. If disabled, choose a certificate at random (will attempt to use newest certificate). | 32-bit OS:
|
| Smart Card | Microsoft Base CSP Provider | DWORD | SessionKeyPromptAlways |
Enabled (1) (default), or Disabled (0) | Card PIN mode only. If enabled, always prompt to confirm certificate selection even if only a single certificate is available. | 32-bit OS:
|
| Smart Card | Microsoft Base CSP Provider | DWORD | SessionKeyPromptEssoKeyPair |
Enabled (1) (default), or Disabled (0) | Card PIN mode only. If enabled, warn and ask the user to confirm before creating a new ESSO key pair on the card. | 32-bit OS:
|
| Smart Card | Microsoft Base CSP Provider | DWORD | SessionKeyAllowAesKeys |
Enabled (1) (default), or Disabled (0) | Card PIN mode only. If enabled, will attempt to create AES-256 session keys (in preference to 3DES keys). Will downgrade to 3DES if card does not support AES. | 32-bit OS:
|
| Smart Card | Microsoft Base CSP Provider | DWORD | SessionKeyAllowDesKeys |
Enabled (1) (default), or Disabled (0) | Card PIN mode only. If enabled, will attempt to create Triple DES session keys (only if AES not enabled or not supported). | 32-bit OS:
|
| Smart Card | Microsoft Base CSP Provider | DWORD | StatusDelay |
Integer 0-10000 milliseconds.
0 disables updates. Default is 500ms. |
Card PIN mode only. Time in milliseconds to display low-level card operation updates. Zero will disable low-level updates. | 32-bit OS:
|
| Smart Card | Microsoft Base CSP Provider | DWORD | SessionKeyCertCheckTime |
Enabled (1) (default), or Disabled (0) | Card PIN mode only. If enabled, Universal Authentication Manager will reject certificates that are not yet valid or have expired (which may also invalidate existing enrollments). | 32-bit OS:
|
| Smart Card | Microsoft Base CSP Provider | SZ | SessionKeyCertCheckDll |
N/A | Full path to custom certificate checker DLL (implementing ICertificateChecker). By default Universal Authentication Manager accepts all certificates. | 32-bit OS:
|
| Smart Card | Microsoft Base CSP Provider | SZ | SessionKeyCertCheckClsid |
Default is {9EC6B854-FCAF-4FC1-99D6-99A7903AA357} |
Optional CLSID of Cert Check DLL. If blank, the default value is used. | 32-bit OS:
|
| Smart Card | PKCS#11 Provider | DWORD | Enabled |
Enabled (1), or Disabled (0) (default) | Enable or disable smart card authenticator support for PKCS#11. | 32-bit OS:
|
| Smart Card | PKCS#11 Provider | SZ | PathFileName |
N/A | Relative or full path to PKCS#11 DLL. Appended to Registry Key/Value contents, if any. | 32-bit OS:
|
| Smart Card | PKCS#11 Provider | SZ | PathRegKey |
N/A | Registry key to read PKCS#11 DLL path and/or filename from. Used with Registry Value. | 32-bit OS:
|
| Smart Card | PKCS#11 Provider | SZ | PathRegValue |
N/A | Registry value to read PKCS#11 DLL path and/or filename from. Used with Registry Key. | 32-bit OS:
|
| Smart Card | PKCS#11 Provider | DWORD | CardTimeout |
Default is 2000 ms
Allowed range is 0-5000 ms |
Registry value to read PKCS#11 DLL path and/or filename from. Used with Registry Key. | 32-bit OS:
|
| Smart Card | PKCS#11 Provider | DWORD | SerialTimeout |
Default is 500 ms
Allowed range is 0-5000 ms |
Max time to wait for a PKCS#11 module to report serial information for an inserted card. | 32-bit OS:
|
| Smart Card | PKCS#11 Provider | DWORD | NeverUnload Module |
Unload DLLs After Use (0) (default), Never Unload DLLs (1) | Option to keep each PKCS#11 DLL permanently loaded in each process. | 32-bit OS:
|
| Smart Card | PKCS#11 Provider | DWORD | ExternalAuthMode |
Smart Card PIN Authentication (0) (default), PKCS#11 Protected Auth Flag (1), Force External Authentication (2), Create Session Object (Morpho) (3) | Smart card authentication behavior. | 32-bit OS:
|
| Smart Card | PKCS#11 Provider | DWORD | ExternalAuthDialog |
Hide Status Dialog (0) (default), Show Status Dialog (1) | Show or hide status dialog when performing external authentication. | 32-bit OS:
|
| Smart Card | PKCS#11 Provider | DWORD | ExternalEnrollMode |
Auth Mode Reauthentication (0) (default), PIN + Morpho Fingerprint Enroll (1), Force Smart Card PIN Auth (2) | Smart card enrollment behavior. | 32-bit OS:
|
| Smart Card | PKCS#11 Provider | DWORD | SessionKeyUseCspForPki |
Enabled (1) (default), or Disabled (0) | Card PIN mode only. Use CSP instead of PKCS11 module for authentication and PKI-specific operations. Must be supported by middleware. | 32-bit OS:
|
| Smart Card | PKCS#11 Provider | DWORD | SessionKeyUseKeyCipherCerts |
Enabled (1) (default), or Disabled (0) | Card PIN mode only. If enabled, use any existing Key Encipher (not Smart Card Usage) certificates and key pairs to wrap session keys. | 32-bit OS:
|
| Smart Card | PKCS#11 Provider | DWORD | SessionKeyUseSmartCardCerts |
Enabled (1) (default), or Disabled (0) | Card PIN mode only. If enabled, use any existing Smart Card Usage (subset of Key Encipher) certificates and key pairs to wrap session keys. | 32-bit OS:
|
| Smart Card | PKCS#11 Provider | DWORD | SessionKeyStrictKeyCipher |
Disabled (0) (default), Enabled (1) | Card PIN type only. If enabled, ignore certificates and key pairs without Key Cipher usage (whether Smart Card Usage or not). | 32-bit OS:
|
| Smart Card | PKCS#11 Provider | DWORD | SessionKeyUseEssoKeyPair |
Enabled (1), or Disabled (0) (default) | Card PIN mode only. If enabled, generate a custom RSA key pair on each smart card to use to wrap session keys. Card must permit key generation. | 32-bit OS:
|
| Smart Card | PKCS#11 Provider | DWORD | SessionKeyRegenerateEssoKeyPair |
Enabled (1), or Disabled (0) (default) | Card PIN mode only. If enabled, and using custom ESSO key pairs, delete and replace any existing key pairs during every enrollment. | 32-bit OS:
|
| Smart Card | PKCS#11 Provider | DWORD | SessionKeyEssoKeyPairBits |
1024-4096 bits.
Default is 2048 bits. |
Card PIN mode only. | 32-bit OS:
|
| Smart Card | PKCS#11 Provider | DWORD | SessionKeyPreferSmartCardCert |
Enabled (1), or Disabled (0) (default) | Card PIN mode only. If enabled, prioritize Smart Card Usage certificates ahead of other Key Encipher certificates. If disabled, use Smart Card Usage as last resort. | 32-bit OS:
|
| Smart Card | PKCS#11 Provider | DWORD | SessionKeyPreferEssoKeyPair |
Enabled (1), or Disabled (0) (default) | Card PIN mode only. If enabled, prioritize ESSO key pair creation ahead of using existing certificates. If disabled, use custom key pair only if existing certs not found. | 32-bit OS:
|
| Smart Card | PKCS#11 Provider | DWORD | SessionKeyPromptIfMultipleCerts |
Enabled (1) (default), or Disabled (0) | Card PIN mode only. If enabled, ask user to choose a certificate if multiple certificates of a single type are detected. If disabled, choose a certificate at random (will attempt to use newest certificate). | 32-bit OS:
|
| Smart Card | PKCS#11 Provider | DWORD | SessionKeyPromptAlways |
Enabled (1) (default), or Disabled (0) | Card PIN mode only. If enabled, always prompt to confirm certificate selection even if only a single certificate is available. | 32-bit OS:
|
| Smart Card | PKCS#11 Provider | DWORD | SessionKeyPromptEssoKeyPair |
Enabled (1) (default), or Disabled (0) | Card PIN mode only. If enabled, warn and ask the user to confirm before creating a new ESSO key pair on the card. | 32-bit OS:
|
| Smart Card | PKCS#11 Provider | DWORD | SessionKeyAllowAesKeys |
Enabled (1) (default), or Disabled (0) | Card PIN mode only. If enabled, will attempt to create AES-256 session keys (in preference to 3DES keys). Will downgrade to 3DES if card does not support AES. | 32-bit OS:
|
| Smart Card | PKCS#11 Provider | DWORD | SessionKeyAllowDesKeys |
Enabled (1) (default), or Disabled (0) | Card PIN mode only. If enabled, will attempt to create Triple DES session keys (only if AES not enabled or not supported). | 32-bit OS:
|
| Smart Card | PKCS#11 Provider | DWORD | StatusDelay |
Integer 0-10000 milliseconds.
0 disables updates. Default is 500ms. |
Card PIN mode only. Time in milliseconds to display low-level card operation updates. Zero will disable low-level updates. | 32-bit OS:
|
| Smart Card | PKCS#11 Provider | DWORD | SessionKeyCertCheckTime |
Enabled (1), or Disabled (0) (default) | Card PIN mode only. If enabled, Universal Authentication Manager will reject certificates that are not yet valid or have expired (which may also invalidate existing enrollments). | 32-bit OS:
|
| Smart Card | PKCS#11 Provider | SZ | SessionKeyCertCheckDll |
N/A | Full path to custom certificate checker DLL (implementing ICertificateChecker). By default Universal Authentication Manager accepts all certificates. | 32-bit OS:
|
| Smart Card | PKCS#11 Provider | SZ | SessionKeyCertCheckClsid |
Default is {9EC6B854-FCAF-4FC1-99D6-99A7903AA357} |
Optional CLSID of Cert Check DLL. If blank, the default value is used. | 32-bit OS:
|
7.5.3 Global Branding Settings
These are general settings related to branding. They allow customers to modify certain brandable text or graphical elements of Universal Authentication Manager on a per-deployment or per-computer basis.
| Target | Category | Type | Name | Values | Description | Path |
|---|---|---|---|---|---|---|
| Framework | Common | SZ | STR:Framework:136 |
ESSO-UAM | Product Short Name | 32-bit OS:
|
| Framework | Common | SZ | STR:Framework:137 |
Oracle Enterprise Single Sign-On Universal Authentication Manager | Product Long Name | 32-bit OS:
|
| Framework | Reauthentication | SZ | BMP:Framework:112 |
N/A | Reauthentication Banner (500x75) | 32-bit OS:
|
| Framework | Reauthentication | SZ | BMP:Framework:111 |
N/A | Reauthentication Band (500x2) | 32-bit OS:
|
| Fingerprint | General | SZ | STR:BiometricAuth:107 |
Fingerprint | Authenticator Name | 32-bit OS:
|
| Fingerprint | General | SZ | ICO:BiometricAuth:103 |
N/A | Authenticator Icon (24x24) | 32-bit OS:
|
| Fingerprint | General | SZ | ICO:BiometricAuth:109 |
N/A | Authenticator Icon (48x48) | 32-bit OS:
|
| Fingerprint | General | SZ | ICO:BiometricAuth:112 |
N/A | Authenticator Icon (128x128) | 32-bit OS:
|
| Proximity Card | Sound Effects | SZ | WAV:ProxCardAuth:113 |
N/A | Omnikey: Undefined = default sound; Blank = disabled. RFIdeas: Disabled by default; use "DEFAULT" to enable. | 32-bit OS:
|
| Proximity Card | Sound Effects | SZ | WAV:ProxCardAuth:110 |
N/A | Disabled by default; use "DEFAULT" to enable. | 32-bit OS:
|
| Proximity Card | Sound Effects | SZ | WAV:ProxCardAuth:112 |
N/A | Applies only to Omnikey, if MinPresence is enabled. Undefined = default sound; Blank = disabled. | 32-bit OS:
|
| Proximity Card | General | SZ | STR:ProxCardAuth:101 |
Proximity Card | Authenticator Name | 32-bit OS:
|
| Proximity Card | General | SZ | STR:ProxCardAuth:142 |
N/ASZ | Default token description. Restricted to alphanumeric and space characters. | 32-bit OS:
|
| Proximity Card | General | SZ | ICO:ProxCardAuth:106 |
N/A | Authenticator Absent Icon (24x24) | 32-bit OS:
|
| Proximity Card | General | SZ | ICO:ProxCardAuth:109 |
N/A | Authenticator Absent Icon (48x48) | 32-bit OS:
|
| Proximity Card | General | SZ | ICO:ProxCardAuth:114 |
N/A | Authenticator Absent Icon (128x128) | 32-bit OS:
|
| Proximity Card | General | SZ | ICO:ProxCardAuth:107 |
N/A | Authenticator Present Icon (24x24) | 32-bit OS:
|
| Proximity Card | General | SZ | ICO:ProxCardAuth:108 |
N/A | Authenticator Present Icon (48x48) | 32-bit OS:
|
| Proximity Card | General | SZ | ICO:ProxCardAuth:115 |
N/A | Authenticator Present Icon (128x128) | 32-bit OS:
|
| Smart Card | General | SZ | STR:SmartCardAuth:101 |
Smart Card | Authenticator Name | 32-bit OS:
|
| Smart Card | General | SZ | STR:SmartCardAuth:173 |
My smart card | Default token description. Restricted to alphanumeric and space characters. | 32-bit OS:
|
| Smart Card | General | SZ | ICO:SmartCardAuth:103 |
N/A | Authenticator Absent Icon (24x24) | 32-bit OS:
|
| Smart Card | General | SZ | ICO:SmartCardAuth:110 |
N/A | Authenticator Absent Icon (48x48) | 32-bit OS:
|
| Smart Card | General | SZ | ICO:SmartCardAuth:112 |
N/A | Authenticator Absent Icon (128x128) | 32-bit OS:
|
| Smart Card | General | SZ | ICO:SmartCardAuth:108 |
N/A | Authenticator Present Icon (24x24) | 32-bit OS:
|
| Smart Card | General | SZ | ICO:SmartCardAuth:109 |
N/A | Authenticator Present Icon (48x48) | 32-bit OS:
|
| Smart Card | General | SZ | ICO:SmartCardAuth:113 |
N/A | Authenticator Present Icon (128x128) | 32-bit OS:
|
| Challenge Questions | General | SZ | ICO:PassphraseAuth:101 |
Challenge Questions | Authenticator Name | 32-bit OS:
|
| Challenge Questions | General | SZ | ICO:PassphraseAuth:103 |
N/A | Authenticator Icon (24x24) | 32-bit OS:
|
| Challenge Questions | General | SZ | ICO:PassphraseAuth:105 |
N/A | Authenticator Icon (48x48) | 32-bit OS:
|
| Challenge Questions | General | SZ | ICO:PassphraseAuth:106 |
N/A | Authenticator Icon (128x128) | 32-bit OS:
|
| Windows Password | General | SZ | STR:WinPwdAuth:101 |
Windows Password | Authenticator Name | 32-bit OS:
|
| Windows Password | General | SZ | ICO:WinPwdAuth:104 |
N/A | Authenticator Icon (24x24) | 32-bit OS:
|
| Windows Password | General | SZ | ICO:WinPwdAuth:103 |
N/A | Authenticator Icon (48x48) | 32-bit OS:
|
| Windows Password | General | SZ | ICO:WinPwdAuth:105 |
N/A | Authenticator Icon (128x128) | 32-bit OS:
|