25.12 Configuring Policy Ordering
Previous releases of Access Manager used a policy matching algorithm to match incoming resource URLs with the stored patterns in an Application Domain. A best match is arrived at based on a predefined algorithm. (This algorithm can not be changed.) If multiple patterns are matched with an incoming URL, the best match pattern is selected and its associated policy is evaluated.
With this 11gR2 PS2 release, rather than the best match algorithm, an Administrator manually designates the order of policies within an Application Domain. To turn on Policy Ordering, the Administrator must first add one or more resource prefixes to the Application Domain. Once these have been added, you can click the Enable Policy Ordering flag. (See Figure 25-2.)
Note:
You may create resource prefixes and not enable policy ordering. In this case, the resource prefixes are ignored and the best match algorithm is used.
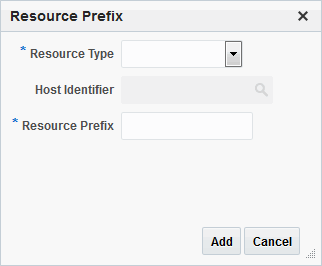
Figure 25-29 is a screenshot of the Resource Prefix configuration pop up.
Figure 25-29 Adding a Resource Prefix for Policy Ordering

Description of "Figure 25-29 Adding a Resource Prefix for Policy Ordering"
During runtime, the incoming URL of the protected resource is checked to determine if it starts with any resource prefix defined in the Application Domain. If the URL matches a resource prefix, the policies in the Application Domain configured with that resource prefix are checked (in the order defined by the Administrator) to see if any resource in the policy matches the incoming resource. If the incoming resource matches a particular policy, it is evaluated and the results are returned; the other policies are not checked.
To configure Policy Ordering