54.10 Managing Global Agent Settings

Global Agent Settings determine single sign-on behavior when users encounter password-protected applications. With these settings you specify what the user sees and is allowed to do when navigating to an application.

The next sections describe how to create new sets of Global Agent Settings or edit existing sets. You can use existing sets created in the the Access Portal Service, or import preconfigured settings in the format of INI files. After you create a set, the process for configuring it is the same as that for editing an existing one.

54.10.1 Searching for Sets of Global Agent Settings

You can search for an existing set of Global Agent Settings.

To search:

  1. Click Federation at the top of the Administrative Console, then click Global Agent Settings in the Access Portal Service section.
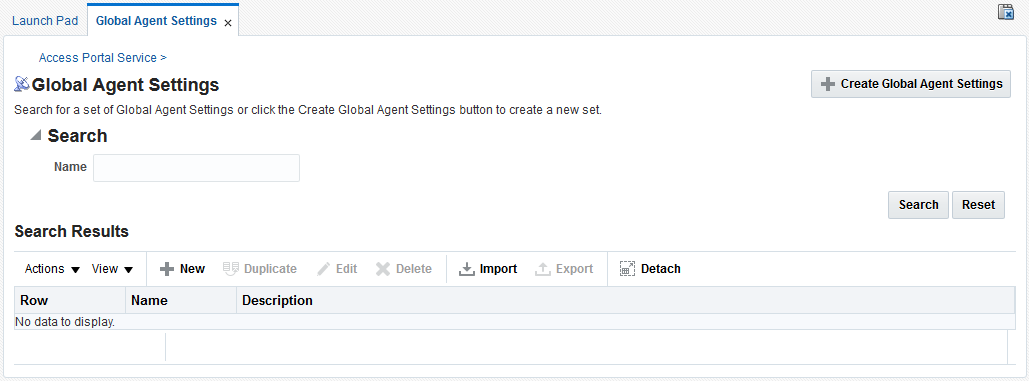
  2. Enter a name or partial string in the Name field, and click the Search button. The results appear in the Search Results table.
  3. Click on any group in the Search Results list to edit its configuration. Continue to step 3 in Creating a Set of Global Agent Settings to learn more about configuring these settings.

Figure 54-8 Global Agent Settings Search tab
Description of Figure 54-8 follows
Description of "Figure 54-8 Global Agent Settings Search tab"

54.10.2 Importing an INI File with a Global Agent Settings Configuration

You can import an INI file (unicode format only) with a Global Agent Settings Configuration.

To import:

  1. Click the Import icon to launch the Import Global Agent Settings dialog, and click the Browse button.
  2. Navigate to an existing INI file, select it and click Open. Then click the Update button. The Global Agent Settings' configuration page opens. Continue to step 3 in the following topic to learn more about configuring these settings.

54.10.3 Creating a Set of Global Agent Settings

You can create a new set of global agent settings configuration.

To create:

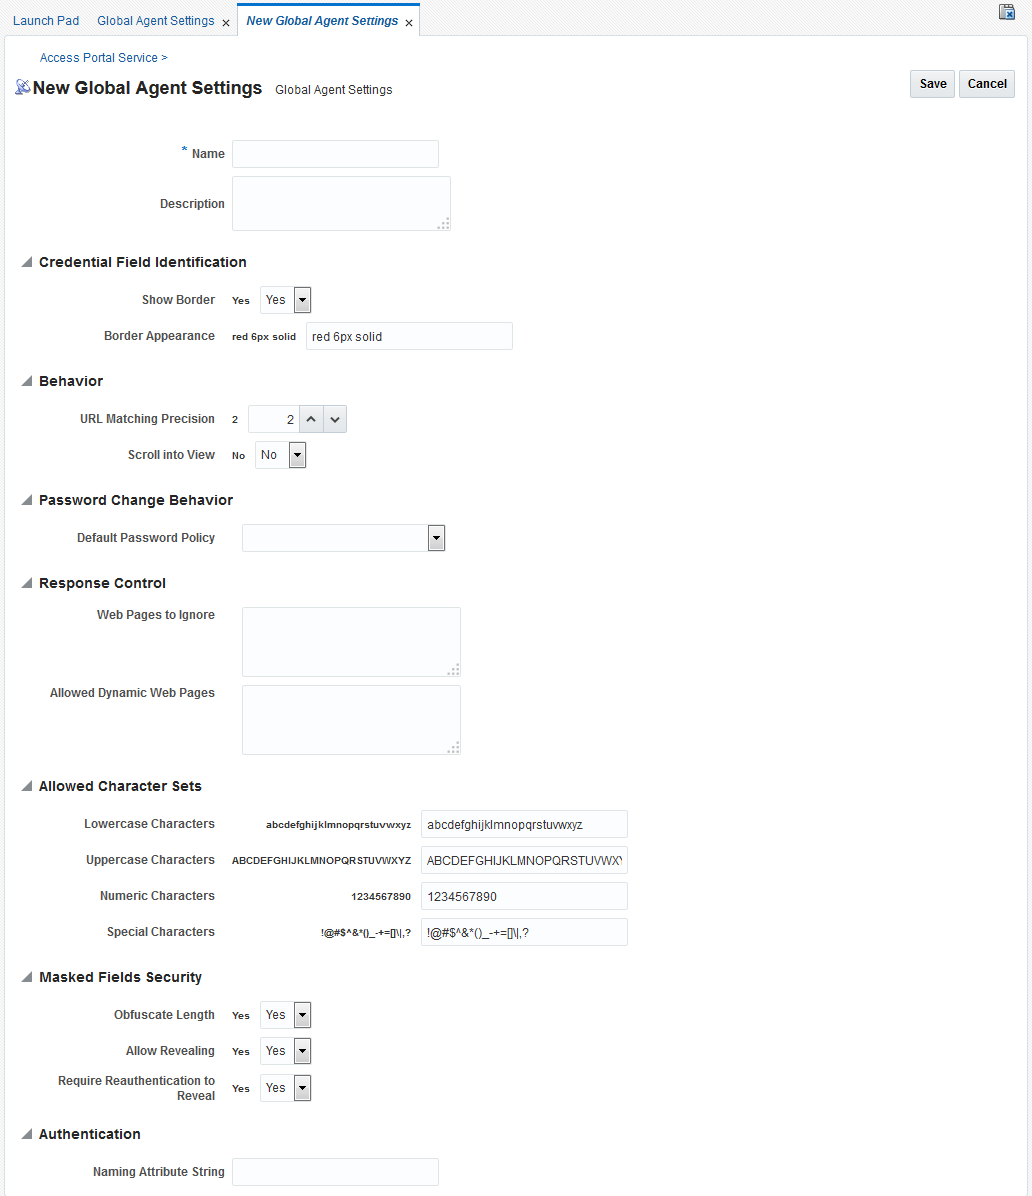
Figure 54-9 New Global Agent Settings Page
Description of Figure 54-9 follows
Description of "Figure 54-9 New Global Agent Settings Page"
  1. Click the Create Global Agent Settings button to launch the Create Global Agent Settings page.
  2. In the Name field, enter a name for the group. Optionally, you can add a description of this set.
  3. In the Credential Field Identification settings, specify the following:
    • Whether to display a highlighted border around the credential fields of an application during logon. The default is to show the border.

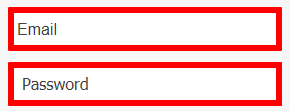
    • The default border color/size/style for highlighting detected web page fields. The default is a solid red border, six pixels in width.

      Following is an example of the results of using the default settings for this group.

      Gmail fields identified.
  4. In the Behavior settings, specify the following:
    • URL Matching Precision. The number of levels of the host portion of the URL used for application detection and response. Default is 2.

      For example, for the URL http://mail.company.co.uk:

      2=match to *.co.uk

      3=match to *.company.co.uk

      4=match to *.mail.company.co.uk

      Note:

      Values less than 2 are treated as 2.

    • Scroll into View. Enables or disables scrolling the browser window to bring the logon fields into view. Default is No.

      This setting disables scrolling when the user has not yet stored credentials for a Web application. Scrolling always occurs when injecting credentials into the logon fields for an account that already exists.

  5. In the Password Change Behavior settings, select a Default Password Policy from the dropdown list, if desired. Default is None.
  6. In the Response Control settings:
    • Enter the list of Web pages to Ignore. This is typically used when the BHO causes conflicts with specific Web applications or sites. Click the ellipsis ("") button to enter the regular expressions that match the URLs to be ignored (one per line).

      Examples:

      • .*http://login\.company\.com/.*

      • .*http://.*\.company\.com/.*

    • Enter the list of Allowed Dynamic Web Pages. Use this setting to list the permissible dynamic (DHTML) Web pages. By default, the BHO does not detect changes made to a dynamic page after the initial presentation of the page.

      Examples:

      • .*http://login\.company\.com/.*

      • .*http://.*\.company\.com/.*

  7. In the Allowed Character Sets settings, enter the permissible characters for each of the four types of fields. The fields are pre-populated with the defaults for each character set.
  8. In the Masked Fields Security settings, specify the following.
    • Obfuscate Length. Specifies whether to display encrypted fields with a string of blank characters different from the length of the obfuscated data. Default is Yes.

    • Allow Revealing. Specifies whether the user is permitted to reveal masked fields. Default is Yes.

    • Require Reauthentication to Reveal. Specifies whether the user must enter the Access Portal Service credentials in order to reveal masked fields, assuming that you have set Allow revealing to Yes. Default is Yes.

  9. In the Authentication section, specify the naming attribute string for the target data repository (if required by your environment). For more information, see the Enterprise Single Sign-On Suite Administrator's Guide.
  10. Click Save to complete global agent setting configuration, or Cancel to close the tab without saving the set.