
 Part 2: Building a Declaratively-driven POJO Web Service
In this tutorial, you will create 4 different Web Services: a POJO Annotation-Driven service, a Declaratively-Driven POJO service, a service for existing WSDL, and an EJB service. The focus of these scenarios is to demonstrate and test Java EE web services. In particular this means JAX-WS (Java API for XML Web Services) and annotation handling. JAX-WS enables you to enter annotations directly into the Java source without the need for a separate XML deployment descriptor.
At the end of the tutorial you create an ADF Client application that consumes the web services you created.
| Purpose | Duration | Application |
|---|---|---|
This tutorial shows you how to build and consume Web Services. The tutorial shows several end-to-end scenarios for creating web services. After you develop several web services, you create a client application that uses those services. To see the complete application you will create, click the Download button to download a zip of the solution application, and then unzip it in a workspace folder of your choice. |
4 hours |  |
-
Download the lab starter files and save the webservice.zip file in a temporary folder (such as d:\Temp.)
-
Using WinZip of whatever zip utility you have, unzip the webservice.zip into a folder of you choice. In this tutorial, we used C:\JDeveloper\mywork.
-
Start JDeveloper by selecting Start > Programs > <JDEVELOPER_HOME> > OracleHome > Oracle JDeveloper Studio > Oracle JDeveloper Studio
If a dialog box opens asking if you would like to import preferences from a previous JDeveloper installation, click NO.
-
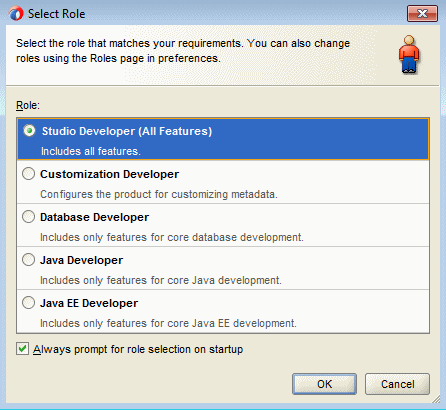
If prompted for a Role, select Studio Developer.
-
If the Tip of the Day window opens, click Close .
-
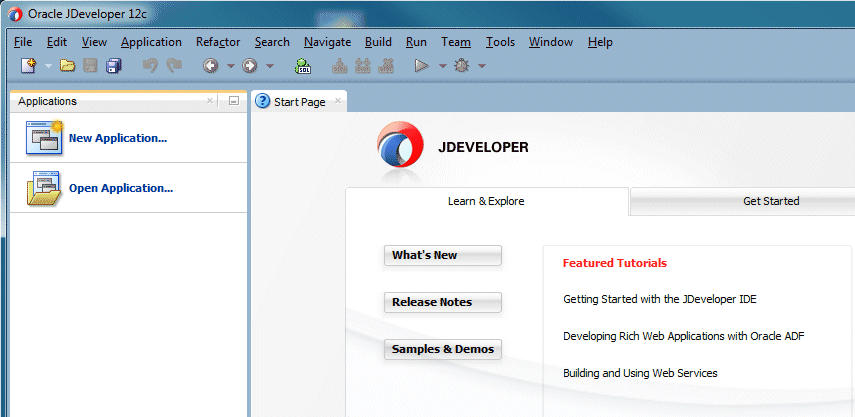
You should now see the JDeveloper IDE. Close the Start page by hovering your mouse over the tab and clicking the X on the tab.
-
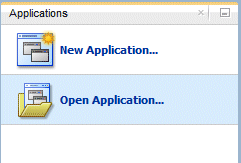
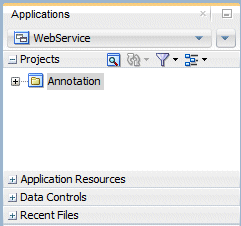
Select the Applications window tab and click Open Application (alternatively, you can select File > Open)
-
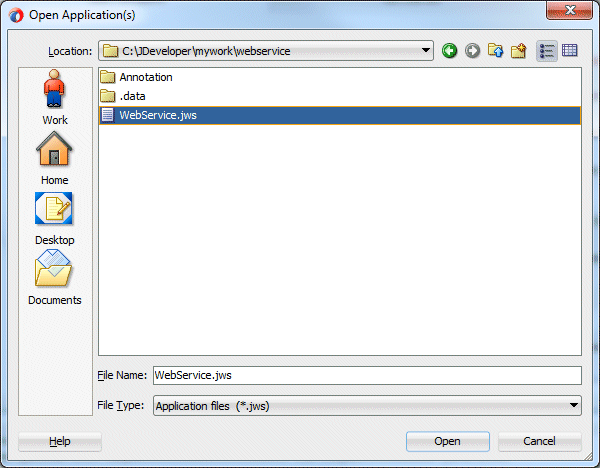
In the Open Application dialog box, locate the Web Service folder where you unzipped the WebService.zip file and select WebService.jws.
-
Click Open
-
If your are prompted to migrate the application, click Yes.
The Applications window should look like this:
In this section you start with a project that contains plain old Java classes and add an annotated method that you publish as a web service.
-
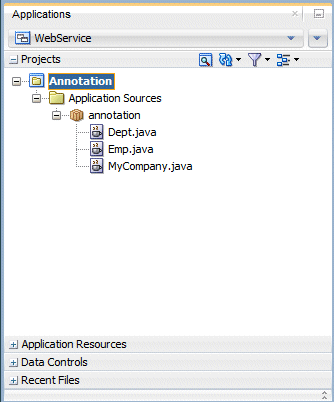
In the Applications window, expand the Annotation project nodes to show the POJO classes:
-
Dept.java describes the department structure
-
Emp.java describes the employee structure
-
MyCompany.java populates information about departments and employees
-
-
In the Applications window, double-click MyCompany.java to edit it.
-
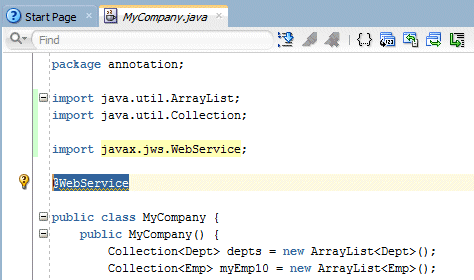
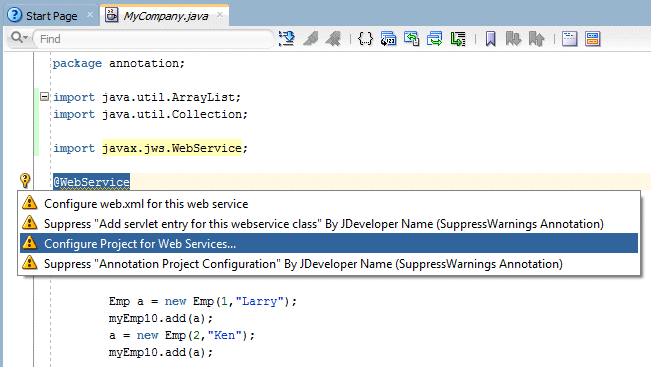
Add an @WebService annotation after the import statements.The IDE will prompt you to select the import for the WebService class. Select javax.jws.WebService from the popup. This annotation denotes that the class contains a method to be used by a web service.
-
In the margin of the editor, click Quick Hint (light bulb icon) and select the Configure project for web services option.
-
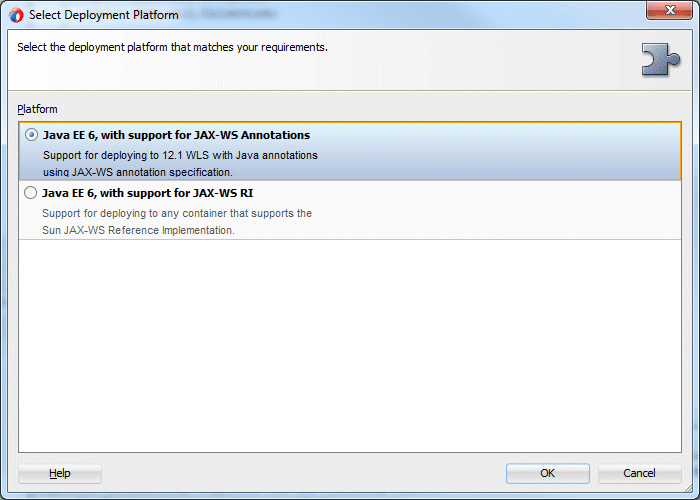
In the Select Deployment Platform dialog box, ensure that Java EE 6, with support for JAX-WS Annotations is selected.
-
Click OK. This step adds the javax.jws.WebService import statement to the Java class if it is not already there and creates a web.xml file.
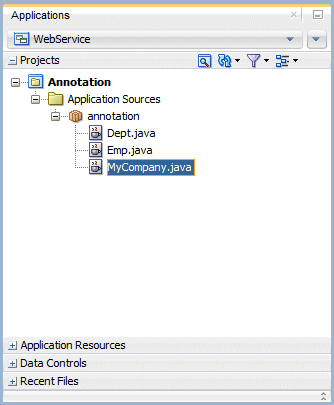
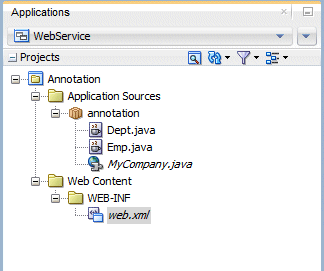
The Applications window should look like the following:
Notice that the icon for MyCompany.java class is changed to represent a WebService class, and the web.xml file has been added to your project.
-
Click Save All
 to save your work.
 -
In the Code Editor, scroll to the bottom of the class and add the following code statements:
public Dept getDeptInfo (int id) {
for (Dept a: this. getMyDepts() ) {
if (a.getId() == id) {
return a;
}
}
return null;
}
This loop returns information about all employees working in a specific department.
The code in the editor window should look like: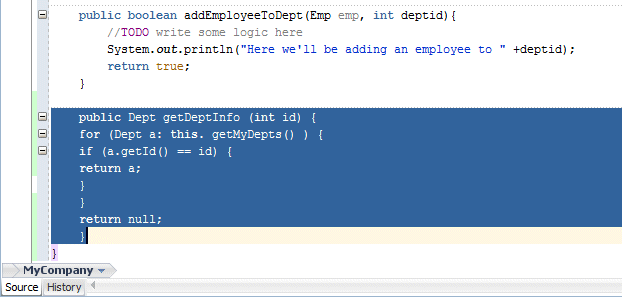
-
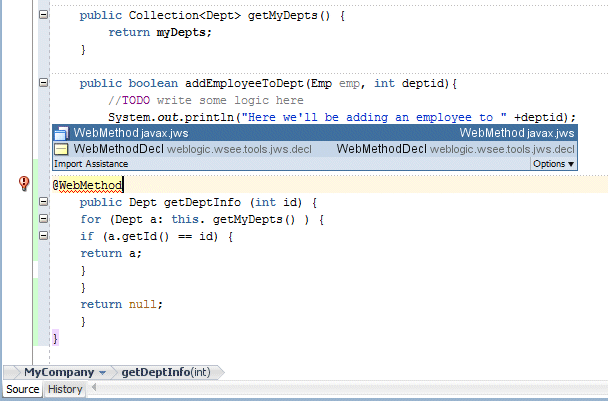
Create a second annotation before the getDeptInfo() method. The annotation signifies this is the method to be exposed from the web service. Add a blank line above the getDeptInfo() method, and start typing @WebMethod. Code insight pops up up a list of available syntaxes. Select WebMethod from the list.
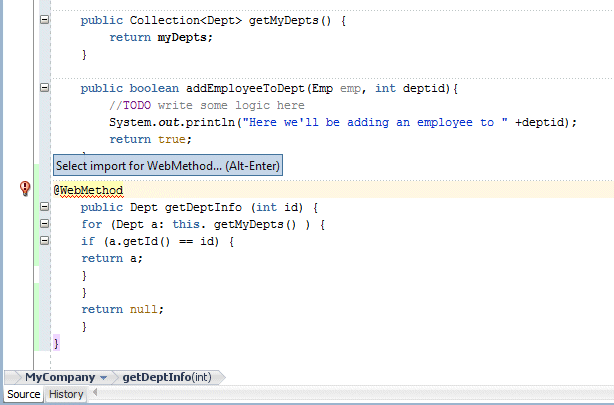
-
If suggested, press [Alt]+[Enter] to add the import javax.jws.WebMethod; statement (although this statement may be added automatically.)
The class should now look like the following:
-
Click Save All
to save your work. -
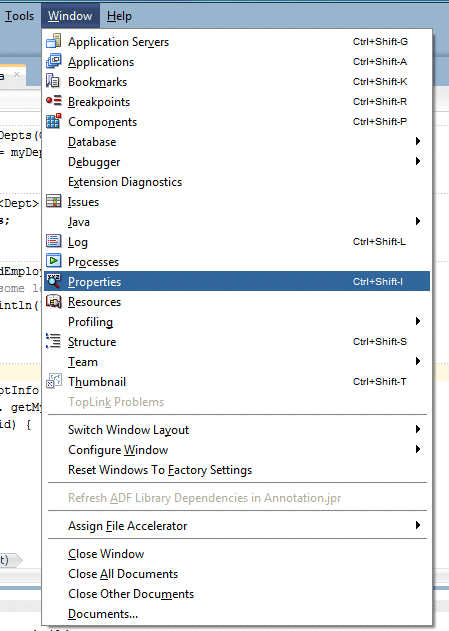
You can use the Properties window to modify the characteristics of the class. In the menu bar, select Window > Properties and it will open as a tab in the bottom portion of the IDE. Note: If the Properties window opens in a different part of the IDE, you can drag its tab and drop it on the bottom panel if you would rather work with it there.
-
To display the properties of the MyCompany class in the Properties window, select the Source tab at the bottom of the Structure window, then select the top level MyCompany class name.
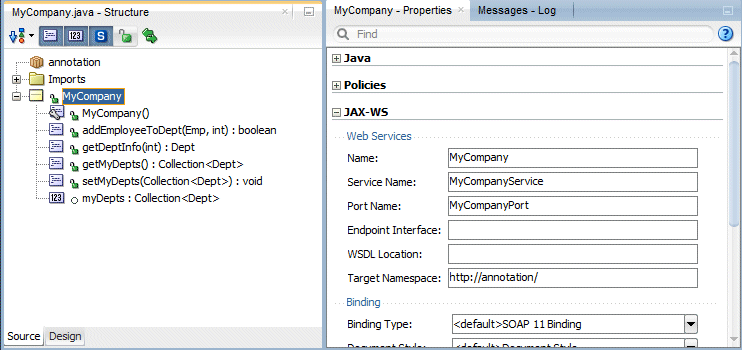
-
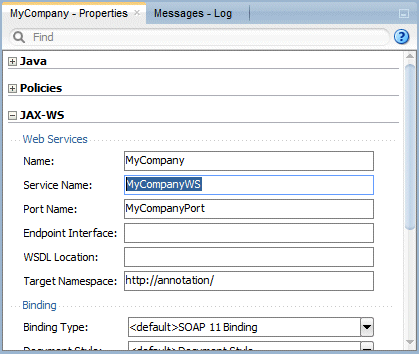
The Properties window displays a few expandable nodes. Expand the JAX-WS node and notice that the Service Name has the word 'Service' appended to the class name.
-
Change the Service Name to MyCompanyWS. Notice that the class reflects the name change.
-
Click Save All
to save your work.
You have now created a POJO Web Service. In this next section, you will test you Web Service.
In this section you compile, deploy and test the web service using the HTTP Analyzer. JDeveloper includes a web service testing mechanism called the HTTP Analyzer. When you use the HTTP analyzer to test web services, JDeveloper compiles and deploys the service to the integrated web server. It then invokes the analyzer, allowing you to send and receive values from the web service.
-
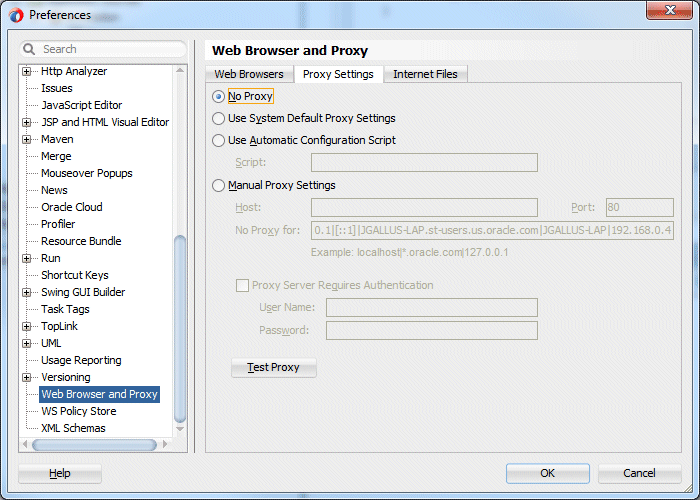
Before testing the web service, check that your web browser settings are correct. Select Tools > Preferences and then scroll down the list on the left to select the Web Browser and Proxy page. On the Proxy Settings tab, ensure that the No Proxy is selected, then click OK.
-
In the Applications window, right-click the MyCompany.java node and in the context menu, select Test Web Service.

This option invokes the integrated WebLogic Server, deploys the service, and then starts the analyzer. It may take a few seconds to start WebLogic Server if you are running it for the first time. If this is the first time you test a service, Windows may ask you about blocking content. Allow the content to be displayed. -
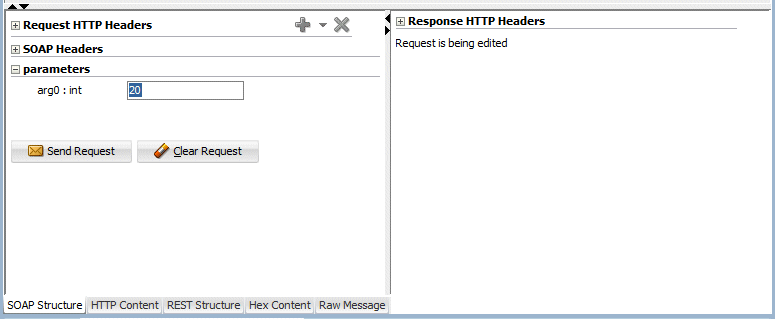
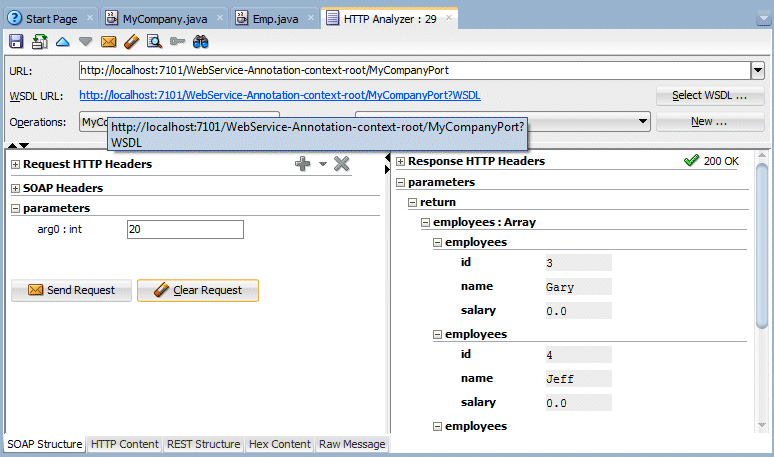
The top portion of the HTTP Analyzer editor window displays the URL for the web service, the WSDL URL, and the exposed Operations. Select the MyCompanyPort.getDeptInfo(,) operation from the list.
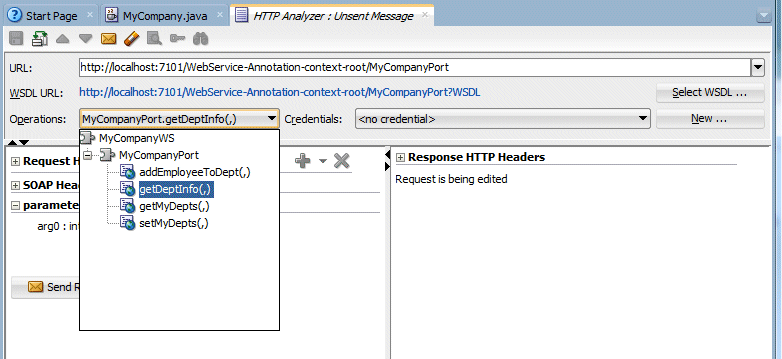
The bottom portion of the analyzer is split into two areas: Request and Response. The request area shows all the arguments from the exposed method (in this case, only one argument.) When the web service is executed, the Response area shows the results.
-
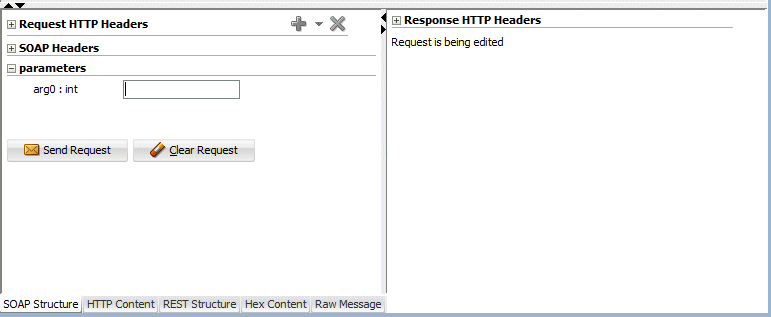
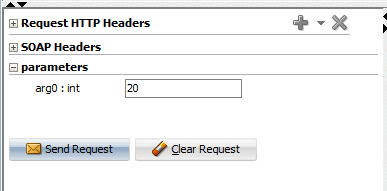
In the Request area, enter a department number value (10, 20 or 30) in the arg0 field.
-
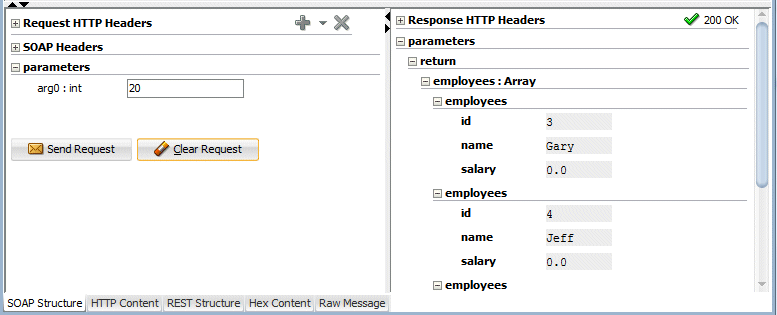
In the toolbar area of the analyzer, click Send Request, or click the Send Request button
 below the argument.
-
The analyzer sends the request to the service, returning after a few seconds the information about employees working in the specified department.
-
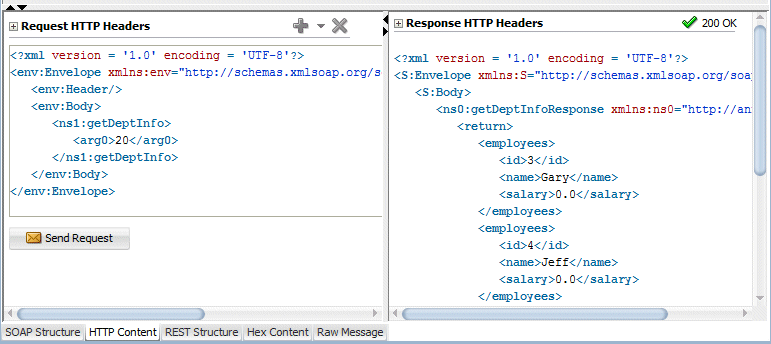
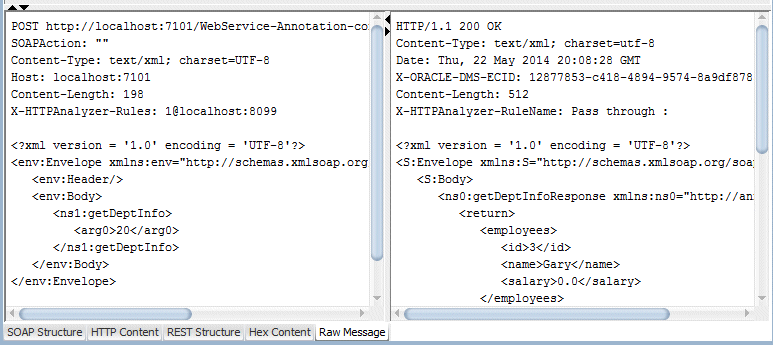
Click the HTTP Content tab at the bottom of the editor to look at the xml code.
-
Click the Raw Message tab at the bottom of the editor for another presentation of the code.
-
Click the SOAP Structure tab at the bottom of the editor, and then in the top part of the HTTP Analyzer, click the WSDL URL link.
-
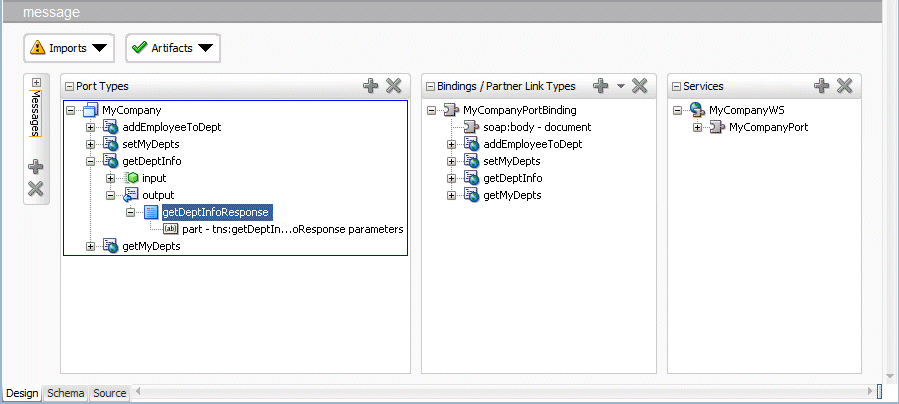
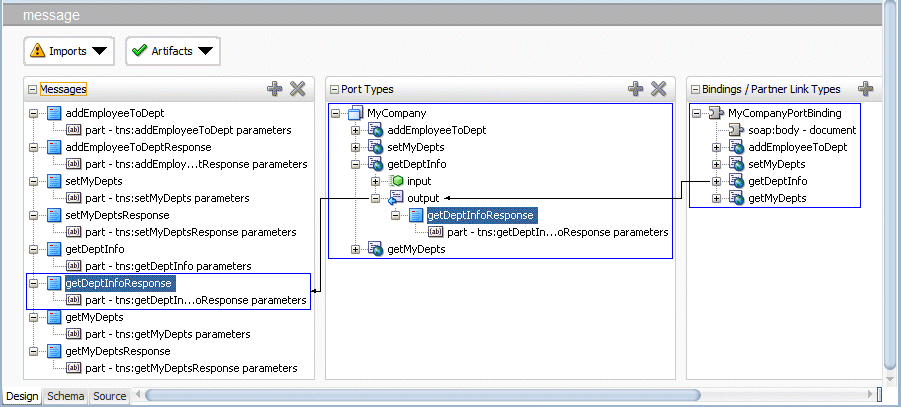
This opens the visual editor for the web service. In the Port Types panel, expand the getDeptInfo > output > getDeptInfoResponse nodes.
-
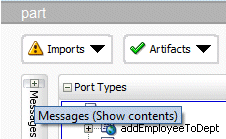
To the left of the Port Types panel, click the small Plus sign at the top of Messages to show message contents.
A new graphical representation shows the flow for any message you select.
-
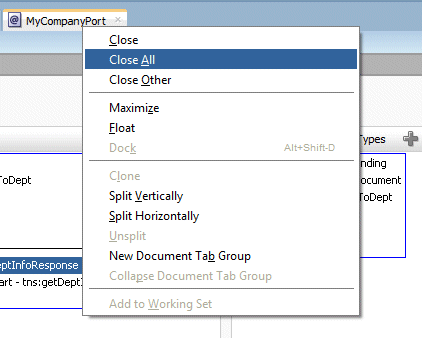
Right-click any tab in the editor window and select the Close All option.
-
Collapse the Annotation project node in the Applications window.


 Expand all | Hide all